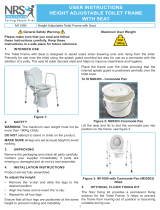
Page is loading ...

1
USER INSTRUCTIONS
LINTON PLUS RAISED TOILET SEAT
General Safety Warning
Please make sure that you read and follow these
instructions carefully. Failure to do so can result
in injury. Keep these instructions in a safe place
for future reference.
1.0 INTENDED USE
The Linton Plus toilet seat’s raised design makes sitting and standing from the toilet easier, with less strain
on the user’s joints. The cut-out seat design makes personal cleansing easier and distributes pressure
more evenly away from the coccyx. The seat is adjustable and xes securely to standard shaped toilets.
Seats are available in 3 sizes and can be supplied with or without a lid.
M53163 2” (50mm) Non Retail Pack - No Lid M53175 4” (100mm) Non Retail Pack - No Lid
M53564 2” (50mm) Retail - No Lid P42469 4” (100mm) Retail - With Lid
P42458 2” (50mm) Retail - With Lid P42446 6” (150mm) Retail - No Lid
M53576 4” (100mm) Retail - No Lid P42471 6” (150mm) Retail - With Lid
Maximum User Weight
30st
190kg
2.0 SAFETY
The maximum user weight must not be greater than
30st (190kg).
Inspect the seat and xings at regular intervals to
make sure that it is safe and secure.
Do not use the seat unless you are sure it is safe to
do so. If in doubt, contact your supplier for advice.
Inspect the seat and xings at regular intervals for
wear and damage.
If damage is found, stop using the seat and contact
your supplier immediately for advice.
1
2
Figure 1: Raised Toilet Seat Assembly
3.0 UNPACKING
Refer to Figure 1. Remove the packaging and check
all parts carefully. Contact your supplier immediately
if parts are missing or damaged and do not try and
assemble.
Contents:
1. Linton Plus Raised Toilet Seat x 1
2. Support Bracket and Handwheel x 2
4.0 ASSEMBLY
4.1 Fitting the Support Bracket:
The support bracket and hand-wheel screw assembly
must be tted to the seat, before tting to the toilet.
Figure 2: Fitting the Support Bracket
1. Refer to Figure 2. Slide the support bracket into
the slot on the toilet seat.
2. Turn the hand-wheel clockwise until the threads
engage.
Note: Do not tighten any further at this stage.
3. Repeat steps 1 and 2 for the opposite side.
4.2 Fitting to the Toilet:
1. Make sure that the existing toilet is safe and
secure before you attempt to t the product.
2. The existing toilet seat and lid must be lifted
before the product can be tted.
3. Check that the support brackets are securely in
place before tting.

2
Figure 3: Seat Position
4. Refer to Figure 3. Place the product onto the
existing toilet, making sure that the front lip and
support brackets are positioned outside of the
bowl.
5. Check the seat is positioned evenly before
securing to the bowl.
6. Secure the seat to the toilet bowl by turning
the support bracket hand-wheels clockwise
simultaneously, at equal amounts, on both sides.
7. You must check that the seat is fully secure
before use. Apply reasonable force, front to
back and side to side to check for movement.
8. If you nd movement in the seat, re-tighten the
support bracket hand-wheels until secure.
4.3 Remove the Seat:
1. To remove the seat, unscrew the support bracket
hand-wheels in an anti-clockwise direction, at
equal amounts, until the seat becomes free. Lift
the seat o the toilet bowl.
5.0 IN USE
WARNING: Do not stand on the seat under
any circumstances, failure to comply can
result in serious injury.
1. We recommend that you check the seat at
regular intervals. Make sure that the screws are
tight and the seat remains evenly positioned on
the toilet bowl.
2. If you think the seat has moved out of position,
release the support bracket hand-wheels, by
turning anti-clockwise, then reposition the seat
on the bowl and tighten the support brackets, in
accordance with Section 4.2.
3. If you remove the seat for any reason, it must
be re-installed in accordance with Section 4.2.
Failure to do so could compromise the safety of
the user.
6.0 CLEANING
1. Clean regularly, using a general purpose, neutral
detergent and warm water.
2. Please check the suitability of the product before
use. Do not use abrasive cleaners or cloths as
this will permanently damage the surface and
invalidate any warranty.
3. Do not use any form of solvent as this will
damage the surface and weaken the product
and invalidate any warranty.
4. To disinfect, wipe with a dilute bleach solution,
and rinse thoroughly with fresh water.
5. These seats may be autoclaved on cleaning
cycles up to 73°C.
6. Dry the seat thoroughly before use.
7.0 PRODUCT DISPOSAL
1. This product should be thoroughly cleaned prior
to disposal.
2. This product is manufactured from metal and
plastic and can be disposed of through Local
Authority Household Waste and Recycling
Centres or through Local Trade Waste Collectors.
8.0 PRODUCT GUARANTEE
NRS Healthcare guarantee this product for a
period of 12 months, from the date of purchase,
against faulty materials and workmanship.
This guarantee does not cover; abuse, misuse,
interference or tampering with any part of the
product.
Any guarantee issued by NRS Healthcare does
not aect your statutory rights.
M53163-UI-7 21-05-2021
NRS HEALTHCARE Sherwood House, Cartwright Way, Forest Business Park
Bardon Hill, Coalville, Leicestershire, LE67 1UB, UK.
Tel: Customer Services: 0345 121 8111 Email: [email protected]
NRS Healthcare is a leading supplier of community equipment and daily living aids.
Please visit one of our websites to view our full range of products:
www.healthcarepro.co.uk or www.completecareshop.co.uk
/


