Page is loading ...

SailVac
™
VHT 5200 Series
Vacuum Holding
Tank
EN
DE
FR
ES
NL
IT
FI
SV
DA
NO
Vacuum Holding Tank System
Instruction manual
vierstufige Füllstandsanzeige
Einbauanleitung.................. 13
Système de surveillance de réservoir
Mode d'emploi .................. 19
Sistema de control del depósito
Manual de instrucciones........... 26
Tankmonitorsysteem
Gebruiksaanwijzing............... 33
Sistema di controllo del serbatoio
Manuale di istruzioni .............. 39
Säiliömittarijärjestelmä
Ohjekirja........................ 45
Tankövervakningssystem
Bruksanvisning .................. 51
Tankkontrolsystem
Instruktionsvejledning ............. 57
Tankovervåkningssystem
Brukerhåndbok .................. 63

2
1 2
SailVac Vacuum Holding Tank
3
A
B C
D
E
F
G
H
I
A
B C
D E F G H I

3
4
5
SailVac Vacuum Holding Tank
6
A
B
C

4
SailVac Vacuum Holding Tank
8
9
7
1
2
3
4

5
EN
1 Notes on using the manual
Caution!
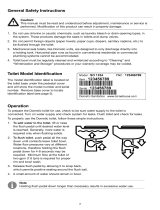
Safety Instruction: Failure to observe this instruction can cause material damage and impair
the function of the device.
Note
Supplementary information for operating the device.
g.
1
A, page 2 : This refers to an element in an illustration. In this example, item A in
gure 1 on page 2.
2 General safety instructions
Read all instructions before use or installation.
The manufacturer will not be held liable for claims for damage resulting from the following:
• Faulty installation or connection
• Damage to the unit from mechanical inuences, misuse or abuse
• Alterations to the unit without express written permission from the manufacturer
• Use for purposes other than those described in this manual
When using electrical devices to install this system, follow safety measures to protect against:
• Electric shock
• Fire hazards
• Injury
Caution!
Before working on any part of an existing or newly installed component of a sanitary system,
be sure all electrical power to system is turned off and all seacocks are in CLOSED or OFF
position. Failure to do so can result in ooding, which can cause the loss of life or property.
Table of contents
1 Notes on using the manual .................................................5
2 General safety instructions .................................................5
3 Intended use ............................................................6
4 Components ............................................................6
5 Specications ...........................................................7
6 Installation ...........................................................7 - 9
7 Operation...........................................................9 - 10
8 Cleaning and winterizing ..................................................10
9 Troubleshooting.....................................................10 - 11
10 Warranty ..........................................................12 - 13
11 Customer service........................................................13
SailVac Vacuum Holding Tank Notes on using the manual

6
Intended use SailVac Vacuum Holding Tank
3 Intended use
The SailVac™ VHT 5200 series vacuum holding tank provides a 14-gallon (53 liter) capacity
holding tank with built-in vacuum-generating capability for exclusive use with any VacuFlush toilet.
The holding tank is specially shaped to install in the outboard space of a typical sailboat head.
By virtue of the extreme low water use of VacuFlush toilets, the VHT 5200 provides enough holding
tank capacity for two people for four days.
3.1 Features
Odor-proof toilet system operation. Vacuum action keeps toilet discharge line clear of efuent
to prevent possible hose permeation of odor. Heavy-wall polyethylene tank prevents odor
permeation and corrosion.
Leakproof performance. Vacuum holding tank ttings are connected on top of the tank, eliminating
the possibility of leaking due to faulty connections below the level of the tank contents.
As little as 1 pint (0.5 l) water consumption per flush. Extends freshwater tank supply. Holds three
times more ushes between pump-outs than standard electric marine toilet systems.
Energy efficient. Draws only 3 amps per ush (12V DC).
“3/4” and “full” tank level sensors. Connects to Dometic or other tank monitor to warn when tank
is nearing capacity.
“Full tank” shutdown relay. When tank reaches “full”, relay turns off power to toilet system to
prevent possible tank overll.
Implosion protection. Heavy-duty tank and reinforcing ribs combine to prevent potential damage
from dockside pumps that may operate at high levels of vacuum.
Thorough tank discharge. Top-mounted diptube design provides most efcient pump-out of efuent.
4 Components
4.1 VHT 5200 vacuum holding tank (g.
1
, page 2)
Ref Description
A Inlet tting from toilet
B Discharge tting
C
Discharge ball valve
(shown in “open” position)
D Vent hose tting
Ref Description
E Vacuum pump
F Vacuum switch
G Holding tank
H “3/4” and “full” tank probes
I “Full tank” shutdown relay
4.2 Typical SailVac toilet system (g.
3
, page 2)
Ref Description
A VacuFlush vacuum toilet
B Vacuum status panel
C Tank level monitor
D SailVac vacuum holding tank
E Discharge pump
Ref Description
F Vent lter
G Thru-hull vent tting
H Overboard discharge
I Dockside discharge

7
5 Specifications
5.1 Materials
Holding tank: polyethylene; 0.25 in. / 6.3 mm nominal wall thickness.
Fittings: polyvinyl chloride, ABS.
Sealing grommets: cross-linked EPDM rubber/polypropylene. White color.
5.2 System requirements
Electrical
Power draw (average) 3 amps / 12 V DC
Circuit breaker/fuse 5 amps / 12 V DC
Inlet
plumbing
ID 1.5 in./38 mm sanitation hose or PVC pipe
Horizontal run 20 ft./6.1 m max. from toilet discharge
Vertical run 5 ft./1.5 m max. from toilet discharge
Discharge
plumbing
ID 1.5 in./38 mm ID sanitation hose or PVC pipe
Vent hose
ID 5/8 in./16 mm sanitation hose
Required
components
VacuFlush vacuum toilet *
* Purchased separately.
Specications subject to change without notice.
5.3 Dimensions (g.
2
, page 2)
6 Installation
6.1 Choose a location for the VHT
The VHT 5200 series tank is specially shaped to install against the hull just outboard of a boat’s head
compartment. Follow these criteria when determining a location:
1. The inlet tting (g.
1
A, p. 2) must be no more than 20 ft. (6.1 m) horizontally from, and no more
than 5 ft. (1.5 m) above, the toilet discharge tting. (The closer the VHT is located to the toilet, the
better the system efciency).
2. The VHT must be installed vertically.
3. Install VHT where access to discharge ball valve is available or can be created (with removable
access panel or door).
4. Do not expose VHT to temperatures above 120° F (49° C). Do not place VHT near heat sources
such as engine manifolds, water heaters, generators, etc. Allow free air ow around VHT.
6.2 Install VHT on mounting surface
Bottom mounting surface must support the entire bottom of the tank. If a mounting surface needs
to be fabricated, use marine grade plywood at least 0.5 in. / 13 mm thick.
Note
Fasteners (lag bolts, screws, washers, etc.) and restraining straps are not supplied with
vacuum holding tank.
SailVac Vacuum Holding Tank Specifications

8
Restraining Strap Installation (g.
4
, page 3)
With restraining straps of 31 mm (1.25 in.) maximum width fastened to hull brace or bulkhead, wrap
straps around front of tank to both sides of tank, positioning the straps within the channels on the
tank. Tighten and secure straps to keep VHT from moving.
Caution!
Do not install tank on projections, such as fastener heads, which could puncture the tank.
Do not allow holding tank to block free ow of bilge water.
6.3 Install sanitation hose
Dometic vacuum holding tanks are pre-assembled with 38 mm (1.5 in.) and 16 mm (0.625 in.) ID hose
connection ttings. Dometic OdorSafe
®
Plus sanitation hose provides the best protection against hose
odor permeation for toilet and holding tank discharge lines, and is available in 38 mm (1.5 in.) ID only.
Dometic MaxFlex™ hose is recommended for 5/8-in. ID vent hose tting installation as it provides
high-quality odor-resistance.
Routing Sanitation Hose
• Protect hose when routing through walls or other barriers (g.
6
A, page 3).
• Avoid binding corners and sharp bends in hose ( g.
6
B, page 3).
• Do not use wire ties to secure hose or pipe. Support exible hose every 0.3 m (12 inches) and
support rigid pipe every 1.5 m (5 feet). Where possible use a support trough under the hose or
pipe (g.
6
C, page 3).
Bulkhead Penetrations (g.
7
, page 4)
Check each side of a bulkhead to ensure that there will be no cutting into:
• fuel or water tanks
• wiring or pipes
• reinforcement stringers (4) that support the hull
When creating new holes, avoid tabs (1) and stringers (4) that hold bulkheads or partitions in place.
Provide additional reinforcement so that structural integrity is not compromised.
• avoid (2)
• possible (3)
Hose and Heat Sources
The operating temperature of exible hose prohibits exposure to sources of high or direct heat, such
as light bulbs or engine manifolds. If any part of the hose system must be run close to a heat source,
use rigid pipe instead of hose.
6.4 Make connections
1. Route 1.5 in./38 mm ID sanitation hose from toilet to VHT inlet, and from VHT outlet to the boat’s
discharge tting(s) (see previous section for hose routing guidelines). VHT inlet and outlet ttings
swivel to allow connection from virtually any direction (g.
5
, p. 3).
2. Route 5/8 in./16 mm vent hose from vacuum pump discharge to vent lter or thru-hull vent tting.
3. Place two hose clamps on hose near each end that attaches to ttings. Use Dometic Hose
Lubricant (g.
8
, p. 4) or liquid dishwashing soap on tting and inside ends of hose, then twist
hose onto tting. Make sure hose end is ush against tting shoulder.
4. Tighten hose clamps at ends of sanitation hose with screws positioned as shown (g.
9
, p. 4).
Vent hose requires only one hose clamp at each connection.
Installation SailVac Vacuum Holding Tank

9
SailVac Vacuum Holding Tank Installation
5. With electrical power off, make electrical connections according to the wiring schematic shown
on the parts list provided with this unit. Electrical installation must follow ABYC standards and
should be performed by qualied personnel only.
Caution!
Failure to follow the procedures above may result in vacuum leaks or inefcient ushing.
Caution – Flooding Hazard!
If the toilet, holding tank or any components are connected to any through-hull ttings,
properly installed seacocks must be installed in all piping connected to the through-hull
ttings. Seacocks must be easily accessible to all users of the system. All valves must be
full-bore valves and of marine (corrosion resistant) quality. Screw-to-close gate valves are
not recommended. Failure to do so can result in ooding, which can cause the loss of life
and property.
Caution – Flooding Hazard!
Some marine practices and/or standards require the installation of a properly positioned
ventilated (vented) loop in the discharge piping to prevent back-siphonage of seawater
into the holding tank. It is up to the system installer and boat owner to select appropriate
means of preventing backow into the holding tank.
7 Operation
7.1 System start-up
1. Fill freshwater tank, then turn on inlet water supply to VacuFlush toilet.
2. Turn on electrical power to vacuum holding tank (VHT).
3. VHT unit may take up to three minutes to initially charge vacuum level and recharge between
ushes.
7.2 Normal operation
VACUUM FLUSHING ACTION
Every time the VacuFlush toilet is ushed, the VHT unit pulls wastewater from the toilet to the holding
tank. The vacuum pump then runs until the proper vacuum level is achieved for the next ush.
Follow ushing instructions in VacuFlush toilet operation manual.
“3/4” and “FULL” TANK PROBES
When the holding tank contents activate the “3/4” tank probe, a signal is sent to a yellow warning
light on the Dometic tank monitor panel (optional). When the tank reaches “full”, a signal is sent
to the red light on the panel, and to a shutdown relay which turns off electrical power to the toilet
system. This prevents the VacuFlush toilet from ushing and overlling the VHT. The VHT must be
emptied before electrical power is restored for normal VacuFlush toilet operation.
7.3 Holding tank pump-out operation
To assure thorough discharge of vacuum holding tank, follow these steps:
1. Turn off electrical power to VHT at circuit breaker and water supply to VacuFlush toilet.
This prevents vacuum pump from starting during pump-out operation.
2. For foot-pedal VacuFlush toilets with built-in pedal lock, follow instruction in toilet operation manual
to keep ush ball in toilet open for holding tank pump-out operation. For electronic VacuFlush
toilets, follow Service Mode instructions for keeping the ush ball open. For all other VacuFlush
toilets, make sure ush ball stays open to allow air into VHT unit during pump-out operation.

10
3. Open discharge ball valve on top of VHT. Pump out holding tank through dockside or
overboard discharge tting.
4. After pump-out, close the discharge valve on top of the VHT, close ush ball in toilet and
resume normal VacuFlush toilet operation.
Caution!
Boat operator must know local sewage discharge regulations.
8 Cleaning and winterizing
8.1 Cleaning
A small amount of water remains in vacuum holding tank at all times, so it is good practice to rinse the
VHT completely after contents have been discharged.
1. After initial pump-out, add holding tank deodorant or cleaner to toilet bowl, and ush with water.
2. Continue ushing and pumping out tank until holding tank discharge is clear.
8.2 Winterizing
Use only propylene glycol freshwater antifreeze to winterize the holding tank. Make sure the
antifreeze does not contain alcohol.
1. Pump out the holding tank.
2. Add propylene glycol freshwater antifreeze to the holding tank.
Caution!
Never use ethylene glycol automotive antifreeze in freshwater systems.
9 Troubleshooting
Problem Possible Cause Service Instruction
1. Vacuum pump running too much
between ushes.
a. Flush ball in toilet leaks.
b. Vacuum line leak.
c. Foreign material has fouled
vacuum pump valves.
d. Pump diaphragm worn or
damaged.
e. Duckbill valve in discharge tting
stuck open.
a. Refer to VacuFlush toilet manual
for information.
b. Tighten all hose connections at
vacuum holding tank and toilet.
c. Disassemble vacuum pump and
inspect under the two at disk
valves. If foreign material is
present, remove it and
reassemble pump.
d. Inspect diaphragm in pump
for small hole or rip. Replace if
necessary.
e. Disassemble discharge outlet
and inspect duckbill valve. Clean
or repair if necessary.
2. Toilet will not ush (no vacuum). a. Vacuum pump will not run.
b. Plugged vacuum discharge line.
c. Plugged vacuum pump valve.
d. Vacuum pump discharge or
intake lines are plugged.
a. See problem 3.
b. Blockage usually at base of toilet
below ush ball. Disconnect line
and clear.
c. Inspect and clean pump valves.
Replace if needed.
d. Disassemble lines and clean.
Operation SailVac Vacuum Holding Tank

11
SailVac Vacuum Holding Tank Troubleshooting
Problem Possible Cause Service Instruction
3. Vacuum pump will not run. a. No electrical power.
b. Loose or broken electrical
wiring.
c. Improper electrical
connections.
d. Faulty vacuum switch.
e. Faulty pump motor.
a. Check input power, circuit
breaker and fuse.
b. Tighten or reconnect wires at
vacuum holding tank.
c. Make certain wires at vacuum
switch are connected to the “B”
terminals. (Refer to Wiring Sche-
matic included with parts list.)
d. To check vacuum switch, short
across “B” terminals with jumper
wire.
e. Replace motor.
4. Vacuum pump will not shut off. a. Insufcient vacuum.
b. Excessive vacuum leak.
c. Faulty vacuum switch.
d. Improper wiring.
a. Verify pump pulls minimum
10 in. Hg of vacuum. Verify
that the discharge ball valve is
closed.
b. See problem 1.
c. To check switch, remove one
“B” terminal wire.
d. Check wiring. Refer to Wiring
Schematic included with parts
list.
5. Vacuum pump is making a loud
noise.
a. Loose set screw in crank
assembly.
b. Pump bearing is worn.
c. Dirt or debris in pump body.
d. Worn or defective motor.
e. Motor loose from mounting
bracket.
a. Remove cover from pump and
check crank assembly setscrew
for tightness.
b. Check pump bearing for wear.
Replace if needed.
c. Disassemble vacuum pump
assembly and inspect inside of
pump body for foreign objects.
d. Replace motor assembly.
e. Tighten the four screws that
secure the motor to the
mounting bracket.
6. Vacuum pump is running too
slow, overheating, blowing fuses
or tripping circuit breakers.
a. Improper voltage.
b. Loose or broken electrical wiring.
c. Improper wire size.
d. Motor worn or defective.
e. Tank is overlled – vacuum
pump forced to pump water.
a. Check input power for low
voltage.
b. Tighten or reconnect wires.
c. Wire size too small – check
electrical diagram for proper wire
size for voltage of pump used.
d. Check motor and replace if
necessary.
e. Disassemble vacuum pump and
empty out water.
7. Difculty in emptying waste from
holding tank.
a. The toilet pedal is not open
during holding tank pump-out.
a. Keep the toilet pedal open
(see “Holding Tank Pump-out
Operation”, page 7).
8. Vacuum pump emits odor. a. Worn, torn or punctured pump
diaphragm.
a. Replace pump diaphragm.
9. Toilet system emits odor. a. Check for improper exible
sanitation hose.
a. Replace hose where necessary.

12
10 Warranty and product liability
North America
Manufacturer’s One-Year Limited Warranty
Dometic Corporation, Sanitation Division (Dometic) warrants to the original purchaser only that this
product, if used for personal, family or household purposes, is free from defects in material and
workmanship for a period of one year from the date of purchase.
If this Dometic product is placed in commercial or business use, it will be warranted to the original
purchaser only to be free of defects in material and workmanship for a period of ninety (90) days
from the date of purchase.
Dometic reserves the right to replace or repair any part of this product that proves, upon inspection
by Dometic, to be defective in material or workmanship. All labor and transportation costs or
charges incidental to warranty service are to be borne by the purchaser-user.
EXCLUSIONS
IN NO EVENT SHALL DOMETIC BE LIABLE FOR INCIDENTAL OR CONSEQUENTIAL DAMAGES,
FOR DAMAGES RESULTING FROM IMPROPER INSTALLATION, OR FOR DAMAGES CAUSED
BY NEGLECT, ABUSE, ALTERATION OR USE OF UNAUTHORIZED COMPONENTS. ALL IMPLIED
WARRANTIES, INCLUDING ANY IMPLIED WARRANTY OF MERCHANTABILITY OR FITNESS FOR
ANY PARTICULAR PURPOSE, ARE LIMITED TO A PERIOD OF ONE YEAR FROM DATE OF
PURCHASE.
IMPLIED WARRANTIES
No person is authorized to change, add to, or create any warranty or obligation other than that set
forth herein. Implied warranties, including those of merchantability and tness for a particular
purpose, are limited to one (1) year from the date of purchase for products used for personal, family
or household purposes, and ninety (90) days from the date of purchase for products placed in
commercial or business use.
OTHER RIGHTS
Some states do not allow limitations on the duration of an implied warranty and some states do not
allow exclusions or limitations regarding incidental or consequential damages; so, the above limita-
tions may not apply to you. This warranty gives you specic legal rights, and you may have other
rights which vary from state to state.
To obtain warranty service, rst contact your local dealer from whom you purchased this product or
go to http://www.dometic.com for a dealer near you.
Europe:
Warranty and Customer Service
Warranty arrangements are in accordance with EC Directive 44/1999/CE and the normal conditions
applicable for the country concerned. For warranty or other service, please contact our Dometic
Service department listed elsewhere in this manual. Any damage due to improper use is not covered
by the warranty.
The warranty does not cover any modications to the product or the use of non-original Dometic
parts; the warranty does not apply if the installation and operating instructions are not adhered to
and no liability shall be entertained.
(continued on next page)
Warranty SailVac Vacuum Holding Tank

13
Product Liability
Product liability of Dometic Group and its subsidiary companies does not include damages which
may arise from: faulty operation; improper alterations or intervention in the equipment; adverse
effects from the environment which may impact the equipment itself or the direct vicinity of the
equipment or persons in the area.
To obtain warranty service, rst contact your local dealer from whom you purchased this product or
go to http://www.dometic.com to locate a dealer near you.
11 Customer service
There is a strong, worldwide network to assist in servicing and maintaining your toilet system. For
the Authorized Service Center near you, please call from 8:00 a.m. to 5:00 p.m. (ET)
Monday through Friday.
You may also contact or have your local dealer contact the Parts Distributor nearest you for quick
response to your replacement parts needs. They carry a complete inventory for the Dometic product
line.
Telephone: 1-800-321-9886 U.S.A. and Canada
330-439-5550 International
Fax: 330-496-3097 U.S.A. and Canada
330-439-5567 International
Web site: http://www.Dometic.com
http://www.DometicSanitation.com
SailVac Vacuum Holding Tank Customer service

14
SailVac Vacuum Holding Tank

15
SailVac Vacuum Holding Tank

16
Dometic is a customer-driven, world-leading provider
of leisure products for the RV, automotive, truck
and marine markets. We supply the industry and
aftermarket with a complete range of air conditioners,
refrigerators, awnings, cookers, sanitation systems,
lighting, mobile power equipment, comfort and safety
solutions, windows, doors and other equipment that
make life more comfortable away from home.
Dometic supplies a wide range of workshop
equipment for service and maintenance of built-in
air conditioners. Dometic also provides specially
designed refrigerators for hotel rooms, ofces,
wine storage and transport and storage of medical
products.
Our products are sold in almost 100 countries and are
produced mainly in wholly-owned production facilities
around the world.
SailVac Vacuum Holding Tank
REVISION A
Form No. 600346576 8/17
©2017 Dometic Corporation
Dometic Corporation, Sanitation Division
13128 State Rt. 226, P.O. Box 38
Big Prairie, OH 44611 USA
1-800-321-9886 • Fax: 330-496-3097
www.Dometic.com
/