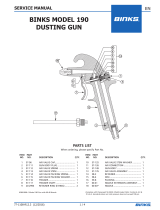
Binks Century FRP Spray Guns User manual

Category
Power fine-spray systems
Type
User manual

This manual is also suitable for

77-2475-R5.2 (9/2017) 1 / 12 www.carlisleft.com
BINKS MODEL 201-510
ROVING CUTTER
The 201-510 Roving Cutter is designed to cut glass rov-
ing into short lengths (1/4" to 1"), and dispense them into
the resin fan. When properly adjusted, the glass/resin
mixture will need a minimum amount of rolling.
The air supply hose must have a minimum 5/16" ID.
Lower air pressures or a smaller diameter hose could
result in poor operation.
Max. Air Consumption: 27cfm (47 m
3
/h)
Max. Air Inlet Pressure: 80 psi (5.52 bar)
WARNING
Extreme caution needed when using this product. Cutters have sharp blades which are
rotating at high speed. Never operate this product with the safety guard removed.
!
201-510 ROVING CUTTER
PACKAGE CONTENTS
207-10501 SQUARE CHUTE
207-12194 ANGLED CHUTE
207-10903 SPARE PARTS KIT
EN
SERVICE MANUAL
77-2475-R5.2 (9/2017)2 / 12
EN
www.carlisleft.com
Binks reserves the right to modify equipment specification without prior notice.
LOCK OUT / TAG-OUT
Failure to de-energize, disconnect, lock out and tag-out all power
sources before performing equipment maintenance could cause
serious injury or death.
OPERATOR TRAINING
All personnel must be trained before operating finishing
equipment.
EQUIPMENT MISUSE HAZARD
Equipment misuse can cause the equipment to rupture,
malfunction, or start unexpectedly and result in serious injury.
PROJECTILE HAZARD
You may be injured by venting liquids or gases that are released
under pressure, or flying debris.
PINCH POINT HAZARD
Moving parts can crush and cut. Pinch points are basically any
areas where there are moving parts.
INSPECT THE EQUIPMENT DAILY
Inspect the equipment for worn or broken parts on a daily basis.
Do not operate the equipment if you are uncertain about its
condition.
In this part sheet, the words WARNING, CAUTION and NOTE are used to
emphasize important safety information as follows:
Hazards or unsafe practices which
could result in minor personal injury,
product or property damage.
!
CAUTION
Hazards or unsafe practices which
could result in severe personal
injury, death or substantial property
damage.
!
WARNING
Important installation, operation or
maintenance information.
NOTE
Read the following warnings before using this equipment.
READ THE MANUAL
Before operating finishing equipment, read and understand all
safety, operation and maintenance information provided in the
operation manual.
WEAR SAFETY GLASSES
Failure to wear safety glasses with side shields could result in
serious eye injury or blindness.
NEVER MODIFY THE EQUIPMENT
Do not modify the equipment unless the manufacturer provides
written approval.
IT IS THE RESPONSIBILITY OF THE EMPLOYER TO PROVIDE THIS INFORMATION TO THE OPERATOR OF THE EQUIPMENT.
FOR FURTHER SAFETY INFORMATION REGARDING THIS EQUIPMENT, SEE THE GENERAL EQUIPMENT SAFETY BOOKLET (77-5300).
KNOW WHERE AND HOW TO SHUT OFF THE EQUIPMENT
IN CASE OF AN EMERGENCY
PRESSURE RELIEF PROCEDURE
Always follow the pressure relief procedure in the equipment
instruction manual.
NOISE HAZARD
You may be injured by loud noise. Hearing protection may be
required when using this equipment.
STATIC CHARGE
Fluid may develop a static charge that must be dissipated through
proper grounding of the equipment, objects to be sprayed and all
other electrically conductive objects in the dispensing area. Improper
grounding or sparks can cause a hazardous condition and result in
fire, explosion or electric shock and other serious injury.
PROP 65 WARNING
WARNING: This product contains chemicals known to the
State of California to cause cancer and birth defects or other
reproductive harm.
WEAR RESPIRATOR
Toxic fumes can cause serious injury or death if inhaled.
Wear a respirator as recommended by the fluid and solvent
manufacturer’s Safety Data Sheet.
TOXIC FLUID & FUMES
Hazardous fluid or toxic fumes can cause serious injury or death if
splashed in the eyes or on the skin, inhaled, injected or
swallowed. LEARN and KNOW the specific hazards or the fluids
you are using.
KEEP EQUIPMENT GUARDS IN PLACE
Do not operate the equipment if the safety devices have been
removed.
!
WARNING
AUTOMATIC EQUIPMENT
Automatic equipment may start suddenly without warning.
FIRE AND EXPLOSION HAZARD
Improper equipment grounding, poor ventilation, open flame or
sparks can cause a hazardous condition and result in fire or
explosion and serious injury.
MEDICAL ALERT
Any injury caused by high pressure liquid can be serious. If you
are injured or even suspect an injury:
Go to an emergency room immediately.
Tell the doctor you suspect an injection injury.
Show the doctor this medical information or the medical alert
card provided with your airless spray equipment.
Tell the doctor what kind of fluid you were spraying or
dispensing.
GET IMMEDIATE MEDICAL ATTENTION
To prevent contact with the fluid, please note the following:
Never point the gun/valve at anyone or any part of the body.
Never put hand or fingers over the spray tip.
Never attempt to stop or deflect fluid leaks with your hand,
body, glove or rag.
Always have the tip guard on the spray gun before spraying.
Always ensure that the gun trigger safety operates before
spraying.
77-2475-R5.2 (9/2017) 3 / 12
EN
www.carlisleft.com
MODEL 201-510 CUTTER ASSEMBLY
1 207-11403 BACK PLATE .............................. 1
2 237-39 SOCKET HEAD SCREW .............. 1
3 237-38 SOCKET HEAD SCREW .............. 1
4 207-11192 ECCENTRIC NUT ........................ 2
5
207-12393 AIR MOTOR ASSEMBLY ............ 1
6 207-11198-1 MANIFOLD ASSEMBLY ............. 1
7 207-11205 MODIFIED SCREW ..................... 1
10 207-11193 SPACER ...................................... 2
11 207-11185 CUTTING HEAD ASSEMBLY ...... 1
12 207-11189 CUTTING HEAD AXLE ............... 1
13A 207-10501 SQUARE CHOPPER CHUTE ....... 1
13B 207-12194 ANGLED CHOPPER CHUTE ....... 1
(NOT SHOWN)
ITEM PART
NO. NO. DESCRIPTION QTY.
14 207-11182 CHOPPER GUARD ASSEMBLY... 1
15 237-175 HEX HEAD SCREW .................... 1
16 237-574 BEARING .................................... 1
17 207-1196-1-K25 ANVIL SLEEVE ........................... 1
18 207-11195 FEEDER BAR ASSEMBLY ........... 1
21 107-1670 BALL VALVE .............................. 1
22 207-11415 MOUNTING BRACKET KIT ........ 1
23 237-572 ELBOW ...................................... 1
24 237-573 AIR HOSE (NOT SHOWN) ......... 1
ITEM PART
NO. NO. DESCRIPTION QTY.
PARTS LIST
When ordering, please specify Part No.
5
REPAIR KITS
106-1265 AIR MOTOR REPAIR KIT FOR ITEM 5
207-10903 SPARE PARTS KIT
6
7
21
23
17
4
3
2
1
22
16
10
11
12
13a
15
14
18
77-2475-R5.2 (9/2017)4 / 12
EN
www.carlisleft.com
OPERATION:
To introduce roving to the cutter, dou-
ble over one end of roving and insert it
through one of the three holes in the
feed bar (18) on the top of the cutter
assembly. The air motor control knob,
on the front of the manifold (6), should
be opened three or four turns, and the
blower control knob, on the rear should
be opened a 1/4 turn. Pull the trigger
and the glass will be dispensed into the
resin stream. By opening or closing the
blower control knob, the glass pattern
will vary in width. By opening the
motor control knob, glass content will
be increased. Close this knob and glass
content will be decreased. Adjust both
motor control and blower control to
produce the desired output and pattern.
The resin fan should be approximately
3" wider than the glass pattern. This
allows the fan pattern to pre-wet the
part and post wet the glass.
ADJUSTMENTS:
Cutting head (11): It should have
sufficient tension against the anvil
sleeve (17) to cut properly. Excessive
tension will overload the air motor
(5) and create starting problems.
Insufficient tension will not allow
complete cutting of the roving. The
eccentric nuts (4) can be used to
adjust the tension correctly.
Idler bearing (16): This should be
adjusted to have a slight contact with
the anvil sleeve (17). Excessive con-
tact will create starting problems.
Insufficient contact will not allow
the roving to feed correctly. The
eccentric nut (4) on the end of idler
bearing is used to adjust the idler
bearing to the correct tension.
Air motor oiling (5): This is accom-
plished by removing the motor con-
trol knob from the manifold assembly
(6), and inserting 2 to 3 drops of light
weight machine oil (use Binks 207-
11155-1). Replace the control knob
and the cutter guard, and run for a
few seconds, wipe off any excess oil.
(Or oil may be added to an in-line
oiler on the air supply hose.)
Cutter alignment: The roving
should enter the resin fan as soon
as possible without excessive fall
out. Simply push the cutter forward
or pull back to achieve this. To
adjust the cutter angle from side to
side, simply turn the knob (22g) on
the mounting bracket (22) in the
direction desired.
DISSASSEMBLY:
1. Start by removing the cutter guard
assembly (14) and chute (13).
2. To remove the air motor assembly
(5) and manifold assembly (6) first
remove the outer retaining ring
(5b) and the anvil sleeve (17) from
the air motor assembly.
3. Then loosen the Allen head cap
screw (2), releasing the air motor
assembly and the manifold assem-
bly from the back plate (1).
4. If it is stuck, you may need to use
slight pressure from a screwdriver
between the air motor and back
plate to free it.
5. To remove the manifold assembly
(6), remove the air hose (25), valve
and elbow (21, 23), and the modi-
fied head screw (7) from within the
manifold. The manifold assembly
will then drop free of the air motor,
and expose the three o-rings (6f).
6. Inspect the muffler (6a) and the
blower tube (6c) for any wear.
Replace if necessary. Be sure to
insert so that the blower holes are
pointing in the right direction.
7. To remove the control knobs from
the manifold assembly, remove
the thumbscrew (6k). Then use a
screwdriver to remove the packing
nut (6i) and the o-rings (6g, 6h).
Replace the o-rings if necessary.
Repeat for other side.
8. For disassembling the air motor
assembly (5), begin by removing
the two pins (5d) holding the tire
shaft (5c) to the rotor. Next pull
the tire off the shaft. Refer to Part
Sheet 77-2883 for further details.
9. Check the bearings (5e) for any
wear, replace if necessary.
10. To remove the cutting head
assembly (11) from the back
plate, hold the eccentric nut (4)
and unscrew the cutting head
bolt (12). To remove the cutting
blades (11f), use a small screw-
driver to pry out the blade spacer
(11e), and the retaining spring
(11d). The old blade will fall free
of the slot when this is done.
11. To remove the cutter bearing
(16) from the back plate, hold
the eccentric nut (4) and unscrew
the hex head screw (15).
RE-ASSEMBLY:
Manifold Assembly:
1. Lubricate the o-rings (6g, 6h) with
petroleum jelly and insert into the
manifold body (6e).
2. Next thread the packing nut (6i)
into the manifold body.
3. Then thread the lock nut (6j) onto
the thumbscrew (6k) and insert
into the manifold body.
4. Repeat steps 1-3 for the other side
of the manifold.
5. Now thread the jam nut (6d) onto
the blower tube (6c). And then
thread the blower tube into the
manifold body. Be sure to note
the position of the blower tube
holes when inserting into the
manifold body.
6. Finally thread the muffler (6a) into
the muffler adapter (6b) and insert
them into the manifold body.
Binks MODEL 201-510 ROVING CUTTER
NOTE
Lubrication is very important and the
motor should be oiled after every 2-4
hours of continuous use.
CAUTION
DO NOT USE A HAMMER TO FORCE
THE AIR MOTOR OUT.
!
77-2475-R5.2 (9/2017) 5 / 12
EN
www.carlisleft.com
Cutting Head Assembly:
The cutter comes from the factory set to cut 1" lengths, by
using four evenly spaced blades, inserted in the cutting
head (11c). You will note that there are slots every 1/2
inch. By inserting or removing the cutting blades, you can
vary the length of cut for special applications. When rein-
serting the new blades, be sure that they are on the front
side of the slot. (Refer to picture above.)
1. Insert the cutting blade (11f), then the cutting blade
spacer (11e) into the cutting head (11c). Next add the
retaining spring (11d); this is accomplished by using a
pair of needle nose pliers.
2. Then secure the above items in place by adding the
two retaining rings (11a) to the cutting head.
Final Assembly:
1. Begin by attaching the cutter bearing (16) and spacer
(10) onto the back plate (1) with a hex head screw (15)
and an eccentric nut (4).
2. Next attach the cutting head assembly (11) and spacer
(10) onto the back plate using the cutting head axle
(12) and an eccentric nut (4).
3. Now you can add the manifold assembly (6) by sliding
it into the back plate. Be sure to lubricate the three
o-rings (6f) on top of the manifold.
4. Connect the tire shaft (5c) to the air motor (5) using
the two roll pins (5d). Then attach the air motor
assembly (5) by sliding the shaft through the back
plate. In doing this make sure to line up the three air
passages with those of the manifold assembly and o-rings.
Secure the air motor assembly onto the manifold
assembly with the modified screw (7). Then secure to
the back plate by tightening the socket head screw (2).
5. To add the anvil sleeve (17) onto the air motor shaft,
you will need to apply pressure, while rotating the cut-
ting head assembly (11) at the same time. This will pre-
vent the blades from damaging the new sleeve. Replace
the retaining rings (5b) and run the motor for one min-
ute, to ensure proper break-in of the new sleeve.
6. Finally add the guard assembly (14) and the chute (13).
Binks MODEL 201-510 ROVING CUTTER
WARNING
USE CAUTION TO PREVENT ACCIDENTAL CUTS
AS THESE BLADES ARE SHARP.
!
CAUTION
DO NOT USE ANY TOOL TO FORCE THE ANVIL SLEEVE ON
THE MOTOR TIRE SHAFT. DAMAGE TO THE MOTOR CAN
OCCUR.
!
77-2475-R5.2 (9/2017)6 / 12
EN
www.carlisleft.com
MODEL 207-11198-1 MANIFOLD ASSEMBLY
(ITEM NO. 6 IN PARTS LIST ON PAGE 4)
6a 237-872 MUFFLER ........................................... 1
6b 207-12299 MUFFLER ADAPTER ......................... 1
6c 207-11200 BLOWER TUBE .................................. 1
6d 237-164 JAM NUT .......................................... 1
6e 207-11201 MANIFOLD BODY ............................ 1
6f 237-550 O-RING .............................................. 3
6g 20-3236-5 O-RING .............................................. 2
6h 20-3467 O-RING .............................................. 2
6i 207-11202 PACKING NUT ................................... 2
6j 207-11203 LOCK NUT ......................................... 2
6k 207-11204 THUMBSCREW .................................. 2
ITEM
NO. PART NO. DESCRIPTION QTY.
Parts are included in 207-10903 Repair Kit.
PARTS LIST
When ordering, please specify Part No.
6e
6f
6d
6g
6h
6i
6j
6a
6c
6b
6k
5a AIR MOTOR ...................... 1
5b 237-22-K5 E-CLIP ................................ 2
5c 207-10062 TIRE SHAFT ....................... 1
5d 237-14 ROLL PIN ........................... 2
106-1265 REPAIR KIT FOR 5A
ITEM
NO. PART NO. DESCRIPTION QTY.
PARTS LIST
When ordering, please specify Part No.
MODEL 207-12393 CHOPPER AIR MOTOR ASSEMBLY
(ITEM NO. 5 IN PARTS LIST ON PAGE 4)
5a
5d
5b
5c
REFER TO
PART SHEET 77-2883
FOR DETAILS OF 5a
77-2475-R5.2 (9/2017) 7 / 12
EN
www.carlisleft.com
MODEL 207-11185 1" CUTTING HEAD ASSEMBLY
(ITEM NO. 11 IN PARTS LIST ON PAGE 4)
AVAILABLE CUTTING HEAD ASSEMBLIES
MODEL 207-11182 CUTTER GUARD ASSEMBLY
(ITEM NO. 14 IN PARTS LIST ON PAGE 4)
11a 237-558 RETAINING RING ......................... 2
11b 237-574 BEARING ..................................... 1
11c 207-11191-1 8 VANE CUTTING HEAD ............. 1
11d 207-11186 RETAINING SPRING ..................... 8
11e 207-11187 CUTTER BLADE SPACER ............. 8
11f 207-11188-1 CUTTER BLADE ........................... 4
ITEM
NO. PART NO. DESCRIPTION QTY.
Parts are included in 207-10903 Repair Kit.
PARTS LIST
When ordering, please specify Part No.
14a 207-10806 CHOPPER GUARD NUT .................... 1
14b 237-159 NYLON WASHER .............................. 1
14c 207-11183 CUTTER GUARD ............................... 1
14d 237-19 RETAINING RING .............................. 1
ITEM
NO. PART NO. DESCRIPTION QTY.
PARTS LIST
When ordering, please specify Part No.
NOTE
Blades (11f) are to be placed in every other slot. This will
result in the standard 1-inch cut length. To insure proper
balance, insert blades around cutting head (11c) equally.
NOTE
A cutter guard insert (207-11184-K5) is also available
separately to increase the life of the guard.
CUTTING HEAD
LENGTH PART NO. NO. OF
PART NO. OF CUT (ITEM NO. 11C) BLADES AVAILABILITY
207-11185 1 INCH 207-11191-1 4 STANDARD
207-11185-1 1/2 INCH 207-11191-1 8 SOLD SEPARATELY
207-11185-3 3/8 INCH 207-11191-3 12 SOLD SEPARATELY
14a
14b
14c
14d
11a
11b
11e
11f
11d
11a
11c
77-2475-R5.2 (9/2017)8 / 12
EN
www.carlisleft.com
MODEL 207-11415 CUTTER MOUNTING KIT
(ITEM NO. 22 IN PARTS LIST ON PAGE 4)
207-10903 REPAIR KIT
(ITEM NO. 20 IN PARTS LIST ON PAGE 4)
22a 237-14 ROLL PIN ........................................... 1
22b 207-11407 CUTTER ADJUSTMENT BRACKET .... 1
22c 20-263-1 WASHER ........................................... 2
22d 237-175 HEX HEAD SCREW ........................... 1
22e SPRING WASHER .............................. 1
22f 237-44 SOCKET HEAD CAP SCREW ............. 1
22g 207-10184 CUTTER ADJUSTING CAM ................ 1
ITEM
NO. PART NO. DESCRIPTION QTY.
PARTS LIST
When ordering, please specify Part No.
5c 237-22-K5 RETAINING RING .............................. 2
6f 237-550 O-RING .............................................. 3
6g 20-3236-K5 O-RING .............................................. 2
6h 20-3467 O-RING .............................................. 2
11d 207-11186 RETAININGSPRING ............................ 8
11e 207-11187 CUTTER BLADE SPACER ................... 8
11f 207-11188 CUTTER BLADES (BOX OF 100) ....... 1
237-543-K5 O-RING .............................................. 2
207-11155-1 AIR MOTOR OIL 2 OZ ...................... 1
ITEM
NO. PART NO. DESCRIPTION QTY.
PARTS LIST
When ordering, please specify Part No.
22d
22c
22b
22a
22e
22f
22g
77-2475-R5.2 (9/2017) 9 / 12
EN
www.carlisleft.com
BINKS MODEL 207-12393
CHOPPER AIR MOTOR ASSEMBLY
1 SEAL .............................................. 1
2 BEARING ....................................... 2
3 DOWEL PIN ...................................
4 DRIVE END PLATE .........................
5 SHIMS ............................................ 2
6 BODY ............................................
7 CAM RING .....................................
8 ROTOR ASSEMBLY ........................
9 VANE ............................................. 8
10 DEAD END PLATE .........................
11 END CAP GASKET ......................... 1
12 DEAD END CAP ............................
13 207-10062 TIRE SHAFT ................................... 1
14 237-14 ROLL PIN ....................................... 2
15 237-22-K5 E-CLIP ............................................ 2
Items available in Repair Kit 106-1265. Please order separately.
Items with no quantity are not available for purchase.
ITEM PART
NO. NO. DESCRIPTION QTY.
PARTS LIST
When ordering, please specify Part No.
CA PROP
65
PROP 65 WARNING
WARNING: This product
contains chemicals known to
the State of California to cause
cancer and birth defects or
other reproductive harm.
77-2475-R5.2 (9/2017)10 / 12
EN
www.carlisleft.com
ASSEMBLY INSTRUCTIONS: BINKS MODEL 207-12393 CHOPPER AIR MOTOR ASSEMBLY
1. Remove the end cap.
2. Remove dead end plate bolts.
3. Remove dead end plate.
4. Remove rotor using an arbor press.
5. Remove vanes.
6. Remove shaft seal and bearings from drive end plate
and bearing from dead end plate.
7. Clean parts. Check for scoring on the end plates
and rotor assembly. If scoring exists, replacing the
air motor is recommended.
8. Place a new cam ring between the rotor and the drive
end plate.
9. Place the drive shaft of the rotor assembly through the
drive end plate. Press the drive bearing onto the drive shaft.
10. Lightly tap on inner race of the drive bearing to snug
up rotor to drive end plate.
11. Install new vanes as required. The angle cuts on the
vane face to the center of the rotor.
12. Place the proper end plate gasket on the body of dead
end. If the original is damaged, replace with a new
one supplied in the Repair Kit (106-1265).
13. Place the dead end plate on the body.
14. Install the dead end bearing and press into place with
an arbor press.
15. Fully tighten the remaining bolts to 75-100 in-lbs.
16. Set end clearance as required:
Total end clearance: .002 in. (.05 mm)
Top clearance: .0015 in. (.038 mm)
Lightly tap on the inner race of the dead end bearing
to free up and center the rotor in the body.
17. Apply a small amount of grease to bearing seal and
install the drive end bearing seal by pressing flush.
18. Reattach end cap.
19. If the air motor is lubricated, apply a few drops of
207-11155-1 lubricant into ports and rotate shaft by
hand for a few rotations.
NOTE
The rotor must NOT rub on either end plate.
NOTE
DO NOT remove drive end plate bolts or drive end plate.
NOTE
Take care as to not damage shims or shim surfaces
when removing.
77-2475-R5.2 (9/2017) 11 / 12
EN
www.carlisleft.com
TROUBLE PROBABLE CAUSE SOLUTION
TROUBLESHOOTING
Glass wrap up.
Glass is not cut cleanly.
Motor will not run, or
lack of power.
Idler bearing does not
turn.
Cutting head does not
turn.
Deep cuts in anvil sleeve.
Bad glass pattern.
Wet glass or oil on anvil sleeve.
Material in cutter guard.
Blower control knob is shut.
Tension adjustments.
Dull or worn blades or anvil.
Dull or nicked blades.
Anvil sleeve needs replacing.
Tension adjusted incorrectly.
Blades installed incorrectly.
Rotor not centered.
Glass wrap up.
Broken vanes.
Stuck bearings.
Lack of lubrication.
Tension adjusted incorrectly.
Lack of air.
Frozen, or incorrectly adjusted.
Frozen, or incorrectly adjusted
against back plate.
Blades are in backwards.
Excessive drag.
Cutter adjusted incorrectly.
Too narrow a resin fan.
Static electricity.
Remove guard and clean out.
Open blower control knob.
Correct tension adjustment.
Replace blades or anvil.
Replace blades and anvil sleeve.
Check tensions.
Re-center rotor.
Clean out cutter.
Re-lubricate and adjust tensions.
Re-adjust tension and lubricate.
Replace blades correctly.
Re-adjust tensions, and cutter.
Change spray tip angle.
Ground the system.
77-2475-R5.2 (9/2017)12 / 12
EN
www.carlisleft.com
WARRANTY POLICY
Binks products are covered by Carlisle Fluid Technologies one year materials and workmanship
limited warranty. The use of any parts or accessories, from a source other than
Carlisle Fluid Technologies, will void all warranties. For specic warranty information please contact
the closest Carlisle Fluid Technologies location listed below.
Binks is part of Carlisle Fluid Technologies, a global leader in innovative nishing technologies.
For technical assistance or to locate an authorized distributor, contact one of our international sales
and customer support locations.
USA/Canada
Tel: 1-888-992-4657
Fax: 1-888-246-5732
United Kingdom
Tel: +44 (0)1202 571 111
Fax: +44 (0)1202 573 488
China
Tel: +8621-3373 0108
Fax: +8621-3373 0308
Mexico
Tel: +52 55 5321 2300
Fax: +52 55 5310 4790
Japan
Tel: +81 45 785 6421
Fax: +81 45 785 6517
Germany
Tel: +49 (0) 6074 403 1
Fax: +49 (0) 6074 403 281
Australia
Tel: +61 (0) 2 8525 7555
Fax: +61 (0) 2 8525 7575
Carlisle Fluid Technologies reserves the right to modify equipment specications without prior notice.
DeVilbiss
®
, Ransburg
®
, ms
®
, BGK
®
, and Binks
®
are registered trademarks of Carlisle Fluid Technologies, Inc.
©2017 Carlisle Fluid Technologies, Inc.
All rights reserved.
For the latest information about our products, visit www.carlisleft.com.
  • Page 1 1
  • Page 2 2
  • Page 3 3
  • Page 4 4
  • Page 5 5
  • Page 6 6
  • Page 7 7
  • Page 8 8
  • Page 9 9
  • Page 10 10
  • Page 11 11
  • Page 12 12

Binks Century FRP Spray Guns User manual

Category
Power fine-spray systems
Type
User manual
This manual is also suitable for

Ask a question and I''ll find the answer in the document

Finding information in a document is now easier with AI