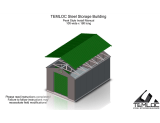
CBC-A

Weller CBC-A User manual

  • Hello! I'm your chat assistant, and I've reviewed the Weller CBC-A-112-G02-G65-I2 air curtain cabinet user manual. This document contains all the information about assembly, operation, and maintenance of your new cabinet. It uses a unique air curtain to separate the operator from the process. I'm ready to help answer any questions you have about it.
  • What is the minimum bench area required for the cabinet?
    What is the sound level of the device?
    What is the warranty period for the air curtain cabinet?
    What should I do if the cabinet does not work?
ASSEMBLING-& OPERATING MANUAL
CBC-A
Air curtain cabinet
FOR A BETTER WORKBENCH ENVIRONMENT
Weller Tools GmbH
Carl-Benz-Str. 2
74354 Besigheim, Germany
T0055730300 / 12.2022
Titel.indd 1 03.09.13 11:12
Tel: +49 (0) 7143 580-0
Fax: +49 (0) 7143 580-108
www.weller-tools.com
Apex Tool Group UK Ltd
Reg. in England, Company No. 14127816
20 Farringdon Street, 8th Floor
London, EC4A 4AB, United Kingdom
Table of contents
1. Introduction 2
2. Content 2
3. Safety instruction 3
4. Assembly instruction 3-7
5. Put into operation 8
6. Management 9
7. Troubleshooting 9
8. Technical data 10
9. Article number 10
10. Warranty 11
1. Introduction
1 Inner gable right
2 Outer gable right
3 Frame
4 Front cap
5 Air curtain gear (2 pcs)
6 Lower backrail
7 Inner gable left
8 Outer gable left
9 Back panel
10 Top cover
11 Power cord
Screw set consisting of:
12 Gable distance (2 pcs)
13 Screw M6 (6 pcs)
14 Barrel nut (8 pcs)
15 Screw with nut M4 (2 pcs)
Mounting tools
2
10. Warranty
11
CBC-A air curtain cabinet creates a clean working environment on the workbench.
A unique air curtain separates the operator from the process, giving unlimited
accessibility on the workbench. The air curtain cabinet stands directly on the
workbench and can be used for a variety of applications, such as laboratory work,
soldering and gluing.
Connect the CBC-A to mobile filter units from Weller for low running costs and high
mobility. The air curtain can also be connected to the central ventilation.
2. Content
Claims by the buyer for physical defects are time-barred after a period of one year from
delivery to the buyer. This does not apply to claims by the buyer for indemnification in
accordance with §§ 478, 479 BGB (German Federal Law Gazette).
We shall only be liable for claims arising from a warranty furnished by us if the quality
or durability warranty has been furnished by use in writing and using the term
„Warranty“.
The warranty shall be void if damage is due to improper use and if the device has been
tampered with by unauthorised persons.
Subject to technical alterations and amendments.
For more information please visit www.weller-tools.com
2.indd 1 07.04.14 10:48
310
4. Assembling instructions
Mount the left inner gable (7) on the frame (3), as shown in the picture, with 3 pcs
M6 screws (13) and 1 pc gable Spacer (12). NOTE! Three Spacers are pre-assembled
onto each gable.
3. Safety instructions
The CBC-A must not be exposed to a temperature over + 50°C, open fire or to
condensed solvents.
8. Technical data CBC-A
1120 x 538 x 580 mm
1275 x 625 x 760 mm
53 kg
49 dB(A)
110/240 V 50/60 Hz
5 watt
5x20 6,3 AT/250V
T5 39W/865
min. 180 - max. 230 m3/h
1200 x 750 mm + 50 mm free area
behind the cabinet
2 years
Width x height x depth, internally
Width x height x depth, externally
Weight
Sound level at 1 m, 200 m3/h
Power Supply
Consumption excl. lighting
Glass tube fuse
Tube lighting (cold day light, colour temp 6500)
Extracted air volume
Bench area required, minimum
Warranty
9. Article number
CBC-A-112-G02-G65-I2 Model CBC-A-112, with flourescent tube lighting, ESD-safe.
Cabinet supplied with sheet top cover with one Ø160 mm connection
(G02), sheet backside panel (G65) and tube lighting (I2).
7
3
Titel.indd 1 03.09.13 10:58
4 9
Mount the air curtain guide (5) and
fasten the right inner gable (1) in the
same way as the left gable.
Mount the lower backrail (6) with 2 pcs
M4 screw with nut (15) in the track at the
very bottom of the inner gables.
Put the cabinet on its feets and adjust
them until the cabinet stands stable.
Max. adjustment 10 mm.
NOTE! Do this before mounting the
outer gables as the nuts need to be
tightened.
Loosen the cables fastened at the right
inner gable and thread them through the
rubber grommets at the right inner
gable.
6. Management
Blue = Clean air Yellow = Polluted air
Do not place the CBC-A in a draught,
for example near doors, windows or
supply air diffuser, as this can disrupt
the air curtain.
Keepchead outside the air curtain.
The workpiece should be placed
approx. 50 mm inside the cabinet.
7. Troubleshooting
Do not modify the air curtain cabinet. Repairs must be done by certified
personnell.
If the CBC-A does not work, check the following:
the electricity supply is connected in a correct way.
the fuse is intact. It is placed beside the power supply.
the cabinet is placed according to the instructions.
extracted air volume is correct.
6
5
1
5
6
58
Pass the cable under the white wires and
through the rubber grommet.
Thread the double end of the cable into
the hole at the front supporting leg and
connect the socket to the upper blower.
Thread the single end of the cable into
the hole at the back supporting leg and
connect the lower blower.
Connect the air curtain cabinet to the
suction source.
NOTE! Neccessary air volume is min. 180
and max. 230 m3/h.
Connect the power cord (11) at the back
of the cabinet.
Switch on the cabinet with the on/off
switch.
Power sockets for connection of
powered devices
5. Put into operation
Place the air curtain cabinet on the workbench, approx. 100 mm from the front edge
of the table. Minimum size of the table is 750x1200 mm. 50 mm free space is
required behind the cabinet.
11
Titel.indd 1 03.09.13 10:59
6 7
Thread the cable from the tube lighting
through the back hole in the left gable
and mount the rubber grommet.
Connect socket.
Mount the top cover (10)…
... and back panel (9) by sliding them
in the tracks.
Mount the front cap (4) by placing it in
the upper track. Bow the cap slightly
and press it in the lower track.
It is important that the cap is placed in
both tracks.
Remove the yellow protection from the
spacers and mount the outer gables (2,
8) with 4 pcs barrel nuts (14) on each
side.
Make the mounting easier by fastening
the barrel nuts slightly and tighten
them when all are in its place.
The assembly is completed.
2
8
2
8
9
10
/