Page is loading ...


3
Thanks
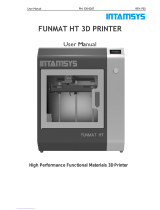
For choosing our product
PRISMA Series Industrial 3D Printers inheriting the design concept of the simple to the extreme.
Use it can print product quickly and easily, even if you’ve never used a 3D Printer.
The printer use the ABS or PLA to print the model, so the product are strong and durable. ABS or
PLA material also ensures that you can model for drilling, tapping, grinding and painting. PRISMA
Series Industrial 3D Printers reserve creative proprietary hardware, software and materials tech-
nology together. Welcome to a new realm of 3D modeling!
INDEX
User-Guide Instructions
Learn More Information
Safety Precautions
Chapter 1 Overview
1.1 Overview
1.2 Front, side and back view
1.3 Tool box accessories
Chapter 2 Installation
2.1 Take Out the Machine
2.2 Install the Material Shelf
2.3 Dismantle the Model
2.4 Paste the Masking Tape
2.5 Install the Material (for example, PLA materials)
2.6 Manual Calibration
2.6.1 Enter the adjust platform interface
2.6.2 Fine Tune the Printing Platform
2.7 Printing the Test Files
Chapter 3 Printing Operation
3.1 Display
3.2 Operation and Printing Parts
3.3 Pause or Continue to Print
3.4 Power Outages
Chapter 4 General Maintenance
4.1 Daily Preventive Maintenance
4.2 Maintenance
4.2.1 500 Hours Maintenance
4.2.2 2000 Hours Maintenance
Chapter 5 Trouble Removal
Chapter 6 Support
04
04
04
05
05
05
06
06
06
06
07
07
07
08
08
08
08
09
09
010
010
010
010
011
011
011
011
012
012

4
USER-GUIDE INSTRUCTIONS
This user guide has been carefully choreographed, divided into “Setup”, “operations”, “Maintenance” and “Troubleshooting” sections,
so that the readers can read in order. Please be sure to carefully read each part, in order to enjoy the best performance of the system.
LEARN MORE INFORMATION
SD card provides the electronic user guide. This guide provides information about the following topics:
1. troubleshooting information
2. important safety notices and regulatory information
3. information about supported printing supplies
4. detailed Description
SAFETY PRECAUTIONS
The following precautions ensure the proper use of the printer and prevent the printer from being damaged. Always follow these pre-
cautions.
1. use the power supply voltage specified on the nameplate. Avoid printer overload caused by the multiple devices attached to your power
outlet.
2. make sure that the printer is properly grounded. Otherwise, it may result in electrical shock, fire, and prone to electromagnetic inter-
ference.
3. Before to remove or repair a printer, please contact the local service representative. Please see the “support” part of the user guide.
4. only use the power cord that came with the printer. Do not damage, cut or repair the power cord. A damaged power cord has risk of fire
or electric shock. Please use approved power cord replace damaged power cords. Do not allow metal or liquids to touch the internal parts
of the printer. Otherwise, it may result in fire, electric shock or other serious injury.
5. in any of the following cases, please turn off the printer, and then unplug the power cord from the power outlet:
• Printer smoking or abnormal smell
• The printer makes strange noises that never produced during normal operation
• Metal or a liquid (not part of cleaning and maintenance routines) touches internal parts of the printer
• Thunderstorm weather
• Power off
This guide uses the following categories.
Note: potentially dangerous situation, if not avoided, may result in minor or moderate injury.
Warning: potentially dangerous situation, if not avoided, may result in serious injury.
High temperature surface: the hot surface symbol indicates a high-temperature equipment. When working close to the hot parts,
make sure to be careful and wear safety gloves.
Gloves: When performing some maintenance procedures, the machine may be hot, so need to use gloves to avoid burns.
Safety glasses: Please wear safety glasses to avoid eye injury.
Lifting hazard: when lifting the printer, there are need two or more persons co-operate, in order to avoid causing serious injury.
Recovery: Use the correct method for recovering materials and packaging materials.
ESD: When using electronic components or work around these parts, please use standard electrostatic discharge (ESD) precautions.

5
CHAPTER1
OVERVIEW
1.1 Overview
PRISMA Series Industrial 3D Printers through the stl file into gcode document production model. The printer print product in the fol-
lowing ways: through computer-controlled printing nozzle, squeeze ABS or PLA material that can be used to produce high-quality pro-
duct. Cura is the pretreatment software when the WindowsXP, WindowsVista, Windows7, Windows8 or Windows10 run on the platform.
PRISMA Series Industrial 3D Printers product dimensions and sizes can be made as follows. Materials available for each material
carrier is equipped with 1000g, enough to make about 120 hours in a row without having to reload, and you can add a second material
to extend time.
Model Product dimensions (W×D×H)mm The size can be made (W×D×H)mm
EB-3DP322-017 520×410×665 300×200×200
EB-3DP325-018 520×410×965 300×200×500
PRISMA Series Industrial 3D Printers have functions of resume printing with power off and resume printing with filament used out,
which can greatly save the client’s losses.
Continue printing with power off: please open the UPS switch when machine is printing, if power off, the machine will pause prin-
ting, the storage battery will keep printing condition for 24 hours, after power apply the machine can continue to print automatically.
Special remind: without power supply , you’d better not click continue to print, because ups can’t supply too long time, and Run out
of electricity will reduce battery working life.
Continue printing with filament used up: if the filament is used up when printing, the machine will automatically pause to print while
detect no material, only after new filament apply can you continue to print.
1.2 Front, side and back view
1Material shelf 6UPS switch
2Print Nozzle 7Power Socket
3SD card slot 8Display panel
4USB port 9Print platform
5ON/OFF Button

6
1.3 Tool box accessories
1Jumper cable 7Scraper knife
2Screwdriver 8SD card
3Extrusion nozzle, Hexagon screw, Wrench, socket 9Masking tape
4Material shelf 10 Art knife
5Tweezer 11 Diagonal pliers
6Feeding tube 12 Power cable
CHAPTER2
INSTALLATION
2.1 Take Out the Machine
It may need two people to take out the machine with the handle beside the machine.
2.2 Install the Material Shelf
Step 1: Use the M3 screw, which attached in the accessory box
Step 2: Plugged in.
Step 3: Turn on the power switch.

7
2.3 Dismantle the Model
Warm prompt: PRISMA Series Industrial 3D Printers display panel is full touch screen resistive screen, click to confirm the content
items.
1. Set down the Hot bed: choose “Z” axis , then click move button , fell the hot bed to a suitable height.
2. Heat the hot bed: click the hot bed button , and input 80,that it turns red means beginning heating ,and the hot bed tempera-
ture will automatically rise to 80°C.
3. Take the model: After 2 minutes heating, take off the model with the scraper knife gently.
2.4 Paste the Masking Tape
Tear the broken tape and paste a new one ,pay attention not to overlap and too large clearance.(If the tapeis are not broken,it can
be reused)
2.5 Install the Material (for example, PLA materials)
1. Hung filament on the shelf, and insert the filament through the Material detector.
2. Click the printing head button and input 200,that it turns red means beginning heating ,and the head temperature will auto-
matically rise to 200°C
2. Insert the material into the entrance of extruder. (As shown in figure)
4. When the temperature rises to 200°C, press the material at the entrance of shrapnel, insert the material, the material squeezing
down, if the material is melted and extruded material, that means the material is inserted successfully. You can also click on
the screen to feed the material.

8
2.6 Manual Calibration
NOTE: BEFORE CALIBRATION, YOU NEED TO DISMANTLE THE MODEL AND PUT NEW TAPES.
2.6.1 Enter the adjust platform interface
1. Choose “Z” axis , and click reset button to raise the hot bed to the highest degree.
2.6.2 Fine Tune the Printing Platform
1. Let the hot bed rise to maximum height and press button to unlock the motors of machine ,and then the printing head can be
lightly pushed to everywhere by hand. It can also be moved by clicking screen.
2. Observe the printing nozzle, the printing platform printing nozzle has a gap of about 0.1 mm (about the thickness of a sheet of
A4 paper), then you can insert a sheet of A4 into the printing nozzles and the printing platform gap, to ensure that the paper can be
inserted, but printing nozzle will not press the paper is suitable. While moving the head, if the clearance is too large or too small,
you need to adjust the corresponding adjustment nut (As shown in figure).
2.7 Printing the Test Files
Click on the SD card icon, choose a gcode file which you want to print, and press on the top right corner to printVerificare che il
filamento si depositi bene sul piatto, in caso contrario verificare la calibrazione del piatto. Porre attenzione al nastro adesivo, deve

9
When printing bottom layer, Observe the print nozzle .If the material can not be pasted on the hotbed, you need to Adjusting nut coun-
terclockwise. If the tape was broken, you need to Adjust the nut clockwise. the best print state is that the material paste on hot bed is
like flat ribbon rather than strips or flat shape.
CHAPTER3
PRINTING OPERATION
3.1 Display
1. XYZ axis coordinate values displayed in real time
2. Head preheating and Bed preheating: press the icon, input a number and click OK, it will begin to heat while the icon turns red.
Click again to cancel heating
3. Length and speed of extrusion: It can be manual adjusted
4. Extrusion and Retraction: E0 is to left extruder while E1 is to right extruder. E0 and E1 will be the same if there is only one extruder
in machine.
Attention: For double extruders , head 1 and 2 mean E0 and E1 in repetier host Icon means retraction, we suggest not use
retraction, it may cause extruder blocked
5. XYZ axis: It will show red border when clicking the icon , then you can click to move the head or bed.
6. Length and speed of moving: moving settings of head, also it can be manual adjusted
7. Moving: Icon means moving towards zero axis, icon means moving outwards from zero axis. Zero axis is located in upper
left corner of front print area.
When moving , choose X, Y or Z axis first, then click icon or to move. When coordinate shows zero, that you can only click
icon to move towards zero axis
8. Unlock the motors: If you click, the motors will be unlocked, then you can push printing head by hand. You can stop moving by click
button at any time.
9. Reset: When choosing X、Y or Z axis, you can press icon to reset that axis you choose. If there is not any axis to be chosen, it
will reset XYZ axis in turn.
10. Card: Click into SD card, select file ,and click button on top right corner to print. You can pause or stop printing at
ay time
Attention: It may need several seconds to preheat before printing.
11. Wifi, Automatic shutdown and system information: This machine is not installed components, not for use temporary

10
3.2 Operation and Printing Parts
1. Stick the tape to the printing plate ( note to swipe air bubbles )
2. Insert the SD card
3. Double click “SD” icon on the display panel, enter into SD card content.
4. Choose the Gcode document , click printing icon, PRISMA Series Industrial 3D Printers will print automatically.
5. after finish printing , use the scraper knife from the kit to take off the printed model.from the heating bed.
Note: when the parts are still warm, it’s easier to remove from the working plate. or pls re-heat the platform to 80°C for a minute,
so that you can remove the model easily
3.3 Pause or Continue to Print
While printing files, you can pause it at any time.
1. Press the “pause” on the display panel, the machine will be suspended to print.
2. When printer pause, press the start icon, it will continue to print.
3. If press stop icon, the printer will stop printing.
3.4 Power Outages
If want to cut off the printer power, please press the power button again. You could do it at anytime, it will not damage the printer.
And there is no need to operate any other steps. If you do it when printer is making parts, it will not finish the current printing task.
Note: After turning off the power switch, the system cooling fan and indicator light will continue to work for a few seconds

11
CHAPTER4
GENERAL MAINTENANCE
4.1 Daily Preventive Maintenance
1. After the completion of each production, cleaning the printing plate and all of accumulated materials with lead screw. If not, can
cause the printing platform is not in a horizontal position, or stuck at the printing platform in its upper limit.
2. Check the printing nozzle. After the completion of each production, you should examine the nozzle to ensure without accumulated
materials. if there is, please clean the nozzle parts. Because it will cause parts quality problems.
3. Use a vacuum cleaner to clean the print production Chamber in order to absorb all residual material and extrusion materials.
4. Clean the door, do not use ammonia-based glass cleaner on the door, otherwise it will damage the window. Use only ethanol
cleaner
4.2 Maintenance
4.2.1 500 Hours Maintenance
About every 500 hours should clean up the nozzle parts.
1. Cut off the printer power completely.
2. Loosen the screw on the heating blocks
3. Use sleeve to twist down the nozzle, take out feeding tube.
4. Take out the new feeding tube from kit, cut 67mm then install in original position.
5. Use sleeve tights up the printing nozzle
4.2.2 2000 Hours Maintenance
After running more than 2000 hours, printing nozzle would impair. May be there are have a negative impact with the surface flatness
and details of the model.
The steps of maintenance as same as the “ 500 hours maintenance” to change new feeding tube, and replace with a new printing
nozzle in the kit.

12
CHAPTER5
TROUBLE REMOVAL
Without power 1. Verify whether the power cord is firmly inserted.
2. Turn on the power switch, whether the power switch is on or not.
3. Verify whether the AC wall socket is provided or not.
Not extruded material Materials may be stuck in the nozzle, please refer to 、500 hours maintenance
Belt Movement Caton Please check the lubricating condition, wipe oil on the optical axis and evenly lubricate
again. Another possibly reason is rack affected by external force during transport
SD card read abnormally SD card damaged; SD card slot damaged; SD card inserted deep insufficient; the slots
line is loose
Nozzle can not heat heating tube is not connected; heating tube damage; temperature control tube damaged;
power tube damaged;
CHAPTER6
SUPPORT
• Products from PRISMA by MachPower® make use of the legal warranty offered by the reseller. Returns are only possible in case of
integrity items, that is, not assembled, lit or used.
• The information in this manual is subject to change at any time without prior notice.
• All information and contents contained in this manual are copyrighted.
• To the extent permitted by applicable law, hereby MachPower® and all its employees or affiliates declare any and all liability, da-
mages and risks arising from death or personal injury due to the assembly or operation of our products. In addition, MachPower®
or any of its officers, executives or affiliates, nor any party involved in the production or creation of our products will in any case be
held liable to you or any person for any special, direct or indirect, incidental, Or consequential resulting from the use or impossibility
of using this manual.


/