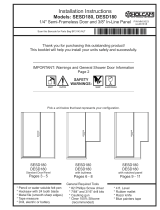
Page is loading ...

1
GRIDSCAPE FIXED PANEL
INSTALLATION INSTRUCTIONS – FULL DIVIDED-LIGHT
PREPARATION
Approximate Installation Time: 30 minutes
Tools Required for Installation:
➢ Chop Saw or Hacksaw
➢ Electric Drill
➢ 3/16” Masonry Drill Bit
➢ 9/64” Metal Drill Bit
➢ Philips Bit
➢ Pencil / Felt Tip Pen
➢ Safety Glasses
➢ Measuring Tape
➢ Masking Tape
➢ Level
➢ Rubber Mallet
➢ Clear Caulking or Sealant
QUESTIONS
Before beginning installation of product, make sure all parts are present. Compare parts with package contents list
and diagram below. Grid appearance may differ from images shown. If any part is missing or damaged, do not
attempt to install the product.
Please call our customer service department at 1-800-874-8601, 8 am - 5 pm EST, Monday to Friday.
Rev. 07/01/2018

2
GRIDSCAPE FIXED PANEL
INSTALLATION INSTRUCTIONS – FULL DIVIDED-LIGHT
CST 998
Sill
1
CST 956
Wall Jamb
1
CST 952
Panel Snap Cover
1
1329
Plastic Screw Anchor
8
6-8114PHP
Installation Screw (#8 x 1-1/4”)
8
834QO
Panel Adjustment Screw (#8 x 3/4”)
6
CP967B
Sill End Cap
1
-
Panel Assembly
1
PACKAGE CONTENTS

3
GRIDSCAPE FIXED PANEL
INSTALLATION INSTRUCTIONS – FULL DIVIDED-LIGHT
CST 952
CST 956
CST 998
CP967B
PANEL
1329 (5x)
6-8114PHP (5x)
(5x)
834QO (3x)
1329 (3x)
6-8114PHP (3x)
(5x)
834QO (3x)
*
* Note: Securing Sill CST 998 to curb / floor with screws is optional.

4
GRIDSCAPE FIXED PANEL
INSTALLATION INSTRUCTIONS – FULL DIVIDED-LIGHT
STEP 2. MARK CENTERLINE AND POSITION SILL ON CURB
➢ Strike a centerline on the curb where the unit will sit.
➢ Position the Sill CST 998 on the centerline against the wall
with the weep holes to the interior. Temporarily tape in place.
Outside Shower
Enclosure
MARK CENTERLINE
WEEP HOLES
TO INSIDE
CST 998
STEP 1. IDENTIFY PANEL LOCATION AT LEFT OR RIGHT
PANEL TO LEFT
PANEL TO RIGHT
CST 998

5
GRIDSCAPE FIXED PANEL
INSTALLATION INSTRUCTIONS – FULL DIVIDED-LIGHT
1/8”
STEP 3. INSTALL WALL JAMB
➢ Set the Wall Jamb CST 956 into the Sill CST 998 and up against the wall.
➢ While holding the Jamb plumb with a level, use the pre-drilled holes in the
Jamb to pencil mark (5) hole locations on the wall.
➢ Remove the Jamb and drill installation holes 1-1/2” deep using a 3/16”
masonry bit. Insert Plastic Screw Anchors 1329 into the holes.
➢ Secure the Jamb in place using (5) Installation Screws 6-8114PHP (#6
Head - #8 x 1-1/14” Pan Head Philips).
➢
CST 956
CST 998
STEP 4. SET PANEL AND TRIM SILL
➢ Set the Panel into the Sill CST 998 and push it
onto the Wall Jamb CST 956 until the Panel is tight
against the Jamb. The metal grid is to the outside.
➢ Mark the Sill at 1/8” from the end of the Panel (add
1/8” for the Snap Cover CST 952).
➢ Set aside the Panel.
➢ Trim the Sill to the mark / measurement.
PLUMB
CST 956
CST 998
6-8114PHP (5x)
1329 (5x)
PLUMB
CST 956
PANEL
Outside Shower
Enclosure
CST 956
CST 956
CST 998
PANEL
CST 998
PANEL
CST 956

6
GRIDSCAPE FIXED PANEL
INSTALLATION INSTRUCTIONS – FULL DIVIDED-LIGHT
➢ Place the Sill CST 998 on the curb centerline with weep holes to the inside of
the enclosure. Push the Sill against the wall under the Wall Jamb CST 956.
➢ OPTIONAL: Secure Sill to curb with Screws.
➢ Drill 3/16” holes through the Sill at (3) pre-drilled 3/8” holes in the Sill.
➢ Drill 3/16” holes 1-1/2” deep into the curb at the (3) pre-drilled holes in the Sill.
➢ Insert Plastic Screw Anchors 1329 into the holes.
➢ Secure the Sill using (3) Installation Screws 6-8114PHP (#8 x 1-1/14”).
STEP 6. SET PANEL AND INSTALL COVER AND SILL CAP
➢ Set the Panel into the Sill CST 998 and push it onto the
Wall Jamb CST 956. The metal grid is to the outside.
➢ Attach the Panel Snap Cover CST 952 to the exposed
vertical edge of the Panel using a rubber mallet.
➢ Adjust the Panel onto / off the Jamb until the Snap Cover
is flush with the end of the Sill.
➢ Insert the Sill End Cap CP967B into the end of the Sill.
CST 952
CP967B
CST 998
PANEL
CST 952
CST 998
CP967B
STEP 5. SET SILL AND * SECURE TO CURB (*OPTIONAL)
CST 998
6-8114PHP (3x)
6-8114PHP (3x)
CST 998
1329 (3x)
Outside Shower
Enclosure
WEEP HOLES
TO INSIDE
PANEL
FLUSH
CST 952
CST 956
3/8” HOLE (3x)
3/16” DRILL BIT
*OPTIONAL

7
GRIDSCAPE FIXED PANEL
INSTALLATION INSTRUCTIONS – FULL DIVIDED-LIGHT
STEP 7. SECURE PANEL FROM INTERIOR
STEP 8. SEAL UNIT EXTERIOR
➢ To complete the installation, run a bead of clear (or matching color)
mildew resistant caulking around the outside perimeter of the shower at
the Sill CST 998 and the Wall Jamb CST 956.
➢ For a unit installed without screwing the Sill down to the curb, run a
bead of silicone caulk on both the outside and inside of the Sill.
➢ IMPORTANT: Do not block the weep holes when caulking to the inside.
➢ Follow the caulking manufacturer’s instructions before using the shower.
➢ Secure the Panel from the interior of the enclosure using Panel
Adjustment Screws 834QO (#8 x 3/4” Pan Head Combo Drive
(Black Head)). Drill 9/64” pilot holes 3/4” deep at each Screw location.
➢ Secure the Panel to the Wall Jamb CST 956 with (3) Screws at top,
middle and bottom. Locate Screws at 1/4” from the edge of the
Panel. Place Screws at 5” from the top and bottom of the Panel.
➢ Secure the Panel to the Sill CST 998 with (3) Screws at left, right,
and center. Locate Screws at 1/4” from the edge of the Sill. Place
Screws into the Panel outside vertical stiles at 1/2” from the left and
right Panel edges.
Outside Shower
Enclosure
5”
5”
1/4”
CST 956
PANEL
CST 998
CST 998
PANEL
1/4”
PANEL
CST 956
834QO (3x)
834QO (3x)
CST 998
CST 956
CAULKING
CENTER
Inside Shower Enclosure
9/64” PILOT HOLES
834QO (3x)
834QO (3x)
IMPT: DO NOT BLOCK
WEEP HOLES TO INSIDE
CST 998
CAULKING
/