Page is loading ...

Publication 1756-IN572E-EN-P – March 2004
Installation Instructions
3, 8, or 16 Axis SERCOS interface Module
(Catalog Number/Series 1756-M03SE/A, 1756-M08SE/B, and
1756-M16SE/A)
The 3, 8, or 16 Axis SERCOS interface™ module mounts in a
ControlLogix™ chassis and uses fiber optical connections for all field-side
wiring.
Before you install your module you should have:
• installed and grounded a 1756 chassis and power supply.
• ordered and received the fiber optic cables for your application.
For: See page:
Important User Information 2
Overview 4
Determining the Power Requirements 5
Identifying Module Components 5
Module Product Label 8
Installing the Module 8
Fiber Optic Transmission 10
Fiber Optic Cables 11
Cable Connector Handling and Maintenance 14
Supported Drives 15
Ring Topology 17
Checking the LED Indicators 18
Removing the Module from the Chassis 21
Module Specifications 22
Hazardous Location Information 26
Rockwell Automation Support Back Cover
Allen-Bradley PLCs

2 3, 8, or 16 Axis SERCOS interface Module
Publication
1756-IN572E-EN-P – March 2004
Important User Information
Solid state equipment has operational characteristics differing from those of
electromechanical equipment. Safety Guidelines for the Application, Installation and
Maintenance of Solid State Controls (Publication SGI-1.1 available from your local Rockwell
Automation sales office or online at http://www.ab.com/manuals/gi) describes some
important differences between solid state equipment and hard-wired electromechanical
devices. Because of this difference, and also because of the wide variety of uses for solid
state equipment, all persons responsible for applying this equipment must satisfy
themselves that each intended application of this equipment is acceptable.
In no event will Rockwell Automation, Inc. be responsible or liable for indirect or
consequential damages resulting from the use or application of this equipment.
The examples and diagrams in this manual are included solely for illustrative purposes.
Because of the many variables and requirements associated with any particular installation,
Rockwell Automation, Inc. cannot assume responsibility or liability for actual use based on
the examples and diagrams.
No patent liability is assumed by Rockwell Automation, Inc. with respect to use of
information, circuits, equipment, or software described in this manual.
Reproduction of the contents of this manual, in whole or in part, without written permission
of Rockwell Automation, Inc. is prohibited.
Throughout this manual we use notes to make you aware of safety considerations.
WARNING
Identifies information about practices or circumstances that can cause an
explosion in a hazardous environment, which may lead to personal injury or
death, property damage, or economic loss.
IMPORTANT
Identifies information that is critical for successful application and
understanding of the product.
ATTENTION
Identifies information about practices or circumstances that can lead to
personal injury or death, property damage, or economic loss. Attentions help
you:
• identify a hazard
• avoid a hazard
• recognize the consequence
SHOCK HAZARD
Labels may be located on or inside the drive to alert people that dangerous
voltage may be present.

3, 8, or 16 Axis SERCOS interface Module 3
Publication
1756-IN572E-EN-P – March 2004
Related Documentation
The following documents contain additional information concerning related
Allen-Bradley products. To obtain a copy, contact your local Rockwell
Automation office or distributor.
BURN HAZARD
Labels may be located on or inside the drive to alert people that surfaces may
be dangerous temperatures.
For: Read This Document: Publication
Number
ControlLogix motion commands Motion Instruction Set
Reference Manual
1756-RM007
Information on setup and
configuration
ControlLogix Motion
Module Setup and
Configuration manual
1756-UM006
Information on installation, wiring,
and setup for the 1394C-SJTxx-D
1394 SERCOS Interface
Multi Axis Motion Control
System
1394C-5.20
Information on integrating the 1394
drive with SERCOS
1394 SERCOS Integration
Manual
1394-IN024
Information on Ultra3000 installation Ultra3000 Hardware
Installation Manual
2098-IN003
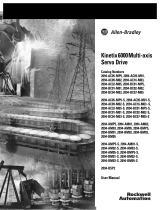
Information on Kinetix 6000 Module
installation
Kinetix 6000 Module
Installation Manual
2094-IN004
Information on Kinetix 6000
installation
Kinetix 6000 Installation
Manual
2094-IN001
Information on integrating the Kinetix
6000 with SERCOS
Kinetix 6000 Integration
Manual
2094-IN002
Information on integrating the
Ultra3000 with the 1756-M08SE
Ultra3000 SERCOS
Integration Manual
2098-IN005
Information on use of the 8720MC
High Performance Drive
8720MC High Performance
Drive User Manual
8720MC-UM001
Important User Information
Allen-Bradley PLCs

4 3, 8, or 16 Axis SERCOS interface Module
Publication
1756-IN572E-EN-P – March 2004
Overview
The 3, 8, or 16 Axis SERCOS interface module serves as a link between the
ControlLogix platform and intelligent drives. The communication link
between the module and the drive(s) is via IEC/EN 61491 SErial Real-time
COmmunication System (SERCOS) using fiber optic medium. Fiber optics
assures reliable high speed data transmission with excellent noise immunity,
improved performance, and elimination of interconnect wiring.
SERCOS is a real-time optical serial interface between the control unit and its
associated drives to transmit periodic and non-periodic data. Its topology is
that of a ring with one master and multiple slaves (axes). The 3, 8 or 16 Axis
SERCOS interface module serves as the interface between one ControlLogix
processor and 1 to 3 axes for the 1756-M03SE, 1 to 8 axes for the
1756-M08SE, and 1 to 16 axes for the 1756-M16SE operating in either
position, velocity, or torque mode. The module has a programmable ring
Cycle Period of 0.5ms, 1ms or 2ms depending on the number of axes and a
ring Data Rate of 4 Mbaud or 8 Mbaud. The module is designed to meet the
Control and Information Protocol (CIP) common specification.
Preventing Electrostatic Discharge
ATTENTION
This equipment is sensitive to electrostatic discharge,
which can cause internal damage and affect normal
operation. Follow these guidelines when you handle
this equipment:
• Touch a grounded object to discharge potential
static.
• Wear an approved grounding wriststrap.
• Do not touch connectors or pins on component
boards.
• Do not touch circuit components inside the
equipment.
• If available, use a static-safe workstation.
• When not in use, store the equipment in
appropriate static-safe packaging.

3, 8, or 16 Axis SERCOS interface Module 5
Publication
1756-IN572E-EN-P – March 2004
Removing and Inserting Under Power (RIUP)
This module is designed so you can remove and insert it under backplane
power and field-side power.
Repeated electrical arcing causes wear to contacts on both the module and its
mating connector. Worn contacts may create electrical resistance that can
affect module operation.
This equipment is classified as open equipment and must be installed
(mounted) in an enclosure during operation as a means of providing safety
protection.
Determining the Power Requirements
This module receives power from the 1756 chassis power supply and requires
two sources of power: 760 mA at 5.1V and 2.5 mA at 24V from the
backplane. Add this current to the requirements of all other modules in this
chassis to prevent overloading the backplane power supply.
Identifying Module Components
The following diagrams provide two views of the module. The first diagram is
a front view which shows the position and function of the LEDs and the
icons for the receiver and transmitter. The second diagram is a side view
which shows the position of the transmitter and receiver connectors. (The
1756-M03SE and the 1756-M16SE look identical to the 1756-M08SE.)
WARNING
When you insert or remove the module while backplane
power is on, an electrical arc can occur. This could cause
an explosion in hazardous location installations. Be sure
that power is removed or the area is nonhazardous
before proceeding.
Allen-Bradley PLCs

6 3, 8, or 16 Axis SERCOS interface Module
Publication
1756-IN572E-EN-P – March 2004
Figure 1 Front View of the Module
Receiver
OK
SERCOS Connector
(front & rear)
Transmitter Icon
Receiver Icon
SERCOS Ring
Status
Status LEDs
Module Health &
Communication Status
Tx
(rear)
Rx
(front)
CP
SERCOS
Communication
Phase
SERCOS interface
TM

3, 8, or 16 Axis SERCOS interface Module 7
Publication
1756-IN572E-EN-P – March 2004
Figure 2 Side View of the Module Showing Fiber Optic Cable Connections
The end of the cable is inserted into the appropriate connector of the
1756M03SE, 1756-M08SE, or 1756-M16SE. The threaded portion of the
cable connector assembly fits over the module connector and is screwed on
finger tight. Make sure that you remove the protector end caps before
Transmitter
Receiver
Allen-Bradley PLCs

8 3, 8, or 16 Axis SERCOS interface Module
Publication
1756-IN572E-EN-P – March 2004
attaching cable to the module. The end of the cable that emits light is the
transmitter.
The Module’s Product Label
The following figure shows the product label that is affixed to the side of the
1756-M03SE, 1756-M08SE, and 1756-M16SE modules. The three modules
look very much alike and checking the label carefully is the only way to be sure
that you have the correct module. Pay particular attention to the CAT. NO.
SERIES field on the label. This field indicates whether you have a
1756-M03SE, 1756-M08SE, or 1756-M16SE module and also the series of
the module. The label contains additional information about the module and
should be thoroughly checked prior to installation to ensure that the product
matches your expectations.
Figure 3 1756-M08SE Product Label
Installing the Module
To install the 3, 8, or 16 Axis SERCOS interface module:
A-B Catalog Number
and Series
Product Name
Certifications
Ratings
Series and Firmware
version Information
Power Requirements
A-B Part Number
Date of Manufacture
Catalog
Revision

3, 8, or 16 Axis SERCOS interface Module 9
Publication
1756-IN572E-EN-P – March 2004
1. Align the module circuit board with the top and bottom chassis guides
Figure 4 Align Module
P
O
WE
R
Printed circuit
board
OK
SERCOS interface
Allen-Bradley PLCs

10 3, 8, or 16 Axis SERCOS interface Module
Publication
1756-IN572E-EN-P – March 2004
2. Push evenly and firmly to seat the module in the chassis. It is seated
when the top and bottom locking tabs have snapped into place.
Figure 5 Seat the Module
Fiber Optic Transmission
The fiber optic transmitter for the SERCOS interface 3, 8, or 16 Axis module
uses a 650nm wavelength. This produces a visible light from the port and is a
determinant in factoring maximum cable lengths. The high light output lets
you use both plastic optical fiber (POF) and Hard Clad Silica (HCS
®
) cables.
The fiber optics used with the 1756-M03SE, 1756-M08SE and 1756-M16SE
modules are rated Class 1 for IEC Laser (LED) Safety Classification. Be aware
that under certain conditions, viewing the optical port may expose the eye to
hazard. Under most viewing conditions, there is no eye hazard.
ATTENTION
When viewed under some conditions, the optical port
may expose the eye beyond the maximum permissible
exposure recommended in ANSI Z136.2, 1993.
PO
W
E
R
Locking
tab
OK
SERCOS interface

3, 8, or 16 Axis SERCOS interface Module 11
Publication
1756-IN572E-EN-P – March 2004
Fiber Optic Cables
The 1756-M03SE, 1756-M08SE, and the 1756-M16SE modules are
connected to the drive(s) via a fiber optic cable. These cables can be made of
either plastic or glass. For more information about the care, handling, and
installation of fiber optic cables see the Fiber Optic Cable Installation and
Handling Instructions, publication number 2090-IN010x-EN-P.
Plastic Fiber Optic Cables
The modules are connected to the drive(s) via a 1000µm plastic simplex fiber
optical cable. Plastic fiber optic cables have a transmission range of 1 meter to
32 meters. Both the transmitter and receiver connections are made using a
F-SMA standard plug that conforms to the F-SMA screw type connector.
Premade plastic fiber optic cable assemblies are available from Rockwell
Automation. Plastic fiber optic cables come in a variety of jackets depending
on application environments. The cable is available without a jacket
(Chlorinated Polyethylene) for use inside an electrical cabinet, a standard
jacket (Polyvinyl Chloride) for use outside of electrical cabinets, and a nylon
jacket for use in harsh environments.
The following table shows the catalog numbers and available lengths for
plastic fiber optic cables that are not jacketed (Chlorinated Polyethylene) and
should be used only within an electrical cabinet.
Allen-Bradley Catalog
Number
Length in meters
(inches)
2090-SCEP1-0 1 m (39 in)
2090-SCEP3-0 3 m (118 in)
2090-SCEP5-0 5 m (197 in)
2090-SCEP8-0 8 m (315 in)
2090-SCEP10-0 10 m (394 in)
2090-SCEP15-0 15 m (591 in)
2090-SCEP20-0 20 m (787 in)
2090-SCEP25-0 25 m (984 in)
Allen-Bradley PLCs

12 3, 8, or 16 Axis SERCOS interface Module
Publication
1756-IN572E-EN-P – March 2004
The plastic fiber optic cables listed in the following table have a standard
jacket (Polyvinyl Chloride) for use in normal environments outside of an
electrical cabinet.
If your cables are going to run through a harsh environment, the cable should
be appropriately jacketed. The following table contains the catalog numbers
and lengths for nylon jacketed cables for use in harsh environments.
2090-SCEP32-0 32 m (1260 in)
Allen-Bradley Catalog
Number
Length in meters
(inches)
2090-SCVP1-0 1 m (39 in)
2090-SCVP3-0 3 m (118 in
2090-SCVP5-0 5 m (197 in)
2090-SCVP8-0 8 m (315 in)
2090-SCVP10-0 10 m (394 in)
2090-SCVP15-0 15 m (591 in)
2090-SCVP20-0 20 m (787in)
2090-SCVP25-0 25 m (984 in)
2090-SCVP32-0 32 m (1260 in)
Allen-Bradley Catalog
Number
Length in meters
(inches)
2090-SCNP1-0 1 m, (39 in)
2090-SCNP3-0 3 m, (118 in)
2090-SCNP5-0 5 m (197 in)
2090-SCNP8-0 8 m (315 in)
2090-SCNP10-0 10 m (394 in)
2090-SCNP15-0 15 m (591 in)
Allen-Bradley Catalog
Number
Length in meters
(inches)

3, 8, or 16 Axis SERCOS interface Module 13
Publication
1756-IN572E-EN-P – March 2004
Glass Fiber Optic Cables
Fiber Optic cables made from glass are a better conduit for the light to pass
through thus increasing the length of cable that may be used and still supply a
strong enough signal for use with the 1756-M03SE, 1756-M08SE, and
1756-M16SE modules.
The modules are connected to the drive(s) via a 200µm glass fiber optical
cable. Glass fiber optic cables have a transmission range of 1 meter to 200
meters. Both the transmitter and receiver connections are made using a
F-SMA standard plug that conforms to the F-SMA screw type connector.
Premade glass fiber optic cable assemblies are available from Rockwell
Automation. Glass fiber optic cables come with a standard jacket (Polyvinyl
Chloride) for use in normal environments.
The following table shows the catalog numbers and lengths available for
premade glass fiber optic cables. These cables have a standard jacket
(Polyvinyl Chloride) for use in normal environments.
2090-SCNP20-0 20 m (787 in)
2090-SCNP25-0 25 m (984 in)
2090-SCNP32-0 32 m (1260 in)
Allen-Bradley Catalog
Number
Length in meters
(inches)
2090-SCVG1-0 1 m (39 in)
2090-SCVG3-0 3 m (118 in)
2090-SCVG5-0 5 m (197 in)
2090-SCVG8-0 8 m (315 in)
2090-SCVG10-0 10 m (394 in)
2090-SCVG15-0 15 m (591 in)
2090-SCVG20-0 20 m (787 in)
Allen-Bradley Catalog
Number
Length in meters
(inches)
Allen-Bradley PLCs

14 3, 8, or 16 Axis SERCOS interface Module
Publication
1756-IN572E-EN-P – March 2004
Cable Connector Handling and Maintenance
When cables are not in use, keep the ends covered with the dust covers that
came with the cables. This helps to keep dust and small particles from
blocking the optic path. Good system performance is dependent on clean
port optics and cable ferrules to avoid obstructing the optical path. Clean
compressed air is often sufficient to remove particles of dirt. You can also use
methanol on a lint and strand free cotton swab. Recommended cleaners
include:
2090-SCVG25-0 25 m (984 in)
2090-SCVG32-0 32 m (1260 in)
2090-SCVG50-0 50 m (1970 in)
2090-SCVG100-0 100 m (3937 in)
Alcohols Aliphatics Other
methyl hexane soap solution
isopropyl heptane naphtha
isobutyl
ATTENTION
The small junction size inherent in the design of these
components increases the components’ susceptibility
to damage from electrostatic discharge (ESD). It is
advised that normal static precautions be taken in
handling and assembly of these components to
prevent damage and/or degradation which can be
induced by ESD.
Allen-Bradley Catalog
Number
Length in meters
(inches)

3, 8, or 16 Axis SERCOS interface Module 15
Publication
1756-IN572E-EN-P – March 2004
Supported Drives
The following Allen-Bradley drives are supported by the SERCOS interface
motion modules.
Catalog Number Description
1394-SJT05-D 1394 5kW SERCOS Interface 460V drive
1394-SJT10-D 1394 10kW SERCOS Interface 460V drive
1394-SJT22-D 1394 22kW SERCOS Interface 460V drive
2094-AC05-M01
Kinetix 6000
TM
230VAC, IAM, 3kW PS, 9A Cont, 17A Peak
2094-AC05-MP5 Kinetix 6000, 230VAC, IAM, 3kW PS, 5A Cont, 10A Peak
2094-AC09-M02 Kinetix 6000, 230VAC, IAM, 6kW PS, 15A Cont, 30A Peak
2094-AC16-M03 Kinetix 6000, 230VAC, IAM, 15kW PS, 24A Cont, 49A Peak
2094-AC32-M05 Kinetix 6000, 230VAC, IAM, 23kW PS, 49A Cont, 98A Peak
2094-AM01 Kinetix 6000, 230VAC, AM, 9A Cont, 17A Peak
2094-AM02 Kinetix 6000, 230VAC, AM, 15A Cont, 30A Peak
2094-AM03 Kinetix 6000, 230VAC, AM, 24A Cont, 49A Peak
2094-AM05 Kinetix 6000, 230VAC, AM, 49A Cont, 98A Peak
2094-AMP5 Kinetix 6000, 230VAC, AM, 5A Cont, 10A Peak
2094-BC01-M01 Kinetix 6000, 460VAC, IAM, 6kW PS, 9A Cont, 13A Peak
2094-BC01-MP5 Kinetix 6000, 460VAC, IAM, 6kW PS, 4A Cont, 6A Peak
2094-BC02-M02 Kinetix 6000, 460VAC, IAM, 15kW PS, 15A Cont, 22A Peak
2094-BC04-M03 Kinetix 6000, 460VAC, IAM, 30kW PS, 30A Cont, 45A Peak
2094-BC07-M05 Kinetix 6000, 460VAC, IAM, 45kW PS, 49A Cont, 73A Peak
2094-BM01 Kinetix 6000, 460VAC, AM, 9A Cont, 13A Peak
2094-BM02 Kinetix 6000, 460VAC, AM, 15A Cont, 22A Peak
2094-BM03 Kinetix 6000, 460VAC, AM, 30A Cont, 45A Peak
2094-BM05 Kinetix 6000, 460VAC, AM, 49A Cont, 79A Peak
Allen-Bradley PLCs

16 3, 8, or 16 Axis SERCOS interface Module
Publication
1756-IN572E-EN-P – March 2004
2094-BMP5 Kinetix 6000, 460VAC, AM, 4A Cont, 6A Peak
2098-DSD-005-SE
Ultra3000
TM
0.5kW SERCOS Interface 230VDrive
2098-DSD-010-SE Ultra30001kW SERCOS Interface 230VDrive
2098-DSD-020-SE Ultra3000 2kW SERCOS Interface 230VDrive
2098-DSD-030-SE Ultra3000 3kW SERCOS Interface 230VDrive
2098-DSD-075-SE Ultra3000 7.5kW SERCOS Interface 230VDrive
2098-DSD-150-SE Ultra3000 15kW SERCOS Interface 230VDrive
2098-DSD-HV030-SE Ultra3000 3kW, 460VAC SERCOS Interface 460V drive
2098-DSD-HV050-SE Ultra3000 5kW, 460VAC SERCOS Interface 460V drive
2098-DSD-HV100-SE Ultra3000 10kW, 460VAC SERCOS Interface 460V drive
2098-DSD-HV150-SE Ultra3000 15kW, 460VAC SERCOS Interface 460V drive
2098-DSD-HV220-SE Ultra3000 22kW, 460VAC SERCOS Interface 460V drive
8720MC-B014 8720MC, 460VAC/750VDC, SERCOS Drive, 14A Cont, 21A Peak
8720MC-B021 8720MC, 460VAC/750VDC, SERCOS Drive, 21A Cont, 32A Peak
8720MC-B027 8720MC, 460VAC/750VDC, SERCOS Drive, 27A Cont, 41A Peak
8720MC-B034 8720MC, 460VAC/750VDC, SERCOS Drive, 34A Cont, 51A Peak
8720MC-B042 8720MC, 460VAC/750VDC, SERCOS Drive, 42A Cont, 63A Peak
8720MC-B048 8720MC, 460VAC/750VDC, SERCOS Drive, 48A Cont, 72A Peak
8720MC-D065 8720MC, 750VDC, SERCOS Drive, 65A Cont, 98A Peak
8720MC-D078 8720MC, 750VDC, SERCOS Drive, 78A Cont, 117A Peak
8720MC-D097 8720MC, 750VDC, SERCOS Drive, 97A Cont, 145A Peak
8720MC-D120 8720MC, 750VDC, SERCOS Drive, 120A Cont, 180A Peak
8720MC-D149 8720MC, 750VDC, SERCOS Drive, 149A Cont, 224A Peak
8720MC-D0180 8720MC, 750VDC, SERCOS Drive, 180A Cont, 270A Peak
Catalog Number Description

3, 8, or 16 Axis SERCOS interface Module 17
Publication
1756-IN572E-EN-P – March 2004
Ring Topology
The SERCOS network consists of a Master (1756-M03SE, 1756-M08SE, or
1756-M16SE module) and multiple drives connected in a ring topology.
The fiber optical ring starts and ends with the master.
The following diagram gives an example of a possible network connected in a
ring topology.
Figure 6 Ring topology with 1394C-SJTxx-D
Any break in the fiber optical ring disables the SERCOS network and creates
a warning that is identified by the SERCOS Ring Status LED.
ATTENTION
Each drive on the SERCOS ring must have a unique
SERCOS address. If two axes have the same address
on the same ring, both respond to commanded
motion. This could lead to damage to the equipment
or product and could result in personal injury.
P
O
WE
R
OK
Tx
Rx
SERCOS interface
Logix5550
RUN
rs232
BAT
I/O
OK
RUN REM PROG
Allen-Bradley PLCs

18 3, 8, or 16 Axis SERCOS interface Module
Publication
1756-IN572E-EN-P – March 2004
Checking the LED Indicators
The module provides three LED indicators to show the state of the system.
The LEDs are located on the bezel of the 1756-M03SE, 1756-M08SE, and
1756-M16SE modules. The LED on the right, marked by OK, indicates the
present health of the module and the communication status. To the immediate
left of the OK LED is the SERCOS Ring LED. This is marked with a ring
icon and displays the status of the SERCOS network. A third LED is situated
on the far left and displays the status of the SERCOS Communication Phases.
The CP LED is for informational purposes only.
The following diagram shows the positioning of the LEDs.
Figure 7 LED Location and Description
During power up, the module completes a self test that includes an indicator
test. All LEDs go red for one second, green for one second, and off for one
second.
OK
SERCOS Ring
Status
Module Health &
Communication
Status
CP
SERCOS
Communication
Phase
SERCOS interface
TM

3, 8, or 16 Axis SERCOS interface Module 19
Publication
1756-IN572E-EN-P – March 2004
SERCOS Communication Phase Status Using the CP Indicator
Module Status Using the OK Indicator
If the CP LED displays: Then the module status is:
Solid Orange In Phase -1: Autobaud detection in progress.
OFF In Phase 0: looking for a closed ring.
Flashing Red In Phase 1: looking for active nodes.
Alternating Red/Green In Phase 2: configuring nodes for communication.
Flashing Green In Phase 3: configuring device specific parameters
Solid Green In Phase 4: configured and active.
If the OK LED
displays:
Then the module status is: Take this action:
Off The module is not operating. • Apply chassis power.
• Verify the module is
completely inserted into
the chassis and
backplane.
Flashing green The module has passed internal
diagnostics, but has not
established active
communications.
None, if you have not configured
the module.
Solid green • Data is being exchanged.
• The module is in the
normal operating state.
None. The module is ready for
action.
Flashing red • A major recoverable
failure has occurred.
• An NVS update is in
progress.
If an NVS update is in progress,
complete the NVS update.
If an NVS update is not in
progress: Reboot
Solid red A potential nonrecoverable fault
has occurred.
• Reboot the module.
• If the solid red persists,
replace the module.
Allen-Bradley PLCs

20 3, 8, or 16 Axis SERCOS interface Module
Publication
1756-IN572E-EN-P – March 2004
SERCOS Ring Status
If the
SERCOS
Ring LED
displays:
Then the ring status is: Take this action:
Solid green The ring, drive, and axes are
configured and are actively
communicating through to the
nodes on the ring.
None.
Flashing red The module has detected a setup
or configuration fault with the
ring.
Check your system setup and
configuration as follows:.
• Ensure drive and axes
addresses are correct.
• Remove excess axes
from ring.
• Make sure application
program has selected
the proper Ring Cycle
Period and Baud Rate.
Solid red The module has detected a
hardware or installation fault
with the ring.
Check your system hardware and
installation as follows:
• Make sure all cables are
properly installed.
• Make sure cable is of the
correct type and length.
• Make sure application
program has configured
the module’s ring
transmit level to High
when using specified
cables.
• Make sure the drive’s
transmit levels are set
appropriately.
• Inspect cables for
degradation.
• Inspect drives for any
faults and correct them.
/