PureAire Remote Digital Display Alarm Indicator User guide

Type
User guide

PureAire Remote Digital Display Alarm Indicator provides continuous monitoring of oxygen and carbon dioxide levels, or gas concentrations. Connect it to compatible PureAire monitors to receive real-time status updates and alarms. Easily mount it on a wall or flat surface and connect using a shielded control cable. It features adjustable alarm levels, polarity switches, and range auto-adjustment for precise readings. The built-in horn and LED indicators provide clear alarm notifications. Use it in various industrial or healthcare settings to ensure safety and compliance.

PureAire Remote Digital Display Alarm Indicator provides continuous monitoring of oxygen and carbon dioxide levels, or gas concentrations. Connect it to compatible PureAire monitors to receive real-time status updates and alarms. Easily mount it on a wall or flat surface and connect using a shielded control cable. It features adjustable alarm levels, polarity switches, and range auto-adjustment for precise readings. The built-in horn and LED indicators provide clear alarm notifications. Use it in various industrial or healthcare settings to ensure safety and compliance.

Remote Digital Display Alarm Indicator
Part #: 99091, 99183, 99186, 99187, 99193
The Remote Digital Display Alarm Indicator provides continuous information on the status of
PureAire’s line of oxygen deficiency and carbon dioxide monitors, O2 analyzers, or gas
detectors. All PureAire safety monitors have a built in mA output. The Remote Display Alarm
easily connects to the monitor’s input power and mA output connection. An 18 AWG, three
conductor, shielded control and instrumentation cable, Belden 8770 or equivalent, is
recommended for the connection. The maximum permissible cable length is 250 feet. The
Remote Display can also be connected to a programmable logic controller (PLC), providing
simultaneous alarm and status indications in multiple locations throughout the facility.
Revision Date: Sept. 2022
PureAire Monitoring Systems, Inc.
1140 Ensell Road
Lake Zurich, Illinois 60047
Phone: 847-726-6000
Fax: 847-726-6051
Toll-Free: 888-788-8050
www.pureairemonitoring.com
1
PureAire Monitoring Systems, Inc.
How to mount the Remote Display Alarm Indicator
1)
Open the two side
doors to expose the
front panel screws.
2)
Loosen the 4 screws
to separate the front
panel from the case.
Mount the case to a wall or other
flat surface. There are 4ea. through
holes for fastening the case.
The case is designed to be flush
mounted.
NOTE: The front cover can be
removed from the case by gently
pulling on the plastic hinges. (they
will stay connected to the front
cover.
To connect the front cover, just
push the plastic hinge into the case.
2
An 18 AWG, three conductor,
shielded control and
instrumentation cable,
Belden 8770 or equivalent, is
recommended for the
connection.
PureAire Monitoring Systems, Inc.
How to wire the Remote Display Alarm Indicator
Identification of switches and controls
1.
Alarm Adjusting Switches These switches are used select the alarm level to be adjusted.
They are factory set at 19.5% for Alarm 1 and 18% for Alarm 2. (Normally set at the factory)
2.
Alarm Polarity Switches These switches are used to select when the alarms will activate.
For oxygen, the alarm switches are set for “Below”. If the readings go below an ambient level,
(i.e. 19.5%), then the internal horn and LED’s will activate. When used with our toxic gas
monitors, the polarity is set to “Above”. (Normally set at the factory)
3.
Range Auto Adjustment Switches These switches are used to adjust the zero and full scale
reading on the Remote Display Alarm Indicator. When sending a 4mA and 20mA signal from
your monitor, pushing these switches will automatically adjust the zero and full scale
readings on the Remote Digital Display.
4.
Alarm Adjusting Buttons – These buttons are used to increase, (UP) or decrease (DOWN)the
alarm settings.
3
ow to wire the Remote Display Alarm Indicator
PureAire Monitoring Systems, Inc.
5.
Horn On/Off Switch – This switch is used to turn the internal audio horn on and off. In the On
position, any alarm will activate the audible horn. To disable the internal horn, turn the switch
to Off.
1. Alarm
adjusting
switches
2. Alarm
Polarity
switches
3. Range auto
adjustment H
switches
Do not remove
jumper unless
connecting to a
second remote
display or a PLC.
4. Alarm adjusting
buttons
5. Horn On Off
Switch
How to Setup and Operate the Remote Display
CAUTION: Entering the set up menus will disable the real time oxygen readings
After wiring the remote display to your monitor, turn on the power to your monitor. During the
warmup the remote display will illuminate a yellow fault LED and the display will read FLt,
(indicating that the monitor is in fault). This will clear after the monitor completes the 4 minute warm-
up.
During warm up After warm up
How to set the zero and full scale range
This will need to be set up in the field to adjust to the length of cable between the monitor and the
remote display alarm indicator. To perform this in the field, first enter the password on your monitor
and select the “Set 4-20mA loop” menu. (See Section 5.5.1 Set 4-20mA loop).
Push the joystick right to select “Set 4mA Zero” and then push the joystick right one more time to
activate it. This sends a 4mA signal to the remote display. On the back of the remote display push the
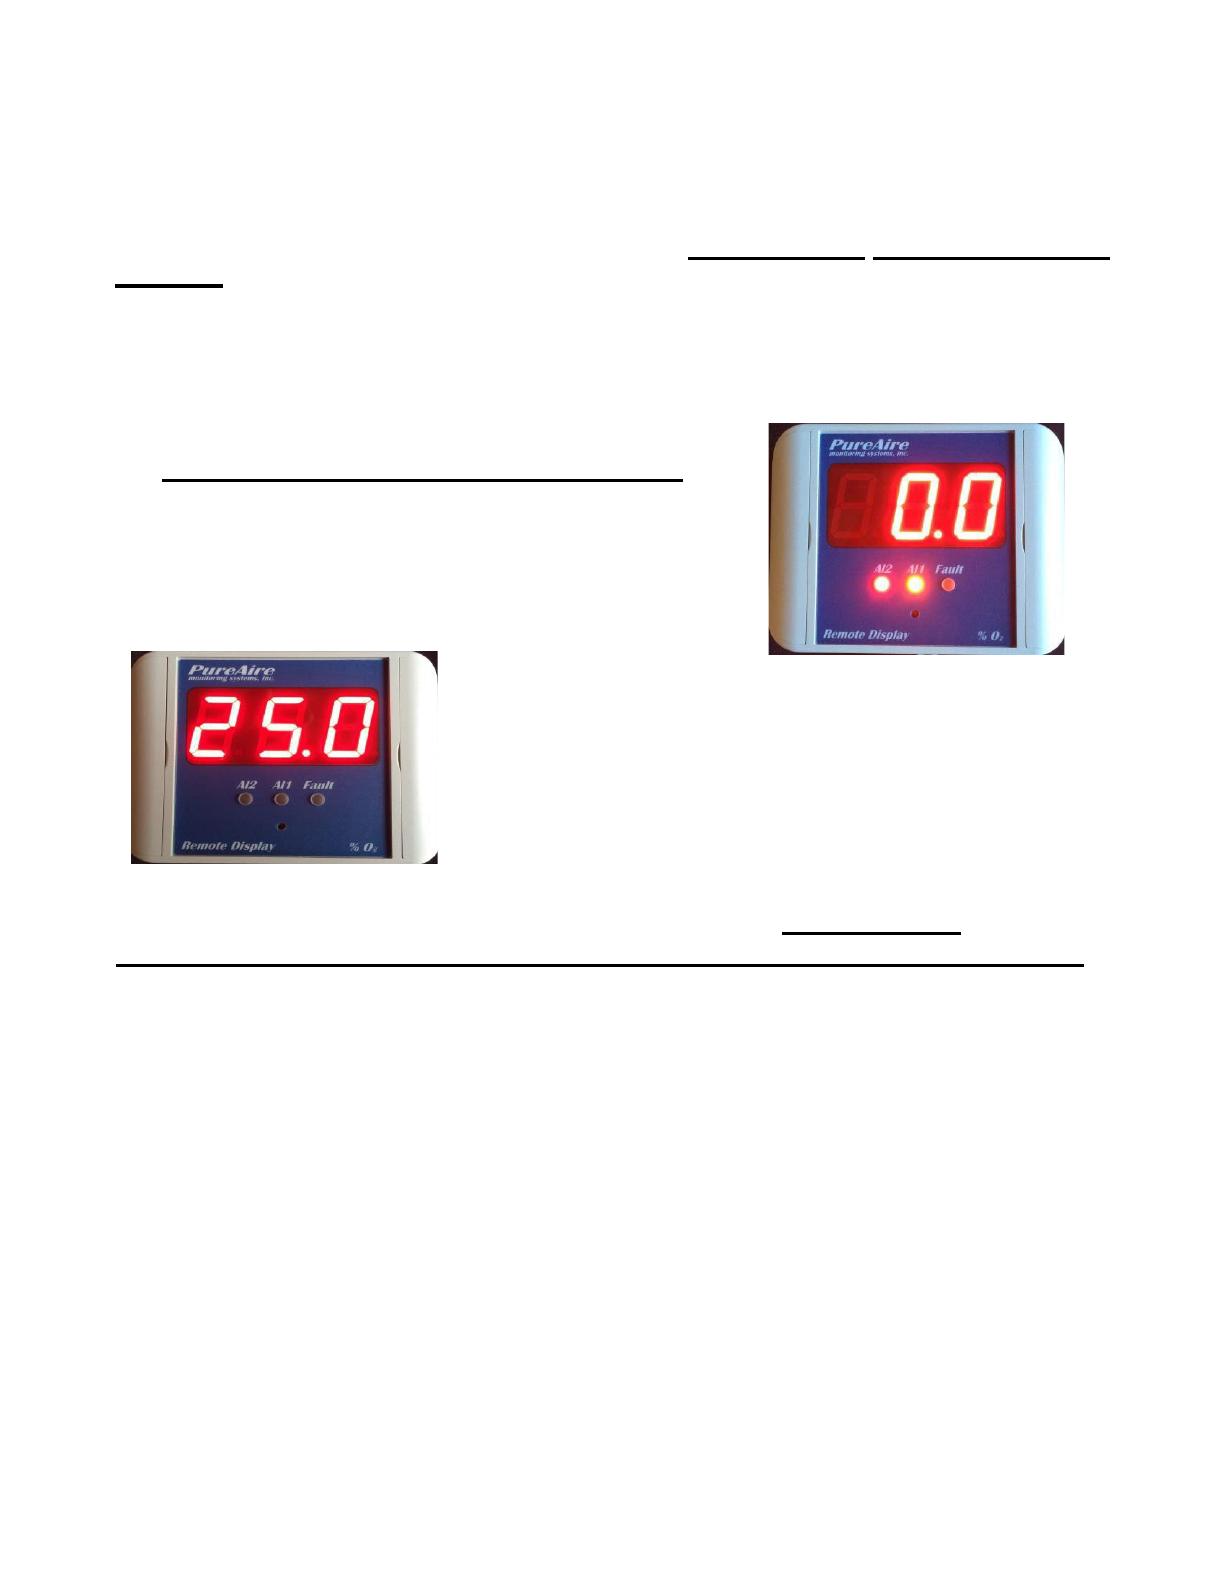
ZERO button for 3 seconds. You’ll see the display reset and automatically adjust itself to the new zero.
If necessary, you can push the joystick up or down to fine tune the zero reading. NOTE: Both AL1
and AL2 LED’s will also be illuminated.
(To exit the Zero menu, push the Joystick left once)
Push the joystick down once to select “Set 20mA Span” and
then push the joystick right one more time to activate it. This
sends a 20mA signal to the remote display. On the back of the
remote display push the SPAN button for 3 seconds. You’ll see the
display reset and automatically adjust itself to the new span of
25%. If necessary you can push the joystick up or down to fine
tune the full scale reading once)
To return the main menu, push the Joystick left until the
monitor scrolls Oxygen 0-25% on the top line.
NOTE: To fine tune the reading to match the
reading on the monitor, use the “Set 20mA
Span” menu. Push the joystick up or down
until both displays match.
CAUTION: If the monitor is in the measuring mode and the ZERO push button is pressed an “Err” will
be displayed on the remote display and no readings will be recorded. If the SPAN push button is
pressed in the measuring mode, the remote display will automatically adjust to 25.0%. You will
need to repeat the above adjustment procedure again for the remote display to mirror the monitor.
NEVER PUSH THE SPAN in the measuring mode.
How to set the internal alarms on the Remote Display
The Remote Display has two user selectable alarms with a separate horn tone to identify Alarm 1 from
Alarm 2. Both alarms, unless specified otherwise, are preset at the factory as:
Oxygen Monitors: AL1 = 19.5% and AL2 = 18%.
Carbon Dioxide Monitors: AL1 = 5,000 ppm and AL2 = 10,000 ppm
LEL 0-100%: AL1 = 20% and AL2 = 40%
*Please note that alarm levels can be changed in the field.
To set Alarm 1, Press Alarm 1 for two seconds to enter the alarm change mode. The display will show
the current alarm setting and the right most decimal point will be lit. Use the UP or DOWN buttons to
increase or decrease the alarm value. When done, push the Alarm 1 button for 2 seconds to get back to
the monitoring mode.
To set Alarm 2, Press the Alarm 2 button for two seconds to enter the alarm change mode. The display
will show the current alarm setting and the left most decimal point will be lit. Use the UP or DOWN
buttons to increase or decrease the alarm value. When done, push the Alarm 2 button for 2 seconds to
get back to the monitoring mode.
4
  • Page 1 1
  • Page 2 2
  • Page 3 3
  • Page 4 4
  • Page 5 5

PureAire Remote Digital Display Alarm Indicator User guide

Type
User guide

PureAire Remote Digital Display Alarm Indicator provides continuous monitoring of oxygen and carbon dioxide levels, or gas concentrations. Connect it to compatible PureAire monitors to receive real-time status updates and alarms. Easily mount it on a wall or flat surface and connect using a shielded control cable. It features adjustable alarm levels, polarity switches, and range auto-adjustment for precise readings. The built-in horn and LED indicators provide clear alarm notifications. Use it in various industrial or healthcare settings to ensure safety and compliance.

Ask a question and I''ll find the answer in the document

Finding information in a document is now easier with AI