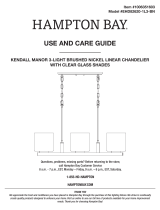
Hampton Bay EHD82620-1-5-MB User guide

Type
User guide

This manual is also suitable for

Hampton Bay EHD82620-1-5-MB is a 5-light brushed nickel chandelier with clear glass shades, perfect for illuminating your home with a touch of elegance. Its adjustable chain allows you to customize the hanging height to suit your needs, while the included socket ring tool makes installation a breeze. Enjoy the warm and inviting ambiance it creates in your living room, dining room, or foyer.

Hampton Bay EHD82620-1-5-MB is a 5-light brushed nickel chandelier with clear glass shades, perfect for illuminating your home with a touch of elegance. Its adjustable chain allows you to customize the hanging height to suit your needs, while the included socket ring tool makes installation a breeze. Enjoy the warm and inviting ambiance it creates in your living room, dining room, or foyer.

THANK YOU
We appreciate the trust and condence you have placed in Hampton Bay through the purchase of this lighting xture. We strive to continually
create quality products designed to enhance your home. Visit us online to see our full line of products available for your home improvement
needs. Thank you for choosing Hampton Bay!
USE AND CARE GUIDE
KENDALL MANOR 5-LIGHT BRUSHED NICKEL CHANDELIER
WITH CLEAR GLASS SHADES
Questions, problems, missing parts? Before returning to the store,
call Hampton Bay Customer Service
8 a.m. - 7 p.m., EST, Monday – Friday, 9 a.m. – 6 p.m., EST, Saturday.
1-855-HD-HAMPTON
HAMPTONBAY.COM
Item #1006351510
Model #EHD82620-1-5-BN
2
Table of Contents
Safety Information ..................................2
Warranty ..........................................2
What is covered ...................................2
What is not covered ................................2
Pre-Installation .....................................3
Planning Installation ...............................3
Tools Required .................................... 3
Hardware Included .................................3
Pre-Installation .....................................4
Package Contents .................................4
Installation ........................................5
Maintenance .......................................8
Care and Cleaning ..................................8
Troubleshooting ....................................8
Safety Information
IMPORTANT: Read and understand this entire
manual before you attempt to assemble, install, or
operate this product.
WARNING: Turn off the electricity at the main
circuit breaker panel before you begin this
installation.
WARNING: This product contains chemicals known
to the State of California to cause cancer, birth
defects, and/or other reproductive harm. Thoroughly
wash hands after installing, handling, cleaning, or
otherwise touching this product.
WARNING: This product must be installed in
accordance with the applicable installation code by a
person familiar with the construction and operation of
the product and the hazards involved.
Warranty
WHAT IS COVERED
The manufacturer warrants the lighting xtures to be free from defects in materials and workmanship for a period of three (3) years
from the date of purchase. This warranty applies only to the original consumer and only to products used in normal use and service. If
this product is found to be defective, the manufacturer’s only obligation, and your exclusive remedy, is the repair or replacement of the
product at the manufacturer’s discretion, provided that the product has not been damaged through misuse, abuse, accident, modications,
alterations, neglect, or mishandling.
WHAT IS NOT COVERED
This warranty shall not apply to any product that is found to have been improperly installed, set-up, or used in any way not in accordance
with the instructions supplied with the product. This warranty shall not apply to a failure of the product as a result of an accident, misuse,
abuse, negligence, alteration, or faulty installation or any other failure not relating to faulty material or workmanship. This warranty shall not
apply to the nish on any portion of the product, such as surface and/or weathering, as this is considered normal wear and tear.
The manufacturer does not warrant and specially disclaims any warranty, whether express or implied, of tness for a particular purpose,
other than the warranty contained herein. The manufacturer specically disclaims any liability and shall not be liable for any consequential
or incidental loss or damage, including but not limited to any labor / expense costs involved in the replacement or repair of said product.
Contact the Customer Service Team at 1-855-HD-HAMPTON or visit www.Hamptonbay.com.
3 HAMPTONBAY.COM
Please contact 1-855-HD-HAMPTON for further assistance.
Pre-Installation
PLANNING INSTALLATION
Before beginning the installation, make sure all the parts are included using the Hardware Included and Package Contents sections. If any
part is missing or damaged, do not attempt to assemble, install, or operate the product.
NOTE: To avoid damaging this product, place it on a a soft,
non-abrasive surface, such as carpet or cardboard.
TOOLS REQUIRED
Phillips
screwdriver
Safety
glasses
Pliers
Electrical
tape
Wire
stripper
Ladder
HARDWARE INCLUDED
NOTE: Hardware is not shown to actual size.
AA BB CC
DD
EE
FF
GG HH JJ
Part Description Quantity
AA Wire nut 3
BB Junction box screw 2
CC Mounting bracket 1
DD Hexnut 1
EE
FF
GG
HH
JJ
Threaded pipe with hexnuts
Threaded ring
Screw collar loop
Chain
Locking link
1
1
1
1
2
4
Pre-Installation (continued)
PACKAGE CONTENTS
A
B
C
D
E
F
G
Part Description Quantity
A Loop 1
B Fixture Body 1
C Socket ring tool 1
D Socket ring 5
E
F
G
Shade
Center ring
Canopy
5
1
1
5 HAMPTONBAY.COM
Please contact 1-855-HD-HAMPTON for further assistance.
Installation
1 Installing the mounting bracket
IMPORTANT: Disconnect the power at the main fuse box.
Hold the mounting bracket (CC) so the head of the attached
ground screw is facing down. From the side of the
mounting bracket (CC) with the head of the ground screw,
thread the short end of the threaded pipe with hexnuts (EE)
into the hole in the center of the mounting bracket (CC). The
top hexnut on the threaded pipe (EE) should be touching
the mounting bracket (CC).
Screw the hexnut (DD) onto the end of the threaded pipe (EE).
Tighten the hexnut (DD) up against the mounting bracket (CC).
Place the mounting bracket (CC) up against the junction
box. Align the slots in the mounting bracket (CC) with the
holes in the junction box. Thread one junction box screw
(BB) into each slot in the mounting bracket (CC) and into
each hole in the junction box.
Thread the screw collar loop (GG) onto the end of the
threaded pipe (EE). Tighten the screw collar loop (GG) up
against the hexnut (DD) on the threaded pipe (EE).
2 Preparing the xture and wires
Push the xture wires up through the bottom of the loop (A).
Screw the loop (A) onto the top of the xture body (B).
Attach one locking link (JJ) to the loop (A).
Determine the desired height of the hanging xture. If
needed, remove chain links from the chain (HH) to achieve
the desired height.
Attach the last chain link on the chain (HH) to the locking
link (JJ) on the loop (A).
Weave the xture wires through the chain (HH), skipping
every other chain link.
Slip the threaded ring (FF) over the ends of the xture
wires and the chain (HH).
Slip the hole in the center of the canopy (G) over the ends
of the xture wires and the chain (HH).
Fit the center ring (F) in between the arms of the xture
body (B). Insert each stud on the center ring (F) into the
hole in each arm.
CC
DD
EE
BB
GG
JUNCTION
BOX
G
FF
HH
JJ
A
B
F
6
Installation (continued)
3 Connecting the wires
Strip 3/4 in. of the insulation from the ends of the xture
wires.
Push the xture wires up through the hole in the screw
collar loop (GG) and out the end of the threaded pipe inside
the junction box.
To aid in connecting the xture wires to the house wires,
temporarily connect the second locking link (JJ) to the
chain link at end of the chain (HH) and to the screw collar
loop (GG).
Loosen the ground screw on the mounting bracket (CC).
Wrap the house ground wire (copper) around the ground
screw. Leave enough ground wire to attach to the xture
ground wire. Twist the end of the xture ground wire and
the end of the house ground wire together. Twist a wire nut
(AA) onto the ends of the wires. Reference the chart below
for the correct wire connections.
4 Connecting the wires (continued)
Twist the end of the house lead wire (black) and the end of
the xture lead wire together. Twist a wire nut (AA) onto the
ends of the wires.
Twist the end of the house neutral wire (white) and the end
of the xture neutral wire together. Twist a wire nut (AA)
onto the ends of the wires. Reference the chart below for
the correct wire connections.
Wrap electrical tape (not included) around the wire nuts
(AA) and the wires. Ensure the wires are securely fastened
into the wire nuts (AA).
Carefully push all the wires and the wire nuts (AA) into the
junction box.
AA
Connect Supply (House) Ground Copper Wire to:
Bare Copper Wire or,
Bare Silver Wire or,
Green Insulated Wire.
House ground
wire (copper)
Fixture
ground wire JJ
Connect Black Lead
Supply (House) Wire to:
Connect White Neutral
Supply (House) Wire to:
Black Wire or,
*Parallel Cord
(Round and Smooth) or,
Insulated Wire
(other than green)
with Copper Conductor.
White Wire or,
*Parallel Cord
(Square and Ridged) or,
Insulated Wire
(other than green)
with Silver Conductor.
*When parallel wire (SPT 1 & SPT 2) is used:
The lead wire is round in shape or smooth.
The neutral wire is square in shape or ridged.
No printed words on
wire insulation or,
Printed words on
wire insulation or,
FIXTURE LEAD WIRE HOUSE LEAD WIRE
(BLACK)
FIXTURE GROUND
WIRE
HOUSE GROUND
WIRE (COPPER)
FIXTURE NEUTRAL
WIRE HOUSE NEUTRAL WIRE
(WHITE)
GG
CC
7 HAMPTONBAY.COM
Please contact 1-855-HD-HAMPTON for further assistance.
Installation (continued)
5 Installing the xture to the ceiling
Remove the second locking link (JJ) from the last link on
the chain (HH) and the screw collar loop (GG).
Raise the canopy (G) up to the ceiling. Pass the hole in the
canopy (G) over the screw collar loop (GG). Position the
canopy (G) up against the ceiling.
Raise the threaded ring (FF) up to the canopy (G). Screw
the threaded ring (FF) onto the screw collar loop (GG).
Tighten the threaded ring (FF) to secure the xture to the
ceiling.
Attach the second locking link (JJ) to the chain link at the
end of the chain (HH) and to the screw collar loop (GG).
6 Installing the shades and bulbs
Pass the hole in the bottom of one shade (E) down over the
socket.
Using the socket ring tool (C), screw a socket ring (D) onto
the socket. DO NOT over tighten the socket ring (D).
Repeat the above steps to install the remaining shades (E).
Screw the recommended bulbs (E26 Edison bulb type, not
included) into the sockets. The correct bulb wattage is
marked on the socket. DO NOT exceed the maximum bulb
wattage.
JJ
FF
HH
G
GG
C
D
E
BULB (NOT
INCLUDED)
8
Maintenance
WARNING: Before you perform any cleaning or
maintenance work, turn off the electricity at the main
circuit breaker panel.
Care and Cleaning
Wipe the xture with a dry, soft cloth.
Do not use any cleaners with chemicals, solvents, or harsh abrasives.
Troubleshooting
Problem Possible Cause Solution
The light bulb will not turn on. A bulb is burned out.
The power is off.
There is a faulty wire connection.
There is a faulty switch.
Replace the light bulb.
Ensure the power supply is on.
Check the wiring.
Contact a qualied and licensed
electrician if you are not
comfortable troubleshooting wiring
problems.
Test or replace the switch.
The fuse blows or the circuit breaker trips
when the light is turned on.
There are crossed wires or the power wire is
grounding out.
Discontinue use of the xture.
Check the wire connections or
contact a qualied electrician.
Questions, problems, missing parts? Before returning to the store,
call Hampton Bay Customer Service
8 a.m. – 7 p.m., EST, Monday – Friday, 9 a.m. – 6 p.m., EST, Saturday.
1-855-HD-HAMPTON
HAMPTONBAY.COM
Retain this manual for future use.
  • Page 1 1
  • Page 2 2
  • Page 3 3
  • Page 4 4
  • Page 5 5
  • Page 6 6
  • Page 7 7
  • Page 8 8
  • Page 9 9

Hampton Bay EHD82620-1-5-MB User guide

Type
User guide
This manual is also suitable for

Hampton Bay EHD82620-1-5-MB is a 5-light brushed nickel chandelier with clear glass shades, perfect for illuminating your home with a touch of elegance. Its adjustable chain allows you to customize the hanging height to suit your needs, while the included socket ring tool makes installation a breeze. Enjoy the warm and inviting ambiance it creates in your living room, dining room, or foyer.

Ask a question and I''ll find the answer in the document

Finding information in a document is now easier with AI