Page is loading ...

DS-W 10.5
315829
Bedienungsanleitung de
Operating instructions en
Mode d’emploi fr
Istruzioni d’uso it
Gebruiksaanwijzing nl
Manual de instruções pt
Manual de instrucciones es
Brugsanvisning da
Käyttöohje fi
Bruksanvisning no
Bruksanvisning sv
Οδηγιες χρησεως el
Ръководство за обслужване bg
Instrukcja obsługi pl
Инструкция по зксплуатации ru
Návod na obsluhu sk
Návod k obsluze cs
Használati utasítás hu
Printed: 07.02.2014 | Doc-Nr: PUB / 5169444 / 000 / 00

'6::*
O
O
U O[
U O[
01
02
Printed: 07.02.2014 | Doc-Nr: PUB / 5169444 / 000 / 00

10 mm
10
13 mm
1
쩸
쩹
2
4
쩺
5
6
3
1 mm
Printed: 07.02.2014 | Doc-Nr: PUB / 5169444 / 000 / 00

13 mm
A
B
10 mm
C
쩸
쩻
D
쩺
E
1 mm
Printed: 07.02.2014 | Doc-Nr: PUB / 5169444 / 000 / 00

3
DS-W 10.5 diamond wire
Safety precautions
The operator and all other persons must
remain at a safe distance while the saw
is running. The safe distance from the
saw corresponds to a radius of at least
twice the free length of the wire.
General information
● Do not kink or bend the wire sharply.
● Do not join diamond wires of different diameters
together.
● To ensure even wear of the beads, the diamond wire
must be retwisted after each long cut, applying a diffe-
rent number of turns, before beginning the next cut.
Cutting direction
Important: The connectors must be fitted,
relative to the cutting direction, as shown
in the illustration.
The diamond wire must be used to cut in
one direction only (see arrows).
Preparations for the first cut
● Connectors are already fitted to new diamond wires.
● The diamond wire must be twisted before joining the
connectors by inserting the pin. Twist the diamond wire,
approx. 1–1.5 turns per metre length of wire, in a coun-
ter-clockwise direction (to the left) as seen when loo-
king straight at the cut face of the end of the wire.
● The corners on the workpiece should be rounded off
to a radius of approx. 10 cm (using a hammer and chi-
sel or a Hilti combihammer) and/or the diamond wire
pulled through by hand.
● Mount the water supply nozzle at the point where the
wire enters the workpiece. Depending on the length of
the cut, it may be necessary to apply cooling water at
several points. It is essential that the wire is cooled per-
fectly if good cutting results are to be achieved.
● Use the advance movement to tighten the wire. Move
away from the machine to a safe distance and start the
motor. Start the saw gently and then increase the run-
ning speed gradually until the optimum drive speed
(r.p.m.) and cutting speed is reached.
● The sawing operation must be monitored continuously.
● The wire saw must be stopped before making adjust-
ments to the water supply nozzles.
Accessories for Hilti diamond wires
Description Comments / Package Ordering Item no.
uses contents designation
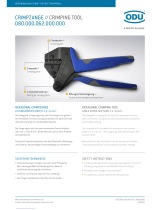
Crimping pliers for crimping connectors / sleeves 1 DS-WSTHY 235845/5
Connector quick-release type 1 DS-WCMV 340427/4
Connector set quick-release type 5 DS-WCMV 371383/1
Pin replacement pin for connectors 10 DS-WP 235842/2
Sleeve repair sleeve 5 DS-WS 235841/4
O-ring fitted between connector / bead 10 O-Ring 10/4.7×2.5 235844/8
Crimping jaws replacement jaws for crimping pliers 2 DS-WJ 340426/6
Cutter for cutting diamond wire 1 DC125-S 000000/0
01 BA DS-W10.5 d_e_f.qxp:01 BA DS-W10.5 d_e_f 13.3.2012 15:35 Uhr Seite 3
Printed: 07.02.2014 | Doc-Nr: PUB / 5169444 / 000 / 00

4
Instructions for fitting DS-WS
repair sleeves (Item no. 235841/4)
Fitting a repair sleeve (first end)
Important: The service life of the connectors is several
times that of the repair sleeve.
Clamp the diamond wire in the vice and use an angle
grinder to cut off the end 13 mm from the first bead.
Use pliers to remove the spring (pull out).
Remove the rubber neatly over a length of 10 mm
(using a knife, cigarette lighter or wire brush).
Fit an O-ring 쩸 (Item no. 235844/8) pushing it onto
the wire until seated against the bead. Fit a repair sleeve
쩺 onto the wire so that the end of the bare wire section
contacts the base of the hole.
Use the crimping pliers 쩺 (Item no. 235845/5) and
the corresponding crimping jaws to crimp the connec-
tor fully in one operation. When doing so, the crimping
jaws should be positioned 1 mm from the O-ring. Worn
or deformed crimping jaws should not be used.
Fitting a repair sleeve (second end)
■ Proceed as described at steps to .
■ Twist the diamond wire, approx. 1–1.5 turns per metre
length of wire, in a counterclockwise direction (to the
left) as seen when looking straight at the cut face of the
end of the wire.
■ Proceed as described at steps to .
Instructions for fitting DS-WC
connectors (Item no. 340427/4)
Fitting the connector (first end, clevis piece)
Clamp the diamond wire in the vice with the cutting
direction as shown (see arrow) and use an angle grinder
to cut off the end 13 mm from the first bead.
Use pliers to remove the spring (pull out).
Remove the rubber neatly over a length of 10 mm
(using a knife, cigarette lighter or wire brush).
Fit an O-ring 쩸 (Item no. 235844/8) pushing it onto
the wire until seated against the bead. Fit the clevis piece
쩹 onto the wire so that the end of the bare wire section
contacts the base of the hole.
Use the crimping pliers 쩺 (Item no. 235845/5) and
the corresponding crimping jaws to crimp the connec-
tor fully in one operation. When doing so, the crimping
jaws should be positioned 1 mm from the O-ring. Worn
or deformed crimping jaws should not be used.
Important: The connectors must be fitted, relative
to the cutting direction, as shown in the illustration.
The diamond wire must be used to cut in one direc-
tion only (see arrows).
Fitting the connector (second end, opposite piece) and
joining the connectors
■ To fit and crimp the second part of the connector
(opposite piece) proceed as described at steps to .
■ Joining the connectors.
Twist the diamond wire, approx. 1–1.5 turns per metre
length of wire, in a counterclockwise direction (to the
left) as seen when looking straight at the cut face of the
end of the wire. Bring the connectors together and insert
the pin (replacement pin, item no. 235842/2) using a
hammer to drive it in flush.
Opening the connectors
■ Use a punch to drive the pin out of the connector.
Replace the pin if it is badly worn (replacement pin, item
no. 235842/2).
01 BA DS-W10.5 d_e_f.qxp:01 BA DS-W10.5 d_e_f 13.3.2012 15:35 Uhr Seite 4
Printed: 07.02.2014 | Doc-Nr: PUB / 5169444 / 000 / 00

*315829*
315829
Hilti Corporation
LI-9494 Schaan
Tel.: +423 / 234 2111
Fax:+423 / 234 29 65
www.hilti.com
Hilti = registered trademark of Hilti Corp., Schaan
W 2558 | 1213 | 10-Pos. 1 | 1
Printed in China © 2013
Right of technical and programme changes reserved S. E. & O
.
315829 / A2
Printed: 07.02.2014 | Doc-Nr: PUB / 5169444 / 000 / 00
/