DS831

Marmitek DS831 User manual

  • Hello! I am an AI chatbot trained to assist you with the Marmitek DS831 User manual. I’ve already reviewed the document and can help you find the information you need or explain it in simple terms. Just ask your questions, and providing more details will help me assist you more effectively!
P
ROGUAR
D
800
20187 / 20070314 • DS831
TM
© ALL RIGHTS RESERVED MARMITEK ®
USER MANUAL 2
GEBRAUCHSANLEITUNG 5
GUIDE UTILISATEUR 9
MODO DE EMPLEO 12
MANUALE D’ISTRUZIONI 15
GEBRUIKSAANWIJZING 18
PROGUARD800
SERIES
DS831 DOOR WINDOW SENSOR
DS831 2
SAFETY WARNINGS
• To prevent short circuits, this product should only be used inside and only in dry
spaces. Do not expose the components to rain or moisture. Do not use the product
close to a bath, swimming pool etc.
• Do not expose the components of your systems to extremely high temperatures
or bright light sources.
• In case of improper usage or if you have altered and repaired the product
yourself, all guarantees expire. Marmitek does not accept responsibility in the case
of improper usage of the product or when the product is used for purposes other
than specified. Marmitek does not accept responsibility for additional damage other
than covered by the legal product responsibility.
• This product is not a toy. Keep out of reach of children.
• Keep batteries out of the reach of children. Dispose of batteries as chemical
waste. Never use old and new batteries or different types of batteries together.
Remove the batteries when you are not using the system for a longer period of
time. Check the polarity (+/-) of the batteries when inserting them in the product.
Wrong positioning can cause an explosion.
• Automatic switching devices provide comfort, but can also be dangerous. They
can surprise people or can ignite clothing hanging over an electric heat source.
Please be careful and take appropriate measures to avoid accidents.
MAGNETIC CONTACT (DS831)
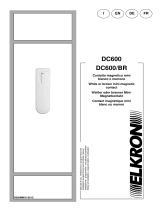
The DS831 is a magnetic contact designed for installation on doors and windows.
This product is a part of the Marmitek ProGuard800 series, and operates together
with the ProGuard800 alarm system. When you wish to know more about the
complete system, its possibilities and its settings, then you can check out the
installation manual or visit
www.marmitek.com
.
INSTALLATION PROCEDURE
To install magnetic contacts.
1. To open the housing, insert a
small screwdriver at the bottom
of the unit between the front and
back cover and twist the
screwdriver to release the cover.
Battery
Holder
Antenna
LED
Indicator
Location
of wiring
knockou
Tamper
Switch
PCB
Release
Tab
Loop
Terminal
1cm max.
Figure B.3: EL-2601 (cover off)
Operation
Mode Jumper
3 © MARMITEK
2. Remove the divider separating the battery from the contacts on the battery
holder. When you apply power and the Tamper switch is open, the DS831
enters Test mode during which a transmission is sent every few seconds. You
can terminate Test mode by closing the Tamper switch.
Note: Due to the occurrence of voltage delay in lithium batteries that
have been in storage, the batteries may initially appear to be dead. In
this case, leave the unit in Test mode for a few minutes until the battery
voltage level is stabilized.
1
When handling the PCB, do not apply pressure on the antenna.
3. From the Programming menu, select Devices, Zones [911].
4. Select the zone to which you
want to register the
transmitter; the system
initiates Registration mode.
When Save? appears on the
panel’s LCD display, press 9.
5. After registration, press the DS831’s tamper switch to terminate Test mode.
6. Before permanently mounting the unit, test the transmitter from the
exact mounting position.
7. To remove the PCB, press the PCB release tab and carefully
lift the board and slide the board away from the back cover.
8. The DS831 is able to operate in three modes: Magnetic
Switch, Universal Transmitter or a combination of the two. If
connecting a wired contact loop (N.C.), connect the terminal
block as follows: 1 - Alarm; 2 - GND. For this purpose, a wiring
knockout is provided in the back cover.
9. Mount the back cover using two screws and replace the
PCB. Use ISO 7050 (ST3.5 x 22) or similar countersunk
screws so that the screw head will not touch the PCB – see
Figure B.4.
10. To open the magnet’s housing, insert a small screwdriver into one of the pry-
off slots located at either end of the magnet’s back cover and lift to separate
from the front cover.
11. Mount the back cover of the magnet using two screws. Make sure that the
guideline on the magnet is correctly aligned with the guideline on the
transmitter.
1
Do not install the magnet further than 1cm from the transmitter.
12. Test the transmitter, making certain that the LED is lit when opening the
door/window and again when closing.
13. Close the front covers of the transmitter and the magnet.
Figure B.4:
Mounting
Screw Position
PCB
HOUSING
Jumper Position
Operation Mode
Pins 1&2 Universal Transmitter
Pins 2&3 Magnetic Switch
Jumper
Removed
Magnetic Switch/
Universal Transmitter
Table B.5: Operation Mode Jumper
DS831 4
TECHNICAL DATA
Antenna: Built-in Whip
Frequency: 868.35MHz FM
Power: 3.6V ½ AA Lithium Battery
Current Consumption: 25mA (transmission)
10μA (standby)
Loop Input Voltage Range: 0-15VDC/AC (peak to peak)
RFI Immunity: 40V/m
Operating Temperature: 0 to 60°C
Dimensions: 65 x 30 x 25mm
Specifications may be modified without prior notice.
Environmental Information for Customers in the European Union
European Directive 2002/96/EC requires that the equipment bearing this symbol
on the product and/or its packaging must not be disposed of with unsorted
municipal waste. The symbol indicates that this product should be disposed of
separately from regular household waste streams. It is your responsibility to
dispose of this and other electric and electronic equipment via designated
collection facilities appointed by the government or local authorities. Correct disposal and
recycling will help prevent potential negative consequences to the environment and human
health. For more detailed information about the disposal of your old equipment, please contact
your local authorities, waste disposal service, or the shop where you purchased the product.
DS831 22
Copyrights
Marmitek is a trademark of Marmidenko B.V.  DS831 is a trademark of
Marmitek B.V. All rights reserved.
Copyright and all other proprietary rights in the content (including but not
limited to model numbers, software, audio, video, text and photographs) rests
with Marmitek B.V. Any use of the Content, but without limitation, distribution,
reproduction, modification, display or transmission without the prior written
consent of Marmitek is strictly prohibited. All copyright and other proprietary
notices shall be retained on all reproductions.
Con ciò, Marmitek BV, dichiara che il DS831 è conforme ai requisiti essenziali ed altre
disposizioni relative alla Direttiva :
Direttiva 1999/5/CE del Parlamento europeo e del Consiglio, del 9 marzo 1999,
riguardante le apparecchiature radio e le apparecchiature terminali di
telecomunicazione e il reciproco riconoscimento della loro conformità
Direttiva 89/336/CEE del Consiglio del 3 maggio 1989 per il ravvicinamento delle
legislazioni degli Stati Membri relative alla compatibilità elettromagnetica
Bij deze verklaart Marmitek BV, dat deze DS831 voldoet aan de essentiële eisen en aan
de
overige relevante bepalingen van Richtlijnen:
Richtlijn 1999/5/EG van het Europees Parlement en de Raad van 9 maart 1999
betreffende radioapparatuur en telecommunicatie-eindapparatuur en de wederzijdse
erkenning van hun conformiteit
Richtlijn 89/336/EEG van de Raad van 3 mei 1989 betreffende de onderlinge
aanpassing van de wetgevingen van de Lid-Staten inzake elektromagnetische
compatibiliteit
MARMITEK BV - P.O. BOX 4257 - 5604 EG EINDHOVEN – NETHERLANDS
868.35MHz is not intended for use in BG, GR, PL & SI.
/