GETTING STARTED
1. Protect all painted surfaces and passing lamps, if equipped, with a soft cloth.
2. Remove seat and disconnect negative battery terminal. (Fig. 1)
a. On 2009 and later models it will help to remove the two T40 bolts and the ECM and tray. (Fig. 2)
3. Remove windshield and outer fairing.
a. Remove the three windshield fasteners. (Fig. 3)
b. Remove the four T27 fairing fasteners and disconnect the headlamp. (There are two as shown in Fig. 4 and two located between
the fork and the frame)
SPEAKER REMOVAL/ INSTALLATION
4. Unplug both terminals on the left and right speakers. (Fig. 5)
5. Remove the three T25 fasteners that secure eachspeaker to the inner fairing.
3. If using the KICKER grilles, peel the stock speaker grilles off of the speaker stand-off (Fig. 6)
4. Separate the speaker from the stand-off, it’s a snap fi t (Fig. 7)
5. Insert your KICKER speaker into the stand-off, making sure the terminals are on the top side
6. Now is the time to install your KICKER emblems into the KICKER grilles, if using
a. Place emblem into grille and bend tabs over
7. Lay the grille over the speaker and refasten the speaker to the inner fairing using the hardware removed in step 2.
AMP INSTALLATION
12. Disconnect the radio harness and antenna from the radio. (Fig. 8)
13. Remove the two T20 fasteners at the top of the radio chassis. (Fig. 8)
a. If using on a radio with CB and/or XM modules, remove the modules from the radio at this time.
14. Fasten the amplifi er to the bracket using supplied hardware and orient with connector to the left side of the motorcycle. (Fig. 9)
15. Making sure all wiring is safely out of the way, slide the amp bracket over the radio chassis and engage tabs on amp bracket into the
rubber grommets on the radio. (Fig. 10)
16. Reinstall the T20 fasteners, removed in step 2, through the amp bracket and into the radio. (Fig. 10)
17. To reinstall modules, slide them under the radio chassis and fasten to the tabs on the amplifi er bracket with supplied hardware.
WIRE ROUTING
18. Take the electrical harness and plug it into the amplifi er.
19. Following the color code, route the left and right side speaker wires safely to their respective speakers. (Fig. 11)
20. Plug in the male ends into the stock harness, the terminals removed during speaker installation. (Fig. 11)
21. Plug the female ends onto the speaker terminals. (Fig. 11)
22. Locate the headlamp harness and remove the red cap over the Orange/White wire.
a. If the wire is currently in use (e.g. accessory lighting) there is an additional connection on the KICKER harness to replace it.
23. Plug the blue wire from the KICKER harness into the Orange/White wire, making sure it is fully engaged. (Fig. 12)
24. Whether the extra blue wire lead is being used or not, heat shrink has been provided to put over it to reduce the risk of a short. (Fig. 15)
25. Follow the proper procedure to remove the fuel tank.
26. Remove the electrical caddy lid.
27. Route the power harness on the left side of the frame neck, lay it into that caddy and under the seat. (Fig. 14 & 15)
a. You may want to remove the fuse now while fi guring out wire placement.
46HDS962
Motorcycle Audio Kit Installation Guide for Harley Davidson
®
Electra Glide | Street Glide | Ultra Glide | Bat Wing Trikes
1996–2013 (FLHT)
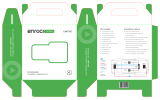
Package Contents:
(1) Install Guide (1) Wiring Harness (4) Black Cable Ties
(2) 5-1/4” KICKER Speakers (6) 8-32 x 1/2” Button Head Bolts (1) Amp Mounting Bracket
(1) 200W KICKER Amp (6) 8-32 Nylock Nuts (4) Black Heat Shrink
Important: Over-tightening mounting fasteners may result in damage to your motorcycle. Please refer to your service manual for proper
procedures and torque specifi cations. KICKER is not responsible for damage resulting from improper installation techniques. This kit may not
be compatible with some aftermarket head units.