Page is loading ...

Installation of DSL Connection and
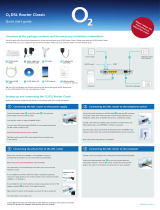
DSL router DrayTek Vigor 2600 VGST
Self-Installation Guide
Further information available:
■ at www.t-com.sk
© August 2006, Slovak Telekom, a. s.
Notes
21 > Self-Installation Guide

Contents
If you have any questions during the installation, contact:
Technical Support Centre 0900 211 111
If you have any problems when installing the DSL connection. The Centre is available from 8 a.m.
to 8 p.m. on business days and from 9 a.m. to 5 p.m. during weekends and public holidays. Calls
are charged by a special premium tariff.
Internet Hotline 0800 123 777
If you have a problem with verification of login or password or need information about your
e-mail account. It is available from 7 a.m. to 10 p.m. on business days. Calls are free of charge.
Fault Reporting Centre 12129
If you want to report a fault or if you need to replace a telephone socket. It is available 24 hours
a day. Calls are free of charge.
Technical Support Centre of the DSL router supplier 02/44 64 18 32
If you have technical questions regarding the router. It is available from 9 a.m. to 5 p.m. on
business days. Calls are charged according to standard tariffs.
3 Preface
4 Installation Package Contents
5 Installing the DSL Connection on a Standard Telephone Line
8 Diagram of the Overall DSL Connection in the case of a Standard Telephone Line
9 Installing the DSL Connection on an ISDN Line
13 Diagram of the Overall DSL Connection in the case of an ISDN Line
14 Installation of DSL router DrayTek Vigor 2600 VGST
19 Testing the Correct Connection
Preface
Congratulations on your purchase of the DSL self-installation package, which, combined with
an Internet access service, enables you to enjoy a high-speed Internet connection. It is a perfect
solution for all our customers who need to increase the efficiency of working on the Internet,
reduce the time necessary for downloading large data volumes, and hence make full use of the
Internet. Please carefully read this Guide describing the procedure of equipment installation and
the services for high-speed DSL access to the Internet using a standard telephone line or an ISDN
line. The installation is very easy – you can do it yourself by following the enclosed procedures and
diagrams.
Important Notice:
Please check the functionality of your standard telephone line or ISDN line and the
contents of the package prior to the installation.
We disclaim any liability for correct installation of your operating system and for protecting
your PC against security threats connected with Internet usage. Therefore we advise you
to install appropriate security programmes to your computer prior to connecting to the
Internet for the first time. We recommend our PC Secure service from Panda Software,
which provides a comprehensive protection to your PC and Internet connection. You can
install a test version of this software from the enclosed installation CD or download it from
www.t-com.sk. For more information contact Internet Hotline 0800 123 777.
Test the correctness of the installation and functionality of the connection using the
test login and password included at the end of this Guide in section Testing the Correct
Installation.
Your computer should meet at least the following requirements
1
:
■ network card 10/100 MB, Internet Explorer 5.5 or higher
1
Not applicable to PC Secure.
2 3
> Self-Installation Guide > DSL router DrayTek Vigor 2600 VGST

Installing the DSL Connection on a Standard Telephone Line
Check the socket of your standard telephone
line.
1. Your standard telephone line must be
terminated with a separate socket with
a single RJ 11 connector (see figure on the
right). If there are several sockets (parallel
sockets), find out, which one is the main
socket (primary).
2. If your telephone socket is unsuitable (it has
a different connector) or if there are other
sockets connected to it (parallel sockets)
which cannot be disconnected, contact the
Fault Reporting Centre at 12129.
3. There should not be an alarm (security
device) connected to your telephone line.
Switch the alarm off before the installation;
otherwise the alarm may become
dysfunctional. Connect the alarm back after
you have successfully installed the DSL
connection.
Installation CDSelf-Installation Guide
Installation Package Contents
Cable with RJ 11 connectors
(designed for connecting
the telephone socket with
the DSL splitter)
4 5
The package of DSL router DrayTek Vigor 2600 VGST contains:
■
installation guide and installation CD
■
DSL router DrayTek Vigor 2600 VGST
■
adapter
■
two external antennas to router
■
interconnection LAN UTP cable with RJ 45 connectors for
connecting of the router to a PC
■
interconnection cable with different connectors for connecting
of the router with a splitter
DSL splitter
You can install your DSL Connection and DSL router DrayTek Vigor 2600 VGST using the
enclosed manual or the installation CD Internet. If you chose the latter, insert the enclosed CD
to your computer’s drive. If the content does not open automatically, launch the START.EXE
programme from the CD’s main directory. On the title page, select “Inštalácia DSL internetu”
from the main menu and then “Inštalácia DSL pripojenia”.
RJ 45 connector
(bigger and wider)
RJ 11 connector
(smaller)
There are normally 2 types of
connectors used:
Suitable
telephone socket
Unsuitable
telephone socket
There are normally 2 types of sockets
used:
> Self-Installation Guide > DSL router DrayTek Vigor 2600 VGST

Follow the installation steps bellow:
1. Pull out the cable connecting other devices,
such as a telephone, other telephone sockets,
fax, or modem, from the telephone socket.
2. Plug the pulled-out cable end to the splitter
port labelled PHONE.
3. Use the separate cable included in the
installation package (both jacks identical
– RJ 11) to connect the telephone socket with
the splitter port labelled LINE.
4. Use the other cable (with connectors of
different sizes), to connect DSL router
DrayTek Vigor 2600 VGST with the splitter.
Plug the bigger connector of the cable into
the larger port on the back of the DSL router
labelled ADSL; plug the smaller connector of
the cable in the splitter port labelled DSL.
5. Proceed with the DSL router installation by
following the instructions on page 14.
6 7
> Self-Installation Guide > DSL router DrayTek Vigor 2600 VGST

Installing the DSL Connection on an ISDN LineDiagram of the Overall DSL Connection in the case
of a Standard Telephone Line
Your ISDN line is terminated with a telephone
socket with an RJ 11 connector (see figure on
page 5). The telephone socket is connected to
the ISDN – NT end point (euro NTBA).
Legend to a suitable NT:
1. manufacturer label (Siemens, Alcatel, Aethra)
2. line-in jack with a line cable (not fixed)
3. two ISDN-out jacks (side by side)
4. 230 V connector
8 9
DSL cable
– accessories to
the DSL router
Enclosed separate
cable to splitter
DSL router
DrayTek Vigor 2600 VGST
Splitter
Your telephone set
Your telephone cable
Telephone socket
> Self-Installation Guide > DSL router DrayTek Vigor 2600 VGST
2. 3. 4.
Suitable NT
1.
Suitable
telephone socket
Unsuitable
telephone socket
There are normally 2 types of sockets
used:

3. Use the other cable (with connectors of
different sizes), to connect DSL router
DrayTek Vigor 2600 VGST with the splitter.
Plug the bigger connector of the cable into
the larger port on the back of the DSL router
labelled ADSL; plug the smaller connector of
the cable in the splitter port labelled DSL.
4. Proceed with the DSL router installation by
following the instructions on page 14.
If your telephone socket is unsuitable (it has
a different connector) and the connecting
cable cannot be pulled out, however your NT
has a line–in jack that can be plugged out
(suitable NT – see figure on page 9), follow
the steps below:
1. Pull out the NT line cable from the socket and
plug it into the splitter port labelled LINE.
10 11
If you have a suitable socket, from which the
connector can be pulled out, follow the steps
below:
1. Pull out the cable from the socket and plug it
into the splitter port labelled PHONE.
2. Use the separate cable included in the
installation package (both connectors are
identical – RJ 11) to connect the telephone
socket with the splitter using the connector
labelled LINE.
> Self-Installation Guide > DSL router DrayTek Vigor 2600 VGST

Diagram of the Overall DSL Connection in the case
of an ISDN Line
12 13
2. Connect the unoccupied socket on the NT
equipment (in point 1) with the splitter port
labelled PHONE using the separate enclosed
cable (both connectors identical – RJ 11).
3. Proceed with the third bullet point of the
preceding procedure.
If your telephone socket is unsuitable (it has
a different connector – please see figure on
page 9) and the connecting cable cannot be
pulled out or your NT has a line–in jack that
cannot be plugged out, contact our Fault
Reporting Centre 12129.
Legend to an unsuitable NT:
1. power cord
2. cable – line-in jack (fixed)
3. ISDN-out jack
230 V
Your telephone cable
Enclosed separate
cable to splitter
DSL cable
– accessories to
the DSL router
Telephone socket
Your NT (Network termination)
Splitter
DSL router
DrayTek Vigor 2600 VGST
Your ISDN
telephone set
> Self-Installation Guide > DSL router DrayTek Vigor 2600 VGST
1. 2. 3.
Unsuitable NT

Installation of DSL router DrayTek Vigor 2600 VGST
14 15
Important Notice:
In case of operating system OS Windows
2000 or XP it is recommended to install
the most recent Service packs. For further
information, please contact Microsoft
Slovensko at 0850 111 300 or our Technical
Support Centre at 0900 211 111.
1. Installation procedure of network
set-up on your PC
In order to be able to work with DSL
router Vigor 2600 VGST, the network card
properties need to be set up properly on
your PC. The most convenient solution
is to set up TCP/IP protocol properties in
a manner enabling to acquire the IP address
from the DHCP server, i.e. your Vigor 2600
VGST router. Also, it is necessary to ensure
when setting the system that the DNS server
address is requested automatically.
You can set up network on your PC taking the
following steps:
1. Click on “Štart“ icon.
2. Select item „Nastavenia“.
3. Select item „Ovládací panel“.
4. Click on the icon “Sieťové pripojenia”.
5. Right-click on the icon “Local Area
Connection“ and choose ”Vlastnosti“.
6. Click on “Internet Protocol (TCP/IP)“ and
then “Vlastnosti“.
7. Select “Získať adresu IP automaticky“.
8. Select “Získať adresu servera DNS
automaticky“.
9. Click on “OK“.
Connecting DSL router DrayTek Vigor
2600 VGST to your PC
1. Plug the LAN UTP cable (blue) into the
network card connector on your PC, the
other end of the cable plug into one of the
4 connectors (P1 through P4), e.g. P1 on the
back panel of the router Vigor 2600 VGST.
If you use more than 1 PC, connect another
computer to the P2 connector, third one to
P3 and fourth one to P4 connector.
2. Plug the adapter into power supply (230 V)
and plug the adapter cable to the DSL
router connecter labelled PWR and then
change the switch to “ON” position
3. Now, your DSL router Vigor 2600 VGST is
on and ready for selected configuration
over any PC in your network; you can verify
the status by a flashing ACT diode and
P1 diode glowing continuously (in case
several PCs are connected, also P2, P3 and
P4 diodes). It is possible that also the LINK
diode will flash on your DSL router as well;
this confirms correct configuration of the
DSL line on the part of T-Com.
4. If the WLAN diode glows on your DSL router
Vigor 2600 VGST, wireless connection
(WiFi) to the DSL router is activated using
a wireless network card (max. 54 Mbps)
connected to your PC. The default setup of
WiFi connectivity enables you to immediately
connect to a router, which automatically
assigns an IP address to your PC. This
means that no WiFi protection is activated
on the router and for the sake of security
it is recommended to set up security
as soon as possible. More information
available in the DSL router manual.
> Self-Installation Guide > DSL router DrayTek Vigor 2600 VGST

16 17
Important Notice Prior to Installation
In case you used Internet connection
on your PC, set your browser (Internet
Explorer etc.) to disable requesting
Internet connection via dial-up.
In case you use Internet Explorer, follow the
instructions below:
1. Launch Internet Explorer (clicking on the
“Internet Explorer” icon).
2. In the menu “Tools” choose item “Internet
options“.
3. Select item “Connections”.
4. Confirm “Never dial a connection”.
5. Click “OK“.
2. DSL Router Configurator Launch
After connecting of PCs to the DSL router,
each connected PC will be assigned an IP
address within the scope 192.168.1.10 to
192.168.1.60. Launch your Internet browser
(Internet Explorer etc.) and enter the address
192.168.1.1 (DSL router address) into the field
for addresses (used for entering www sites
addresses) and press “Enter“. Doing so you
will connect to your DSL router, which will
request a user name and password, not set
by default. Therefore, all you need to do is
click “OK” without entering a username and
password.
The main menu of configurator is displayed
using which you can administer and monitor
DSL router activity. The menu is in English
or Slovak language depending on the router
firmware version.
In the offer “Rýchle nastavenia” click on
“Prístup do internetu“, on the next page click
on link PPPoE/PPPoA and the site PPPoE/
PPPoA in client mode will be displayed:
Following the example on the Figure, set up
the following items:
PPPoE/PPPoA client:
■ Zapnutý
DSL router setup:
■ VPI : 1
■ VCI : 32
■ Typ zapuzdrenia: LLC/SNAP
■ Protokol: PPPoE
■ Modulácia: G.DMT
> Self-Installation Guide > DSL router DrayTek Vigor 2600 VGST

Testing the Correct Connection
18 19
Setting up the provider:
To test your Internet connection, first
use the test username and password on
page 20 in section Internet – Internet
Connection Functionality Check. After
checking the DSL connection functionality,
you can connect to the Internet using your
username and password.
After setting all parameters it is necessary
to confirm and save the setup in the DSL
router by clicking on “Confirm”. Now,
your DSL router is configured for Internet
connection. You can check whether you are
really connected to the Internet in “Správa
systému” by clicking on “Online stav“.
All you need to do now is enter, from any PC
connected to the DSL router, a www address
in the respective field in your browser,
the DSL router will automatically dial the
connection and you can start surfing.
This Guide is a brief set of instructions
enabling you to launch the equipment to gain
fast Internet connection; explanation of other
functionalities of the DSL router Vigor 2600
VGST is available in the digital guide on the
enclosed installation CD.
> Self-Installation Guide > DSL router DrayTek Vigor 2600 VGST
Telephone – telephone/digital line functionality check
The dialling tone should be heard from the receiver of your telephone/fax. Try to make a call
and check the quality of sound in the receiver. If you installed the device correctly, the quality of
sound did not change compared to the condition prior to the installation.
Possible problems:
■ the dialling tone is not heard
■ disturbing sounds (noise, crackling) heard from the receiver
■ calls cannot be made from the telephone
Telephone line outages may occur during the DSL installation; a digital line may be functional
1 minute after the NT was connected to the splitter. If these faults have not disappeared after
a repeated check of the connection carried out according to the Guide, contact our Fault
Reporting Centre 12129.
Router – DSL Connection Functionality Check
Check status of the indication diodes on your router and compare it to the description included
in the documentation from your DSL router manufacturer. The router should be in hibernating
mode.
Possible problems:
■ no control on the router glowing
■ status of controls not corresponding to hibernating status of the router
■ not connected to the LAN network
In case you discover any discrepancies, check the entire installation procedure again. If you do
not succeed in resolving the problem, contact our Technical Support Centre at 0900 211 111,
or the Technical Support Centre of the DSL router supplier at 02/44 64 18 32.
20
Internet – Internet Connection Functionality Check
To check whether your router has been installed correctly and whether your DSL line is
functional, check the “LINE” LED diode on your DSL router. If the LED is flashing, the router is
synchronising itself with the DSL line. To test the Internet connection, wait until the LED turns
solid green.
For testing of the Internet connection, please use the following account:
Login: dsl@test
Password: dsl
To test the DSL functionality of your connection, write the web address www.t-com.sk in your
Internet browser (Internet Explorer, Netscape, Firefox etc.) serving for the purposes of testing
the functionality of the installation. The functionality can be tested only on this web site; access
to other web sites will be disabled. If the relevant page is displayed, the DSL connection is
functional. Now you can log in with the login and password you were provided by your
Internet service provider. High-speed Internet is ready and you can start working on and
enjoying the Internet. In case of any problems with the connection, please contact the
Internet Hotline 0800 123 777.
> DSL router DrayTek Vigor 2600 VGST
/