
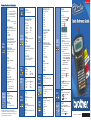
Model PT-1650
1. Parameter Settings
Set settings for bar code.
A. Protocol
Specify protocol.
Code 39
UPC-A
Code 128
EAN8
EAN128
EAN13
CODABAR
I-2/5
UPC-E
B. Width
Specify width of bar code graphic.
Small
Medium
Large
C. Under Number
Specify whether the number is printed
under the bar code.
On
Off
D. Check Digit
Code 39, I-2/5 and CODABAR only,
specify Check Digit on/off.
On
Off
1. Style
Set font style.
Normal
Italic
Bold
Italic + Bold
Outline
Italic + Outline
1. Size
Set the size for an individual line.
Auto
4mm
1mm
6mm
2mm
9mm
3mm
12mm
1. Copies
1-99
2. Number (sequential labels)
Off
1-99
3. Block No.
Choose the block numbers (start/end)
to print.
4. Mirror (print text in reverse order)
Off
On
CCoommmmoonn FFuunnccttiioonnss && CCoommmmaannddss
1. Cut
1 (1 = cut-pause; no chain print)
2 (2 = no cut-pause; no chain print)
3 (3 = cut-pause; chain print)
4 (4 = no cut-pause; chain print)
2. Contrast
+ 2 to –2 ( 0 = default, + = darker,
— = lighter)
3. Auto Reduction
If label is set to AUTO size, text size
or width will change based on label
length.
Text Size
Text Width
4. Length Adjustment
Increase or decrease the label length
if the length differs from actual.
+3 to -1, 0 = default
5. Symbol Save
Personal Category is full, symbols
will be added (on) or not (off).
On
Off
6. Units
Set unit for measurement.
inch
mm
7. Language
Set language for menus, settings
and messages.
English
Français
8. Version Info
Version information for P-touch
software & symbol set.
Main
Boot
Char-Set (Character Set)
Symb-Set (Symbol Set)
1. Length
Specify label length.
Auto / 0.30 - 39.00inch
(Auto / 6 - 999mm)
2. Margin
Specify margin.
0.10 - 4.00inch (2 - 99mm)
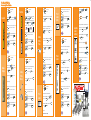
Setup
Menu
(Line)
Style
(Line)
Size
Format
(Label)
Length
Print
Options
Label
Type
Bar Code
Functions
(Label)
Frame
(Label)
Clear
Bar Code
1. Bar Code
Type in bar code data.
1. GLB (Global) Size
Set font size for label.
Auto
1mm
2mm
3mm
4mm
6mm
9mm
12mm
2. GLB (Global) Wide
Set label font width.
Minimum
Narrow
Normal
Wide
3. GLB (Global) Style
Set label font style - individual line
style overrides settings.
Normal
Bold
Outline
Italic
Italic + Bold
Italic + Outline
4. Align
Specify text alignment.
Left
Justify
Right
Center
1. Frame
Choose from 14 different borders.
Off
1 – 14
1. Clear
Clear text (and font) to start new label.
Text & Format
Text Only
1. Label Type
Specify type of label printed.
Normal
Rotate
Rotate-Repeat
Port
Panel
Flag
Vertical
®
(Label/
Database)
Transfer
Search
Data
Insert
Space
Insert
Printed in China LN5676001A
1. Transfer
Transfer a database or template.
With PT-1650
Turn Machine OFF with
Press and Hold
simultaneously
Release
Release
With PC and PT-Editor
Open PT-Editor on PC
Open templates/database to be
transferred
Verify printer is set to PT-1650 with
File ... Printer Setup command
Access the File Transfer screen with
File ... Transfer Template
For each template file to be
transferred
• Click on the template file [may
be attached to database] in list
• Choose a PF key to transfer to
by clicking on
Change PF key
Mapping
and selecting the PF
key from pull down list
Click
Start
, to transfer files
On PC, select
Exit
to exit out of
transfer program.
On P-touch, press to turn
machine off. Press to turn
machine on.
Use
PF key
(you have assigned)
to access transferred template (to
directly access database, see
Data below).
1. Data
Scroll through a transferred database.
- Scroll columns
- Scroll rows
1. Search
Search through a transferred
database. Database must be opened
with .
Type in characters (case
dependent). to start.
©2003 Brother International Corporation, 100 Somerset
Corporate Boulevard, Bridgewater, NJ 08807. All rights reserved.
All trademarks and registered trademarks referenced herein are
the property of their respective companies.

1. Press – until Vertical.
Press to select.
2. Type
Text
. Enter more than one line of text with
A) or B) . Text will
be added to previous text. Example by typing:
3. To change text style or size per specific line, use
to place cursor on line to be
changed. Use
– to specify different font types.
to choose. Press
to enter.
– to specify different font sizes.
to choose. Press
4.
1. Press – until Rot-Rep.
Press to select.
2. Set the length of the label with (
BLK LEN
), use
number pad to type length or arrows
to select, arrow to the
next option.
3. Choose frame (
FRAME
) option - Arrow
to select, to end.
4. Type
Text.
5. To change text style or size per specific line, use
to place cursor on line to be
changed. Use
– to specify different font types.
to choose. Press
to enter.
– to specify different font sizes.
to choose. Press
to enter.
6.
1. Press – until Normal.
Press to select.
2. Type
Text
( for new line, or
to place a block of text to the right).
3. To change text style or size per specific line, use
to place cursor on line to be
changed. Use
– to specify different font types.
to choose. Press
to enter.
– to specify different font sizes.
to choose. Press
to enter.
4.
1. Press – until Normal.
Press to select.
2. Set label length – use number
pad to type length or to specify.
Press to enter.
3. Type
Name
. Press for new line.
4. Type
Company.
5. To change text style or size per specific line, use
to place cursor on line to be
changed. Use
– to specify different font types.
to choose. Press
to enter.
– to specify different font sizes.
to choose. Press
to enter.
6.
CCrreeaattiinngg && PPrriinnttiinngg
CCoommmmoonnllyy UUsseedd LLaabbeellss
General
Name
Badge
1. Press – until Flag.
Press to select.
2. Set the diameter of the cable/wire (
FLAG
O )
arrows to select, arrow
to next option.
3. Set the length of the label (
FLAG LEN
), use
number pad to type length or arrows
to select, arrow to the
next option.
4. Choose frame (
FRAME
) option - Arrow
to select frame, arrow to next option.
5. Choose to have text rotated or not (
ROTATE
),
arrows to select, to end.
6. Type
text
.
7. To change text style or size per specific line, use
to place cursor on line to be
changed. Use
– to specify different font types.
to choose. Press
to enter.
– to specify different font sizes.
to choose. Press
to enter.
8.
1. Press – until Port.
Press to select.
2. Set the length of the label (
BLK LEN
),
use pad to type length or arrows
to select, arrow to the next option.
3. Choose frame (
FRAME
) option - Arrow
to select, to end.
4. Type
Text.
(continue to next column)
5. To change text style or size per specific line, use
to place cursor on line to be
changed. Use
– to specify different font types.
to choose. Press
to enter.
– to specify different font sizes.
to choose. Press
to enter.
6.
1. Press – until Panel.
Press to select.
2. Set the length of the label with (
BLK LEN
), use
number pad to type length or arrows
to select, arrow to the
next option.
3. Choose frame (
FRAME
) option - Arrow
to select, to end.
4. Choose print option - front of a panel or for
the reverse of a panel — arrow to select,
to end.
5. Type
Text
. Use to separate
port information.
6. To change text style or size per specific line, use
to place cursor on line to be
changed. Use
– to specify different font types.
to choose. Press
to enter.
– to specify different font sizes.
to choose. Press
to enter.
7.
Vertical
Cable/
Wire
Wrap
Cable/
Wire
Flag
Port
Label
Port
Label
(cont.)
Panel
Label
I
A)
1. 123 1. 123
2. 456 2. 456
3. 3.
B)
1
2
7C-A01 7C-A02
4 1
5 2
6 3
1
2
3
(Two Column)
(One Column)
Output: Output:
R
E
P
O
R
T
W
I
R
E
2
4 1
5 2
6 3
1. Set Cut Option to 2,
to 2 to choose.
2. Press - until Rotate. Press
to select.
3. Set the length between the ports (
BLK LEN
), use
number pad to type length or arrows
to select, arrow to the next option.
4. Choose frame (
FRAME
) option – Arrow
to select, to end.
5. Type
Text
or choose
Symbol
with .
6. Enter more than one line of text with .
7. Separate port information with .
8. To change text style or size per specific port,
use to place cursor on line to be
changed. Use
– to specify different font types.
to choose. Press to enter.
– to specify different font sizes.
to choose. Press to enter.
9.
Faceplate
Label
(Vertical)
-
 1
1
-
 2
2


Ask a question and I''ll find the answer in the document
Finding information in a document is now easier with AI
Related papers
Other documents
-
OBJECTIF LUNE PRes Connect 1.6 Operating instructions
-
Brady BMP 61 User manual
-
-
-
Avid iNews 2.0 User manual
-
 OpenOffice.org OpenOffice - 3.0 Quick start guide
-
-
Brady BBP 85 User manual
-
-
