Page is loading ...

(Troubleshooting continued).
(Troubleshooting continued).(Troubleshooting continued).
(Troubleshooting continued).
Problem:
Problem:Problem:
Problem: The mounting plate came off of the motor
Action:
Action:Action:
Action: First remove the cup from the mounting plate, and then reattach
the plate by gently pressing the mounting plate onto the metal shaft at the
black vinyl nut section on the back of the mounting plate. Press it on
GENTLY and leave approximately 1/4" of the metal shaft visible. Reattach
the cup to the mounting plate.
Problem:
Problem:Problem:
Problem: The cup rotates downward without switch activation.
Action:
Action:Action:
Action: This is letting you know that the load you have in the measuring
cup is too heavy. Remove some of the load and begin again.
Care of Unit:
Care of Unit:Care of Unit:
Care of Unit:
The Pouring Cup on Flex Mount can be wiped clean with any household
multi-purpose cleaner and disinfectant.
The measuring cup is attached to its mounting plate via dual lock Velcro
and can be removed from the unit for cleaning purposes. Do not place in
Do not place in Do not place in
Do not place in
dishwasher. (See Important Notes.)
dishwasher. (See Important Notes.)dishwasher. (See Important Notes.)
dishwasher. (See Important Notes.)
Do not submerge
Do not submergeDo not submerge
Do not submerge the unit, as it will damage the electrical components.
Do not use abrasive cleaners
Do not use abrasive cleanersDo not use abrasive cleaners
Do not use abrasive cleaners, as they will scratch the surface of the unit.
For Technical Support:
Call our Technical Service Department
Monday through Friday, 9 a.m. to 5 p.m. (EST)
1-800-832-8697
customer_support@enablingdevices.com
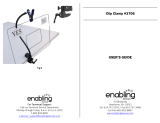
Pouring Cup on Flex Mount #24
USER’S GUIDE
50 Broadway
Hawthorne, NY 10532
Tel. 914.747.3070 / Fax 914.747.3480
Toll Free 800.832.8697
www.enablingdevices.com

Our pouring cup makes placement easier. It allows you to pour
liquids, sand, flour, etc. into the container of your choice. Simply
activate your first external capability switch (not included) and the
cup will pour into your cup, bowl, pail, sandbox, etc. Activating the
second external capability switch (not included) returns the cup to
the upright position. Enables users of all ages to actively partake in
cooking exercises or engage in dramatic play. Perfect for teaching
the laws of conservation. Attaches easily to flat surfaces, bars or
table legs. Removable measuring cup facilitates easy cleaning.
Accepts 1/8" plugs.
Operation:
Operation:Operation:
Operation:
1. The Pouring Cup on Flex Mount requires 4 AA batteries. The
battery compartment is located in the plastic housing unit
near the clamp. Alkaline batteries are recommended
because they last longer. Do not use rechargeable batteries
because they supply lower voltage and the unit may not
perform as well. When installing new batteries, always be
careful to observe proper battery polarity.
2. Connect the unit to a double switch, such as the rocking plate
switch (#1399), or to any two external capability switches
(not included), via the jacks located on the back of the plastic
housing unit, behind the battery compartment. The Pouring
Cup on Flex Mount, #24, is equipped with 1/8-inch jacks, for
use with capability switches with 1/8-inch plugs. If you use
1/4- to 1/8-inch adapters purchased elsewhere, they must
be mono adapters, not stereo. Make sure that you have tight
connections between the switches and the jacks. There
should be NO GAPS. On the housing unit opposite the battery
case is a speed adjustment knob, turning it clockwise
increases the speed at which the cup turns and counter clock
wises decreases it.
3. The measuring cup is attached to its mounting plate via dual
lock Velcro and can be removed from the unit for cleaning
purposes (See Important Notes
Important NotesImportant Notes
Important Notes, below). Do not clean in
Do not clean in Do not clean in
Do not clean in
dishwasher.
dishwasher.dishwasher.
dishwasher.
4. To attach the cup to the bell shaped housing, first remove the
pouring cup from the black mounting plate, by holding the
black mounting plate with one hand and pry the cup off with
the other hand.
5. Next press the black mounting plate onto the metal shaft
gently, leaving approximately ¼" of the shaft visible. Then
secure the cup to the mounting plate. Please note: the end
on the vinyl nut will have rough finish this is normal and not
broken.
6. Activate the first switch and the cup will pour. Activate the
second switch to return the cup to the upright position. The
Pouring Cup on Flex Mount attaches easily to flat surfaces,
bars or table legs.
Important Notes:
Important Notes:Important Notes:
Important Notes:
1. When removing the measuring cup from the mounting plate,
hold the black mounting plate with one hand and pry the cup
off with the other hand.
2. To reattach the measuring cup, set the measuring cup in
place against the black mounting plate, and then secure it to
the Velcro by pressing with your fingers. Make sure it is
securely re-attached.
Troubleshooting:
Troubleshooting:Troubleshooting:
Troubleshooting:
Problem:
Problem:Problem:
Problem: The measuring cup does not rotate.
Action #1:
Action #1:Action #1:
Action #1: Replace the batteries, paying attention to proper polarity.

Action #2:
Action #2:Action #2:
Action #2: Make sure that you have TIGHT connections between the
switches and the jacks. There should be NO gaps!
Problem:
Problem:Problem:
Problem: The measuring cup came off of the black mounting plate.
Action:
Action:Action:
Action: Reattach it in the manner explained in the above directions.
(Troubleshooting continued on back page).
(Troubleshooting continued on back page).(Troubleshooting continued on back page).
(Troubleshooting continued on back page).
1. Clamping Options:
Clamping Options: Clamping Options:
Clamping Options: Our mounting clamp is designed for
mounting to tubular (wheelchair, bedrail, walker, etc.) or flat
surfaces such as a table top or desk. For flat surface mounting
use the included wedge insert shoe stored in front of the locking
knob on the clamp (see Fig.1 & 2)
Loosen locking knob slightly to
remove wedge, tighten knob once wedge has been removed.
Fig.1
Fig.1Fig.1
Fig.1
Fig. 2
Fig. 2Fig. 2
Fig. 2
2. Using the mounting clamp, attach the Pouring Cup to a Wheel
Chair, Table or Desk. Tighten the clamp enough to hold the
Pouring Cup securely, but do not over-Tighten the clamp.
3. For some mounting applications the clamp will need to be
mounted horizontally, we have included a Gooseneck clamp
mount adapter for this use. To use the adapter you first must
remove the Gooseneck from the clamp, do this by loosening the
set knob on the back of the clamp. This is the same knob that
holds the clamp wedge (shown in Fig.1). Next depress the spring
loaded pin on the side of the clamp and pull the Gooseneck from
the clamp (see Fig.3). Attach the adapter to the Gooseneck and
secure with the included mounting screws as shown in (Fig. 4 &
5).
Fig.3
Fig.4 Fig.
Fig.4 Fig.Fig.4 Fig.
Fig.4 Fig.5
55
5
Rev
Rev Rev
Rev 1
11
1/
//
/17/17
17/1717/17
17/17
/