Page is loading ...

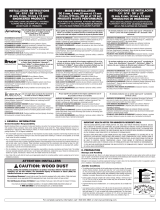
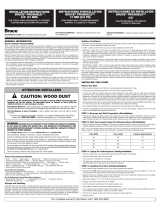
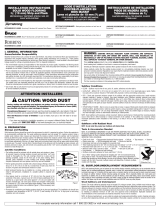
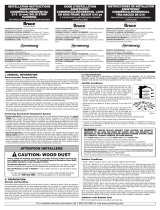
INSTALLATION RECOMMENDATIONS
3/8" & 1/2" (10 mm and 13 mm) ENGINEERED HARDWOOD PRODUCTS
FOR STAPLE-DOWN, MECHANICALLY FASTENED, FLOATING AND GLUE-DOWN APPLICATIONS.
Do not staple down Pecan, Maple or Hickory Products
Note: All species of hand-scraped products can be stapled down with 20 gauge staples (1” minimum length).
Birch, Hickory, Maple and Pecan hand-scraped products can be stapled down using the recommended fastening
machines.
RECOMMENDED ADHESIVES: Armstrong™ ProConnect™ Flooring Adhesive, Armstrong® Equalizer Urethane
Adhesive, or Armstrong Summit Select™
Note: Please refer to floorexpert.com for full installation instructions, storage and handling
recommendations, all coordinating Trims, Moldings, Adhesives, accessories and installation
recommendations for each type of subfloor, including subfloor / underlayment requirements, instructions
for gluing and fastening patterns; http://www.floorexpert.com.
GENERAL INFORMATION
IMPORTANT HEALTH NOTICE FOR MINNESOTA RESIDENTS ONLY:
THESE BUILDING MATERIALS EMIT FORMALDEHYDE. EYE, NOSE, AND THROAT IRRITATION,
HEADACHE, NAUSEA AND A VARIETY OF ASTHMA-LIKE SYMPTOMS, INCLUDING SHORTNESS OF
BREATH, HAVE BEEN REPORTED AS A RESULT OF FORMALDEHYDE EXPOSURE. ELDERLY PERSONS
AND YOUNG CHILDREN, AS WELL AS ANYONE WITH A HISTORY OF ASTHMA, ALLERGIES, OR LUNG
PROBLEMS, MAY BE AT GREATER RISK. RESEARCH IS CONTINUING ON THE POSSIBLE LONG-TERM
EFFECTS OF EXPOSURE TO FORMALDEHYDE.
REDUCED VENTILATION MAY ALLOW FORMALDEHYDE AND OTHER CONTAMINANTS TO ACCUMULATE
IN THE INDOOR AIR. HIGH INDOOR TEMPERATURES AND HUMIDITY RAISE FORMALDEHYDE LEVELS.
WHEN A HOME IS LOCATED IN AREAS SUBJECT TO EXTREME SUMMER TEMPERATURES, AN AIR-
CONDITIONING SYSTEM CAN BE USED TO CONTROL INDOOR TEMPERATURE LEVELS. OTHER MEANS
OF CONTROLLED MECHANICAL VENTILATION CAN BE USED TO REDUCE LEVELS OF FORMALDEHYDE
AND OTHER INDOOR AIR CONTAMINANTS.
IF YOU HAVE ANY QUESTIONS REGARDING THE HEALTH EFFECTS OF FORMALDEHYDE, CONSULT
YOUR DOCTOR OR LOCAL HEALTH DEPARTMENT.
WARNING: EXISTING IN-PLACE RESILIENT FLOOR COVERING AND ASPHALTIC ADHESIVES. DO NOT
SAND, DRY SWEEP, DRY SCRAPE, DRILL, SAW, BEADBLAST, OR MECHANICALLY CHIP OR PULVERIZE
EXISTING RESILIENT FLOORING, BACKING, LINING FELT, ASPHALTIC “CUTBACK” ADHESIVE, OR
OTHER ADHESIVE.
These existing in-place products may contain asbestos fibers and/or crystalline silica. Avoid creating dust.
Inhalation of such dust is a cancer and respiratory tract hazard. Smoking by individuals exposed to asbestos
fibers greatly increases the risk of serious bodily harm. Unless positively certain that the existing in-place product
Page 1

is a non-asbestos-containing material, you must presume it contains asbestos. Regulations may require that the
material be tested to determine asbestos content and may govern removal and disposal of material. See current
edition of the Resilient Floor Covering Institute (RFCI) publication Recommended Work Practices for Removal of
Resilient Floor Coverings for instructions on removing all resilient floor covering structures or contact your retailer
or customer care – 1-800-233-3823. The floor covering or adhesive in this package does NOT contain asbestos.
Storage and Handling (See Floor Expert)
CLEAN, LEVEL/FLAT, DRY & STRUCTURALLY SOUND
Subfloor Conditions (See Floor Expert)
Installation Steps
Doorway and Wall Preparation (All Installation Methods)-See Floor Expert
Establish a Starting Point (All Installation Methods)
• Installation parallel to the longest wall is recommended for best visual effects, however, the floor should be
installed perpendicular to the flooring joists unless the subfloor has been reinforced to reduce subfloor sagging.
• When possible, always begin the layout or installation from the straightest wall, generally an outside wall. Allow
1/2˝ (13 mm) expansion when installing floating floors.
Installing First & Second Rows (Mechanically Fastened/Staple-Down Installations)
• Use the longest, straightest boards available for the first two rows. For random and alternate width products, use
the widest plank for the first row. Align tongue of first row on chalk line. The groove should be facing the starting
wall. Pre-drill 1/2˝ (13 mm) from back (groove) edge, 1˝-2˝ (2.5-5 cm) from each end, and at 6˝ (15 cm) intervals
when possible. Fasten using 4 or 6d finishing nails or 1˝ (2.5 cm) pneumatic finish nails/brads. Countersink the
nails.
• Pre-drill and blind-nail at a 45° angle through the tongue of the first row every 1˝-2˝ (2.5-5 cm) from the ends and
spaced in 3˝-4˝ (7.6-10 cm) intervals. Countersink nails to ensure flush engagement of groove with the following
row(s). Continue blind nailing using this method with following rows until stapler can be used. Alternatively use a
pneumatic finish nailer and install nails/brads at the same intervals with a minimum length of 1˝ (2.5 cm).
Installing the Floor (Mechanically Fastened/Staple-Down Installations)
• Always use the recommended stapler for the specific product being installed (see “Installation Applications”).
Use a minimum 1˝ (2.5 cm) staple recommended by the stapler manufacturer, 1˝-2˝ (2.5-5 cm) from the ends
spaced at 3˝-4˝ (8-10 cm) intervals.
• Fasten several sacrificial boards to the floor. At least two boards, stapled side by side, must be used to indicate
proper machine adjustments.
• Check for surface damage, air pressure setting, tongue damage, edge blistering, etc. before proceeding. Make
all adjustments and corrections before installation begins.
• Install the remainder of the floor working from several cartons.
Spread the Adhesive (Glue-Down Installations)- See Adhesive container for more information
Installing the Floor (Glue-Down Installations)
• Use the longest, straightest boards available for the first two rows. For random and alternate width products, use
the widest plank for the first row. The first row of planks should be installed with the edge of the groove lined up
on the chalk line. The tongue should be facing the starting wall. The first row must be aligned and seated in the
adhesive, as all additional rows will be pushed back to this original row. Remove tongue to allow for expansion
space, if necessary, on the row adjoining the wall. Continue to Step 5.
• When installing pieces, engage the end-joint first, as close to the side (long) tongue and groove as possible,
then slide together tightly to engage the side (long) joint tongue and groove. To avoid adhesive bleed-through and
memory pull-back, avoid sliding pieces through the adhesive as much as possible when placing them in position.
• During the installation occasionally remove a piece of flooring from the subfloor and inspect the back for proper
adhesive transfer. Adequate adhesive transfer is necessary to ensure sufficient holding strength.
Page 2

NOTE: Clean adhesive from the surface of the floor frequently, using the recommended adhesive cleaner.
Urethane adhesives become extremely difficult to remove when cured. Do not use 3M Scotch-Blue™ 2080Tape
before adhesive is removed from the surface. Use clean towels, changed frequently, to prevent haze and
adhesive residue.
• Check for a tight fit between all edges and ends of each plank. End-joints of adjacent rows should be staggered
4˝-6˝ (10-15 cm) when possible, to ensure a more favorable overall appearance.
• It may be necessary to align the product with a cut-off piece of scrap as shown. To eliminate minor shifting or
gapping of product during installation, use 3M Scotch-Blue™ 2080 Tape to hold the planks together. After
installation is complete, remove all of the 3M Scotch-Blue™ 2080 Tape from the surface, Do not let the tape
remain on the flooring longer than 24 hours. Avoid the use of masking or duct tape, which leaves an adhesive
residue and may damage the finish.
General Information for Floating Floors
• Plan the floor layout (in width) to avoid having to rip the last row narrower than 1˝ (2.5 cm). This may require
ripping the first row to assure the last row is at least the minimum width.
Installing the Underlayment (Floating Installations Only)
• Install the underlayment in the same direction the hardwood flooring is to be installed.
• Extend the underlayment a few inches up the wall.
• The floating floor underlayment already has double-sided tape for ease of taping the precut overlapping seams.
If a non-adhesive underlayment is used, tape all seams with the included tape.
Installing the Floor (Floating Installations Only)
• The first row can be installed using one of two methods after the layout has been completed (Step 2). Allow 1/2˝
(13 mm) expansion. (Sacrificial board, Wedges)
• Select the first board. All installations should begin with the groove side against the wall using the longest
boards available. Apply a continuous 1/8˝ (3 mm) glue bead to the inside bottom of the groove on the end of the
board. Do not apply glue to the groove side at this time. Products with the end tongue on the left should be
installed right to left, opposite tongues should be left to right. If a sacrificial board was used DO NOT glue the first
row to it.
• Complete the first row. Cut the last board allowing for 1/2˝ (13 mm) clearance between the wall and the floor.
(Use the remaining end of the cut board as a starter board for any row following row three). Install a wedge on the
end of the board between the hardwood flooring and the wall, allowing 1/2˝ (13 mm) expansion space. Avoid
installation of any boards shorter than 16˝ (40.6 cm) in the first four rows.
• If any glue gets on the surface of the flooring, wipe off immediately with a clean damp cloth.
• Cut or use a shorter board for the first board of the second row. Start the second row by applying a 1/8˝ (3 mm)
bead along the inside bottom of the end and side groove of the new board. Install the first board of row two. Apply
a bead of glue to the inside bottom of the end and side groove of the next board and install. When installing
boards together, use a tapping block against the tongue, not the groove. Tap the boards into place by tapping
with a hammer on the tapping block. DO NOT tap on the edge directly with the hammer. Complete the second
through fourth rows using this technique. Insert wedges on the ends, as necessary, to restrain the movement of
the floor.
• In the remaining rows, stagger joints 4˝-6˝ (10-15 cm) apart. Install the rest of the floor. Be sure all joints are
tight.
Complete the Installation (All Installation Methods)
• Remove all tape and clean the floor with the recommended hardwood flooring cleaner.
• Inspect the floor, filling all minor gaps with the appropriate blended filler.
INSTALLERS – ADVISE YOUR CUSTOMER OF THE FOLLOWING
Seasons: Heating and Non-heating; Heating Season (Dry): Non-Heating Season (Humid, Wet):
NOTE: Final inspection by the end-user should occur from a standing position.
For questions, call customer care 1-800-233-3823; Monday-Friday; 9:00 am - 4:30 pm ET
http://www.floorexpert.com.
Page 3
/


