Page is loading ...

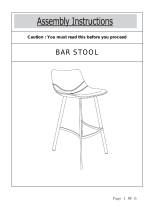
Bar/ Counter Stool
Page 1
Assembly Instructions
Caution: You must read this before you proceed.

Page 2
Parts List
Hardware
Part NO.
A
B
C
QTY
1PC
2PCS
Description
Seat
'H' Leg Frame
Side Rails
Picture
Label
QTY
Description
Picture
1 9PCSØ5/16"x50mm Bolt
2 9PCS
Spring Washer Ring
3
9PCS
4
Allen Key
5
Screw (Ø4x38mm)
6 1PCScrewdriver
1PC
5PCS
Flat Washer Ring
2PCS

Page 3
Assembly Preparation
Before Begining Assembly
9pcs of 50mm Bolts +
9pcs of Flat Washer
Ring + 9pcs of Spring
Washer Ring + one
Allen Key
Pack A for assembling
the 'H' Leg Frame (B) to
the Chair Seat (A)
1pc of Screwdriver +
5pcs Ø4*38mm Screws
Pack B for assembling
the Side Rails (C) to the
'H' Leg Frame (B)
Read intructions, cover to cover-
Have 2 adults on hand for assembly-
Do not assemble on flooring or carpet-
Assemble on a clean non-marring surface (packing foam)-
Save all packaging until finishing-
Unpack and place all
parts for clear visibility

Page 4
Assembly Steps
Step 1
A. Seat
B. 'H' Leg Frame
C. Side Rails
Place the Barstool Seat (A) onto a soft surface to avoid any scratches or damages to the product.
REMOVE the Seat Base Cover from the underside of the Seat (A), take out the Side Rails (C) and
hardware.
Step 2
Insert the Side Rail (C) into the oval housing of 'H' leg frame (B) as shown above.
Then, use the hardware of Part B to attach the Side Rails (C) to the other 'H' Leg frame (B).
WARNING !! DO NOT OVER TIGHTEN. OVER TIGHTENING COULD LEAD TO DAMAGE OF
THE PRODUCT. TIGHTEN ONLY UNTIL SECURE.
B
B
C
C

Page 5
Assembly Steps
Step 3
Step 4
Place the Seat (A) onto a soft and clean surface to avoid any scratches or damages to the product.
Attach the assembled unit from Step 2 to the Chair Seat (A).
Use the hardware of Part A to connect these.
WARNING!! DO NOT OVER TIGHTEN. OVER TIGHTENING COULD LEAD TO DAMAGE OF THE
PRODUCT. TIGHTEN ONLY UNTIL SECURE
A
Place the chair on a LEVEL SURFACE to see if it wobbles.
If it wobbles, lift the chair to some 30cm to 50cm height from the ground.
Keep your feet and toes well away from the drop zone.
Drop the chair freely and vertically with the four legs, hitting the ground at the same time.
This Drop Test will help to ensure that all the bolts and gaps, to all reach full alignment status.
Test again for evenness on a LEVEL SURFACE.
If no wobbles found, proceed to tighten all the bolts.
CAUTION : When tightening these bolts, tighten sequentially.
DO NOT tighten any screw fully and then towards the next one.
This would cause the frame to warp.
If there is still wobbles, loosen the bolts and execute this same drop tests.
WARNING!! IF CHAIR IS NOT STABLE , IT COULD LEAD TO DAMAGING THE PRODUCT.
If wobble
Test again
30cm - 50cm

Page 6
Assembly Steps
Step 5
Place the Seat Base Cover Back underneath the Chair Seat (as shown in picture) from where it was
originally removed from.
Smooth down the 4 velcro edges with your hand.
The bar/ counter stool is now ready for use.

Page 7
Care & Maintenance
Do not put hot items directly on furniture surface.
Dust and pick-up spills using a clean, non-colored, lint-free cloth.
Do not clean furniture with harsh cleansers or polish.
Do not place furniture under direct sunlight.
Do not place furniture near heating or cooling vents.
Do not write on furniture without a padded barrier to protect the surface.
Do not place furniture outside. For indoor use only.
Not for commercial use. For residential use only.
Stains may be removed with mild soap solution and damp cloth.
/


