Page is loading ...

Printer User Guide
CDP-E063-010 © CANON INC. 2008
ENGLISH
COPY

2
What You Can Do with Your SELPHY
Enjoy printing images with your SELPHY printer.
Creative Print (p. 40)
Complete your favorite images using a variety of Creative Print functions.
Add Frames (p. 42) Add Clip Art
Stamps (p. 43)
Create a Calendar
(p. 45)
Print a Picture
Diary (p. 47)
Add a Speech
Bubble (p. 48)
Print with Effects
(p. 50)
Create ID Photos
(p. 51)
Print a Movie (p. 53)
Print with Gold or Silver Effects (pp. 42, 43)
Use a gold or silver print supporting cartridge for printing with gold or silver effects.
Print with gold or silver effects on
frames or clip art stamps.
More creative decoration by using a computer (p. 88).
Print desired frames and text with gold or silver effects
using the supplied software, Ulead Photo Express LE.
Add (update) frames and clip art stamps to the printer
from a computer with the supplied software, SELPHY
Contents Utility.
COPY

3
Print Settings (p. 54)
Print the Date (p. 55) Print the Image Number
(p. 55)
Add Borders to an Image
(p. 55)
Print after Selecting a
Page Layout (p. 57)
Print after Correcting
Red-Eye (p. 55)
Print after Adjusting the
Brightness (p. 58)
You can enlarge and print a portion
of an image.
Trimming Images (p. 33)
Reprint (p. 70)
You can reprint without inserting a memory card after saving the printing history.
Add Favorite Images and Print (pp. 60, 62)
You can add favorite images in a memory card to the printer and print them without the
need to reinsert the memory card.
COPY

4
Table of Contents
What You Can Do with Your SELPHY
..........................................2
Table of Contents.............................................................................4
About This Guide .............................................................................6
Conventions Used in this Guide...........................................................6
Getting Started..................................................................................7
Check the Package Contents...............................................................8
Accessories (Sold Separately) .............................................................9
Components Guide ............................................................................10
Preparing/Replacing/Storing the Easy Photo Pack
................................21
Placing/Connecting the Printer...........................................................27
Printing Precautions ...........................................................................28
Printing from Memory Cards.....................................................29
Compatible Memory Cards ................................................................30
Insert a Memory Card ........................................................................31
Print Selected Images (Basic Print) ...................................................32
Print All Images..................................................................................37
Print an Image Using Camera Specified Settings (DPOF Print) ........38
Selecting an Image during Auto Play for Printing (Auto Play)............39
Creative Print .....................................................................................40
Print Settings......................................................................................54
Printing Favorite Images.............................................................59
Add Favorite Images to the Printer ....................................................60
Print Added Images............................................................................62
Protect................................................................................................63
Erase..................................................................................................66
COPY

5
Table of Contents
Reprinting .........................................................................................69
Reprint................................................................................................70
Printing from a Camera ...............................................................72
Print Images When Connected with a Camera ..................................73
Printing from a Mobile Phone (Wireless Printing).............75
Infrared (IrDA) Wireless Printing ........................................................76
Printing via Bluetooth .........................................................................77
Printing from a Computer...........................................................79
System Requirements........................................................................80
Install the Printer Driver and Software ...............................................82
Introduction to the Supplied Programs...............................................88
Appendix ...........................................................................................98
Make Printer Settings.........................................................................99
Cleaning, Storing and Carrying the Printer.......................................103
Safety Precautions ...........................................................................105
Handling Precautions .......................................................................107
Specifications ...................................................................................109
Troubleshooting ........................................................................... 111
You Think There is a Problem.......................................................... 112
Error Messages................................................................................ 116
Index .................................................................................................122
COPY

6
About This Guide
Conventions Used in this Guide
z Use the "Easy Photo Pack" which is an ink and paper integrated cartridge in the SELPHY ES
series. This is referred to as "Easy Photo Pack" or "cartridge" in this guide.
z This printer can be used with various types of media, such as, SD
*
memory cards or
MultiMediaCards (p. 30).
These types of media are referred to as "memory cards" in this guide.
* SD is an acronym for Secure Digital.
z General "camera" descriptions in this guide refer to digital cameras or digital camcorders
compatible with the SELPHY ES3. The explanations in this guide use Canon digital cameras.
z In this guide, the screen shots from the LCD monitor show a "P" for the Postcard-size ink and
paper integrated cartridge.
z Illustrations and screen examples shown in this guide may differ slightly from the actual printer.
Before using your printer for the first time, please read through the Safety Precautions
(p. 105) and the Handling Precautions (p. 107).
This mark denotes issues that
may affect the printer's operation.
This mark denotes additional
topics that complement the basic
operating procedures. The
number refers to the
corresponding step.
COPY

7
Getting Started
Getting Started
COPY

8
Getting Started
Check the Package Contents
The package contains the following accessories. If there is anything missing, please contact the
store where you purchased this product.
Main Printer Unit 5 Print Trial Cartridge
(Postcard size)
Cleaner Unit
(Inserted prior to shipment)
Compact Photo Printer
Solution Disk
Power Cord
• SELPHY Beginner's Guide
• Warranty Card
• "Canon Customer Support"
Leaflet
COPY

9
Getting Started
Accessories (Sold Separately)
Easy Photo Packs
* Card-size label sheet.
Ink and paper integrated cartridge.
The cartridge differs depending on the paper size and ink type.
Please refer to the Easy Photo Pack table below.
You can print wirelessly from a Bluetooth-enabled mobile phone
(p. 77).
Thin lines/texts may be unclear or defaced when printing with the gold or silver print supporting
cartridge (Easy Photo Pack E-P20G/E-P20S).
Paper Size Ink Type
Name
(Product No.)
No. of
Sheets
Color of
Cartridge
Postcard size
(100 x 148mm)
(4 x 6 in.)
Color
Easy Photo Pack E-P100 100
Green
Easy Photo Pack E-P50 50
Color/
Gold
Easy Photo Pack E-P20G 20 Gold
Color/
Silver
Easy Photo Pack E-P20S 20 Silver
BW Easy Photo Pack E-P25BW 25 Gray
L size
(89 x 119mm)
(3.5 x 4.7 in.)
Color
Easy Photo Pack E-L100 100
Blue
Easy Photo Pack E-L50
50
Card size
(54 x 86mm)
(2.1 x 3.4 in.)
Color
Easy Photo Pack E-C25 25
Orange
Easy Photo Pack E-C25L
*
25
Easy Photo Pack
Bluetooth Unit BU-30
COPY

10
Getting Started
Components Guide
Front View
1 Print Output Receptacle
Button
Press to manually open the output receptacle cover.
2 Card Slot Cover Open to insert a memory card or card adapter with a
memory card inserted.
3 Print Output Receptacle Paper is deposited here after printing.
4 Paper-Handling Slot Paper projects from this slot while printing is in progress.
5 Print Output Receptacle
Cover
Opens automatically when printing starts.
6 Cartridge Lever Slide down to eject the Easy Photo Pack.
7 Cartridge Compartment Insert the Easy Photo Pack into this compartment.
8 Cartridge Cover Open to replace the Easy Photo Pack.
9 Cartridge Cover Lever Slide up to open the cartridge cover.
1
2
3
4
5
6
7
8
9
COPY

Components Guide
11
Getting Started
Back View
1 Carrying Handle Used for carrying the printer (p. 104).
2 Air Vents Dissipates heat inside the printer and prevents overheating.
3 AC IN (Power Input) Terminal Connects to the power cord.
4 USB Terminal for PC
Connection
For USB connection to your PC using a commercially
available USB cable.
5 USB Terminal for Camera
Connection
Connects to a camera using the interface cable, or
Bluetooth unit (sold separately).
1
2
3
4
5
COPY

Components Guide
12
Getting Started
Card Slot
About the Slot Cover
Slide the slot cover right or left to use the "SD/MMC
+
/miniSD" slot or "microSD" slot.
1 Sliding Slot Cover Slide to use the SD/MMC
+
/miniSD slot or the microSD slot.
2 SD/MMC
+
/miniSD Slot Insert a memory card such as SD memory card or
MultiMediaCard (p. 30).
3 microSD Slot Insert a memory card such as microSD card (p. 30).
4 CF/microdrive Slot Insert a memory card such as CompactFlash card or
Microdrive (p. 30).
5 MS/MS Duo Slot Insert a memory card such as Memory Stick or Memory
Stick Duo (p. 30).
1
3
2
5
4
COPY

Components Guide
13
Getting Started
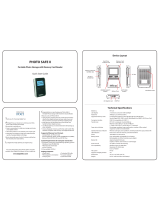
Controls
1 Button Displays the mode menu (p. 18).
2 Saving Lamp Indicates the status of the built-in memory.
Blinks orange: Adding images in the printer.
3 Power Lamp Indicates the printer status.
Lights green: Power on / communicating infrared data
Blinks green: Printing
Blinks green (fast): Communicating with Bluetooth /
Direct Print
4 Button Turns the printer's power on when pressed until the power
lamp lights green.
5 Button Displays the Creative Print menu (p. 40).
6 Button Displays the main menu (displayed menu items differ
depending on the print mode).
Print All Images (p. 37)
DPOF Print (p. 38)
Auto Play (p. 39)
Print Settings (p. 54)
Printer Setup (p. 99)
Add to Favorites (p. 60)
Protect (p. 63)
Erase (p. 66)
7 Infrared Data Receiver Receives infrared data from a mobile phone.
8 Button Displays the properties of the selected image (p. 16).
1
2
3
4
5
8
9
6
7
1
0
11
1
2
1
4
1
3
1
6
1
7
1
5
COPY

Components Guide
14
Getting Started
9 Button Displays the editing menu.
Trimming (p. 33)
Page Layout (p. 35)
Select by date (p. 36)
10 LCD Monitor Displays images, setting screens, and error messages.
11 (Enlarge, Reduce)
Button
Displays an enlarged or reduced view of the image (p. 15).
12 Button Starts printing.
13 Button Confirms settings.
14 Easy-Scroll Wheel Used instead of , , , (excluding some
functions) (p. 20).
15 , , , (Up, Down,
Left, Right) Buttons
Used for selecting images, shifting items, changing setting
value, moving trimming frames, etc.
16 Button Returns to the previous screen.
Cancels printing.
17 Button Specifies the number of prints for a selected image.
The LCD monitor may be covered with a thin plastic film for protection against scratches during
shipment. If so, remove the film before using the printer.
COPY

Components Guide
15
Getting Started
LCD Monitor
Multi View and Single View
z The screen that displays the first time you turn the printer on is called "Multi View".
z When pressing in Multi View, a single image will be displayed. This screen is called "Single
View". Press to return to Multi View.
z When turning on the power again, the last screen selected before turning off the power ("Multi
View" or "Single View") will be displayed.
z Single View is used for the screen samples in this guide.
Enlarged View
You can enlarge an image by pressing in Single View. Press to return to Single View.
Switching the View to 9 Images at a Time
Pressing in Multi View displays a set of 9 images, and a jump bar appears below the images.
Press the or buttons to display the previous or next images. Press to return to Multi
View.
Single View Multi View
Multi View 9 Image View
Jump Bar
COPY

Components Guide
16
Getting Started
Information Views
You can switch the image information views by pressing .
No information displays only in Single View or Enlarged View.
Sample View of the LCD Monitor
1 Number of Copies for the
Displayed Image
Displays the number of copies for the displayed image.
2 Time and Date Displays the date and time the image was shot.
3 File Number Displays the image number.
4 Memory Card Displays the slot in which a memory card is inserted (only
when the print mode is Normal).
:SD/MMC
+
/miniSD slot
:microSD slot
: CF/microdrive slot
: MS/MS Duo slot
5 Number of Displayed Image/
Total Number of Images
Displays the number of the currently displayed image, and
the total number of images on a memory card (or built-in
memory).
6 Total Number of Copies Displays the total number of images to print.
7 Recording Pixels Displays the recording pixels or time counter for movies
(only when the print mode is Normal).
No informationOperation
commands
(Default setting)
Image
information
Print settings
Image information
COPY

Components Guide
17
Getting Started
8 Paper Type Displays the paper type.
P : Postcard size
L : L size
C : Card size
C Label : Card size full-sized label sheet
G : Postcard size (supporting gold printing)
S : Postcard size (supporting silver printing)
BW : Postcard size (black and white)
9 Paper Status Displays the remaining amount of paper in the cartridge.
: 1/2 full or more (the trial cartridge is different
from the commercially available Easy Photo
Pack and does not display).
: About 1/4 full or more.
: About 1/8 full or more.
: The cartridge is empty.
No Display
: The status is unknown.
10 Protect Displays when the image is protected (Favorite print mode
only).
11 Operation Guides Displays operation guides. Follow the instructions to
proceed.
COPY

Components Guide
18
Getting Started
Switching the Print Mode
You can display the mode menu by pressing .
Press or to select the print mode and press . A screen to select images in each mode
(or printing history) is displayed.
Mode Description
Normal (pp. 32, 75, 79) Print images from a memory card, mobile phone (cellphone
(Infrared)) or personal computer.
Favorite (p. 62) Select images saved in the built-in memory of the printer in [Add
to Favorites] (p. 60) and print.
Reprint (p. 70) Select images you wish to reprint from the printing history list
and print.
• You can print without inserting a memory card if you have added images to the favorites or
printing history.
• The mode menu can be displayed anytime, except when the printer is connected to a camera or
when a Bluetooth unit is inserted.
• Pressing displays the image selection screen (or the printing history) in the selected
mode.
• Pressing or displays the Creative Print menu or the main menu in the selected
mode. If is pressed while in Reprint, the Creative Print menu will not be displayed.
COPY

Components Guide
19
Getting Started
The Jump Function
Pressing in Single View or in the Creative Print image selection screen, if the print mode is
Normal or Favorite, displays the Jump screen.
Press or to select a search key, then press or to jump to an image matching the
search key.
Jump 10 Images Jumps ahead 10 images.
Jump 50 Images Jumps ahead 50 images.
Jump 100 Images Jumps ahead 100 images.
Jump Selected Images Jumps to the images that you have set a number of copies for,
or that you have marked with in [Add to Favorites], [Protect]
or [Erase].
Jump Selected date Jumps to the newest image of each shooting day.
COPY

Components Guide
20
Getting Started
Easy-Scroll Wheel
You can select images or menu items and rotate the trimming frame or the image just by turning
the Easy-Scroll Wheel instead of pressing , , or .
Image Scroll Function
When the print mode is Normal or Favorite, giving the Easy-Scroll Wheel a quick turn in Single
View or in the Creative Print image selection screen, for example, will display 5 images at the
bottom of the screen. You can scroll through the images one at a time by turning the wheel and
select the image which is displayed enlarged at the upper left corner.
If there are less than 5 images on a memory card (or built-in memory of the printer), the Image
Scroll display will not appear on the screen.
COPY
/