Page is loading ...

Made in Switzerland
Design Patent Pending Made in Switzerland
®
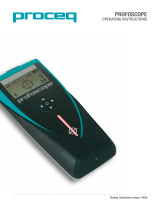
Operating Instructions

© 2017 Proceq SA 2
Scope of Delivery
D
K
T
C
BE
F G I
A
O
NP
L M
U
Q S
R
H J

3 © 2017 Proceq SA
Scope of Delivery
Profometer 600 (39210001)
Profometer 630 AI / 650 AI (39220001 / 39230001)
Profometer Corrosion (39250001)
Upgrade kit to Profometer Corrosion (39250002)
Upgrade kit to Profometer 600 Cover Meter (39250003)
Profometer Corrosion rod electrode (39250010)
Profometer Corrosion wheel electrode (33001001)
Profometer Corrosion four wheel electrode (33001004)
ACarrying case
•
•
•
•
•
BProfometer touchscreen
•
•
•
CBattery complete
•
•
•
DPower supply incl. cables
•
•
•
EUSB cable
•
•
•
FDVD with software and documentation • •
•
•
•
GDocumentation • •
•
•
•
HActivation key •
•
ICarrying strap complete
•
•
•
JProbe cable 1.5 m (5 ft) •
•
•
KUniversal probe with ruggedized scan cart •
•
•
LChalk • • •
MInterface box • •
NCable coil l=25 m (82 ft) with clamp • •
ORod electrode with spare parts •
PCopper sulphate, 250g • • •
QCitric acid, 250g • •
RRod electrode cable, 1 lead, l=1.5 m (5 ft) •
STool kit • •
TWheel electrode with cables and spare parts •
UFour wheel electrode with cables and spare parts •

© 2017 Proceq SA 4
Table of Contents
1. Safety and Liability ...................................................5
1.1 General Information ........................................................... 5
1.2 Liability ...............................................................................5
1.3 Safety Instructions ............................................................5
1.4 Correct Usage ...................................................................5
2. General Operation ........................................................ 6
2.1 Getting Started ..................................................................6
2.2 Main Menu .........................................................................7
2.3 Upgrade procedure ...........................................................7
2.4 Cover Meter and Corrosion functionalities ......................8
3. Profometer 6 Cover Meter............................................ 9
3.1 Measuring Principle ..........................................................9
3.2 Cover Meter Operation ...................................................10
4. Profometer Corrosion ................................................. 30
4.1 Measuring Principle ........................................................30
4.2 Profometer Corrosion Operation ....................................33
5. Explorer Document Handling ..................................... 43
6. Ordering Information ................................................. 44
6.1 Units .................................................................................44
6.2 Upgrades .........................................................................44
6.3 Parts and Accessories ....................................................44
7. Technical Specifications ............................................ 45
8. Maintenance and Support ......................................... 46
8.1 Maintenance and Cleaning .............................................46
8.2 Support Concept .............................................................47
8.3 Standard Warranty and Extended Warranty ..................47
8.4 Disposal ...........................................................................47
9. Profometer Link Software .......................................... 47
9.1 Starting Profometer Link .................................................47
9.2 Connecting to a Profometer Touchscreen Unit ..............48
9.3 Viewing Cover Meter Data ..............................................48
9.4 Viewing Corrosion Data ..................................................49
9.5 Editing and moving data files .........................................49
9.6 Exporting Data ................................................................. 50
9.7 Merging Corrosion Scans ...............................................51
9.8 Further Functions ............................................................51
10. Appendices ................................................................. 52
10.1 Appendix A1: Rebar Diameters ......................................52
10.2 Appendix A2: Neighboring Bar Correction .....................52
10.3 Appendix A3: Minimum / Maximum Cover ....................52

5 © 2017 Proceq SA
1. Safety and Liability
1.1 General Information
This manual contains important information on the safety, use and main-
tenance of the Profometer 6. Read through the manual carefully before
the first use of the instrument. Keep the manual in a safe place for future
reference.
1.2 Liability
Our “General Terms and Conditions of Sales and Delivery” apply in all
cases. Warranty and liability claims arising from personal injury and dam-
age to property cannot be upheld if they are due to one or more of the
following causes:
• Failure to use the instrument in accordance with its designated use as
described in this manual.
• Incorrect performance check for operation and maintenance of the in-
strument and its components.
• Failure to adhere to the sections of the manual dealing with the per-
formance check, operation and maintenance of the instrument and its
components.
• Unauthorised modifications to the instrument and its components.
• Serious damage resulting from the effects of foreign bodies, accidents,
vandalism and force majeure
All information contained in this documentation is presented in good faith
and believed to be correct. Proceq SA makes no warranties and excludes
all liability as to the completeness and/or accuracy of the information.
1.3 Safety Instructions
The equipment is not allowed to be operated by children or anyone under
the influence of alcohol, drugs or pharmaceutical preparations. Anyone
who is not familiar with this manual must be supervised when using the
equipment.
• Carry out the stipulated maintenance properly and at the correct time.
• Following completion of the maintenance tasks, perform a functional
check.
1.4 Correct Usage
• The instrument is only to be used for its designated purpose as de-
scribe herein.
• Replace faulty components only with original replacement parts from
Proceq.
• Accessories should only be installed or connected to the instrument
if they are expressly authorized by Proceq. If other accessories are
installed or connected to the instrument then Proceq will accept no
liability and the product guarantee is forfeit.

© 2017 Proceq SA 6
2. General Operation
2.1 Getting Started
Battery installation
To install the battery, remove the protection foil and lift the stand as
shown. Insert the battery and fasten in place with the screw.
There are two status LEDs (Figure 1, 1) and above them a light sensor.
The upper LED is red while charging and turns to green when it is fully
charged. The other LED is application specific.
NOTE! Only use the power supply provided.
• A complete charge requires < 9h (Instrument not operating).
• Charging time is much longer if the instrument is in use.
• An optional quick charger (Part No. 327 01 053) can be used to charge
a spare battery or to charge the battery outside of the instrument. In
this case it takes < 4h for a complete charge.
Energy Saving
Energy saving may be programmed as desired under System/Power set-
tings.
Figure 1: Main menu, leds, buttons
Buttons
Lift the protective visor.
On the upper right of the screen there are three buttons (Figure 1, 2).
Power On/Off – Press to power on. Press and hold to power off.
Fullscreen / PDF viewer / Hard Keys Mode.
Back Button – returns to previous screen.
1
2

7 © 2017 Proceq SA
Probes connection Profometer 6
Connect the universal probe to either of the two sockets or on the
upper side of the Profometer touchscreen using the probe cable.
Profometer Corrosion
Mount the interface box on the right side of the Profometer touchscreen
using the attached screws and and connect the cable to either of
the two sockets or on the upper side of the Profometer touchscreen.
Connect the electrode signal cable to socket and the ground cable to
the socket of the interface box. Wheel electrodes: connect the path
measurement cable to socket of the interface box.
USB Host:
Connect a mouse, keyboard or USB stick.
USB Device:
Connect application specific probes and PC.
Ethernet:
Connection for firmware upgrades.
Power Supply:
Connect the power supply through this connection.
USB Host
USB Device
Ethernet
Power Supply
2.2 Main Menu
On start up, the main menu is displayed. All functions are accessible
directly via the touchscreen.
Return to the previous menu by pressing the back button or the return
icon (arrow) at the top left of the touchscreen.
Measurement
Select to access either Cover Meter or Corrosion measuring
modes.
Settings
Application specific settings.
Explorer
File manager application for reviewing saved measurements.
System
Select your preferred interface language, date and time set-
tings and power saving options.
Information
Open documentation (Operating Instructions and additional
PDF files) and device info.
Power off
Switch off the device.
2.3 Upgrade procedure
The following procedure has to be performed in order to upgrade to Pro-
fometer 630 AI / 650 AI functionalities from a Profometer 600 unit or to
unlock Profometer 600 / 630 AI / 650 AI Cover Meter functionalities on a
Profometer Corrosion unit.
The Activation Key can be provided together with the initial purchase
(when a Profometer 630 AI or 650 AI unit is supplied) or can be ordered
anytime after the initial purchase in order to upgrade / unlock to further
functionalities.

© 2017 Proceq SA 8
1. Press the Power On/Off button to power on the touchscreen
2. Access the System menu, then go to Features and Enter activation
key
3. Enter the activation key
2.4 Cover Meter and Corrosion functionalities
A Profometer unit can have both the features of Cover Meter and Corro-
sion Analysis Instrument in the following cases
• Profometer 6 Cover Meter with the upgrade kit to Profometer Corro-
sion (392 50 002)
• Profometer Corrosion with the upgrade kit to Profometer 600 Cover
Meter (392 50 003) plus any possible upgrade to Profometer 630 AI
or 650 AI
In either case the corresponding functionality (Cover Meter and/or Corro-
sion) will be available on the Platform depending on whether the universal
probe or the interface box respectively is initially connected to the unit.
An image on the top of the measuring screen will indicate whether the
universal probe and/or the interface box are connected to the unit.
When going into the Settings or Explorer menus the user will be prompt-
ed whether to access the Cover Meter or Corrosion corresponding sub-
menus.
The user can disable at any time either feature by going into the System
/ Features menu and unchecking the corresponding box.

9 © 2017 Proceq SA
3. Profometer 6 Cover Meter
3.1 Measuring Principle
3.1.1. Pulse induction
The Profometer 6 uses electromagnetic pulse induction technology to
detect rebars. Coils in the probe are periodically charged by current
pulses and thus generate a magnetic field. On the surface of any electri-
cally conductive material which is in the magnetic field, eddy currents are
produced. They induce a magnetic field in the opposite direction. The
resulting change in voltage can be utilized for the measurement.
Coils
Concrete
Rebar
Magnetic Field
Figure 2: Measurement principle
The Profometer 6 uses different coil arrangements to generate several
magnetic fields. Advanced signal processing allows locating a rebar as
well as measuring of cover and rebar diameter.
This method is unaffected by all non conductive materials such as con-
crete, wood, plastics, bricks etc. However any kind of conductive materi-
als within the magnetic field (sphere of approx. 200 mm / 8 inch radius)
will have an influence on the measurement.
NOTE! Remove all metallic objects such as rings and watch-
es before you start measuring.
3.1.2. Calibrated Measuring with Profometer 6
The Profometer 6 is calibrated to measure on a normal rebar arrange-
ment; which is an arrangement of non-stainless steel rebars fastened
with binding wires only e. g. when measuring on welded mesh wires the
cover and diameter readings must be corrected (see “3.2.4. Practical
Hints”). The following information on accuracy, measuring ranges and
resolutions refer to measurements on normal rebar arrangements.
3.1.3. The
Measuring
Range
The measuring range is dependent on the bar size. The expected ac-
curacy of the cover measurement is indicated in the graphic below. It
complies with BS1881 part 204, for a single rebar with sufficient spacing.
0
10
20
30
40
50
60
70
80
90
100
110
120
130
140
150
160
170
180
190
5 10 15 20 25 30 35 40 45 50 55
7
6
5
4
3
2
1
#2 #3 #5 #6 #8 #9 #11 #13 #14 #16 #18
[inch] [mm]
Rebar size
Cover depth
Spot probe
measuring range
Standard
measuring range
±4 mm
±2 mm
±1 mm
±1 mm
[mm]
[1/8 inch]
153 mm
50 mm
Large
measuring range
measuring
accuray
185 mm
100 mm
Figure 3: Measuring ranges and accuracy: up to the indicated limits the
cover is measured and displayed. In the Locating Mode a rebar
is shown. In the Single-Line Mode the cover curve is shown but
a rebar is only set up to 90 % of the maximum cover.

© 2017 Proceq SA 10
3.1.4. Resolution
There is a limit to the minimum spacing of bars
depend
ing on the cover
depth and rebar diameter. It is impossible to distinguish
be
tween indi-
vidual bars above these
limits.
0
20
40
60
80
100
120
140
160
180
200
0 20 40 60 80 100 120 140 160 180 200
1
2
3
4
5
7
6
8
0
12345 67
0
[inch] [mm]
Cover depth
Spot probe
range
Standard
range
Ø 40 mm
Ø 26 mm
Ø 16 mm
Ø 12 mm
Ø 8 mm
Below the curve:
Individual rebar can be detected
Rebar spacing [inch]
[mm]
C
S
# 12
# 13
# 8
# 4
# 3
# 2
S
C
# 5
Large range
Figure 4: Resolution
3.1.5. Sphere of influence by Ferromagnetic Material
MC (SLA) C
Sphere of influence: Diameter 400 mm / 16 inch
Figure 5: Influence sphere
Any ferromagnetic material within the sphere may have an influence on
on the signal value (e. g. during a reset).
3.2 Cover Meter Operation
3.2.1. Cover Meter Operation
Scroll up and down the screen by dragging your finger up or down the
screen. The current setting is displayed on the right hand side. Tap on an
item to adjust it.
Measuring Mode Adjust-
able after
data stor-
age
Settings Locate Single-
Line
Multi-
Line
Cross-
Line
Are-
Scan
Measuring Range • • • • • No
Rebar Diameter
Scan X
• • • • • Yes
Rebar Diameter
Scan Y
1]
•Yes
Artificial Intelli-
gence
2] / Neigh-
boring Rebar
Correction
• • • • • Yes
Cover Calibration2] • • • • • Yes
Unit • • • • • No
Minimum Cover • • • • • Yes
Maximum Cover • • • Yes
Cover Offset • • • • • No
Display Inclined
Rebar
•Yes
Sharpen • • Yes
Display Curve •Yes
Align Rebar
Positions
• • No

11 © 2017 Proceq SA
Measuring Mode Adjust-
able after
data stor-
age
Settings Locate Single-
Line
Multi-
Line
Cross-
Line
Are-
Scan
Return to start on
new line
• • Yes
Line Height • • • Yes
Grid Width • • Yes
1] This parameter affects all measurement modes (in addition to Cross-Line) when-
ever Artificial Intelligence Correction is selected
2] Only available on Profometer 630 AI / 650 AI
Meauring Range
Select between Standard, Large or Auto ranges (see Figure 3).
The Standard range setting is the default setting and the most accurate.
Auto range setting automatically switches between Standard and Large
range; it is only available when in the Locating Mode. Spot range set-
ting should be selected for measurements of small areas, in corners
and where the distance between reinforcing bars is small. The Large
range setting should be selected when the concrete cover is deeper, to
provide more accurate results.
Rebar Diameter Scan X / Rebar Diameter Scan Y
Select the Rebar Diameter (6 to 40 mm / #2 to #12, see “10.1 Appendix A1:
Rebar Diameters”), either determined from the drawing or as measured.
Tap on the info button on top of the Settings page to view a graphical
overview of the above mentioned parameters.
Artificial Intelligence / Neighboring Rebar Correction
It compensates the influence of 1st and 2nd layer neighbor rebars (AI) or 1st
layer neighbor rebars only (NRC) on cover measurement of 1st layer rebars.
If both a1 and a2 spacings are entered, Φ1 ≤ Φ2 and Standard Range is set,
then the Artificial Intelligence is automatically applied.
If only a1 spacing is entered or Φ1 > Φ2 or Large/Spot Range is set, then the
Neighboring Rebar Correction (only taking into account 1st layer) is automati-
cally applied.
The user can enter the spacing value manually or choose the Auto function,
which redirects to a Single-Line scan where the spacing is automatically
measured and averaged.
The rebar size measurement is anyway only corrected with NRC.
Tap on the info button on top of the Settings page to view a graphical over-
view of the above mentioned parameters.
Cover Calibration
This correction is used for calibrating the cover measured by the instru-
ment (Measured Cover) to the actual value directly measured on a open
location (Reference Cover). The corresponding Rebar Diameter Setting is
also to be specified.
This correction can be used regardless of rebar geometry and Measuring
Range selected
Unit
Select Metric, Metric Japanese, Imperial or Imperial Diameter, Metric
Cover and Distance.
Minimum Cover
A Minimum Cover value from 10 to 142 mm / 0.40 to 5.56 inch can be set
in 1 mm / 0.04 inch steps (see “10.3 Appendix A3: Minimum / Maximum
Cover”). In the Single-Line, Multi-Line and Cross-Line Mode/View rebars
with less than minimum cover will be shown in red color. In the Single-
Line View and Statistical View a horizontal, respectively vertical dotted
line in red indicates the Minimum Cover value set.
Maximum Cover
A Maximum Cover value from 20 to 190 mm / 0.80 to 7.48 inch can be set
in steps of 1 mm / 0.04 inch (see “10.3 Appendix A3: Minimum / Maximum
Cover”). In the Single-Line, Multi-Line and Cross-Line Mode/View rebars
with cover exceeding the Maximum cover will be shown in grey color.
NOTE! The Maximum Cover must be at least 10 mm / 0.40
inch higher than the Minimum Cover. If not, the instrument
will correct it automatically.

© 2017 Proceq SA 12
Return to start on new line
With this feature set, the cursor jumps back to the start line when chang-
ing line in the Multi-Line and Cross-Line Modes.
Line Height (in Y-direction)
The line height of must be set in the Multi-Line, Area-Scan and Cross-
Line Modes. It determines the spacing between the measuring rows. A
height of 5 to 203 cm / 2.00 to 80.00 inch can be set.
Grid Width (in X-direction)
The grid width must be set in the Area-Scan and Cross-Line Modes. A
width from 5 to 203 cm / 2.00 to 80.00 inch can be set.
3.2.2. Cover Meter Measurement Modes
When Measurement Mode is selected for the first time after switching on
the instrument, zeroing of the probe is performed. Confirm it and wait for the
button assessment window. Wait or tap anywhere on the screen. The Meas-
urement Modes available are shown in the menu on the top of the screen.
Locating Single-Line Multi-Line Area-Scan Cross-Line
Profometer 600 •
Profometer 630 AI ••••
Profometer 650 AI •••••
NOTE! Valid for all Measuring Modes: In case measuring data
shall be stored create a folder in the Explorer (see “5. Explorer
Document Handling”) and check if the correct folder is active.
The Maximum Cover should also be set for different files measured on
the same surface to get the same color range for comparison purposes.
Cover Offset
When a Cover Offset value is set the measured cover will be reduced by
this value; e. g. when a wooden or plastic plate is used to measure with
the probe cart on rough surfaces (see “3.2.4. Practical Hints”). In this
case the plate thickness must be set as Cover Offset value). A value from
1 to 50 mm / 0.04 to 1.92 inch can be set.
Display Inclined Rebar
By setting this feature the inclined rebar is displayed in the Locating Mode
when all four wheels of the cart have passed over the inclined rebar. In
the Single-Line and Multi-Line Modes it is only shown in the cart symbol.
NOTE! In areas with small rebar spacing this feature may not
work properly.
Sharpen
With this setting the signal strength color spectrum of the Multi-Line and
Cross-Line Views can be sharpened.
Display Curve
Select Cover Value, Signal Strength or None. The respective curve or
no curve is displayed in Single-Line View.
Align Rebar Positions
When measuring in the Multi-Line or Cross-Line Mode along at least two
lines of at least 55 cm / 22.00 inch length, the rebar positions of subse-
quent lines are aligned to the rebar positions of the previous lines.
NOTE! This feature should only be set if the rebars are running
parallel to the start line (X- or Y-line). It is not activated during
the measurements (activated only when storing the data).

13 © 2017 Proceq SA
E Center Line (CL)
*When an Arrow LED lights up move the
probe along the rebar axis until MC LED
C or D lights up. Then the MC is
precisely above a rebar axis.
By pushing A and B simultane-
ously the cursor jumps to the next line
(in Multi-Line, Area-Scan and Cross-Line
Mode only)
B Short: Measure diameter
Long: Zeroing
D Measurement Center when
Spot range is set (MC Sp)
Measurement Center when Standard,
Large or Auto range is set (MC SLA)
Short: Start / Stop
Long: Set marker A
C
F Arrow LED indicates proximity of rebar*
Arrow LED indicates proximity of rebar* F
Figure 6: Universal Probe overview

© 2017 Proceq SA 14
Locating Mode Profometer
600
Profometer
630 AI
Profometer
650 AI
12
3
4567
12
11
10
9
8
Figure 7: Locating Mode
1File name: enter the file name and tap return. Saved measurements
will be stored with this file name. If several measurements are made
under the same filename, a suffix increments after each measure-
ment and follows the file name.
2Probe connected, current time, battery status and warning triangle
for zeroing the probe when needed: after 5 minutes in orange, after
10 minutes in red.
NOTE! Tap on the triangle to perform zeroing.
3Display of selected Settings:
• Measuring Range
• Type of correction (None, AI, NRC, CAL)
• 1st and 2nd layer rebar size and spacing
• Cover Offset (if set)
• Probe Direction X: Undefined direction
^, v, <, >: On vertical wall, probe head towards
up, down, left, right
_, ˉ: On horizontal surface, on soffit
4Settings: switches to the settings menu
5Rebar Diameter: measuring of rebar diameter
6 Store measured data
7 Restart: all data of current measurement are deleted
8 Actual Cover
9 Distance to the nearest rebar
10 Nos. / Measured diameter
11 Signal strength
12 Coils indicator
Whenever possible start with locating the rebars of the first layer, E.g on
a column this would be the horizontal stirrups.
Holding the CL E horizontally, move vertically up or down until the Arrow
LED lights up and then move back until the MC LED lights up.
After having located the first layer rebars continue with locating the sec-
ond layer rebars.
• Position the MC (C or D depending on the set Measuring Range) at the
mid line of the first layer rebars, e. g. on a column hold the probe with
the CL running vertically and move the probe cart vertically until both
rectangles in the probe symbol 12 are green and of equal size. When-
ever the coils rectangles 12 are of different size and red, the probe po-

15 © 2017 Proceq SA
sition is not optimal and the cover / diameter measurement becomes
not reliable
• Now move the probe cart horizontally until one of the Arrow LEDs F
lights up and then move back until MC LED C or D lights up.
• At this position you may also measure the diameter either by pushing
B on the right side of the probe or 5 (see Figure 7) on the Touchscreen
unit (e. g. when the probe is fixed to the telescopic extension rod).
• If the spacing of parallel or orthogonal rebars is between 5 and 30 cm
(2.00 to 12.00 inch), activate AI or NRC correction. If the cover is too
small for diameter measurement “too close” is displayed.
• In this case place a wooden or plastic board on the surface and set the
board thickness as Cover Offset to measure the diameter.
Finally the measured diameter must be set. The cover reading will be cor-
rected according to the diameter set.
NOTE! A rebar is shown only within the cover ranges indicat-
ed in Figure 3; for more details about diameter measurement
see “3.2.4. Practical Hints”.
• Tap 6 to store the diameter and cover measurement.
• Repeat this procedure at each rebar.
The saved data can be seen in the Snapshot and Normal Statistics View
(see “3.2.3. Cover Meter Display Views”).
Whenever a rebar is inclined to the Cover of the probe, if Display Inclined
Rebars is set, the angle will be shown on the display (minimum detected
inclination is 6 degrees).
NOTE! Cover values are only saved for later viewing, if the
diameter was measured and saved.
Single-Line View Profometer
630 AI
Profometer
650 AI
1 2
3
4
5678910
16 17
1415
13
12
11
19
18
Figure 8: Single-Line Mode
1File name: enter the file name and tap return. Saved measurements
will be stored with this file name. If several measurements are made
under the same filename, a suffix increments after each measure-
ment and follows the file name.
2Probe connected, current time, battery status and warning triangle
for zeroing the probe when needed: after 5 minutes in orange, after
10 minutes in red..
NOTE! Tap on the triangle to perform zeroing.

© 2017 Proceq SA 16
3Display of selected Settings:
• Measuring Range
• Type of correction (None, AI, NRC, CAL)
• 1st and 2nd layer rebar size and spacing
• Cover Offset (if set)
• Probe Di-
rection
X: Undefined direction
^, v, <, >: On vertical wall, probe head towards up,
down, left, right
_, ˉ: On horizontal surface, on soffit
Zoom in by placing thumb and index finger together on
the screen and spreading them apart. This can be used in
both the horizontal and vertical directions when making a
measurement.
Zoom out by placing thumb and index finger apart on the
screen and pinching them together.
Pan the image from left to right by dragging.
4Curve displayed: Cover / Signal strength / None
5Settings: switches to the settings menu
6Rebar Diameter: measuring of rebar diameter
7 Store measured data
8 Restart: all data of current measurement are deleted
9 Zoom in to cursor position
10 Zoom to fit the whole scan
11 Actual Cover
12 Distance to the nearest rebar
13 Nos. / Measured diameter
14 Skip distance
15 Skip button
16 Coils indicator
17 Speed bar
18 Minimum set cover value (if set)
19 Measured diameter
NOTE! It is advisable to locate the first and second layer re-
bars with the Locating Mode to find the optimum line posi-
tion prior to measuring with the Single-Line Mode.
• Position the probe cart at the start line in an optimum position (see
Figure 9, the MC C / D at the mid line of the rebars running parallel to
the moving direction, both rectangles in 16 are of equal size).
Midpoint line
CL 16
MC C / D
Figure 9: Optimal probe position
• Start with the measurement if the cursor is at the start line. If not per-
form a reset 8.
• Move the probe cart with constant speed crosswise over the rebars,
not exceeding the maximum speed (speed bar 17 half filled in green).
• Above each rebar, when the red LED of MC C / D lights up, you may
measure the rebar diameter and on completion, it will be displayed in
blue. The measured diameter may be deleted within 5 seconds by tap-
ping on 6.

17 © 2017 Proceq SA
• In case the spacing between parallel or orthogonal rebars is in the
range of 5 to 30 cm (2.00 to 12.00 inch), activate AI or NRC correction.
The cursor position can be adapted in two ways to a changed cart position:
• Tap on the cursor and wait until it becomes white and orange. Move
the cursor to the desired position (even left to the zero line is possible).
Be aware: Scanning is no longer possible between the cursor and the
zero-line. Rebars that have already been scanned cannot be removed
by a new scan, but you may scan to the left of the first rebar or to the
right of the last rebar. To delete rebars already scanned, tap 8 and
confirm with Yes.
• Tap on 14 and set the skip distance. For example, if you have to make
a break in the scan due to an obstacle such as a column, move the cart
until the right wheels touch the column, then set the skip distance to
the width of the column plus 107mm / 4.2 inches for the cart and repo-
sition the cart at the other side of the column with the left wheels
touching the column. Tap on 15 . A blue dotted line is set at the begin-
ning of the skipped interval.
NOTE! The cover curve is shown (if selected) within the cover
ranges indicated in Figure 3 but a rebar will only be shown up
to 90 % of those limits.
To display a rebar as a
circle zoom the horizontal
and vertical axis to the
same scale.
The spacings of the rebars
are shown in blue.
The distances from the
start line to the first rebar
and from the end line to
the last rebar are shown in
white color. If the figures
are not shown, zoom in.
Spacing between rebars (in blue)
Figure 10: Screen of Single-Line Mode with cover curve
• To change a diameter tap on the rebar.
A window opens.
• Tap on the window and change diameter.
To erase set diameter to zero.
The new diameter is set and shown in orange.
The cover changes accordingly but the cover
curve remains except above the rebar axis.
New set diameter shown in orange
Figure 11: Single-Line View zoomed, showing change of rebar diameter

© 2017 Proceq SA 18
Figure 12: Single-Line option to mask a rebar by double-tapping on it
When utilizing the Single-Line Mode, the user has the option to display
the Cover curve, Signal Strength curve or no curve. The Signal Strength
curve is used to confirm the presence of reinforcing bars. Local effects
such as metallic elements present below the surface (metallic wire, anchor-
age, etc.) or changes in testing speed when obtaining the data can result
in an “apparent” reinforcing bar appearing on the screen. It is possible to
hide the “apparent” reinforcing bar by double tapping on the correspond-
ing dot when in Single-Line Cover or Signal Strength View and selecting
the “Mask” option. The corresponding cover values will not be taken into
account in the Statistical View (refer to Section “3.2.3. Cover Meter Display
Views”).
The path length measurement accuracy depends on the test surface. The
accuracy of measurements done on a smooth concrete surface (concrete
poured in metallic shuttering) is shown in the specifications, see “7. Tech-
nical Specifications”. On rougher surfaces the measured length may be
reduced or checked at certain intervals by setting markings on the test
surface and comparing with marks set on the display (long push on A ).
After storage (tap 7), the data can be seen in the Statistics View, the
Single-Line View and also in the Snapshot View if at least one diam-
eter was measured (see “3.2.3. Cover Meter Display Views”).
The maximum scan length is 999 m / 3’280 feet in each direction (to the
right and to the left from the zero line).
Multi-Line Mode Profometer
630 AI
Profometer
650 AI
1 2
3
4
56781011
17 18
1516
14
13
12
9
Figure 13: Multi-Line Mode
1File name: enter the file name and tap return. Saved measurements
will be stored with this file name. If several measurements are made
under the same filename, a suffix increments after each measure-
ment and follows the file name.

19 © 2017 Proceq SA
2Probe connected, current time, battery status and warning triangle
for zeroing the probe when needed: after 5 minutes in orange, after
10 minutes in red..
NOTE! Tap on the triangle to perform zeroing.
3Display of selected Settings:
• Measuring Range
• Type of correction (None, AI, NRC, CAL)
• 1st and 2nd layer rebar size and spacing
• Cover Offset (if set)
• Probe Direction X: Undefined direction
^, v, <, >: On vertical wall, probe head towards
up, down, left, right
_, ˉ: On horizontal surface, on soffit
Zoom in by placing thumb and index finger together on
the screen and spreading them apart. This can be used in
both the horizontal and vertical directions when making a
measurement.
Zoom out by placing thumb and index finger apart on the
screen and pinching them together.
Pan the image from left to right by dragging.
4Measured values displayed: Cover / Diameter
5Settings: switches to the settings menu
6Rebar Diameter: measuring of rebar diameter
7 Store measured data
8 Restart: all data of current measurement are deleted
9 Delete current line
10 Move to next line / Rotate probe
11 Zoom to fit the whole scan
12 Actual Cover
13 Distance to the nearest rebar
14 Nos. / Measured diameter
15 Skip distance
16 Skip button
17 Coils indicator
18 Speed bar
NOTE! It is advisable to locate the first and second layer rebars
with the Locating Mode to find the optimum line position prior
to measuring with the Multi-Line Mode (see Figure 9). “Align
Rebar Position” should only be set, if all rebars are running
parallel to the start line (Y-axis). For large areas it is advisable
not to set “Return to start on new line” and to measure the
lines alternatively start to end, back from end to start.
• Position the probe cart at the start line in an optimum position (see
Figure 9, the MC C / D at the mid line of the rebars running parallel to
the moving direction, both rectangles in 16 are of equal size).
• Start with the measurement if the cursor is at the start line. If not per-
form a reset 8.
• Move the probe cart crosswise over the rebars. Above each rebar,
when the red LED of MC C / D lights up, you may measure the rebar
diameter and on completion, it will be displayed. If the spacing be-
tween parallel or orthogonal rebars is in the range of 5 to 30 cm (2.00
to 12.00 inch), activate AI or NRC correction. At the end of the first line
a marker (dotted blue line) is set. To proceed with the next line tap 10

© 2017 Proceq SA 20
or push A and B simultaneously on the probe. The cursor jumps to
the next measuring row, either to the start line or remains at the end
line, depending on whether “Return to start on new line” is set or not.
Changing the cursor position works like in the Single-Line Mode (tap
and drag the cursor or use the Skip button). At the start of each line
you may change the probe direction (e. g. when measuring on a wall
along the bottom line close to the slab).
• Tap on 10.The arrow in the probe cart symbol changes from to .
For the next line you may change back to .
NOTE! By changing the setting “Line Height” during the
measurements the height of all lines including the ones al-
ready measured will change and hence, also the line posi-
tions. Change the line height only if it was previously wrongly
At each rebar you may measure the rebar diameter. At the end, set
one common diameter, normally the smallest one (see “3.2.4. Practical
Hints”).
When displaying the Cover values in the color palette the range is defined
by the Minimum and Maximum Cover values used in Settings.
When displaying the Diameter values in the color palette all rebars will
be shown in the respective color. Rebars for which the diameter was
not measured or set are shown in white; diameters set in the Single-Line
View (Figure 11) are shown additionally with an orange cross bar in the
middle of the rebar.
After storage (tap 7 ), the data can be seen in the Statistics View, the
Single-Line View, the Multi-Line View and also in the Snapshot View if
at least one diameter was measured. In the Multi-Line View the signal
strength spectrum can be seen in addition to the cover and diameter, see
“3.2.3 Cover Meter Display Views”.
In one measuring sequence a maximum of 62 lines can be scanned and
stored in one file.
NOTE! A rebar will only be shown up to 90 % of the limits
of Figure 3.
Area-Scan Mode Profometer
630 AI
Profometer
650 AI
The Area-Scan Mode is mainly used to show the first layer rebar covers
on large areas, e.g. of concrete slabs in car parks. It is best suited for a
combination with half-cell potential measurements; e. g. combined with
Profometer Corrosion measurements; in this case the line height and grid
width should be the same for both measurements.
The main differences with the Multi-Line Mode is that instead of the sin-
gle rebars, only the lowest cover value inside every cell is displayed; the
single cell area is defined by the Line Height (same meaning as for Multi-
Line Mode ) and the Grid Width. This latest should be set at least 1.1
times larger than the maximum rebar spacing of the first layer rebars, in
order to be sure that at least one rebar is located within one cell.
NOTE! Since the Area-Mode is used on rather large areas,
“Return to start on new line” should not be set.
The measuring procedure including turning the probe cart and changing
cursor position is the same as for Multi-Line Mode.
Figure 14 is a plan view, where the cover values are shown as rectangles
of different colors. Red means the cover is smaller than the minimum set.
/