Page is loading ...

MAKE THE MOST OF YOUR
SEDONA
BY
TM
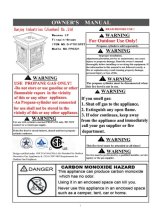
Warning: Improper installation, adjustment, alteration. Service or maintenance can cause severe injury or death, and may result in prop-
erty damage. Read these installation, operating and maintenance instructions thoroughly before installing or servicing this appliance.
INSTALLER: THIS MANUAL MUST BE LEFT WITH THE APPLIANCE.
CONSUMER: KEEP THIS MANUAL FOR FUTURE USE.
CARE & USE/FIRE PIT InSTAllATIOn

2
|
Care & use/ FIre PIT InsTallaTIon
WARnInGS
READ THIS MANUAL CAREFULLY and completely before using your grill to reduce the risk of:
1. Fire
2. Burn hazard, personal injury or property damage
3. Ruined steaks or other unpleasant cooking experiences
4. Unapproved installation or servicing.
THIS PRODUCT IS DESIGNED FOR OUTDOOR USE ONLY. Improper installation, adjustment, alteration, service
or maintenance can cause property damage, injury or death.
Read this manual thoroughly before installation, use, or servicing of this product.
1. The burning of gaseous fuel generates some by-products which are on the list of substances which are
known by the State of California to cause cancer or reproductive harm.
2. California law requires businesses to warn customers of potential exposure to such substances. To minimize
exposure to the substances, always operate this unit according to the use and care instructions found in this
manual. Be certain to provide adequate ventilation when in operation
If you smell gas:
1. Shut off all gas supply lines to the grill.
2. Extinguish any open flames.
3. Carefully open the lid. Remember, it may be
extremely hot!
4. If odor continues, keep everyone away from the
grill and immediately call your gas supplier or
your fire department.
1. DO NOT store or use gasoline or other flam-
mable vapors and liquids in the vicinity of this
or any other appliance.
2. An LP cylinder not connected for use shall
not be stored in the vicinity of this or any
other appliance.
s’Il y a une odeur de gaz:
1. Coupez l’admission de gaz de l’appariel.
2. Éteindre toute flamme nue.
3. Ouvrir le couvercle.
4. Si l’odeur persiste, éloignez-vous de
l’appareil et appelez immédiatement le
fournisseur de gaz ou le service d’incendie.
1. Ne pas entreposer ni utiliser de l’essence ni
d’autres vapeurs ou liquides inflammables
dans le voisinage de l’appareil, ni de tout
autre appareil.
2. Une bouteille de propane qui n’est pas rac-
cordée en vue de son utilisation, ne doit pas
être entreposée dans le voisinage de cet
appareil ou de tout autre appareil.
WarnIng
danger
WarnIng
danger
avertIssment
Warning! CalIfornIa proposItIon 65
SEDONA

Care & use/ FIre PIT InsTallaTIon
|
3
WARnInGS
WarnIng
To obtain replacement parts or service contact:
Lynx Grills
7300 Flores Street
Downey, CA 90242
888-289-5969
•Never use dented, rusty or damaged propane cylinders. Never store additional or empty propane cyl-
inders in the grill cabinet or in the vicinity of this or any other appliance. Do not store propane cylinders
indoors or on their sides.
•Children should never be left alone or unattended in an area where a grill is located. Place your grill well
away from areas where children play. Do not store items that may interest children in or around the grill, in
the cart, or in the masonry enclosure.
•Never move the grill when hot. When in use, portions of the grill are hot enough to cause severe burns.
•Always maintain the required clearances from combustibles as detailed. The grill is designed for outdoor
use only. Never use in a garage, building, shed, breezeway, or other enclosed area. Do not use this grill
under any overhead combustible construction.
•Gas grills are not designed or certified for and are not to be installed in or on recreational vehicles, por-
table trailers, boats or any other moving installation.
•Always have an ABC Fire Extinguisher accessible — never attempt to extinguish a grease fire with water or
other liquids.
•Storing your grill: Store your grill in a well-ventilated area. If stored indoors, detach and leave L.P. cylinder
outdoors in a well-ventilated area away from heat and away from where children may tamper with it.
•Keep any electrical supply cord and the fuel supply hose away from any heated surfaces. Electrical cords
should be placed away from walkways to avoid tripping hazard.
•Do not repair or replace any part of the grill unless specifically recommended in this manual. Other service
should be performed by a qualified technician.
•If the grill is installed by a professional installer or technician, be sure that he/she shows you where your
gas supply shut-off is located. All gas lines must have a shut-off that is readily and easily accessible. If you
smell gas, check for gas leaks immediately. Check only with a soap and water solution. (See INDEX: “Leak
Testing” for further details.) Never check for gas leaks with an open flame.
•Inspect the L.P. gas supply hose prior to each use of the grill. If there is evidence of excessive abrasion or
wear, or the hose is cut, it must be replaced before using the grill.
•Never remove the grounding prong from the plug or use this product with an ungrounded, 2-prong
adapter.
THIS MANUAL MUST REMAIN WITH THE PRODUCT OWNER FOR FUTURE REFERENCE.

4
|
Care & use/ FIre PIT InsTallaTIon
WARnInGS
state of massaCHusetts
danger
1. Massachusetts requires all gas be installed using a plumber or gas fitter carrying the appropriate Massachu-
setts license.
2. All permanently-installed natural gas or propane installations require a “T” handle type manual gas valve be
installed in the gas supply line to this appliance.
3. This does not apply to portable propane installations using a 20 pound cylinder.
1. This appliance produces carbon monoxide which has no odor.
2. Using this appliance in an enclosed space can cause death.
3. Never use this appliance in an enclosed space. Never use in a garage, building, shed, breezeway, or other
enclosed area.
WarnIng
1. This outdoor appliance and its individual shutoff valve must be disconnected from the gas supply piping
system during any pressure testing of that system at test pressures in excess of 1/2 psi (3.5 kPa).
2. This outdoor appliance must be isolated from the gas supply piping system by closing its individual manual
shutoff valve during any pressure testing of the gas supply piping system at test pressures equal to or less
than 1/2 psi (3.5 kPa).
Prior to assembly of your Sedona Fire Pit you may want to consider the location of the fire pit. Do you have pre-
vailing winds which may effect the burner operation? Is the ground you plan on installing the fire pit level and
firm? Do you have an assistant to help with positioning the fire pit and table top. The table top may be heavy
and awkward to handle alone.
Before you can use the fire pit you must install the table top on the fire pit base, and install the burner assem-
bly to the table top. The LP gas tank must be installed and connected properly to the burner assembly and the
controls connected for proper operation.
Please read these instructions carefully and completely before proceeding. Incorrect installation and assembly
may result in fire, damage or personal injury or death.
SEDONA

Care & use/ FIre PIT InsTallaTIon
|
5
IMPORTAnT SAFETY PRECAUTIOnS
PLEASE REVIEW THESE IMPORTANT SAFETY
PRECAUTIONS BEFORE YOU USE YOUR FIRE PIT.
1. NEVER LEAVE THE FIRE PIT UNATTENDED WHILE IN USE.
2. Follow the instructions in this manual carefully to reduce the risk or personal injury, death or property loss.
3. Ensure all tie-down wires have been removed from the burners.
4. Always use caution when operating the appliance in a windy area.
5. Avoid wearing loose-fitting garments or long sleeves while adjusting fire pit media. They could ignite.
6. Never touch the appliance rocks or immediate surrounding surfaces with your bare hands while in operation.
7. Use only the type of fuel specified on the appliance rating plated located …… . Verify the fuel gas is correct and
the proper pressure is available. Never use wood, charcoal or any other solid fuel or liquid fuel in this fire pit.
8. Never replace the River Rocks with any other material such as granite, marble or any other dense stone as these
may crack or burst under flame and heat.
9. Do not use the appliance unless a leak check has been performed on all gas connections. (See INDEX: “Leak
Testing” for further details.)
10. Never operate the appliance while under the influence of alcohol or drugs.
11. Do not lean on table shelves and never place a load weighing more than 25 pounds on the shelf.
12. If the burner does not light or goes out during operation, turn off all gas control knobs and wait five (5) minutes
before attempting to re-light.

6
|
Care & use/ FIre PIT InsTallaTIon
STEP1: Unpack the table top and the base. Remove all packing materials, tie down straps and any other packaging.
STEP2: Place the fire pit base on a flat firm surface. The Fire Pit must be on solid ground or pavers so it will not sink over time.
STEP3: With the help of an assistant, place the table top on top of the base, making sure the table top is centered properly.
SEDOnA FIRE PIT ASSEMblY InSTRUCTIOnS
Burner and IgnItIon Controls ...continued
Install burner and burner pan in the table top opening. This can be accomplished In
one or two ways. Before dropping the burner pan into the enclosure, connect the
quick disconnect device to the burner, and the ignition wire from the igniter module
to the electrode. As an alternative you can install the burner pan into the table top,
and working from the base access door, connect the quick disconnect hose gas
supply and the ignition electrode wire. Do not add the burner media until you check
the spark ignition in the next step.
Quick Disconnect and Igniter Connection
Ignition Wire Connector
Step 1

Care & use/ FIre PIT InsTallaTIon
|
7
Press the ignition button and verify a spark is present at the spark electrode at the burner
assembly. If you do not see or hear a spark, please refer to the trouble shooting section of this
manual. If the ignition spark is present, proceed to the nest step, addition of burner media
Media installation
bURnER AnD IGnITIOn COnTROlS ...continued
Step 2
STEP1: Install the burner pan as described above
STEP2: Add lava rocks and spread evenly to cover the entire burner assembly, and an additional ½ - 1” deep.
STEP3: Add river rocks in a single layer, to cover the lava rock
Your Fire Pit needs burner media in order to create realistic, natural looking flame effects. Follow the instructions
outlined below to create safe and pleasing fire effects.
InstallIng the lP CylInder
The LP Gas cylinder, or tank, must comply with U.S Department of Transportation (D.O.T.) Specifications for LP Gas
Cylinders or the Standard for Cylinders, Spheres and Tubes for Transportation of Dangerous Goods an Commission
CAN/CSA-B339. The cylinder must be protected with a listed overfill preventtion device and provided with a connec-
tion device compatible with the appliance connector. Failure to meet this requirement may create a hazardous condi-
tion resulting in personal injury, death or damage to personal property, and may pose a risk of fire or explosion.
WarnIng

8
|
Care & use/ FIre PIT InsTallaTIon
InSTAllInG THE lP CYlInDER...continued
The LP tank is brought into the fire pit enclosure and
secured to the base by at the bottom ring of the cylinder.
The tank retention bolts are screwed into the bottom collar
of the tank to hold it in place.
Connect the LP hose and regulator assemble to the LP Cyl-
inder. Do not use tools when making this connection, the
knob must be hand tightened only. Make sure the burner
control valve is in the OFF position before opening the
cylinder valve.
Step 1
Step 2
Safety PrecautionS
Inspect the LP gas hose and connections before each use. If there is any damage from normal operating conditions,
weather, rodents or other adverse conditions so not use the hose. Turn OFF the LP tank valve and replace the hose and
regulator assembly. Replacement parts are available from the manufacturer.
Before using your fire pit you must test all gas connection to ensure leak free connections. Gas connections can be
tested with a solution of 1 part dish soap to 3 parts water. Turn on gas at the cylinder gas valve. Brush or spray the solu-
tion on all connections and look for the formation of bubbles. NEVER USE AN OPEN FLAME TO CHECK FOR LEAKS.
If you find any leaks, tighten the connections and retest. If you cannot stop the leak, turn of the gas at the cylinder gas
valve and call a qualified repair technician, or contact Lynx Grills to arrange a service call.
Inspect the burners assembly regularly for damage. Clean any blocked ports. Be aware that insects like to make webs
inside burner assemblies and hoses.

Care & use/ FIre PIT InsTallaTIon
|
9
lIGHTInG InSTRUCTIOnS
STEP1: Make sure the gas valve on the LP Tank is in the open position
STEP2: Start the spark igniter by pressing the ignition button. The starter will stay on until the button is pressed again.
STEP3: Using the Gas Valve Key, open the gas control valve through
the opening in the control panel. Turn the key to the left (counter-
clockwise) until it is full open. The burner should light immediately. If
the burner does not light in 4 seconds, turn the gas valve OFF, push
the ignition button to turn off the igniter, Wait 5-minutes for any gas
to dissipate, then try again steps 2 and 3 again. If the burner fails to
light contact Sedona Customer Care.
STEP4: If the burner has lit, push in the ignition button to shut of the
ignition module.
STEP5: Use the gas valve key to adjust the flame to a comfortable
level. DO NOT LEAVE A LIT FIRE-PIT UNATTENDED!
Shutting Down the Fire Pit
STEP1: Using the Gas Valve Key Turn off the gas to the burner by turning the Key to the right (clockwise) until the valve
fully closed
STEP2: Shut OFF the LP tank gas valve
Converting to a reFreSHMent BoWL
You new Sedona Fire Pit is easily converted into a icy beverage holder for those warm days when a fire pit Is not needed.
STEP1: Shut off gas from the LP cylinder
STEP2: Disconnect the ignition wire at the Molex Connector
STEP3: Lift out the burner pan using the convenient handle
STEP4: Insert the Ice pan into the cutout opening
STEP5: Fill with ice and your favorite beverages and enjoy.

10
|
Care & use/ FIre PIT InsTallaTIon
REFRESHMENT BOWL CONVERSION
44.00
TOP VIEW
TOP VIEW
FRONT VIEW
44.00
22.00
22.00
FIRE/REFRESHMENT
BOWL
44.00
44.00
24.00
28.00
44.00
TOP VIEW
TOP VIEW
FRONT VIEW
44.00
22.00
22.00
FIRE/REFRESHMENT
BOWL
44.00
44.00
24.00
28.00
44.00
TOP VIEW
TOP VIEW
FRONT VIEW
44.00
22.00
22.00
FIRE/REFRESHMENT
BOWL
44.00
44.00
24.00
28.00
FEATURES
PERFORMANCE
TECHNICAL
ACCESSORIES
PRODUCT DIMENSIONS
Model No. LFPC-S & LFPC-G. LFPS-S & LFPS-G
44" round top on round pedestal with unique nautilus burner. 44" square top on round pedestal with unique
nautilus burner.
Tumbled volcanic variegated stone.
Access door provides easy accessibility to LP Tank and battery compartment.
65,000 BTU max.
Fuel Type: LP Standard / NG Kit available.
Electric pushbutton ignition with manual valve for flame setting.
NG Conversion Kit available.
Caster Kit available.
Vinyl Cover (included).
Overall diameter 44"
Overall height approx. 24"
1. Remove gravel pan
from top
2. Place refreshment bowl
into top
3. Refreshment bowl

Lynx Grills
7300 Flores Street
Downey, CA 90242
Service: (888) Buy-Lynx (888-289-5969)
Fax: (562) 299-6789
www.lynxgrills.com
SEDONA
BY
TM
/