HP Samsung ProXpress SL-M3375 Laser Multifunction Printer series User guide
- Type
- User guide

Admin Getting Around Guide
April 2015
SecuThru™
Fleet Admin Pro

Contents_2
Contents
COPYRIGHT
HOW TO USE THIS GUIDE
Intended Audience .......................................................................................................5
Terminology..................................................................................................................5
GETTING STARTED
About System ...............................................................................................................6
Installation Requirements ...........................................................................................6
Installing System .........................................................................................................7
Opening System Browser ...........................................................................................9
Logging in to System ..................................................................................................9
System Interface Overview .........................................................................................9
DASHBOARD
Domain ........................................................................................................................13
Server ..........................................................................................................................13
DEVICE
Device Management ..................................................................................................14
Multi-Domain Device Management ..........................................................................16
Supply .........................................................................................................................16
Prole Monitor ...........................................................................................................17
Management History .................................................................................................17
USER
User Management ......................................................................................................22
Multi-Domain User Management ..............................................................................23
REPORT
Report Categories ......................................................................................................24
Instant Report ............................................................................................................25
Report Generation ....................................................................................................26
Multi-Domain Instant Report .....................................................................................27
Multi-Domain Report Generation .............................................................................27
RULE
Rule Toolbar ...............................................................................................................28
PLUG-IN

Contents_3
FILE
Plug-in .........................................................................................................................30
Device .........................................................................................................................30
Local Device Agent ....................................................................................................31
Site Manager Installer ................................................................................................31
Device Cloning ...........................................................................................................32
Firmware .....................................................................................................................32
Font/Form/Macro .......................................................................................................32
Driver ..........................................................................................................................33
SETTINGS
OPEN SOURCE INFORMATION
Apache License 1.1 ...................................................................................................37
Apache License 2.0 ...................................................................................................37
BSD .............................................................................................................................39
LGPL2.1 ......................................................................................................................40
LGPL3.0 ......................................................................................................................45
EPL ..............................................................................................................................47
MIT ...............................................................................................................................47
Common Development and Distribution License (CDDL-1.0) ...............................47
Common Development and Distribution License (CDDL) 1.1 ...............................51
JSON License .............................................................................................................54
ICU License - ICU 1.8.1 and Later .............................................................................54
Microsoft JDBC Driver 3.0 for SQL Server License ................................................55
Sun JavaBeans Activation Framework 1.1.1 License for Nonredistributables ....56
Adobe Flex Software Development Kit v4.0 Software License .............................59
ARPHIC PUBLIC LICENSE ........................................................................................63

Copyright_4
Copyright
© 2015 Samsung Electronics Co., Ltd. All rights reserved.
This admin guide is provided for information purposes only. All information included herein is subject to change without
any notice.
Samsung Electronics is not responsible for any direct or indirect damages, arising from or related to use of this admin
guide.
• Fleet Admin Pro is a trademark of Samsung Electronics Co., Ltd.
• Samsung and Samsung logo are trademarks of Samsung Electronics Co., Ltd.
• Microsoft, Windows, Internet Explorer and Windows Vista are either registered trademarks or trademarks of
Microsoft Corporation in the United States and other countries.
• All other brand, product and company names herein may be the trademarks of their respective owners.
REV. 1.0

How to Use This Guide_5
How to Use This Guide
The Guide provides an overview of the key System features with references to the context Help for detailed info. The
document goal is to give you a qiuck tour on what you can do in the System. The tour starts with installation guidelines
and user interface overview, then continues with the System components description, chapter by chapter. The chapters
are arranged according to the page view, moving from left to right. The installation guidelines are provided in detail to help
you easily start working with the System.
Intended Audience
TheGuideisintendedforanetworkadministratormanagingaprinterdeviceeetandunderstanding:
• network printing environment,
• network protocols (including SNMP and HTTP), subnets, security features, addresses,
• Windows operating systems on server and client computers,
• LDAP.
The Guide can also be useful for the MPS business representatives who provide printing services to third parties.
Terminology
ThefollowingtermsareusedthroughoutthisGuide:
Acronyms
ThefollowingacronymsareusedthroughoutthisGuide:
ACRONYMS MEANING
IP Internet Protocol
HTTP Hypertext Transfer Protocol
HTTPS Secure Hypertext Transfer Protocol
LDAP Lightweight Directory Access Protocol
mDNS Multicast Domain Name System
MIB Management Information Base
NTLM NT LAN Manager
OS Operating System
SLP Service Location Protocol
SMTP Simple Mail Transfer Protocol
SNMP Simple Network Management Protocol
SWS SyncThru Web Service, i.e. Device Embedded Web Server
TCP Transmission Control Protocol
UDP User Datagram Protocol
WMI Windows Management Instrumentation
XOA eXtensible Open Architecture

Getting Started_6
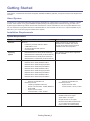
Getting Started
This chapter contains basic info about the System, detailed installation guideline, and quick overview of the System user
interface.
About System
TheSystemisaweb-basedmanagingandmonitoringapplication.Itisdesignedforyoutodiscover,congure,manage,
monitor, create reports on any type of SNMP-compliant printing and imaging devices without leaving your desk. The
System supports Samsung network devices and some devices of other manufacturers, but on the public MIB level only.
You can access the key System features from the Main Menu in the UI header. The Main Menu options available to you
depend on your role and the plug-ins installed in the System.
Installation Requirements
System Requirements
ITEMS SERVER SYSTEM REQUIREMENTS CLIENT SYSTEM REQUIREMENTS
Hardware Minimum:
• Pentium 4 processor, 2GHz or faster
• 2 GB RAM or more
• at least 50 GB free disk space is
recommended.
Client computers do not require any
software to be installed. Only a web
browser the System supports must be
installed on the client computers.
Operating
system
• MS Windows Server 2012 (32 bit and 64 bit)
• MS Windows 8 Professional (32 bit and 64 bit)
• MS Windows Server 2008 (32 bit and 64 bit)
• MS Windows 7 Professional (32 bit and 64 bit)
Any operating system with a supported
browser installed.
Database • PostgreSQL 9
• MS SQL Server 2005 Standard Edition
• MS SQL Server 2005 Workgroup Edition
• MS SQL Server 2005 Enterprise Edition
• MS SQL Server 2008 Standard Edition
• MS SQL Server 2008 Workgroup Edition
• MS SQL Server 2008 Enterprise Edition
• MS SQL Server 2012 Standard Edition
• MS SQL Server 2012 Enterprise Edition
N/A
Network • Networkinterface:
- Ethernet 10/100 Base-TX
• Networkprotocols:
- TCP/IP (compatible with IPv6)
- Devicecommunication:SNMP,SNMPv3,
HTTP, WMI
- System server & client
communication:HTTP,HTTPS
• Networkinterface:
- Ethernet 10/100 Base-TX
• Networkprotocols:
- System server & client
communication:HTTP,HTTPS
Browsers N/A • Internet Explorer 9.X or higher
• Mozilla Firefox 24 or higher
• Apple Safari 7 or higher
• Google Chrome 31 or higher
• Browser needs Adobe Flash Player
10.1 or higher (the highest Flash
Player version is recommended)

Getting Started_7
ITEMS SERVER SYSTEM REQUIREMENTS CLIENT SYSTEM REQUIREMENTS
Resolution N/A under browser • 1280 x 1024 or higher resolution is
highly recommended.
• 1400 x 900 or higher resolution
(wide screen) is highly
recommended.
Ports
TheSystemlistensonseveralportsandopenssomeportsforspecicfeatures.Seethetablebelowforportdescription:
PORT TYPE DESCRIPTION
162 UDP SNMP communication port
8080 TCP HTTPdefaultport(notrequiredincaseofHTTPSconguration,canbe
modiedduringtheinstallation)
8081 TCP HTTPSdefaultport(notrequiredincaseofHTTPconguration,canbe
modiedduringtheinstallation)
427 UDP SLP multicast discovery (can be disabled in Settings)
5353 UDP mDNS passive discovery (can be disabled in Settings)
5432 TCP Default remote PostgreSQL port (in case Remote PostgreSQL is selected)
1433 TCP Default MS SQL port (in case MS SQL Server is selected)
Installing System
To install System:
1. GotothelocalornetworklocationwhereyoudownloadedtheSystemsetuple.
2. RuntheEXEleunderanaccounthavingAdministratorpermission.
3. In the displayed User Account Control dialog click Yestoconrminstallation.
This step might be missing. It depends on your OS and its security settings.
4. In the displayed Installer Language dialog select the needed language and click OK.
5. Read the setup guide and click Next to continue installation.
6. Read the license information and click I Agree to continue installation.
7. Choose the destination path for installation.
8. Click Next.
9. SelecttheDatabaseservertypeyouwishtouse:
• Embedded PostgreSQL
orifyouprefertouseyourowndatabase:
• Remote PostgreSQL
• Microsoft SQL Server.
10. If Microsoft SQL Server/ Remote PostgreSQL is selected on step 9, provide your MS SQL Server/PostgreSQL
settings.
11. Click Next.
12. Providenetworkconnectionsettings:
a. Select the Add an exception to Windows Firewall checkbox.
b. Modify the port number, if needed (8080 is used by default).
c. (Optional) To enable local user authentication select the Enable authentication checkbox and enter User ID
and password.
13. Click Next.
14. Selectthecheckboxesofthecomponentsyouwishtoinstall:
• Client Software Management.ItenableslestorageintheSystemforyoutouploadandmanagedevice
applicationsetuples,includingdriversandotherles.Theplug-inalsosupportspullinstallationforyouto
downloadasetuple(e.g.Local Device Agent), install it, and track the results via the System.
• Device Management Extention. It enables extended device mangement features for Samsung devices,
includingdeviceproperiesfromSamsungprivateMIB,cloning,reporting,deviceprolesandtagmanagement
as well as trouble management.
• Device Software Management.Itenablesdevicesoftwareassociatedfeatures,includingrmwareupdateand
font/form/macro management.

Getting Started_8
• XOA Application Management. It enables capability to install XOA applications to devices and manage their
licenses.
• Managed Domain. It enables you to create and manage domains including their own devices and users. This
can be useful, if you need to manage and get statistics on devices and users of different companies under your
support or subsidiaries in your company that shouldn’t share the data.
• PC Site Manager. It allows to install additional Site Managers on PC(s). The plug-in can be used only together
with the Managed Domain plug-in.
• Device Site Manager. It allows to install Site Managers on device(s). The plug-in can be used only together
with the Managed Domain plug-in.
• Accounting. It enables basic accounting functionality, including scans/copies/faxes quotas for users and
capability to track the related usage statistics.
You can install/uninstall a plug-in after the System installation via the Plug-in menu.
15. Click Next.
16. Review the settings summary and click Next. If something is wrong, click Back one or several times to navigate
back to the needed installation step and make corrections.
17. Click Install.
18. As the installation is successfully completed, click Next.
19. Select the Start Fleet Admin Pro application checkbox and click Close.
20. As the application is launched and ready, click Close.
Microsoft SQL Server Settings
ToprovideMicrosoftSQLServersettings:
1. In the Database servereldenteryourMSSQLServeraddress.
2. (If needed) Change the port number of your MS SQL Server. Microsoft SQL Server uses port 1433 as a default.
3. In the Database nameeldenterthenameofthedatabaseyouwishtouse.
4. In the User IDeldenteravalidusernametoaccessyourMSSQLServer.Theusermusthavepermission to con-
nect to database engine and db_owner role for the needed database.
If you wish to use domain authentication, enter a domain user account name and specify Domain authentication
settings as follows:
a. Click Advanced settings.
b. Select Domain authentication option.
c. In the Domain name ledenterthedomainname.
d. Click OK.
5. In the Passwordeldenterthecorrespondingpassword.
6. (If you want to create a new database) Select the Create database checkbox.
7. Inthiscasemakesuretheuserspeciedonstep4istheMSSQLServersysadmin. Otherwise, the System
installation will be aborted.
8. Click Check to check the data base connection.
9. Ifconnectionissuccessful,inthedisplayedconrmationdialogclickOK. If failed, check the settings and try again.
10. (Optional)Congureencryptionofdatabasesettingsle/deviceconnectionsettingsandthenameoftheMSSQL
serverinstanceyouwishtouse(incaseyouhaveseveraldatabaseinstances):
a. Click Advanced settings.
b. Select Database authentication option.
c. Select Encrypt database settingslecheckbox.
d. In the Local user accounteldenteralocalWindowsuseraccountnametobeusedforencryptionofthe
databasesettingsle(storedintheSysteminstallationfolder).
e. In the Passwordeldenterthecorrespondingpassword.
f. Select the Encrypt device connection settings checkbox to encrypt the device connection settings stored in
the database.
g. (If you have several database instances) In the MS SQL server instance nameeldentertheneededdata-
base instance name.
h. Click OK.
Remote PostgreSQL Settings
ToprovideRemotePostgreSQLsettings:
1. In the Database server eldenteryourremotePostgreSQLaddress.
2. (If needed) Change the port number of your PostgreSQL. PostgreSQL uses port 5432 as a default.
3. In the Database nameeldentertheremoteexistingPostgreSQLdatabasename.
4. In the User IDeldenteravaliduseraccountnametoaccesstheremotePostgreSQLdatabase.Thisaccountmust
have administrator permissions.

Getting Started_9
5. In the Passwordeldenterthecorrespondingpassword.
6. (If you want to create a new database) Select the Create database checkbox.
7. Click Check to check the database connection.
8. Ifconnectionissuccessful,inthedisplayedconrmationdialogclickOK. If failed, check the settings and try again.
9. (Optional)Congureencryptionofdatabasesettingsle/deviceconnectionsettings:
a. Click Advanced settings.
b. Select Encrypt database settings le checkbox.
c. In the Local user accounteldenteralocalWindowsuseraccountnametobeusedforencryptionofthe
databasesettingsle(storedintheSysteminstallationfolder).
d. In the Passwordeldenterthecorrespondingpassword.
e. Select the Encrypt device connection settings checkbox to encrypt the device connection settings stored in
the database.
f. Click OK.
Opening System Browser
ToaccesstheSysteminawebbrowseraddressbarenter:
• http://server_name.domain:port_number
“server_name.domain” is the hostname of the machine where the System is installed.
“port_number” is the web server port number you entered during installation on step 12.
Or
• http://ip_address:port_number
“ip_address” is the IP address of the machine where the System is installed.
“port_number” is the web server port number you entered during installation.
Another way to open the System is to select Samsung Network Printer Utilities>Fleet Admin Pro>Fleet Admin
Pro from the Start menu.
If you have migrated from one System version to another or from SyncThru Web Admin Server 6, clear your browser
cache before you launch the System. Otherwise, the System may work incorrectly.
Logging in to System
Ifauthenticationisenabled,logintotheSystemasfollows:
1. Open the System as described in the previous section.
2. On the displayed page in the Login IDeldenteryouraccountnameregisteredintheSystem.
If Local and LDAP authentication is enabled in the System and you are an LDAP user, enter your login in format
<account name>@<LDAP server name> (e.g. j.smith@sng).
If you are a domain user of the multi-instance System, enter your login in format <domain name>\<account name>
(e.g.UKOfce\j.smith).
See Instance Management in online help for details on System instances.
3. (Optional) Select Save login ID checkbox to avoid entering your login every time you log in.
4. Click LOGIN.
System Interface Overview
The System interface layout depends on the Main Menu item selected in the header and your role in the System. The
tablebelowdescribestheSysteminterfaceitems:
NO. ITEM DESCRIPTION
1 ID User ID displayed along with Logout, if user authentication is enabled and a user is logged in.
2 Logout A link to exit the System.
3 About Information about the System (including its version number and other details).
5 Help AlinktoopentheSystemHelpwhereyoucanndinfoonhowtoperformtheoperationyou
need.
7 Site Map A link to view the structure of the System menus.
8 Language
Selector
A drop-down list for you to select the System display language.

Getting Started_10
NO. ITEM DESCRIPTION
9 Main Menu The header including the key menu options for you to access the System features. The options
setdependsonyourpermissionsandtheplug-insinstalledintheSystem.Itcaninclude:
• Dashboard. It allows to access the dashboard. See “Dashboard” on page 13.
• Device. It allows to access the Device Management features. See “Device” on page 14.
• User. It allows to access the User Management features. See “User” on page 22.
• Report. It allows to access reporting capabilities. See “Report” on page 24.
• Rule. It allows to access rule-based task automation features. See “Rule” on page 28.
• Domain. It allows to access Domain Management features. See “Domain” on page 46.
• Plug-in. It allows to access Plug-in Management features. See “Plug-in” on page 29.
• File. It allows to access File Storage features. See “File” on page 30.
• Settings.ItallowstoaccesstheSystemsettingspageforconguringtheserveras
needed. See “Settings” on page 34.
10 Sub-menu It appears as you hover the cursor over a Main Menu option. The sub-menus set depends on
the Main Menu option selected.
11 Breadcrumbs It is displayed under the Main Menu and represents a navigation path to the currently displayed
page.
12 Toolbar It is displayed at the top of the right panel of the System pages and includes a set of controls.
The set depends on the currently selected sub-menu of the Main Menu and provides access to
the corresponding features. For example, under User > User Management it provides access
to user Role Assignment and User Import features.
13 All Tasks The button is displayed at the bottom right corner of the System pages. It opens a list of
currentlyactivetasks(e.g.deviceconguration).Youcanstop,pause,andresumethem.

Getting Started_11
Icon Overview
The table below provides the System icons description.
Common
ICON NAME DESCRIPTION
Refresh Reloads the data in the information panel.
Refresh Selected Item Refreshes the information only for the selected items by retrieving
information directly from the devices.
Help Opens the System Help.
Add Adds a new item (e.g. a device, user).
Delete Deletes selected items.
Modify Congurestheselecteditemsettings(e.g.userdetails).
Add Adds a new item (e.g. a user group, device group). It is usually
displayed on the left panel of the System pages.
Modify Congurestheselecteditemsettings(e.g.ausergroup,devicegroup).
It is usually displayed on the left panel of the System pages.
Delete Removes the selected item (e.g. a user group, device group). It is
usually displayed on the left panel of the System pages.
Import Importsa.csvleincludingtheneededdata(e.g.userlist).
Export Exportstheselectediteminfotoa.csvle(e.g.userlist,devicelist).
Printable format Opens a new browser window/tab with the info (e.g. a report) in a
printer-friendly format.
Email Sendsanemailwiththedatatothespeciedrecipient(e.g.areport).
Statistics Opens the statistical data in chart format.
History Summary Expands task information in the history pages.
Sort by name Sorts list by name (e.g. task list in the device discovery history).
Sort be date Sorts list by date (e.g. task list in the device discovery history).
Pause Pausesarunnungtask(e.g.devicediscovery,deviceconguration).
Start Initiatesapausedtask(e.g.devicediscovery,deviceconguration).
Stop Stopsarunnungtask(e.g.devicediscovery,deviceconguration).
Sort Custom Appears as you hover the cursor over a column (e.g. in the Device
List) and allows you to sort the list in ascending or descending order, or
open a window for selecting custom columns to display.
Close Closes the window or the widget on Dashboard.

Getting Started_12
Dashboard
ICON NAME DESCRIPTION
Minimize/Maximize Toggles between a full-screen widget and a minimized widget on
Dashboard.
Edit Opens the window to make changes to the widget properties.
Device
ICON NAME DESCRIPTION
Normal Device is in a normal operational state.
Unknown The status of the device is unknown.
Warning Device is in a state where an error might occur in the future. For
example, it might be in toner low status, which may lead to toner empty
status.
Error Device has an error.
Disconnected Device is not connected to the network.
New Device is newly discovered.
System Search
TheSystemprovidesasearcheldforyoutoquicklyspottheneededitem(e.g.adevice,user,le).Theeldis
displayed above an item list (e.g. device list). Enter your request (e.g. device host name) and press Enter or click
themagniericon.Thesearcheldishighlightedinyellow.Aslongasitisyellow,theitemlistdisplaysonlythe
itemsmatchingthesearchrequest.Toviewallitemsagain,clearthesearchstringandclickthemagniericon.Do
not forget to press Enter/click the magnier icon every time you change a search request. Otherwise, the search
results are not updated.

Dashboard_13
Dashboard
The Dashboard menu is available, if you have Dashboard permission(s).Itallowsyoutocongureadashboardwith
interactive widgets showing device, user, and System related statistics. For example, you can add a widget showing
current status of devices. This will help you to quickly monitor your printing environment. The widget set depends on the
plug-ins installed in the System.
TheDashboardmenuincludesthefollowingsubmenus:
• Domain,
• Server.
Domain
The DomainsubmenuopenstheDomaindashboardwhereyoucan:
• add widgets with device and user statistics. To do this click a widget place-holder in the top left corner (to add the
veryrstwidget)ortheAdd Dashboard Widget icon at the bottom left corner. They open the Widget Wizard where
you select a widget and specify its parameters. Parameters vary depending on the selected widget. Generally, you
will select a device/user group whose statistics you wish to tack and how to display the statistics (as a pie or bar
chart).
• congure widgets layout. From the View mode drop-down select how many widgets to display on the Dashboard.
You can also drag and drop added widgets to the needed location on the Dashboard.
• set refresh interval for widgets. To do this click the Setting button at the bottom right corner.
If several domains are available, every managed domain will have its own dashboard.
See Dashboard in online help.
Viewing and Managing Widgets
Awidgetheaderincludesthefollowingcontrolsforyoutoviewandmanageit(listedfromlefttoright):
• Refresh icon. Click it to refresh a widget data.
• Edit icon. It opens the Widget Wizard where you can modify the widget parameters (e.g. select another device group
or change the widget statistics period).
• Max icon. It opens a widget in a maximized view showing more detailed info. For example, if you expand the Device
Status widget, you can view not only a device chart by status, but also the corresponding device list as well as a
link (on the left ) to the Device Management page where the full Device List is shown. A widget expanded view can
include a link to the corresponding instant report.
To minimize a widget click the Max icon again.
• Close icon. It removes a widget from the Dashboard.
For a chart you can hover the cursor over a bar/sector to view details on what it shows. For example, as you hover
the cursor over a sector of the Device Status chart, the tooltip shows the device status, percent and number of
devices in this status.
Server
The Server submenu opens the Sever dashboard where you can add the Server Health Widget to monitor the current
statusoftheSystemserverintermsof:
• CPU usage level,
• RAM availability,
• HDD usage level.
Use the header icons (described in the previous section) to view and manage the widget. See Dashboard>Server Health
Widget in online help.

Device_14
Device
The Devicemenusupportsallthedevice-relatedoperationsincludingdevicediscovery,conguration,rmwareupdate
and others. You can access the menu and its sub-menus, if you have Device permissions. The Device menu includes the
followingsubmenus:
• Device Management. See “Device Management” on page 14.
• Multi-Domain Device Management. The submenu is available, if the Managed Domain plugin is enabled in the
System. See “Multi-Domain Device Management” on page 16.
• Management History. See “Management History” on page 17.
• Supply. See “Supply” on page 16.
• Prole Monitor. See“ProleMonitor”onpage17.
Device Management
Device Management submenu opens the Device Managementpageincluding:
• ontheleftpanel:
• device groups,
• ontherightpanel:
• device list,
• device management toolbar above the device list.
Device Groups
The System allows you to add devices to groups. It makes device management easier. By default the following groups
areprovided:
• Device Groups including:
• All. The group contains all the devices added to the System.
• Ungrouped. The group includes the devices not assigned to any group.
• Grouped. The group is a root group for you to create your own sub-groups under and add devices to
them. You can also modify, delete groups as well as drag and drop devices from one group to another.
See Device Management>Group Management>Device Group in online help for details.
• Dynamic Groups including groups and sub-groups to which devices are added automatically according to their
specicproperties(e.g.model,color,on/offstatus).UnderCustom Group you can create your own dynamic
subgroups. The devices will be automatically added to them according to the conditions you specify. See Device
Management>Group Management>Dynamic Group in online help for details.
Device List
The Device List on the right panel shows the discovered devices belonging to the group selected on the left panel. The
Device List is a table where each column represents a device parameter and its value (e.g. host name, model name, IP
address). See Device Management>Device List in online help for details.
Youcanmanagethetabletoviewtheneededinfo:
• customize columns (e.g. sort, add, remove) via the column wizard. To open it hover the cursor over a column, click
the triangle icon, and select Custom.
• lter by device status/tag using the corresponding drop-down menus above the Device List,
• search(e.g.byhostname,modelname)usingsearcheldabovetheDeviceList.
See Device Management>Device List>Column Management in online help for details.
You can also double-click a device to view its details(e.g.commonparametersliketonerorpaperstatus,rmware,
congurationdetails).Theyaredisplayedontabs.Asetoftabsdependsontheplug-insenabledintheSystem.See
Device Management>Device List>Device Details in online help.
Device Management Toolbar
A set of device management toolbar items above the Device List depends on the your permissions and the plug-ins
enabledintheSystem.Thesetcaninclude:
• Device Discovery button. It opens the Device Discovery wizard where you can select discovery methods, specify
device connection settings, and initiate the discovery immediately or schedule it for a certain date. The wizard also

Device_15
allowsyoutosavethespecieddiscoverysettingsasatemplatetoquicklyusethemlater.SeeDeviceManagement
> Device Discovery > Device Discovery Settings in online help. The discovered devices will be displayed in the
Device List on the right panel. You can also monitor discovery results in the Device Discovery History. See Device
Management>Device Discovery>Device Discovery History.
• Device Conguration button. It is active when a device(s) is selected. The button opens the Device Conguration
wizardwhereyoucanselectdeviceparameterstocongureanddenetheneededvaluesforthem.Conguration
itemsavailabledependonthedevicemodelandrmwareversion.Thespeciedcongurationsettingscanbe
savedasatemplateandeasilyloadedlater.Youcanalsoselectwhethertocongureselecteddevicesimmediately
ofschedulethatforacertaindate.SeeDeviceManagement>DeviceConguration>DeviceCongurationSettingsin
onlinehelp.YoucanalsomonitorcongurationresultsintheDeviceCongurationHistory.SeeDeviceManagement
>DeviceConguration>DeviceCongurationHistoryinonlinehelp.
Beforeconguration,ensurethedevicessupportSNMPprotocolandSNMPWriteCommunityorSNMPv3
settings are provided correctly in the System. See Settings>Device >Connection in online help.
• Device Proles button (available if Device Management Extension plug-in is installed). It opens the Device
Proleswizardwhereyoucancreateandassignaprole(s)todevices.Adeviceproleincludesasetofdevice
propertiesyouwishtomonitor.Foreachpropertyintheproleyoudeneaconditionitmustmeet.Forexample,
deviceinputtray1sizeisA4.Asyouassignaprole(s),youcannavigatetotheProleMonitor and view whether
thecurrentcongurationofthedevice(s)meetstheproleconditions.SeeDeviceManagement>DeviceProlesand
DeviceManagement>ProleMonitorinonlinehelp.
• Device Cloning button (available if Device Management Extension plug-in is installed). It opens the Device Clon-
ingwizardallowingtoclonecongurationfromonedevicetoothers.Inthewizardyoucanselectaconguration
leandapplyittotheselecteddevices.Thelecanbeadeviceaddressbookoracloningleincludingcertain
settings.Thelesareavailable,ifdownloadedfromdevicestotheSystemrepository.SeeDeviceManagement>De-
viceCloningandDeviceManagement>DeviceCloning>CloningCongurationFilesManagementinonlinehelp.
Note you can perform cloning between devices of the same model only. Before cloning, check SWS
credentialsarespeciedfortheneededdevices.
• Firmware Management button (available if Device Software Management plug-in is installed). It is active when
a device(s) is selected. The button opens the Firmware Management wizardallowingtoupdatermwareofthe
selecteddevices.Inthewizardyoucanselectarmwarelepereachdevicemodelandapplyittotheselected
devices.Thelesareavailable,ifuploadedtotheSystem repository. See Device Management> Firmware Manage-
ment>Firmware Management Toolbox and Device Management>Firmware Management>Firmware File in online
help. Use Firmware Management History to monitor update results. See Device Management>Firmware Manage-
ment>Firmware History in online help.
Beforeupdatingrmware,checkSWS credentialsarespeciedfortheneededdevices.
• Application Management button (available if XOA Application Management plug-in is installed). It is active when
a device(s) is selected. The button opens the Application Management wizard allowing to install, unistall, start or
stop applications (application lifecycle control) on devices. To install an application to device, ensure the application
PARleisuploadedtotheSystemrepository.SeeDeviceManagement>DeviceApplicationManagement>Lifecycle
Management Wizard and Device Management>Device Application Management>Device Application Repository.
Use Application Management History to monitor results of device application management. See Device
Management>Device Application Management>Task Management in online help.
Before managing device applications, check SWS credentials arespeciedfortheneededdevices.
• Font/Form/Macro Management button (available if Device Software Management plug-in is installed). It is active
when a device(s) is selected. The button opens the Font/Form/Macro Management wizard allowing to install font,
form,ormacrolestodevices.Inthewizardyoucanselectaleandinitiateinstallationimmediatelyorscheduleit
forcertaindate.Thelesareavailable,ifuploadedtotheSystemrepository.SeeDeviceManagement>Font/Form/
Macro>Font/Form/Macro Settings and Device Management>Font/Form/Macro> Set Font/Form/Macro in online
help. Use Font/Form/Macro Management History to monitor results of font/form/macro management. See Device
Management>Font/Form/Macro>Font/Form/Macro History in online help.
• Driver Management button (available if Client Software Management plug-in is installed). It is active when a device
is selected. The button opens the Driver Management wizard allowing to install a print driver (for a selected device)
on a remote network computer. In the wizard you can use Auto driver selection or Manual driver selection option
topicktheneededdriver.Intherstcasethedriverleisselectedautomatically(perdevicemodel).Inthesecond
caseyouselectitfromthedriverlelistdisplayedaccordingtothedevicemodelandthecomputerOS.Thelesare
available, if uploaded to the System repository. See Device Management>Driver Management>Driver Installation
and Device Management>Driver Management>Driver Files in online help. Use Driver Installation History to monitor
results of driver installation. See Device Management>Driver Management>Driver Installation History in online
help.
• License Management button (available if XOA Application Management plug-in is installed). It is active
when a device(s) is selected. The button opens the License Management wizard allowing to activate and
deactivate licenses of the applications installed on devices. See Device Management>Device Application
Management>License Management Wizard in online help.
Before managing licenses, check SWS credentialsarespeciedfortheneededdevices.

Device_16
• Assign Site Manager button (available if Managed Domain plug-in is installed). It is active when a device(s)
is selected. The button opens a dialog allowing to select a Site Manager for a device. Site Manager
ensures communication between the System and devices. See Site Management and Multi-Domain Device
Management>Assigning Site Manager to Device in online help.
• Add icon. It opens a dialog allowing to add one device to the Device List. To do this you need to enter the device
host name and connection settings. See section Adding New Devices in Device Management>Device List in online
help.
• Delete icon. It is active when a device(s) is selected. The button opens a dialog allowing to delete devices from the
System. You can select not only to delete, but also block the deleted devices. In this case they will not be added to
the System during next discoveries. See section Deleting Devices in Device Management>Device List in online help.
• Connection Settings button. It is active when a device(s) is selected. The button opens a dialog allowing to provide
SNMP device connection settings and credentials of the device Embedded Web Server (SWS). SNMP settings
are neededfordevicedatacollectionanddeviceconguration.SWSloginandpasswordarerequiredforrmware
update, device cloning, and application management. You can select Use Default option to apply the default settings
orspecifyindividualdevicesettings.ThedefaultsettingsaredenedviatheSettingspage.SeeSettings>Device>
Connection in online help.
• Assign Tags icon (available if Device Management Extension plug-in is installed). It is active when a device(s) is
selected.Thebuttonopensadialogallowingtoassigntagstodevices.TheyouwillbeabletoltertheDeviceList
by tags to quickly spot the needed devices. See Device Management>Tag Management>Assigning Tag in online
help.
• Show devices from subgroups checkbox. When disabled, the Device List shows the devices of the selected group
only. When enabled, the Device List shows the devices of the selected group and its subgroups.
• Statuses drop-downmenu.ItallowsyoutoltertheDeviceListbydevicestatusaswellascreateanduseyourown
customlter.
• Tags drop-downmenu(availableifDeviceManagementExtensionplug-inisinstalled).Itallowsyoutolterthe
Device List by device tags assigned with the help of icon Assign Tags.
• Searcheld.Itenablesyoutosearch devices by certain parameters (e.g. host name, model name, IP address).
Multi-Domain Device Management
When the Managed Domain plug-in is installed and enabled in the System, Multi-Domain Device Management
submenu is available to you, if you have Cross Managed Domain authorities and Managed Domain plug-in is enabled.
The submenu opens the Multi-Domain Device Managementpagewhereyoucan:
• view Device List by domain or in all domains at once,
• move devices from one group to another across domains,
• manage device groups within domains (add, remove, modify),
• assign Site Manager to a device.
You must have appropriate authorities to perform the listed operations. Perform them the same way as from the Device
Management page. The difference is rst select the domain where you wish to perform the operation. A domain is
an entity assigned to the System instance. It includes devices, users, and settings of different networks. See Site
Management in online help for details.
The Multi-Domain Device Management page looks and feels like the Device Management page. It differs in terms of
availablecontrolsand:
• includes Managed Domains section on the left panel for you to select multiple domains.
• displays device groups aggregated by domains. A set of groups depends on the selected domain(s). The Dynamic
Groups sectionincludesbydefault:
• Site Manager group showing Site Managers registered in the System. Select a Site Manager to view a list of
devices the Site Manager is assigned to.
• Custom Group showing domains selected in the Managed Domains section. Select a domain to view a
device list of the domain.
See Multi-Domain Device Management in online help for details.
Supply
The Supply submenu opens Threshold Template Assignment page where you can assign/unassign supply level
templates to/from devices. The submenu is available in case Device Management Extention plug-in is enabled. Devices
include different types of supplies including toner, drum, fuser, transfer, and others. The System allows you use supply
leveltemplatestocongureearlywarning,low,andemptylevelsforthem.AccordingtothesesettingstheSystemwill
detect Supply Level Alerts. And you will be able to track the device supply level in the Device List or via email messages.

Device_17
The Threshold Template Assignment pageconsistsof:
• ontheleftpanel:
• device groups. Select a group to view the corresponding device list. You can also add, modify, and
delete groups the same way as via the Device Management page. See Device Management>Group
Management>Device Group and Device Management>Group Management>Dynamic Group in online help.
• ontherightpanel:
• device list. It shows the devices of the selected group. Pick devices to assign/unassign supply level
templates to/from. If needed, manage the list columns (e.g. sort, add, remove) the same way as on the Device
Management page. See Device Management>Device List>Column Management.
• supply template toolbarwith:
• Assign Threshold Template button. It is active when a device(s) is selected. The button opens the
Assign Threshold Template wizard where you can select and apply the needed supply level template.
Templates are available, if they have already been created. If not, you can click the Add icon and create
the needed template right from the wizard. See Device Management>Individual Device Supply Level
Settings and Settings>Supply>Threshold Template>Creating Device Supply Level Template in online
help.
• Unassign icon. It is active when a device(s) is selected. Click this icon to unassign a template(s) from
device(s). See Unassigning Supply Level Template in Settings>Supply>Threshold Template>Creating
Device Supply Level Template.
• searcheld.Itenablesyoutond a template by name.
• Show devices from subgroups checkbox. When disabled, the Device List shows the devices of the
selected group only. When enabled, the Device List shows the devices of the selected group and its
subgroups.
Prole Monitor
If you have the Monitor Proles permission, the Prole Monitor submenu opens Prole Monitor page. The submenu is
available in case Device Management Extention plug-in is enabled. It helps you to monitor and manage prolesassigned
to devices via the Device Managementpage.Youcanviewwhethercurrentcongurationofdevicesmeetsthetheir
prolesettings.Ifitdoesnot,theproleisviolated,i.e.itsstatusisViolated.
The Prole Monitor pageincludes:
• ontheleftpanel:
• Proleslist.Itshowsalistofprolesassignedtodevices.Pereachproleyoucanview[totalnumberof
devices/numberofdeviceswiththeproleviolated].SelectaproletoviewthecorrespondingDeviceListon
therightpanel.TodeleteaproleusetheDeleteiconatthebottom.
• ontherightpanel:
• device list.Itshowsthedeviceswiththeselectedprole.IntheProle Status column check whether the
deviceproleisViolated or OK(i.e.currentdevicecongurationmeetstheprolesettings).IfViolated, the
violated setting column is highlighted in red. Hover the cursor over the column to view why it is violated. See
DeviceManagement>ProleMonitorinonlinehelp.
• prole monitor toolbarwith:
• Unassign Prolesbutton.Itisactivewhenadevice(s)isselected.Clickittounassigntheprolefrom
devices.SeeDeviceManagement>ProleMonitor>UnassigningDeviceProleinonlinehelp.
• prole statusdrop-downmenu.Itallowstolterthedevicelistbydeviceprolestatus(Violated or
OK).
• searcheld.Itenablesyoutondadevicebyhostname.
Management History
The Management Historysubmenuenablesyoutotrackhistoryofdevicemanagementtasks,including:
• Device Discovery History (see “Device Discovery History” on page 18),
• Application Management History,
• Firmware Management History,
• Font/Form/Macro Management History,
• Driver Installation History,
• Local Device Agent Installation History,
• DeviceCongurationHistory.

Device_18
Device Discovery History
The Device Discovery History submenu opens the Device Discovery History page. It allows you to monitor discovery
tasks and their results. You can also modify, delete, disable, and initiate discoveries manually.
The Device Discovery History pageconsistsof:
• theleftpanelwhere:
• Historysectionshowsalistofscheduleddiscoverytasks.Pereachtask[executiontime][recurringinterval,
e.g.once,weekly][numberofruns]aredisplayed.Ifataskhasalreadyrun,itismarkedbyaplusicon.Clickit
to view task run(s). Per each task run execution time is shown. Click a task run to view its results.
The section also provides sort by name/sort by date icon at the header for you to sort the task list accordingly.
To modify or delete selected task use the corresponding icons at the section bottom. Note only active tasks can
bemodied.
• Calendar section allows you to quickly spot the needed task. Pick a date. If it is marked by a blue triangle with
a number inside, it shows the number of tasks scheduled for this date. Click it and select a task.
• therightpanel.Itsviewdependsonwhatisselectedontheleftpanel,including:
• Discovery Setting Summary showing discovery task settings (discovery method, connection settings), if
a task name is selected. When the task is active (postponed or runs regularly, e.g. weekly), you can edit its
settings. Click the modify icon to do that.
• Discovery results showing a list of discovered devices with status per each device. See “Discovery Results
List” on page 18.
• History Summary section. It opens as you click the History Summary icon in the top right corner. When a task
name is selected, the section shows the task status, execution time, and recurring interval. It also provides
Disable and Run Now buttons for you to deactivate/initiate task immediately. Disable is enabled, if the task is
active.
When a task run is selected, the section shows the task run status, number of discovered (successfully added)
and failed (not added) devices. It also provides pause, start, and stop buttons for you to pause/initiate/stop task
run. You can use them, if the task run is in progress.
Discovery Results List
The Discovery results are displayed as a Device List table. Per each device the Status column shows discovery
status:
• Succeeded, if a device is successfully added to the System.
• Failed, if a device failed to be added.
Youcanlterthelistbystatus.Todothatusethestatusdrop-downmenuabovethelist.Tospotcertainresultuse
the standard searcheld.Ifneeded,customizethelisttoviewtherelevantinfo.Forexample,add,removecolumns
as for the Device List. See Device Management>Device List>Column Management in online help.
Use the Retry button to retry discovery for all failed or selected devices. The button is enabled, if discovery is
nished.
Application Management History
The Application Management History submenu opens the Application Management History page. The submenu
is available in case XOA Applications Management plug-in is enabled. It allows you to monitor device application
management tasks (installation, uninstallation,stop, start) and their results. You can also modify, delete, disable, and
initiate tasks manually.
The Application Management History pageconsistsof:
• theleftpanelwhere:
• Historysectionshowsalistofscheduledapplicationmanagementtasks.Pereachtask[executiontime]
[recurringinterval,e.g.once,weekly][numberofruns]aredisplayed.Ifataskhasalreadyrun,itismarkedby
a plus icon. Click it to view task run(s). Per each task run execution time is shown. Click a task run to view its
results.
The section also provides sort by name/sort by date icon at the header for you to sort the task list accordingly.
To modify or delete selected task use the corresponding icons at the section bottom. Note only active tasks can
bemodied.
• Calendar section allows you to quickly spot the needed task. Pick a date. If it is marked by a blue triangle with
a number inside, it shows the number of tasks scheduled for this date. Click it and select a task.
• therightpanel.Itsviewdependsonwhatisselectedontheleftpanel,including:
• application management task results showing a device list with application task details per each device. See
“Application Management Results List” on page 19.

Device_19
• History Summary section. It opens as you click the History Summary icon in the top right corner. When a task
name is selected, the section shows the task status, execution time, and recurring interval. It also provides
Disable and Run Now buttons for you to deactivate/initiate task immediately. Disable is enabled, if the task is
active.
When a task run is selected, the section shows the task run execution time, status, number of successful and
failed application actions (e.g. install, stop). It also provides pause, start, and stop buttons for you to pause/
initiate/stop task run. You can use them, if the task run is in progress.
Application Management Results List
Resultsofdeviceapplicationmanagementaredisplayedastable.Youcanltertheresultsbystatus(e.g.Failed,
Succeed). To do that use the status drop-down menu above the list. To spot certain result use the standard search
eld.Ifneeded,customizethelisttoviewtherelevantinfo.Forexample,add,removecolumnsasfortheDevice
List. See Device Management>Device List>Column Management in online help.
Use the Retrybuttontoretrytaskforallfailedorselecteddevices.Thebuttonisenabled,ifataskisnished.See
Device Management>Device Application Management>Task Management in online help.
Firmware Management History
The Firmware Management History submenu opens the Firmware Management History page. The submenu is
available in case Device Software Management plug-in is enabled. It allowsyoutomonitordevicermwareupdatetasks
and their results. You can also modify, delete, disable, and initiate tasks manually.
The Firmware Management History pageconsistsof:
• theleftpanelwhere:
• Historysectionshowsalistofscheduledrmwareupdatetasks.Pereachtask[executiontime][recurring
interval][numberofruns]aredisplayed.Ifataskhasalreadyrun,itismarkedbyaplusicon.Clickittoview
task run(s). Per each task run execution time is shown. Click a task run to view its results.
The section also provides sort by name/sort by date icon at the header for you to sort the task list accordingly.
To modify or delete selected task use the corresponding icons at the section bottom. Note only active tasks
canbemodied.
• Calendar section allows you to quickly spot the needed task. Pick a date. If it is marked by a blue triangle with
a number inside, it shows the number of tasks scheduled for this date. Click it and select a task.
• therightpanel.Itsviewdependsonwhatisselectedontheleftpanel,including:
• rmware update results. See “Firmware Management Results” on page 19.
• History Summary section. It opens as you click the History Summary icon in the top right corner. When a task
name is selected, the section shows the task status, execution time, and recurring interval. It also provides
Disable and Run Now buttons for you to deactivate/initiate task immediately. Disable is enabled, if the task is
active.
When a task run is selected, the section shows the task run execution time, status, number of successful and
faileddevicermwareupdates.Italsoprovidespause, start, and stop buttons for you to pause/initiate/stop task
run. You can use them, if the task run is in progress.
Firmware Management Results
Resultsofdevicermwaremanagementaredisplayedastable.Youcanltertheresultsbystatus(e.g.Failed,
Succeed). To do that use the status drop-down menu above the list. To spot certain result use the standard search
eld.Ifneeded,customizethelisttoviewtherelevantinfo.Forexample,add,removecolumnsasfortheDevice
List. See Device Management>Device List>Column Management in online help.
Use the Retrybuttontoretrytaskforallfailedorselecteddevices.Thebuttonisenabled,ifataskisnished.
See Device Management>Firmware Management>Firmware History in online help.
Font/Form/Macro Management History
The Font/Form/Macro Management History submenu opens the Font/Form/Macro Management History page. The
submenu is available in case Device Software Management plug-in is enabled. It allows you to monitor device font/form/
macro management tasks (e.g. font installation) and their results. You can also modify, delete, disable, and initiate tasks
manually.
The Font/Form/Macro Management History pageconsistsof:
• theleftpanelwhere:
• Historysectionshowsalistofscheduledfont/form/macrotasks.Pereachtask[executiontime][recurring
interval][numberofruns]aredisplayed.Ifataskhasalreadyrun,itismarkedbyaplusicon.Clickittoview

Device_20
task run(s). Per each task run execution time is shown. Click a task run to view its results.
The section also provides sort by name/sort by date icon at the header for you to sort the task list accordingly.
To modify or delete selected task use the corresponding icons at the section bottom. Note only active tasks
canbemodied.SeeModifyingTaskandDeletingTaskinDeviceManagement>Font/Form/Macro>Font/Form/
Macro History in online help.
• Calendar section allows you to quickly spot the needed task. Pick a date. If it is marked by a blue triangle with
a number inside, it shows the number of tasks scheduled for this date. Click it and select a task.
• therightpanel.Itsviewdependsonwhatisselectedontheleftpanel,including:font/form/macro task results, if a
task run is selected. See “Font/Form/Macro Task Results List” on page 20.
• History Summary section. It opens as you click the History Summary icon in the top right corner. When a task
name is selected, the section shows the task status, execution time, and recurring interval. It also provides
Disable and Run Now buttons for you to deactivate/initiate task immediately. Disable is enabled, if the task is
active.
When a task run is selected, the section shows the task run execution time, status, number of successful and
failed installations. It also provides pause, start, and stop buttons for you to pause/initiate/stop task run. You
can use them, if the task run is in progress.
Font/Form/Macro Task Results List
Font/form/macrotaskresultsaredisplayedasatable.Youcanltertheresultsbystatus(e.g.Failed,Succeed,
Progress ). To do that use the status drop-down menu above the list. To spot certain result use the standard search
eld.Ifneeded,customizethelisttoviewtherelevantinfo.Forexample,add,removecolumnsasfortheDevice
List. See Device Management>Device List>Column Management in online help.
Use the Retrybuttontoretrytaskforallfailedorselecteddevices.Thebuttonisenabled,ifataskisnished.See
Viewing and Retrying Task in Device Management>Font/Form/Macro>Font/Form/Macro History in online help.
Driver Installation History
The Driver Installation History submenu opens the Driver Installation History page. The submenu is available in case
Client Software Management plug-in is enabled. It allows you to monitor history of driver installations, track when and on
which computers they were installed.
The Driver Installation History pageconsistsof:
• theleftpanelwhere:
• Historysectionshowsalistofdriverinstallationtasks.Pereachtask[executiontime][recurringinterval]
[numberofruns]aredisplayed.Ataskismarkedbyaplusicon.Clickittoviewthetaskrun.Pereachtaskrun
execution time is shown. Click a task run to view its result.
The section also provides sort by name/sort by date icon at the header for you to sort the task list accordingly.
To delete a selected task use the delete icon at the section bottom. See Deleting Task in Device Management>
Driver Management>Driver Installation History in online help.
• Calendar section allows you to quickly spot the needed installation task. Pick a date. If it is marked by a blue
triangle with a number inside, it shows the number of tasks executed on this date. Click it and select a task.
• therightpanel.Itsviewdependsonwhatisselectedontheleftpanel,including:
• Driver installation result section, if a task run is selected. See Viewing Task Result in Device
Management>Driver Management>Driver Installation History in online help.
If needed, customize the results table to view the relevant info. For example, remove columns as for the Device List.
See Device Management>Device List>Column Management in online help.
Local Device Agent Installation History
The Local Device Agent Installation History submenu opens the Local Device Agent Installation History page. The
submenu is available in case Client Software Management plug-in is enabled. It allows you to monitor history of Local
Device Agent installations, track when and on which computers it was installed. Local Device Agent enables the System
to manage USB-connected devices.
The Local Device Agent Installation History pageconsistsof:
• theleftpanelwhere:
• HistorysectionshowsalistofLocalDeviceAgentinstallationtasks.Pereachtask[executiontime][recurring
interval][numberofruns]aredisplayed.Ataskismarkedbyaplusicon.Clickittoviewthetaskrun.Pereach
task run execution time is shown. Click a task run to view its results.
The section also provides sort by name/sort by date icon at the header for you to sort the task list accordingly.
To delete a selected task use the delete icon at the section bottom. See Deleting Task in Device Management>
Local Device Agent Management>Local Device Agent Installation History in online help.
• Calendar section allows you to quickly spot the needed installation task. Pick a date. If it is marked by a blue
Page is loading ...
Page is loading ...
Page is loading ...
Page is loading ...
Page is loading ...
Page is loading ...
Page is loading ...
Page is loading ...
Page is loading ...
Page is loading ...
Page is loading ...
Page is loading ...
Page is loading ...
Page is loading ...
Page is loading ...
Page is loading ...
Page is loading ...
Page is loading ...
Page is loading ...
Page is loading ...
Page is loading ...
Page is loading ...
Page is loading ...
Page is loading ...
Page is loading ...
Page is loading ...
Page is loading ...
Page is loading ...
Page is loading ...
Page is loading ...
Page is loading ...
Page is loading ...
Page is loading ...
Page is loading ...
Page is loading ...
Page is loading ...
Page is loading ...
Page is loading ...
Page is loading ...
Page is loading ...
Page is loading ...
Page is loading ...
Page is loading ...
Page is loading ...
Page is loading ...
-
 1
1
-
 2
2
-
 3
3
-
 4
4
-
 5
5
-
 6
6
-
 7
7
-
 8
8
-
 9
9
-
 10
10
-
 11
11
-
 12
12
-
 13
13
-
 14
14
-
 15
15
-
 16
16
-
 17
17
-
 18
18
-
 19
19
-
 20
20
-
 21
21
-
 22
22
-
 23
23
-
 24
24
-
 25
25
-
 26
26
-
 27
27
-
 28
28
-
 29
29
-
 30
30
-
 31
31
-
 32
32
-
 33
33
-
 34
34
-
 35
35
-
 36
36
-
 37
37
-
 38
38
-
 39
39
-
 40
40
-
 41
41
-
 42
42
-
 43
43
-
 44
44
-
 45
45
-
 46
46
-
 47
47
-
 48
48
-
 49
49
-
 50
50
-
 51
51
-
 52
52
-
 53
53
-
 54
54
-
 55
55
-
 56
56
-
 57
57
-
 58
58
-
 59
59
-
 60
60
-
 61
61
-
 62
62
-
 63
63
-
 64
64
-
 65
65


HP Samsung ProXpress SL-M3375 Laser Multifunction Printer series User guide
- Type
- User guide
Ask a question and I''ll find the answer in the document
Finding information in a document is now easier with AI
Related papers
Other documents
-
Canon PIXMA G1400 User manual
-
Samsung CLX-8640ND User manual
-
Samsung SL-C1454N User manual
-
Samsung SL-M2625 User manual
-
VMware vRealize vRealize Operations Manager 6.5 User guide
-
-
Dell Data Guardian User guide
-
-
-