Page is loading ...

Specifications
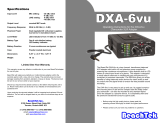
Input Level MIC setting: -40 dBu typical
LINE setting: +4 dBu typical
Gain 40 dB
Output Level +18 dBu max
Frequency Response 20Hz to 20 KHz (-1 dB)
THD + N Less than 0.03% @ 1 kHz, +4 dBu output
Signal-to-Noise Ratio 90 dB @ -10dBu input
Phantom Power Dual regulated 48 volt power supplies
Current to 14 mA (direct short)
Battery Type One 9 volt alkaline battery
LED battery indicator
Battery Duration 4 hours typical (no phantom)
Case Powder coated aluminum
Dimensions 6.25” L x 2.5” W x 1.25” H
Weight 16 oz
Limited One Year Warranty
This warranty covers any defects or malfunction in your new BeachTek adapter
for one year.
BeachTek will replace any defective or malfunctioning adapter, within the
warranty period, with a new unit at no charge. The warranty does not cover
damage resulting from accident, alteration, misuse or abuse. The device must
be sent to our service center at your expense.
Should you require service please contact us first before returning the unit to
us. Return instructions can be found on our website at www.beachtek.com/
questions.html
Upon receiving the returned adapter it will be inspected and replaced if found
defective. The unit will be shipped back to you within five business days at our
expense.
BeachTek Inc.
1855 Kirschner Road, Suite 230
Kelowna, BC, V1Y 4N7
tel (416) 690-9457
email [email protected]
web www.beachtek.com
DXA-6HD
Operating Instructions for the DXA-6HD High Definition Adapter
- For use on the Sony FX1
• Before using this high quality device, please read this
operating manual thoroughly to obtain the highest performance.
• Please contact us if you have any problems or questions.
The BeachTek DXA-6HD is a two channel, XLR adapter with
built-in low noise preamplifiers and 48 volt phantom power supplies.
This adapter is designed to easily attach two professional, balanced
microphones or wireless systems to the Sony FX1 camcorder.
The DXA-6HD is very easy to set up and use. Its rugged construc-
tion ensures years of use and its compact size fits neatly under the
camcorder - can also be mounted to any standard tripod. The DXA-
6HD provides exceptionally quite preamplifiers to provide clean,
powerful audio from virtually any microphone to ensure the best
possible sound recording.
©2008 BeachTek Inc.

Rear Panel Controls and Connections
4. MONO / STEREO Switch
The MONO setting mixes both channels together and sends the
audio to both the right and left channels which is ideal when only one
microphone is being used. Stereo keeps both channels separated
when two microphones are connected to the adapter for two discreet
audio channels. When in MONO mode, be sure to keep the trim
control on the unused channel fully clockwise to reduce the loading
effect on the working channel.
5. XLR Inputs
The two XLR inputs can accept balanced or unbalanced
connections. To convert the input to unbalanced, simply ground pin
1 to 3 on the XLR input cable. Be sure to turn off the phantom power
for any channel that has an unbalanced device connected to it.
6. Output Cable
The attached shielded cable terminates in a gold plated, stereo
mini plug connector. Plug this into the microphone jack on your
camcorder.
Bottom Dip Switches
7. MIC / LINE Switches
To connect a microphone to either channel of the DXA-6HD, set the
corresponding MIC/LINE switch to MIC. To connect a line level output
from a mixer to the DXA-6HD, set the MIC/LINE switch to LINE to
activate a 40 dB pad. This attenuates the signal to the proper level so
that it will not overdrive the input of your camcorder.
Please call us if you have any questions.
Front Panel Controls and Indicators
Mounting and Connection
Mount the DXA-6HD securely to the tripod bushing on the under
side of your camcorder. Connect the cable from the DXA-6HD to the
camcorder’s microphone jack. The onboard microphone should now
be disabled.
Camera Setup
Set the audio mode switch on the back of the camcorder to MAN
to deactivate the AGC. Turn the AUDIO LEVEL thumbwheel on the
camcorder to 3 on the dial. Set the input level on the camera menu to
EXT LINE. This bypasses the camcorders preamplifiers for superior
audio. You are now ready to attach external microphones to the
adapter.
Adapter Controls and Connectors
1. Power
Install a fresh 9 volt alkaline battery in the adapter if you wish to
use phantom power Turn on the unit to activate the phantom power
supplies. The Power LED should light to indicate good battery power.
Turn off the power when not in use to conserve battery power.
2. Phantom Power
If your condenser microphone requires 48 volts phantom power
to operate, first connect the microphone to the adapter. Activate the
PWR ON switch and then the PH ON switch for the channel it is
connected to. The LED above the corresponding channel trim control
should light to indicate that 48 volt power is present. Do not plug
dynamic microphones, unbalanced devices, wireless receivers or
feeds from mixing boards into the adapter with the phantom power
activated as it may damage the connecting device.
3. Trim Controls
Each channel of the DXA-6HD has a trim control to adjust the input
signal level.
Adjust the trim controls on each channel of the adapter for the
desired volume level on camcorder. Use the level indicator on the
camera as a guide. Be sure not to activate the red bar on the level
meter to avoid distortion.
As a guide, the recording levels should be no higher than -12 dBFS
(Full Scale). Please refer to your camcorder’s user manual for more
information on setting the proper recording levels.
/