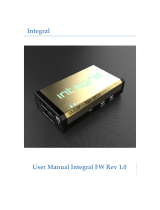
HDMI2SPW

WAGNER HDMI2SPW User manual

  • Hello! I've reviewed the user manual for the Pro.2 HDMI2SPW HDMI Splitter/Switch. This device supports 4K@60Hz, HDCP2.2, and HDR10, and includes features like EDID management, downscaling, audio extraction and embedding. I'm ready to answer any questions you may have about its operation and capabilities.
  • What is the default EDID setting?
    Does the device have a downscaling feature?
    How to select HDMI input 2?
Operating Instruction
1X2 Splitter/2x1 Switch
4K@60hz YUV4:4:4 18Gbps
Support HDCP2.2, HDR10
Model:HDMI2SPW
Operating Instruction
Dear customer
Thank you for purchasing this product. For optimum performance and safety,
please read these instructions carefully before connecting, operating or
adjusting this product. Please keep this manual for future reference.
TABLE OF CONTENTS
Features
Specifications
Package Contents
Panel Description
Application
EDID Setting
The firmware update
Maintenance
Product Service
Warranty
Features
HDMI 2.0 version (Support 4K@60Hz YUV4:4:4)
Bandwidth upto 18Gbps
HDCP2.2/ HDCP1.4
Support 3D,HDR10,Dolby vision and DTS
Support 2xHDMI in, 2xHDMI out
EDID management and Down Scaler functions
Support Analog 3.5mm stereo out /SPDIF out audio extraction
Support Analog 3.5mm stereo/SPDIF in audio embedded
Support power off memory function
2
Operating Instruction
3. Default EDID: When the EDID is default, LED 4 light will be off. The unit
is default to 4K60 EDID.
Note:
1. This product has downscale feature when the EDID is set to Copy or Default,
but not in mixed mode. It also downscale the resolution only, not the refresh
rate though. Downscale doesn’t support 4K60 422 input signal.
2. Set the EDID to default or copy mode, to have output 1 to 4K60 and output 2
to 1080P if the source is 4K60.
The firmware update for future references
Please open the software UART_ISP.exe on the PC, you need select the correct
port and baud rate 115200, enter A1 in port, then you need select the program
in path, and click UPDATE to complete the upgrade.
7
Operating Instruction
Application Diagram
EDID Setting
1. Copy EDID : When EDID is in Copy mode, LED4 light will be on. The
priority port is HDMI output 1, it will copy the output 2 EDID when output 1 is
not in use. When the video source output is set to auto, if the ouput1 is 4K60
TV and the output 2 is 4K30/1080p TV, under the copy EDID mode, the output
1 will be 4K60, and the output 2 will be downscaled to 1080P60.
2. Mixed EDID: When EDID is in mixed mode, LED4 light will be flashing, a
group of optimal EDID will be generated to ensure the source can be output to
both TVs. It also keeps both settings in the memory, when any of the outputs is
disconnected or not in use, another output will be still available. Under the
mixed EDID mode, if output 1 is 4K60 TV, and output 2 is 4K30/1080p TV,
both outputs will be set to 4K30 or 1080P depends on the output TVs.
6
Operating Instruction
Specifications
Package Contents
1) 1x HDMI Switch
2) 1x 5V/1A DC power adapter
3) 1x User manual
3
Operating Temperature Range
0℃ to +40℃(+32℉ to +104℉)
Operating Humidity Range
5 to 90%RH (No Condensation)
Power supply
5V
Maximum power
(work under 4K2K/60hz)
2W
Max resolution
4k@60hz YUV4:4:4
Function
HDR10 and Dolby vision
HDMI version
HDMI 2.0
HDCP version
HDCP2.2 / HDCP1.4
Control ways
Switch button and EDID
Distance
1080P: input 8m max; output 8m max
4k@30hz: input 8m max;output 8m max
4k@60hz-8bit: input 5m max;output 5m max
Dimensions(LxWxH)
121x68.2x20mm
Operating Instruction
Panel Description
1. Power and Firmware upgrade USB port 2. Power Indicator
3. Indicator light 4. SPDIF In
5. Audio out 6. HDMI output
7. Audio in 8. HDMI input
9. SPDIF out 10.Menu button
11.SET button:
Setting Instruction
1. Hold the "Menu" button for at least 2 seconds and release, the LED lights
will flash.
2. Short press the "Menu" button, the LED 3,4,5,6 will light up one by one in a
loop and can set "input source, EDID, Audio embed or extractor, Audio
channel" individually.
3. Press the "Set" button to change the LED indicator to "On" "Blink" or "Off".
(Refer to the function table)
4
Operating Instruction
For example, the HDMI2SPW is default to HDMI input 1, to select HDMI
input 2, the instruction is:
1. Hold the "menu" button for 2 seconds and release it.
2. Short press the "menu" button till the LED 3 lights up, press the "set" button
to set the LED 3 "ON";
3. Press the "set" button once again, the LED 3 will be "OFF" and unit is back
to HDMI input 1.
Press and hold “Set” button 5S to restore factory settings.
List of functional indicator lights:
Function
N/A
N/A
Switch
EDID
Embedder
/Extractor
LED
Indicator
1
2
3
4
5
OFF
\
\
HDMI in
1
Default
Extractor
Blink
\
\
\
Auto
SPDIF
embed
ON
\
\
HDMI in
2
Copy
Analog
embed
Application
1. Connect source devices with input ports of the switch by HDMI Cable.
2. Connect HDMI output port with TV or other HDMI sink devices by HDMI
Cable.
3. Connect 5V POWER adaptor with DC power socket.
4. Power on
5
/