Page is loading ...

C -11 Powered Subwoofer
Owner s Information'

C-11 Powered Subwoofer
Information
Important Instructions
1. Read your owner's manual carefully before using the product. Retain this manual
for future reference.
2. The subwoofer should be placed at a ventilated, dry and cool location, away from
any heat sources such as radiators or amplifiers. Do not obstruct the amplifier in
the C-11 from ventilation. It is necessary that air can flow around the finned heat
sink on the rear panel of the amplifier.
3. Do not use the subwoofer near water or expose it to rain or moisture.
4. Always unplug the power cord first when making connections. Switch power on
only after you check and make sure all connections are made correctly.
5. Unplug the power cord from the outlet when you are not going to use the
subwoofer for a long period of time.
6. To clean, unplug the power cord from the outlet first. Use a damp cloth only to
wipe dust off the surface. Do not use any liquid cleaners.
7. Do not put coffee cups or other objects on top of the cabinet. They can be shaken
off when the subwoofer is in operation as it can produce a lot of vibration.
Introduction
C-11 is a home theater subwoofer equipped with a build-in equalizer. The 5-
band equalizer is a powerful tool in correcting anomalies of subwoofers caused by
room acoustics. It will greatly increase subwoofer performance when used properly.
In the real world, subwoofers generally do not have a flat frequency response. Only
in ideal conditions such as open air or large anechoic test chambers do they have a
perfect response measurement. When a subwoofer is played in a listening room, the
bass frequencies can be up or down 10 dB from the ideal response. The sound can
have a “boomy” or ill-defined bass that will impair the overall musical performance.
The 5-band equalizer is designed to control offending bass notes that “booms”
louder than they should. It features precisely aligned 1/3-octave equalization filters
that are only found on the best professional audio equipment.
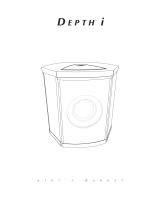
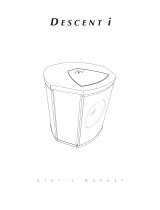
The cabinet has been designed using extensive computer modeling for the best
possible alignment between driver and box. Coupled with two high excursion

proprietary 10” drivers, the C-11 produces clean, powerful and controlled bass.
Three large rear-firing vents ensure ventilation of both driver and amplifier for cool
running at high power. The vent's large bore and “gas flowed” cross-section reduces
air turbulence that causes audible distortion.
Please refer to Fig. 3 (Front control panel) and Fig. 4 (Back panel) for functions on
C-11 Subwoofer amplifiers
Functions and Connections

Power switch on/off
Upper position: Power on
Lower position: Power off
Middle position: Auto on
At this position the subwoofer amplifier is in a stand by mode, awaiting an input
signal. When there is no signal, the amplifier is shut down. As soon as the signal
appears, the amplifier switches on. If signal is absent, the amplifier will shut
down automatically after a pre-determined period of time. The power indicator
is red when the switch is at OFF position, and green when the switch is at ON
or AUTO position.
Volume Control
Use this control to balance the level of the woofer with the level of your main
speakers.
Crossover Frequency control
If you are using small loudspeakers (4”to 6” woofers) in your main system, you
will need to set the crossover frequency at a high position (100 to 160 Hz). If
your main speakers have larger woofers (8” and above) you will need to set the
crossover frequency to much lower position (40 to 80 Hz). Generally, the larger
the speaker, the greater the low frequency output will be. If the frequency
control is set too high, the bass will appear “boomy” due to outputs of
subwoofer and main speakers overlapping each other. If it is set too low, the
bass will be ill defined and the subwoofer will sound detached from the rest of
the system.
Phase Control
Use this control to determine the best possible bass performance of your system.
There can be interference between your main speakers and subwoofer at the
frequency where they cross over due to placement, room acoustics and type of
main speakers used. By carefully positioning the subwoofer in the room in
combination with the level and crossover control, you should be able to get a
seamless transition between your main speakers and subwoofer. Start with the
full anticlockwise 0 position. This means that the subwoofer will push out
positive pressure wave corresponding to a positive electrical input. The
180 full clockwise position inverts this so the subwoofer will put out a negative
1-3

pressure wave. You can use this position if you are unable to get a good
integration between the subwoofer and main speakers.
Equalizer on/off
At “off” position, the amplifier will function normally without the effect of the
5-band equalizer.
5-band Equalizer
Please refer to “Setting up EQ for the Room”
High Level Inputs L&R
These inputs should be connected to the left and right speaker terminals of your
amplifier/receiver, if you intend to connect the subwoofer using this option
instead of the low-level RCA input connections.
High Level Output L&R
You could connect your main speakers from the subwoofer amplifier instead of
the main amplifier/receiver. Use this option if you are connecting the
subwoofer up via the High Level Input.
CAUTION! Do not use both low level and high level connection methods
simultaneously. This may cause damage to the subwoofer and your
amplifier/receiver.
Low level Input & Output
Connect this to the pre-amp output of your amplifier/receiver. If you do not
have a pre-amp output or a power amplifier input, you can connect up the
subwoofer using the Low Level Input/Output utilizing a tape input/output
amplifier/receiver. Connect the tape output to the Low Level Input on the
subwoofer, then connect the tape input to the Low Level Output on the
Subwoofer. To switch the subwoofer into the circuit, switch the tape monitor
input on your amplifier/receiver.
Use this in conjunction with your receiver/amplifier. Connect this output to the
power amplifier input of your amplifier/receiver.
Power input socket and Fuse
For continued protection, replace only with same type fuse. (A spare fuse is
enclosed for replacement.)
88
1-4

Connection
Please see diagrams below for different method of connecting the subwoofer to your
main amplifier/receiver. It may be possible to use alternative connecting methods.
Please refer to the owner's manual of your amplifier/receiver or seek professional
advice from your retailer or installer.
CAUTION! Before switching power on, please make sure all connections are made
properly, i.e., positive to positive, negative to negative.
Connection method 1:
Connecting the subwoofer using dedicated subwoofer RCA output from receiver (see
Fig. 5)
Connection method 2:
Connecting subwoofer between pre-amplifier outputs and power amplifier inputs
( see Fig. 6)
1-5


Setting up EQ or the Room
Play some familiar pieces of music that have prominent bass lines. Start with the EQ
switched out and then adjust the EQ filters one by one switching the EQ in and out. It
is better to start with the EQ cutting the frequencies and not boosting them.
Remember that a 10 dB boost is adding ten times the power at that frequency so it
would be easy to overload the system at high power levels with the EQ sliders set at
maximum.
Room Size and Room Position
The size of the room and the position of sub-woofer placement will also determine
low frequency limit of the subwoofer. So by adjusting the EQ settings, the ideal
response can be obtained without having to place the subwoofer in an unpractical
location. Small rooms usually add gain to low frequencies, which can be
overpowering to the rest of the music. Large rooms need greater low frequency
energy to sound balanced. The EQ settings can be adjusted to fit the room size. The
5 band equalizer should be used with great caution. The power levels to the speaker
can be boosted by as much as 10 times! So if the subwoofer is running at 100 watts
the EQ boost at maximum will try to push the amplifier to an impossible 1000 watts!
Although the amplifier and speakers are designed to handle overload conditions it is
still possible to cause damage from mis-use.
Placement of Subwoofer
The subwoofer can be placed virtually anywhere in your room without affecting the stereo
image of your main speakers. Placing the unit in a corner of the room will yield the greatest
bass output but may not provide the best sound, as this position will cause maximum room
mode resonance. You can start with this position and then move the subwoofer to different
areas until you find the sound satisfactory. The best method is to try different positions.
Keep a clearance of 100mm/4” from the wall or furniture to provide best performance.
1-7

Service and Warranty
The C-11 Subwoofers have a warranty period of 1 year, starting from the date of
purchase. This warranty is provided to the original owner who purchased the product
from an authorized dealer. This warranty covers defect in materials or
workmanship that occurs in normal use only, and excludes damage that results from
abuse, mis-use, accidents, shipping, or repairs or modifications by anyone other than
authorized representatives. The warranty is void if serial number has been
removed.
Should you need service on your speakers, please bring it to the dealer whom you pur-
chased from along with sales slip.
If this is not possible, call or write to:
American Acoustic Development LLC
8559 Page Ave, St. Louis,
MO 63114, USA
Tel: 314-814-3383
Fax: 314-628-9941
E-mail:[email protected]
www.aadsound.com
1-8

1-9
C-11 Specifications
Amplifier type
Solid state Class A/B
Power
160 watts continuous into 4 Ohm
Woofer
Frequency response
30 Hz to 160 Hz +/- 3 dB
Electronic crossover
Continuously variable from 30 Hz to 160 Hz
24dB/octave
Phase control
Variable 0 - 180
Inputs
Low level RCA 300mv sensitivity in both channel
High level 5 way binding post 10v sensitivity
Outputs
Low level RCA
High level 5 way binding post
Enclosure type
Vented bass reflex
Cabinet dimensions
514(H) x375 (W) x445(D) mm
Net weight
23.5 Kg
Finish
Proprietary 10” diaphragm
Aluminum Cone / 60 Az magnet / 2” voice coil
5 Band EQ
10dB at 25Hz 40Hz 60Hz 80Hz 100Hz
+
Cherry/Classic Black(viny1)
0dB0dB
AUTO
-10dB
ON
ON
-10dB
80Hz
160Hz30
60Hz40Hz
MIN
+10dB
OFF
POWER
MAX
25Hz
FREQUENCY
VOLUME
180¡ã
OFF
EQ
+10dB
0¡ã
100Hz
PHASE
C-11 Product

www.aadsound.com
/