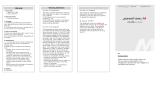
Get To Know Your Urozetta.
Urozetta Cloud Pro/ Cloud/ Pro Mobile WiFi
Beijing Ulink Technology Co.Ltd.
About Urozetta Cloud Pro/ Cloud/ Pro Mobile WiFi
1. Power Button
2. *Microphone
3. Forced Reset Button
4. Type-C USB interface
5. Display screen and Touch screen
6. *Speaker
7. *Microphone
8. Indicator Light
9. RFID Label
10. AI Smart Button/WPS Button
11. SIM Card Slot

12. Device Label
1. Network Signal Status
2. WLAN WiFi Status
3. Status Code
4. SIM Card Status(Physical SIM Mode)
5. Bluetooth
6. GPS
7. Battery Level
8. Battery Status
9. Menu
Remarks:“*”Only for Urozetta Cloud Pro and Urozetta Pro
1. Buttons

1) Power Button: Long press the Power Button for more than 3 seconds to
power on/off the device;
Short press to turn the screen on or off.
2) AI Smart Button:Short press to turn on the screen. Short press again to
turn on the AI(only for Urozetta Cloud Pro and Urozetta Pro)
3) WPS Button:For devices with WPS capability, turn on the WPS
connection function then long press the Urozetta Cloud WPS Button for
over 3 seconds. After the devices pair, complete the encryption
authentication and connection between Urozetta Cloud and the wireless
device.(Only for Urozetta Cloud)
4) Forced Reset Button:Short press to force restart and restore to factory
settings. Long press for more than 8 seconds to force power off. (Warning:
Please do not press the Forced Reset Button without customer service
support.)
5) Screen Lock: After 60 seconds without use,
the device screen will lock. After 90 seconds without use,the screen will turn off. To
lock and turn off the screen,just short press the power button.
6) Unlock Screen: Short press the power button to turn on and unlock the
screen.
2. Indicator Light Description
Power On Status
Pulsing Red
Charging,Low

Light
Battery
Pulsing
Yellow Light
Charging,Medium
Battery
Pulsing
Green Light
Charging,High
Battery
Continuous
Green Light
Charging
Completed
Flashing
Red Light
Low Battery
Flashing
Blue Light
No network
Continuous
Blue Light
Normal network
Power Off Status
Pulsing Red
Light
Charging,Low
Battery
Pulsing
Yellow Light
Charging,Medium
Battery
Pulsing
Green Light
Charging,High
Battery
Continuous
Green Light
Charging
Completed
System Status
Continuous Green Light
System Starting Up
Pulsing Yellow Light
Software Upgrade With System Start-up
Pulsing Red Ligh
System Shutdown
3. How to connect a device to your UROZETTA Wifi Network
1)WiFi Network Manual Connection
a) Find the SSID and KEY displayed on the bottom label of the UROZETTA WiFi
device
b) Enter the SSID and KEY found on the network connection of your phone or
other device you want to connect to successfully connect to the network.
Note: If the SSID and KEY displayed on the bottom label of the device are worn
off and cannot be viewed clearly, you can start the UROZETTA WiFi device and
view it in "Home"-> "Network"-> "WLAN"
4. 2). Code Scan Connection (Camera Scanning / Wechat Scanning)
a) Start up your UROZETTA WiFi device and enter the homescreen
b) Click the "I want to connect " button at the bottom right of the screen to enter

the code scanning page
5. c) Open your phone or other device’s camera scanner or WeChat to scan the
corresponding QR code
d) After the scan is completed, your phone or other device will automatically
connect to the network.
Note: WeChat‘s scan code function can also be used to scan the Ucode QR code
on the label on the back of the UROZETTA WiFi device
6. 3).NFC Touch Connection
a) Turn on the NFC function of your phone or other device you want to connect
b) Hold your phone or other device to the front bottom area of the UROZETTA
WiFi device
c) After the connection prompt pops up on your phone or other device, click
"Connect" to automatically connect.
Note: This feature is only available on Android devices
7. 4). WPS One-click Connection
a) Turn on the "WPS" function in the settings of your phone or other device you
want to connect.
b) Click the "I want to connect " button at the bottom right of UROZETTA WiFi
device`s screen to enter the connection mode selection page
c) Select "WPS connection" to enter the WPS network operation page, and click
the " " button to activate the WPS network function of UROZETTA WiFi device
d) Your device should automatically find the network. After the confirmation
prompt pops up on your phone or other device, click "OK" to connect to the
network.
Note: i)This feature is only available on Android devices
ii)For Urozetta Cloud, you can press the “WPS” button on the right side of
the UROZETTA WiFi device to activate the WPS connection function.
8. Use of SIM card slot
1) Urozetta Cloud Pro and Urozetta Cloud both support "Physical SIM ” mode and
"Virtual SIM ”mode. You can change the setting by navigating to "Home"-> "Network
"->" SIM Card Mode ". Urozetta Pro only supports" Physical SIM ” mode.
2) In the" Physical SIM ” mode, a SIM card must be inserted to use the UROZETTA WiFi
device. Some SIM cards also need an APN to be setup, which should be setup on the
WebUI or App. The external card slot does not support switching SIM cards when the
UROZETTA WiFi device is on. If you need to use a SIM card, restart the UROZETTA WiFi
device after inserting or extracting an external SIM card.
3) In the "Virtual SIM ”mode, there is no need to insert a SIM card into the external card

slot. You can purchase a data package through the UROCOMM App, and you can
connect to a local network by turning on the UROZETTA WiFi device when you arrive at
your destination.
9. Device Management
1)Scan the QR code below to download the Urocomm app. With the app you can
easily buy data packages, manage your data, change passwords, set up your
device, restart your device, and more.
2) Buying data packages and managing your data is only supported for
Urozetta Cloud Pro and Urozetta Cloud.
10. About WebUI – Change your settings though your web browser
1) Connect to the WLAN wifi network of your mobile phone or PC device
using Urozetta Cloud Pro/Urozetta Cloud/Urozetta Pro.
2) Enter the address "urocomm.info" or “192.168.225.1” in the browser, the
default password is: 12345678
3) After logging in, you can use the Web Page to change your password and
set an APN, etc.
Urozetta Cloud Pro/ Cloud/ Pro Mobile WiFi Specifications
Product
Name
Urozetta Cloud Pro Mobile
WiFi
Urozetta Cloud Mobile
WiFi
Urozetta Pro Mobile WiFi

Model
UZ-211-1
UZ-201
UZ-111-1
Size
86mm*86mm*26mm
86mm*86mm*26mm
86mm*86mm*26mm
Weight
191.4g
189g
183.1g
Bands
LTE-TDD: B38/B39/B40/B41
LTE-TDD: B38/B39/B40/B41
LTE-TDD: B38/B39/B40/B41
LTE-FDD:
B1/B2/B3/B4/B5/B7/B8/B11/
B12/B17/B18/B19/B20/B21
LTE-FDD:
B1/B2/B3/B4/B5/B7/B8/B11
/B12/B17/B18/B19/B20/B21
LTE-FDD:
B1/B2/B3/B4/B5/B7/B8/B11/B12/
B17/B18/B19/B20/B21
WCDMA:
B1/B2/B4/B5/B6/B8/B19
WCDMA:
B1/B2/B4/B5/B6/B8/B19
WCDMA: B1/B2/B4/B5/B6/B8/B19
GSM: B2/B3/B5/B8
GSM: B2/B3/B5/B8
GSM: B2/B3/B5/B8
WLAN
Support 2.4G & 5G
Support 2.4G & 5G
Support 2.4G & 5G
IEEE 802.11a/b/g/n/ac
IEEE 802.11a/b/g/n/ac
IEEE 802.11a/b/g/n/ac
LCD
Screen
2.8 inches
2.8 inches
2.8 inches
LCD
Pixels
240 x 320 pixel
240 x 320 pixel
240 x 320 pixel
Touch
screen
Support
Support
Support
Battery
type
Lithium-ion 21700 battery
Lithium-ion 21700
battery
Lithium-ion 21700 battery
Cell
Norminal
Capacity
5000mAh
5000mAh
5000mAh
Cell
Rated
Capacity
4850mAh
4850mAh
4850mAh
USB Port
Input:Type-C 5V2A
Input:Type-C 5V2A
Input:Type-C 5V2A
Output:Type-C 5V1A
Output:Type-C 5V1A
Output:Type-C 5V1A
Bluetoot
h
Support
(This feature is coming
soon)
Support
(This feature is coming
soon)
Support
(This feature is coming
soon)
AI
Alexa
Not support
Alexa
Cloud
MiFi
Support
Support
Not support
Other
function
s
GPS,Power bank,
Indicator Light,WPS,
RFID Label,Interpreter
GPS,Power bank,
Indicator Light,WPS,
RFID Label
GPS,Power bank,Indicator
Light,WPS,RFID
Label,Interpreter
Working
temperat
ure
-10℃-35℃
-10℃-35℃
-10℃-35℃
FAQ
1. How to change the Wi-Fi name and password?

First connect your mobile phone or PC device to your Mobile WiFi WLAN
network , and enter“urocomm.info” or 192.168.225.1 in your browser,and
enter the password 12345678 to open the administration interface. Here you can
change your Wi-Fi name and password. After it has been changed, remember to
save it.
Alternatively, you can change the Wi-Fi name and password in the APP.
1. What should I do when my Phone/Tablet can not connect with the device?
(1) Make sure the Phone/Tablet’s WLAN is turned on.
(2) Refresh the network list, and search for the SSID of the device.
(3) Make sure to input the correct password.
(4) Disconnect your device from your current network and then reconnect.
2. What should I do when the device has no internet connection?
(1) Make sure the device status is normal. The signal may be weaker when in
airports, mountain areas, high ways, harbors, basements, rural areas and islands.
Please restart and try again after moving to a different location.
(2) If you still can not get an internet connection, please contact us through
email : service@urocomm.com
3. What should I do if my device is lost?
If your device is lost accidentally, please contact customer service to freeze your
account in time to avoid additional fees.
4. Why can I not use my device after a SIM card is inserted?

In some countries when you insert a SIM card, you need to manually set an APN
(Access Point Name). If this is the case, please go to the website: urocomm.info
or 192.168.225.1 , and enter the password 12345678; After entering the Web UI,
go to “Menu” -“APN”, manually add a network operator APN, and then
save the settings.
Warning
· Please only use original accessories provided with purchase. Use of unauthorized
chargers or other accessories may cause damage to the device and can result in
fire, explosions, or other hazards.
.If users of the UROZETTA WiFi device use a power adapter to charge the UROZETTA WiFi device, they
should purchase a power adapter that meets the requirements of the corresponding safety standards
or a power adapter that has obtained the quality and safety certification of the country in which it is
used.
· Please keep the device in a dry and cool environment and do not let the device
come into contact with water. Extreme high or low-temperatures may cause
damage to the device.
· Please do not expose the device to high temperature environments or heating ,
such as strong sunlight, heaters, microwaves, ovens, or water-heaters etc.
An overheated battery might cause explosion.
· When charging is complete or the device is fully charged, please disconnect the
charger from the device and unplug the charger from the power outlet.
· The built-in battery is non-removable. Please do not attempt to change or

disassemble the battery by yourself. This may result in damage to the battery or
the device. The battery can only be replaced by an official authorized service
provider.
Notice: Using the wrong model of battery may result in an explosion. Please
make sure to dispose of used batteries as instructed.
Device Working Temperature: The device should be kept at a working
temperature of -10℃ to 35℃. For the user's safety, please avoid using the
device in a high-temperature environment for long periods of time, as this
leads a shorter device lifetime. The device will stop charging automatically
when the battery temperature reaches 45℃, and shut down automatically
when battery temperature is more than 55℃.
When using an external SIM card, self-cutting SIM cards and non-standard
SIM cards can not be used.
This device supports NFC touch RFID tagging for fast Wi-Fi connection. If the
Wi-Fi SSID or Key is changed, please use a phone with NFC read/write
capability and the Urocomm APP with the same SSID and Key. Otherwise, the
device will not be able to use the touch RFID tagging high speed connection.
We are only responsible for the function of the device’s official operating
system and update system. The use of any other systems or software from
unofficial third parties might cause security risks.
FCC Statement
This equipment has been tested and found to comply with the limits for a Class B

digital device, pursuant to part 15 of the FCC Rules. These limits are designed to
provide reasonable protection against harmful interference in a residential
installation. This equipment generates, uses and can radiate radio frequency
energy and, if not installed and used in accordance with the instructions, may
cause harmful interference to radio communications. However, there is no
guarantee that interference will not occur in a particular installation. If this
equipment does cause harmful interference to radio or television reception,
which can be determined by turning the equipment off and on, the user is
encouraged to try to correct the interference by one or more of the following
measures:
—Reorient or relocate the receiving antenna.
—Increase the separation between the equipment and receiver.
—Connect the equipment into an outlet on a circuit different from that to which
the receiver is connected.
—Consult the dealer or an experienced radio/TV technician for help.
FCC Radiation Exposure Statement
This device complies with FCC SAR exposure limits set forth for an uncontrolled
environment. SAR compliance for using the equipment in close proximity to the
human body has been evaluated at 10mm. This equipment must not be co-
located or operating in conjunction with any other antenna or transmitter. End-
users and installers must be provide with antenna installation instructions and
consider removing the no-collocation statement.
Caution!
Any Changes or modifications not expressly approved by the party responsible for
compliance could void the user’s authority to operate the equipment.
This device complies with part 15 of the FCC Rules. Operation is subject to the following
two conditions: (1) This device may not cause harmful interference, and (2) this device

must accept any interference received, including interference that may cause undesired
operation.
This device is restricted to indoor use when operating in the 5150-5250MHz frequency
range in all EU/EFTA member states and Turkey.
Countries:
(BE/BG/CZ/DK/DE/EE/IE/EL/ES/FR/HR/IT/CY/LV/LT/LU/HU/MT/NL/AT/PL/PT/RO/SI/SK/FI/SE/UK
/TR/NO/CH/IS/LI)
EU Regulatory Conformance
Hereby, Beijing ULINK Technology Co., Ltd. declares that this radio equipment type is
in compliance with the Directive 2014/53/EU. For the full text of the EU declaration
of conformity, visit this website: www.urocomm.com
Notice: The operating temperature of the device between -10℃to 35℃.
This product can be used across EU member states.
Technical features and characteristic for EU
WLAN
Operation Frequency:
2412MHz~2472MHz
802.11b/802.11g/802.11n(H20)
2422MHz~2462MHz 802.11n(H40)
5180MHz ~ 5240MHz for
802.11a/802.11n(HT20)/802.11ac(VHT20);
5190MHz ~ 5230MHz for
802.11n(HT40)/802.11ac(VHT40)
Maximum Power(2.4GHz):
16.87dBm(E.I.R.P.)
Maximum Power(5.2GHz):
14.32dBm(E.I.R.P.)
5.8G SRD
Operation Frequency:
5745MHz ~ 5825MHz
Maximum Power:
13.91dBm(E.I.R.P.)
BT
Operation Frequency:
2402~2480MHz
Maximum Power (BT:):
4.97dBm(E.I.R.P.)

Maximum Power (BLE:):
-1.12dBm(E.I.R.P.)
GSM
Operation Frequency:
E-GSM 900
TX: 880~915MHz RX:925~960MHz
DCS 1800
TX: 1710~1785MHz RX:1805~1880MHz
Maximum Power (E-GSM 900):
31.58dBm
Maximum Power (DCS 1800):
29.80dBm
WCDMA
Operation Frequency:
Band 1
TX:1920MHz~1980MHz,RX:2110MHz~2170MHz
Band 8
TX: 880MHz~915MHz,RX:925MHz~960MHz
Maximum Power
(WCDMA Band 1):
22.6dBm
Maximum Power
(WCDMA Band 8):
22.8dBm
FDD LTE
Operation Frequency:
Band 1
TX:1920MHz~1980MHz,RX:2110MHz~2170MHz
Band 3
TX:1710MHz~1785MHz,RX:1805MHz~1880MHz
Band 7
TX:2500MHz~2570MHz,RX:2620MHz~2690MHz
Band 8
TX:880MHz~915MHz,RX:925MHz~960MHz
Band 20
TX:832MHz~862MHz,RX:791MHz~821MHz
Maximum Power (Band 1):
21.7dBm
Maximum Power (Band 3):
22.8dBm
Maximum Power (Band 7):
22.8dBm

Maximum Power (Band 8):
23.4dBm
Maximum Power (Band 20):
22.8dBm
TDD LTE
Operation Frequency:
Band 38
TX:2570MHz~2620MHz,RX:2570MHz~2620MHz
Band 40
TX:2300MHz~2400MHz,RX:2300MHz~2400MHz
Maximum Power (Band 38):
23.8dBm
Maximum Power (Band 40):
22.9dBm
RF EXPOSURE INFORMATION (SAR)
This device meets the government ’s requirements for exposure to radio
waves.
The SAR limit set by the CE is 2.0W/kg
The highest reported SAR values under the CE regulatory for your device are
listed below:
Body SAR: 1.051W/kg
Contact
Service Email: servic[email protected]
Copyright Notice
Beijing Ulink Technology Co., Ltd. reserve the final interpretation of the UROZETTA
trademarks for this product.
For More Surprises:
Please visit www.urocomm.com

/