Page is loading ...

ROTARY HAMMER
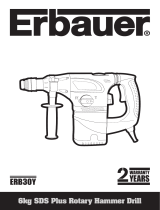
2732

USER MANUAL 1
SPECIFICATIONS
Model 2732
Power 1250W
Voltage 220-240V
Frequency 50-60Hz
Weight 5.2kg
Chuck Type SDS Plus
Chuck Size 32mm
Impact Energy 4.5J
Max Capacity in Concrete 32mm
Max Capacity In Steel 13mm
Max Capacity In Wood 40mm
No-Load Speed 800 RPM
Max Imapct Rate 2600 BPM
Supplied In BMC
Includes
Grease bottle, Rubber protect
cap,Bits bag includes SDS
plus drill bit 8*150,SDS plus
drill bit 10*150 ,SDS plus drill
bit 12*150, SDS plus point
chisel bit, SDS plus flat chisel
bit , Depth guage, Auxiliary
Ronix-design handle
PART LIST
SDS chunch
Oil Gauge
Trigger
Motor Housing
Carbon Brush

2ROTARY HAMMER
WARNING!
The electric hammer chisel power tool noise output may exceed
85dB(A) at the workplace. In this instance, wear ear protection.
Wear safety-hearing protection
Wear dust mask
Wear safety goggles
Wear safety shoes
Wear hard hat
Save these instructions for reference
POWER TOOL SAFETY
.GENERAL SAFETY RULES
WARNING!
Read all instructions Failure to follow all instructions listed
below may result in electric shock, fire and/or serious injury.
The term “power tool” in all of the warnings listed below refers to your
mains operated (corded) power tool or battery operated (cordless)
power tool.
SAVE THESE INSTRUCTIONS
.WORK AREA
Keep work area clean and well lit. Cluttered and dark areas invite
accidents.
Do not operate power tools in explosive atmospheres, such as in the
presence of flammable liquids, gases or dust. Power tools create sparks,
which may ignite the dust or fumes.

USER MANUAL 3
Keep children and bystanders away while operating a power tool.
Distractions can cause you to lose control.
.ELECTRICAL SAFETY
Power tool plugs must match the outlet. Never modify the plug in any
way. Do not use any adapter plugs with earthed (grounded) power tools.
Unmodified plugs and matching outlets will reduce risk of electric shock.
Avoid body contact with earthed or grounded surfaces such as pipes,
radiators, ranges and refrigerators. There is an increased risk of electric
shock if your body is earthed or grounded.
Do not expose power tools to rain or wet conditions. Water entering the
power tool will increase the risk of electric shock.
Do not abuse the cord. Never use the cord for carrying, pulling or unplugging
the power tool. Keep cord away from heat, oil, sharp edges or moving
parts. Damaged or entangled cords increase the risk of electric shock.
When operating a power tool outdoors, use an extension cord suitable
for outdoor use. Use of a cord suitable for outdoor use reduces the risk
of electric shock.
.PERSONAL SAFETY
Stay alert, watch what you are doing and use common sense when
operating a power tool. Do not use a power tool while you are tired or under
the influence of drugs, alcohol or medication. A moment of inattention
while operating power tools may result in serious personal injury.
Use safety equipment. Always wear eye protection. Safety equipment
such as dust mask, non-skid safety shoes, hardhat, or hearing protection
used for appropriate conditions will reduce personal injury.
Avoid accidental starting. Ensure the switch is in the OFF position
before plugging in. Carrying power tools with your finger on the switch
or plugging in power tools that have the switch ON invites accidents.
Remove any adjusting key or wrench before turning the power tool on.

4ROTARY HAMMER
A wrench or key left attached to a rotating part of the power tool may
result in personal injury.
Do not overreach. Keep proper footing and balance at all times. This
enables better control of the power tool in unexpected situations.
Dress properly. Do not wear loose clothing or jewellery. Keep your hair,
clothing and gloves away from moving parts. Loose clothes, jewellery or
long hair can be caught in moving parts.
If devices are provided for the connection of dust extraction and collection
facilities, ensure these are connected and properly used. Use of these
devices can reduce dust related hazards.
.POWER TOOL USE AND CARE
Do not force the power tool. Use the correct power tool for your
application. The correct power tool will do the job better and safer at the
rate for which it was designed.
Do not use the tool if the switch does not turn it ON or OFF. Any power tool
that cannot be controlled with the switch is dangerous and must be repaired.
Disconnect the plug from the power source before making any
adjustments, changing accessories or storing power tools. Such
preventive safety measures reduce the risk of starting the power
tool accidentally.
Store idle power tools out of the reach of children and do not allow persons
unfamiliar with the power tool or these instructions to operate the power
tool. Power tools are dangerous in the hands of untrained users.
Maintain power tools. Check for misalignment or binding of moving
parts, breakage of parts and any other condition that may affect
the power tools operation. If damaged, have the power tool repaired
before use. Many accidents are caused by poorly maintained power tools.
Keep cutting tools sharp and clean. Properly maintained cutting tools
with sharp cutting edges are less likely to bind and are easier to control.
Use the power tool, accessories and tool bits etc., in accordance with
these instructions and in the manner intended for the particular type of
power tool, taking into account the working conditions and the work to be

USER MANUAL 5
performed. Use of the power tool for operations different from intended
could result in a hazardous situation.
.SERVICE
Tool service must be performed only by qualified personnel. Service or
maintenance performed by unqualified personnel could result in risk of injury.
When servicing a tool, use only identical replacement parts. Follow
instructions in the Maintenance section of this manual. Use of
unauthorized parts or failure to follow Maintenance instructions may
create a risk of electric shock or injury.
.SPECIFIC SAFETY RULES
WARNING!
For your safety, do not plug in your Power tool until you have read and
understood this Owner’s Manual.
- WEAR EYE PROTECTION. Use face or dust mask along with safety
goggles. Use hearing protection, particularly during extended periods of
operation, wear safety shoes, wear hard hat
- “Wear ear protectors with impact chisels. Exposure to noise can cause
hearing loss”
- DO NOT wear gloves, jewellery, neckties or loose clothing.
- DO NOT drill, cut or sand material too small to be securely held.
- ALWAYS keep hands out of the path of the drill bit and saw blade.
Avoid awkward hand positions where a sudden slip could cause your
hand to move into the path of the drill bit or saw blade.
- SECURE WORKPIECE. Use clamps or a vice to hold the work when
practical. It is safer than using your hand and it frees both hands to
operate the tool.
- MAKE SURE there are no nails or foreign objects in the part of the
workpiece to be cut drilled or sanded.
.SPECIFIC SAFETY RULES – CONT’D

6ROTARY HAMMER
- TO AVOID INJURY from accidental starting, always remove the Plug
from the electrical socket before installing or removing a chisel bit.
DRILL SAFETY
- When using electric hammer chisel only use bits that are configured
with the correct slots for this chuck.
- BEFORE STARTING the operation, jog the chisel switch to make sure
the chisel bit does not wobble or vibrate.
- DO NOT USE fly cutters or multiple-part hole cutters, as they can
come apart or become unbalanced in use.
- MAKE SURE the spindle has come to a complete stop before touching
the chuck or attempting to change the chisel bit also
beware that the bit will be hot, let it cool down before changing as it
could burn and cause injury.
- ALWAYS MAKE SURE THE CHISEL OR CHISEL IS FIRMLY SEATED
IN THE Hex CHUCK before starting the job in hand.
SYMBOLS
Some of the following symbols may be used on your tool. Please study
them and learn their meaning. Proper interpretation of these symbols
will allow you to operate the tool better and safer.
V volts
A amperes
Hz hertz
W watt
Kw kilowatts
F farads
microfarads

USER MANUAL 7
l litres
Kg kilograms
bar bars
Pa pascals
h Hours
min minutes
s seconds
No load speed
./min or minˉ¹ Revolutions or reciprocations per minute
direct current
alternating current
² two-phase alternating current
2N two-phase alternating current with neutral
3 three-phase alternating current
3N three-phase alternating current with neutral
Rated current of the appropriate fuse-link in amperes
Time-lag miniature fuselink where X is the symbol for the
time/current characteristic, as given in EN 60127
protective earthing at earthing terminal, Class I tools
Diameter
0 Off position
Arrow
Warning symbol
alternating or direct current
splash proof construction
watertight construction
class II construction
IPXX IP symbol
ACCESSORIES & CARTON CONTENTS
.AVAILABLE ACCESSORIES

8ROTARY HAMMER
WARNING!
Use only accessories recommended for this electric hammer chisel.
Follow instructions that accompany accessories. Use of improper
accessories may cause injury to the operator or damage to the
cordless drill.
Do not use any accessory unless you have completely read the
instructions or Owner’s Manual for that accessory.
- Various chisels
CARTON CONTENTS
WARNING!
If any part is missing or damaged, do not plug the chisel into the power
source until the missing or damaged part is replaced.
Carefully unpack the tools see “Components chart” at right hand side of this page.
NOTE:
See illustration of components on Page 11.
WARNING!
To avoid fire or toxic reaction, never use gasoline, naphtha, acetone,
lacquer thinners or similar highly volatile solvents to clean the tool.
.CARTON CONTENTS – CONT’D
ROTARY HAMMER
KEY Description QTY
A Rotary hammer 1
B Chisels 2
C Drill bits 3
D Oil key 1
E Carry case 1

USER MANUAL 9
ASSEMBLY & OPERATION
WARNING!
Always make sure the power tool is isolated from the power supply before
fitting any attachment Handle. See Always make sure the fixed handle is
secure before any job takes place as a loose handle could uries.
Switching the chisel on/off
The chisel has an On/Off switch built in to the handle. Holding the chisel
with both hands simply squeeze the trigger and the motor will start. To
switch off release the trigger.
Trigger switch
WARNING!
The electric hammer chisel continues for a few second after the trigger
has been release, be careful when putting it down.
Fitting a chisel bit into the Hex housing.
132
1

10 ROTARY HAMMER
Put the bit into the hex housing and clamp the bit by turning the stop
lever half a turn anti clockwise. This will lock the bit in place.
Do not use the chisel until you are satisfied the bit is secured.
3
This electric hammer chisel does not have reverse direction, so always
take care not to force the chisel in case the chisel bit gets stuck. Always
make sure you keep the chisel going in and out to remove debris.
This chisel does not have torque facility. It is not recommended to use
any other bit other than masonry or chisels do not use metal cutting
drills, this could cause serious injury.
NOTE:
chiseling for an extended period of time may cause the chisel motor to
overheat. If the chisel gets hot, stop chiseling and allow it to cool for at
least 15 minutes.
.PRECAUTIONS ON USING ELECTRIC HAMMER CHISEL
1) Before using the electric hammer chisel always make sure the oil
supply is to the full level and the screw is tight.
2) This electric hammer chisel has a fixed handle always make sure
the screws holding the handle are secure before operation takes place.
Always use both hands when using this chisel failure to adhere to this
could invite injuries.
3) Safe operation, always make sure you have a stable posture and safe
footing before operating the electric hammer chisel.
4) When working at a high level, always make sure that no person or persons
are below you, as this could invite injuries to those persons under you.
5) Before starting any job like breaking, chipping a wall, floor or ceiling,
thoroughly confirm that no items such as an electric cable, water pipe or

USER MANUAL 11
conduit are buried inside as this could cause injury or flooding.
6) Properly set the bit holder.
7) The bit can become very hot during operation exercise extreme
caution as this could cause injury.
8) Always wear protective safety glasses.
9) Always wear ear defenders or earplugs.
10) Always wear suitable dust mask.
11) Always wear protective footwear.
12) Always wear hardhat.
.INFORMATION ON HOW TO USE THE ELECTRIC HAMMER CHISEL
Prior to operation
1) Power source
Ensure that the power source to be utilized conforms to the power
requirements specified on the product nameplate.
2) Grounding
This tool should be grounded while in use to protect the operator from
electric shock.
The tool is equipped with a three-conductor cord and grounding type
receptacle, the green (or green and yellow) conductor in the cord is the
grounding wire. Never connect the green (or green and yellow) wire to a
live or neutral terminal.
3) Power switch
Ensure that the power switch is in the off position before any work is
carried out on the chisel. If the plug is connected to a power receptacle
while the power switch is in the on position, the power tool will start
operating immediately this could invite serious injury.
4) Extension cord
When the work area is away from the power source, use an extension
cord of sufficient thickness and rated capacity. The extension cord
should be kept as short as practicable.
.HOW TO USE THE ELECTRIC HAMMER CHISEL

12 ROTARY HAMMER
Place the bit you are going to use to do the job in hand as in page 11.
1) Pull the trigger switch after applying the chisel bit tip to the chiseling position.
2) It may be necessary to punch the bit against the crushing position forcibly
in order to begin the striking stroke. This is not due to malfunction of the tool,
it means that the safe guard mechanism against no-load striking is working.
3) By utilizing the weight of the machine and by firmly holding the
hammer chisel with both hands, one can effectively control the
subsequent recoil motion.
Proceed at a moderate work rate, the use of too much force will
impair efficiency.
CAUTION:
Sometimes the tool does not begin the striking stroke even when the
motor rotates this may be because the oil has become thick
Due to low temperature or has been standing idle for long period. Run
the chisel for approx 5 minutes to bring the oil temperature up.
MAINTENANCE
.OIL FEEDING
CAUTION:
Prior to oil feeding, always disconnect the plug from the power supply

USER MANUAL 13
receptacle. Since an oil chamber is built in this electric hammer chisel, it
can be used for approximately 20 days without supplying lubrication oil,
assuming that the chisel is used continuously 3-4 hours daily.
Feed oil into the oil tank as described below before using the hammer chisel.
1) When the chisel is held upright look through the oil gauge window to
see if oil is visible, if no oil shows oil must be installed before operating.
If chisel is used without oil this could seriously damaged the chisel and
forfeit any warranty given.
2) Before feeding oil, use the provided wrench to remove the oil gauge (4).
Be careful not to lose the rubber packing attached below the oil gauge.
3) Check the oil level once daily, confirming that oil is filled.
4) After feeding oil, securely clamp the oil gauge.
NOTE:
Oil for the electric hammer chisel is sold separately, use Shell oil
ROTELLA 40 (engine oil) or equivalent, this is sold at most shops or
filling stations anywhere.
.MAINTENANCE AND INSPECTION
1) Inspecting the tool
When using dull tool bits this can cause motor malfunction and degraded
efficiency. Always replace dull bits with new ones without delay when
abrasion is noted.
2) Inspecting the mounting screws
Regularly inspect all mounting screws and ensure that they are
properly tightened. Should any of the screws be loose, retighten them
immediately. Failure to do so could result in serious injury.
3) Maintenance of the motor
The motor unit winding is the very “heart” of the power tool. Exercise

14 ROTARY HAMMER
due care to ensure the winding does not become damaged and/or wet
with oil or water.
4) Inspecting the carbon brushes
The motor employs carbon brushes that are consumable parts; since an
excessively worn carbon brush could result in motor trouble, replace the
carbon brush. Wear limiter (6) No of carbon brush (7).
6
44
7
4 mm
17 mm
Always keep carbon brushes clean and ensure that they slide freely
within the brush holders.
.REPLACEMENT STEPS
The carbon brush can be removed by removing the cap cover (9), cap
rubber and brush cap in that order at the interior
To replace carbon brush reverse order of removal.
brush carton
.INSTALLING BITS
Never hold the chuck body with one hand and use the chisel power
to the chisel body to loosen or tighten bits. You may severely injure
your hand.
WARNING!
Have you read “POWER TOOL SAFETY”, “DRILL SAFETY” and

USER MANUAL 15
“SYMBOLS” on pages 4,5 & 6 of this manual? If not, please do it now
before you operate this drill. Your safety depends on it!
Every time you use the drill you should verify the following:
1) Hex bit is secure.
2) Oil level is full.
3) Select to the function you want to do before you engage in the
proposed operation
4) All safety apparel. Safety Glasses Safety Shoes. Safety Gloves. Ear
Defenders and Safety Hat are being worn.
Failure to adhere to these safety rules can greatly increase the chances
of injury.
WARNING!
Be prepared for binding and bit breakthrough. When these situations
occur, the chisel bit has the tendency to grab the workpiece.
This action will kick the chisel opposite to the direction of chisel bit
rotation and could cause loss of control when breaking through material
as you complete chiseling the hole.
If you are not prepared, this loss of control can result in possible
serious injury.
.GENERAL
When servicing, use only identical replacement parts. Use of any other
part may create a hazard or cause product damage.
DO NOT use solvents when cleaning plastic parts. Most plastics are
susceptible to damage from various types of commercial solvents and may
be damaged by their use. Use clean cloth to remove dirt, dust, oil, grease etc.
Do not at any time allow brake fluids, gasoline, petroleum-based
products, penetrating oils, etc. to come in contact with plastic parts.
They contain chemicals that can damage, weaken or destroy plastic.
DO NOT abuse power tools. Abusive practices can damage the tool as
well as the workpiece.
DO NOT attempt to modify tools or create accessories not recommended.
Any such alteration or modification is misuse and could result in a


/