Page is loading ...

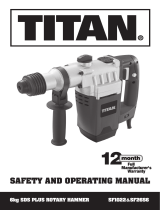
Rotary hammer WX333
SAFETY AND OPERATING MANUAL

Rotary hammer WX333
SAFETY INSTRUCTIONS
WARNING: Read all safety
warnings and all instructions.
Failure to follow the warnings and
instructions may result in electric shock, fire
and/or serious injury.
Save all warnings and instructions for
future reference.
The term “power tool” in the warnings refers
to your mains-operated (corded) power tool
or battery-operated (cordless) power tool.
1. Work area safety
a) Keep work area clean and well lit.
Cluttered or dark areas invite accidents.
b) Do not operate power tools in
explosive atmospheres, such as in
the presence of flammable liquids,
gases or dust. Power tools create sparks
which may ignite the dust or fumes.
c) Keep children and bystanders
away while operating a power tool.
Distractions can cause you to lose
control.
2. Electrical safety
a) Power tool plugs must match the
outlet. Never modify the plug in any
way. Do not use any adapter plugs
with earthed (grounded) power tools.
Unmodified plugs and matching outlets
will reduce risk of electric shock.
b) Avoid body contact with earthed or
grounded surfaces such as pipes,
radiators, ranges and refrigerators.
There is an increased risk of electric
shock if your body is earthed or
grounded.
c) Do not expose power tools to rain or
wet conditions. Water entering a power
tool will increase the risk of electric shock.
d) Do not abuse the cord. Never use
the cord for carrying, pulling or
unplugging the power tool. Keep cord
away from heat, oil, sharp edges or
moving parts. Damaged or entangled
cords increase the risk of electric shock.
e) When operating a power tool
outdoors, use an extension cord
suitable for outdoor use. Use of a cord
suitable for outdoor use reduces the risk
of electric shock.
f) Recommendation for the use of a
residual current device with a rated
residual current of 30 mA or less.
3. Personal safety
a) Stay alert, watch what you are
doing and use common sense when
operating a power tool. Do not use
a power tool while you are tired or
under the influence of drugs, alcohol
or medication. A moment of inattention
while operating power tools may result in
serious personal injury.
b) Use personal protective equipment.
Always wear eye protection.
Protective equipment such as dust mask,
non-skid safety shoes, hard hat, or
hearing protection used for appropriate
conditions will reduce personal injuries.
c) Prevent unintentional starting. Ensure
the switch is in the off-position
before connecting to power source
and/or battery pack, picking up or
carrying the tool. Carrying power
tools with your finger on the switch or
energising power tools that have the
switch on invites accidents.
d) Remove any adjusting key or wrench
before turning the power tool on. A
wrench or a key left attached to a rotating
part of the power tool may result in
personal injury.
e) Do not overreach. Keep proper
footing and balance at all times. This
enables better control of the power tool
in unexpected situations.
f) Dress properly. Do not wear loose
clothing or jewellery. Keep your hair,
clothing and gloves away from moving
parts. Loose clothes, jewellery or long hair
can be caught in moving parts.
g) If devices are provided for the
connection of dust extraction and
collection facilities, ensure these are
connected and properly used. Use of
these devices can reduce dust-related
hazards.

Rotary hammer WX333
4. Power tool use and care
a) Do not force the power tool. Use
the correct power tool for your
application. The correct power tool will
do the job better and safer at the rate for
which it was designed.
b) Do not use the power tool if the
switch does not turn it on and off.
Any power tool that cannot be controlled
with the switch is dangerous and must be
repaired.
c) Disconnect the plug from the
power source and/or the battery
pack from the power tool before
making any adjustments, changing
accessories, or storing power tools.
Such preventive safety measures
reduce the risk of starting the power tool
accidentally.
d) Store idle power tools out of the reach
of children and do not allow persons
unfamiliar with the power tool or these
instructions to operate the power tool.
Power tools are dangerous in the hands of
untrained users.
e) Maintain power tools. Check for
misalignment or binding of moving
parts, breakage of parts and any
other condition that may affect the
power tools operation. If damaged,
have the power tool repaired before
use. Many accidents are caused by
poorly maintained power tools.
f) Keep cutting tools sharp and clean.
Properly maintained cutting tools with
sharp cutting edges are less likely to bind
and are easier to control.
g) Use the power tool, accessories and
tool bits etc. in accordance with
these instructions and in the manner
intended for the particular type of
power tool, taking into account the
working conditions and the work to
be performed. Use of the power tool for
operations different from those intended
could result in a hazardous situation.
5. Battery tool use and care
a) Ensure the switch is in the off
position before inserting battery
pack. Inserting the battery pack into
power tools that have the switch on
invites accidents.
b) Recharge only with the charger
specified by the manufacturer. A
charger that is suitable for one type of
battery pack.
c) Use power tools only with
specifically designated battery packs.
Use of any other battery packs may
create a risk of injury and fire.
d) When battery pack is not in use, keep
it away from other metal objects like
paper clips, coins, keys, nails, screw,
or other small metal objects that can
make a connection from one terminal
to another. Shorting the battery terminals
together may cause burns or fire.
e) Under abusive conditions, liquid
may be ejected from the battery;
avoid contact, if contact accidentally
occurs, flush with water. If liquid
contacts eyes, additionally seek
medical help. Liquid ejected from the
battery may cause irritation or burns.
6. Service
a) Have your power tool serviced by
a qualified repair person using only
identical replacement parts. This will
ensure that that safety of the power tool
is maintained.
ADDITIONAL SAFETY
POINTS FOR YOUR
ROTARY HAMMER
1. Wear ear protectors when using rotary
hammer. Exposure to noise can cause
hearing loss.
2. Use auxiliary handles supplied with the
tool. Loss of control can cause personal
injury.
3. Safety boots are recommended at all
times especially when using the chisel
actions.
4. Proper safety gloves are also
recommended.
5. When using chisel a dust mask is

Rotary hammer WX333
necessary because of the cement dust
created by the action.
6. Always check walls and ceiling to avoid
hidden power cables and pipes. A metal
detector can be obtained from any good
DIY store for this purpose.
7. Use clamps or a vice to hold workpiece, if
possible.
8. This heavy duty high torque machine
should not be used, while standing on a
ladder.
9. Before starting to work always check that
the chisel or drill bit is properly locked in
the chuck.
10. Hold the tool firmly with both hands while
working and provide for secure footing.
The tool is more securely guided with
both hands.
11. Wait until the machine has come to a
standstill before placing it down. The
insertion tool can be come caught and
lead to loss of control over the machine.
12. The screw of machine can come loose
easily, and causing a breakdown or
accident. Check tightness of screw
carefully before operation.
13. Do not touch the bit or parts close to the
bit immediately after operation. They may
be extremely hot and could burn your skin.
14. In cold weather or when the tool has
not been used for a long time. Let the
tool warm up for a while by operating
it under no load. This will loosen up the
lubrication.
15. Some material contains chemicals which
may be toxic. Take caution to prevent
dust inhalation and skin contact. Follow
material supplier safety data.
TORQUE LIMITER
There is a clutch in your hammer drill.
The torque limiter will actuate when a certain
torque level is reached. The motor will
disengage from the output shaft. When this
happens, the bit will stop turning.
As soon as the torque limiter actuates, switch
off the tool immediately. This will help prevent
premature wear of the tool.
SYMBOLS
To reduce the risk of injury, user
must read instruction manual
Warning
Double insulation
Wear eye protection
Wear ear protection
Wear dust mask
RCM marking

Rotary hammer WX333
1. LOCKING SLEEVE
2. DEPTH GAUGE
3. GREASE BOX COVER
4. ON / OFF SWITCH
5. HAMMER OR DRILLING ACTION SELECTOR SWITCH
6. HAMMER OR CHISEL ACTION SELECTOR SWITCH
7. VARIABLE SPEED CONTROL
8. SDS DRILL BITS*
9. SPANNER
10. KEY CHUCK WITH ADAPTOR, CHUCK KEY*
11. PLASTIC CONTAINER GREASE*
12. DUST COVER*
13. CHISELS (POINT & FLAT)*
14. AUXILIARY HANDLE
* Not all the accessories illustrated or described are included in standard delivery.

Rotary hammer WX333
A weighted sound pressure 89.6 dB(A)
Uncertainty 3 dB(A)
A weighted sound power 100.6 dB(A)
Uncertainty 3 dB(A)
Vibration total values (triax vector sum) determined according to EN60745:
Hammer drilling into concrete Vibration emission value αh,HD=17.426 m/s2
Chiselling Vibration emission value αh,Cheq=14.329 m/s2
Uncertainty K=1.5 m/s2
Rated voltages 220V-240V~50Hz/60Hz
Rated power 1250W
No load speed 0-750/min
Impact rate 0-3700/min
Rated impact energy 5.0J
Chuck type SDS-plus
Drilling capacity Masonry 32mm
Steel 13mm
Wood 40mm
Protection class /ll
Weight 6.1kg
TECHNICAL DATA
NOISE / VIBRATION INFORMATION

Rotary hammer WX333
ACCESSORIES
Auxiliary handle 1
Depth gauge 1
SDS drill bits(8 10 12x150mm) 3
SDS Chisel(point&flat 250mm) 2
Dust cover 1
Spanner 1
Key chuck with adaptor, chuck key 1
Plastic container grease 1
We recommend that you purchase your accessories from the same store that sold you the tool.
Use good quality accessories marked with a well-known brand name. Choose the type according
to the work you intend to undertake. Refer to the accessory packaging for further details. Store
personnel can assist you and offer advice.

Rotary hammer WX333
OPERATING INSTRUCTIONS
NOTE: Before using the tool, read the
instruction book carefully.
1. ADJUSTING THE AUXILIARY HANDLE (See
A )
For your personal safety we recommend using the
auxiliary handle at all times.
To adjust the handle, rotate the bottom of the handle
anti-clockwise and rotate the handle around the
hammer collar until the handle is in the desired
position. Tighten fully.
2. USING THE DEPTH GAUGE (See A)
The depth gauge can be used to set a constant depth
to the drill.
Rotate the locking screw on the top of the handle
anti-clockwise to loosen, insert the depth stop into
the handle. Adjust it to the desired depth. Rotate the
locking screw clockwise to tighten.
3. FITTING BITS OR CHUCK (See B1)
Clean the bit shank and apply grease before installing
the bit. Hold the rotary grip, pull back the lock sleeve
and insert the bits or chuck into the bit holder. Turn
the bit and push it in until a resistance is felt. The
shaft drops completely into the bit holder. Once you
are satisfied that it has been seated, release the black
lock sleeve. This would lock the bits or chuck into
position.
After installing, always make sure that the tool or
chuck is securely held in the bit holder by trying to
pull it out.
If the bits or chuck is not located well, repeat the
operation again.
4. REMOVE BITS OR KEY CHUCK (See B1)
To remove the tool or chuck, pull back the lock sleeve,
hold and pull the tool or chuck out.
NOTE: The bits or chuck are gripped firmly by
the shank and can not be removed once locked in
position.
5. USING THE CHUCK
For added convenience, your rotary hammer drill now
comes with a 3-jaw chuck. It enables you to work with
non-SDS drill bits/tools.
WARNING! The 3-jaw chuck is designed for
wood and metal DRILLING work only. NEVER
use this chuck with rotary hammer or chisel. THIS
�
�
�

Rotary hammer WX333
CHUCK CAN BE DAMAGED IF YOU DO SO.
Inserting a drill bit into chuck. (See B2)
Before installing drill bit, remove mains plug from
mains supply.
Place chuck key into chuck, turn key anti-clockwise to
undo/loosen chuck, insert drill/tool and firmly tighten
chuck by turning key clockwise. Remove key and
replace in Blow Mould Case.
6. OPERATING THE ON/OFF SWITCH (See C)
Depress the switch to start the tool and release it to
stop your tool.
7. USING THE VARIABLE SPEED CONTROL (See
D)
The speed increases as you turn the switch towards
the higher number and decreases on the lower
number.
8. HAMMER DRILL FUNCTION (See E,F)
1) For drilling concrete, masonry etc, press the lock
button (A) and rotate the selector switch to make sign
“ “ point to the triangle. (See E)
NOTE: You must press the selector switch lock button
before adjusting the selector switch. If the selector
switch cannot go into the required position, switch on
your hammer a little, then adjust the selector switch
again.
2) Turn the hammer or drilling action selector switch
pointing to the hammer action “ “ position. (See F)
3) You are now set up for hammer drilling into
masonry.
9. DRILLING FUNCTION (See G,H)
1) Press the lock button (A) and rotate the selector
switch to make sign “ “ point to the triangle. (See
G)
2) Turn the hammer or drilling action selector switch
pointing to the drilling action “ “ position. (See H)
3) You are now set up for drilling function.
10. CHISEL FUNCTION (See I,J)
1) For chipping, grooving or demolition operation,
press the lock button (A) and then rotate the selector
switch make sign “ “ pointing to the triangle . (see I)
2) Turn the hammer or drilling action selector switch
pointing to the hammer action “ “ position. (see J)
3) You are now set up for chisel work using Chisel
action.
�
�
�
�
�
�
�
�
�
�
�
�

Rotary hammer WX333
WARNING! You must make sure that the
selector switch is positively locked in chisel
mode position. If not, it could cause a hazard.
11. DUST COVER (See K)
Use the dust cover to prevent dust from falling over
the tool and on your self when performing overhead
drilling operations. Attach the dust cover to the bit as
shown in the K.
12. LUBRICATION MACHINE (See L)
Always check there is sufficient grease in the grease
box before usage. Check every 5 hrs of usage. Open
the grease box lid at the top of the drill using the
pin spanner provided. Then top up the grease box
(capacity 20gms max) using the grease provided with
your tool. The grease specification is general purpose
lithium based.
CAUTION: Keep the container of grease away
from children.
13. TO REPLACE THE BRUSHES (See M,N)
Disconnect the plug from the power supply.
Unscrew the carbon brush cap with screwdriver.
Remove the carbon brush. Check the length of the
brush and replace if under 6mm. When brushes need
replacement always renew both brushes, even if one
is still more than 6mm long.
Completely screw down the carbon brush cap. Check
that the tool is working. Before use, allow it run for a
few minutes to enable the brushes to settle.
WORKING HINTS FOR YOUR
TOOL
1. Reduce the pressure on the drill bit when it is about
to break through. This will prevent the drill from
jamming.
2. When drilling a large hole, first drill a pilot hole
using a smaller drill bit.
3. Always apply pressure to your drill bit in a straight
line, and if possible at right angles to the workpiece.
4. Never change the operating mode whilst the drill is
running.
5. Do not apply excessive pressure to the tool when
chiseling. Expressive force does not speed up the
work.
�
�
�
�
�
�
�
�
�
�
�
�

MAINTENANCE
Remove the plug from the socket before carrying
out any adjustment, servicing or maintenance.
There are no user serviceable parts in your power
tool. Never use water or chemical cleaners to clean
your power tool. Wipe clean with a dry cloth. Always
store your power tool in a dry place. Keep the motor
ventilation slots clean. Keep all working controls free
of dust. Occasionally you may see sparks through the
ventilation slots. This is normal and will not damage
your power tool.
If the supply cord is damaged, it must be replaced
by the manufacturer, its service agent or similarly
qualified persons in order to avoid a hazard.
TROUBLESHOOTING
1. If your power tool does not start, check the plug on
the power supply first.
2. If your hammer becomes too hot in use, set the
hammer switch to the drill mode and allow your drill
to operate at maximum speed without load for 2
minutes.
3. If your hammer work efficiency is too low, please
add sufficient grease in the grease box.
4. If your hammer use in low efficiency, please check
whether the tool is blunt.
5. If a fault can not be rectified, return the tool to an
authorized dealer for repair.
�
�
�
�
�
�
�
�
�

/
