Page is loading ...

Cisco Small Business
WAP4410N Wireless-N Access Point
with Power Over Ethernet
ADMINISTRATION
GUIDE

© 2009 Cisco Systems, Inc. All rights reserved. OL-19774-01
CCDE, CCSI, CCENT, Cisco Eos, Cisco HealthPresence, the Cisco logo, Cisco Lumin, Cisco Nexus, Cisco Nurse Connect, Cisco Stackpower,
Cisco StadiumVision, Cisco TelePresence, Cisco WebEx, DCE, and Welcome to the Human Network are trademarks; Changing the Way We Work, Live, Play, and
Learn and Cisco Store are service marks; and Access Registrar, Aironet, AsyncOS, Bringing the Meeting To You, Catalyst, CCDA, CCDP, CCIE, CCIP, CCNA,
CCNP, CCSP, CCVP, Cisco, the Cisco Certified Internetwork Expert logo, Cisco IOS, Cisco Press, Cisco Systems, Cisco Systems Capital, the Cisco Systems
logo, Cisco Unity, Collaboration Without Limitation, EtherFast, EtherSwitch, Event Center, Fast Step, Follow Me Browsing, FormShare, GigaDrive, HomeLink,
Internet Quotient, IOS, iPhone, iQuick Study, IronPort, the IronPort logo, LightStream, Linksys, MediaTone, MeetingPlace, MeetingPlace Chime Sound, MGX,
Networkers, Networking Academy, Network Registrar, PCNow, PIX, PowerPanels, ProConnect, ScriptShare, SenderBase, SMARTnet, Spectrum Expert,
StackWise, The Fastest Way to Increase Your Internet Quotient, TransPath, WebEx, and the WebEx logo are registered trademarks of Cisco Systems, Inc. and/
or its affiliates in the United States and certain other countries.
All other trademarks mentioned in this document or website are the property of their respective owners. The use of the word partner does not imply a
partnership relationship between Cisco and any other company. (0903R)

WAP4410N Wireless-N Access Point with Power Over Internet iii
Contents
About This Document vi
Audience vi
Organization vi
Finding Information in PDF Files vii
Finding Text in a PDF vii
Finding Text in Multiple PDF Files viii
Chapter 1: Introduction 1
Chapter 2: Planning Your Wireless Network 3
Network Topology 3
Roaming 3
Network Layout 4
Example of a Simple Wireless Network 4
Chapter 3: Getting to Know the Wireless-N Access Point 6
Front Panel 6
Back Panel 7
Antennas and Positions 8
Chapter 4: Connecting the WAP4410N Access Point 9
Placement Options 9
Desktop Option 9
Wall-Mount Option 9
Stand Option 10
Connecting the WAP4410N Access Point to the Network 11
Using a PoE Switch to Connect the WAP4410N Access Point
to the Network 12
Using a Standard Switch to Connect the WAP4410N Access Point
to the Network 13

WAP4410N Wireless-N Access Point with Power Over Internet iv
Contents
Chapter 5: Setting Up the WAP4410N Wireless-N Access Point 14
Launching the Web-Based Configuration Utility 14
Navigating the Utility 15
Setup 15
Wireless 15
AP Mode 16
Administration 16
Status 16
Chapter 6: Configuring the WAP4410N Wireless-N Access Point 18
Setting Up Your Access Point 18
Configuring Basic Setup Settings 19
Configuring Time Settings 22
Configuring Advanced Settings 23
Wireless 24
Configuring Basic Settings 25
Configuring Security 27
Configuring Connection Control 39
Configuring Wi-Fi Protected Setup 43
Configuring VLAN & QoS 44
Configuring Advanced Settings 46
Configuring the AP Mode 49
Administration 51
Configuring Administration Settings 52
Configuring Administration Log 54
Diagnosing Access Point Problems 56
Restoring Factory Default Settings 57
Upgrading the Firmware 58
Rebooting the Access Point 59
Managing the Access Point’s Configuration 60

WAP4410N Wireless-N Access Point with Power Over Internet v
Contents
Configuring Status Settings 61
Checking Local Network Status 61
Checking the Wireless Status 63
Checking System Performance 64
Appendix A: Troubleshooting and Help 66
Frequently Asked Questions 66
Windows Help 72
TCP/IP 72
Shared Resources 73
Network Neighborhood/My Network Places 73
Appendix B: Wireless Security 74
Security Precautions 74
Protecting Your Network 75
Appendix C: Upgrading Firmware 77
Appendix D: Specifications 79
Appendix E: Where to Go From Here 82
Product Resources 82
Related Documentation 83

Preface
WAP4410N Wireless-N Access Point with Power Over Internet vi
About This Document
This guide describes the concepts and tasks necessary to install, configure, and
manage the WAP4410N Access Point.
Audience
The audience for this document includes wireless network users, administrators,
and managers.
Organization
This table describes the contents of each chapter in this document.
Chapter Title Description
Chapter 1 Introduction Introduces the access point and its
capabilities.
Chapter 2 Planning Your Wireless
Network
Describes how to connect the
access point to the network.
Chapter 3 Getting to Know the
Wireless-N Access Point
Describes the physical features of
the access point.
Chapter 4 Connecting the
WAP4410N Access
Point
Explains how to place and connect
the access point.
Chapter 5 Setting Up the
WAP4410N Wireless-N
Access Point
Explains how to use the web-based
utility to configure the basic settings
of the access point through your web
browser.
Chapter 6 Configuring the
WAP4410N Wireless-N
Access Point
Describes how to configure and
manage your WAP4410 access
point.

Preface
WAP4410N Wireless-N Access Point with Power Over Internet vii
Finding Information in PDF Files
The WAP4410N Access Point documents are published as PDF files. The PDF
Find/Search tool within Adobe® Reader® lets you find information quickly and
easily online. You can perform the following tasks:
• Search an individual PDF file.
• Search multiple PDF files at once (for example, all PDFs in a specific folder
or disk drive).
• Perform advanced searches.
Finding Text in a PDF
Follow this procedure to find text in a PDF file.
STEP 1 Enter your search terms in the Find text box on the toolbar.
NOTE By default, the Find tool is available at the right end of the Acrobat toolbar. If the Find
tool does not appear, choose Edit > Find.
Appendix A Troubleshooting and
Help
Provides solutions to problems that
may occur during the installation and
operation of the access point.
Appendix B Wireless Security Discusses security considerations
when using a wireless network.
Appendix C Upgrading Firmware Provides instructions to upgrade the
access point’s firmware.
Appendix D Specifications Lists the formal specifications of the
access point.
Appendix E Where to Go From Here Provides links to related sources of
information.
Chapter Title Description

Preface
WAP4410N Wireless-N Access Point with Power Over Internet viii
STEP 2 Optionally, click the arrow next to the Find text box to refine your search by
choosing special options such as Whole Words Only.
STEP 3 Press Enter.
STEP 4 Acrobat displays the first instance of the search term.
STEP 5 Press Enter again to continue to more instances of the term.
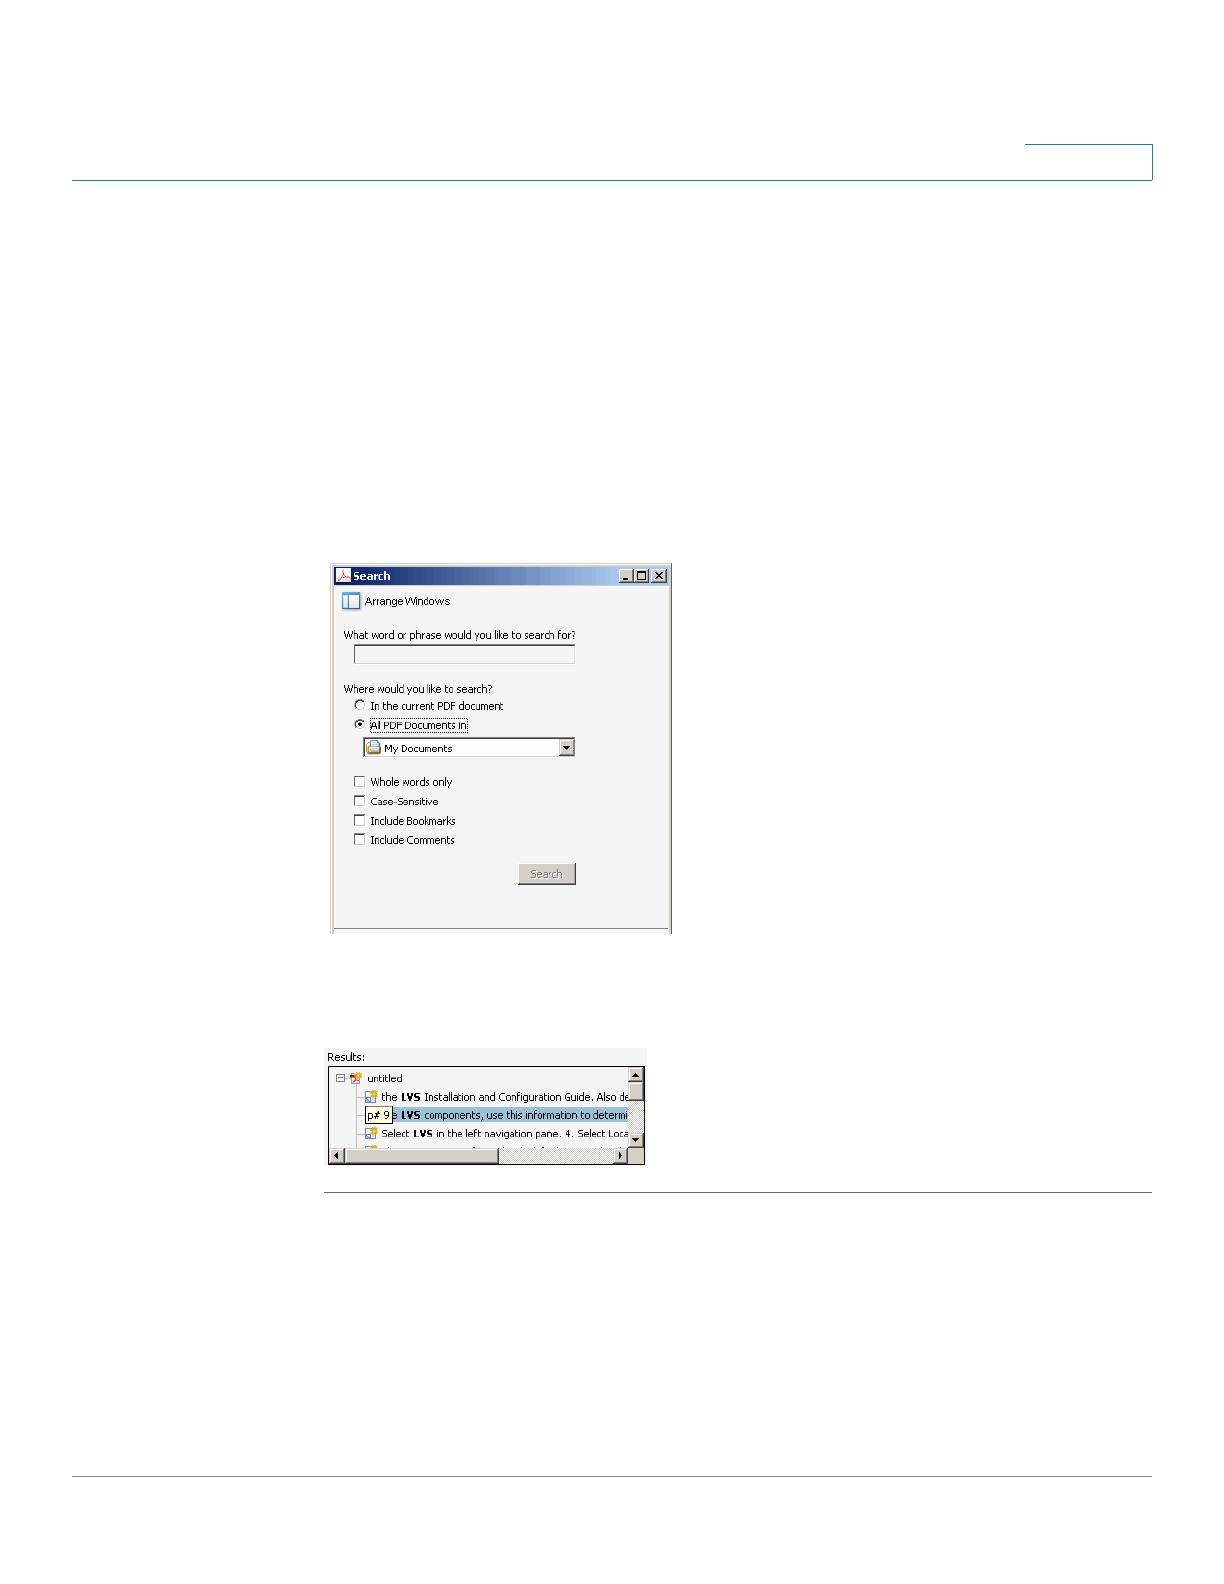
Finding Text in Multiple PDF Files
The
Search
window lets you search for terms in multiple PDF files that are stored
on your PC or local network. The PDF files do not need to be open.
STEP 1 Start Acrobat Professional or Adobe Reader.
STEP 2 Choose Edit > Search, or click the arrow next to the
Find
box and then choose
Open Full Acrobat Search.
Preface
WAP4410N Wireless-N Access Point with Power Over Internet ix
STEP 3 In the
Search
window, complete the following steps:
a. Enter the text that you want to find.
b. Choose All PDF Documents in.
From the drop-down box, choose Browse for Location. Then choose the
location on your computer or local network, and click OK.
c. If you want to specify additional search criteria, click Use Advanced Search
Options, and choose the options you want.
d. Click Search.
STEP 4 When the Results appear, click + to open a folder, and then click any link to open
the file where the search terms appear.
For more information about the Find and Search functions, see the Adobe Acrobat
online help.

1
WAP4410N Wireless-N Access Point with Power Over Internet 1
Introduction
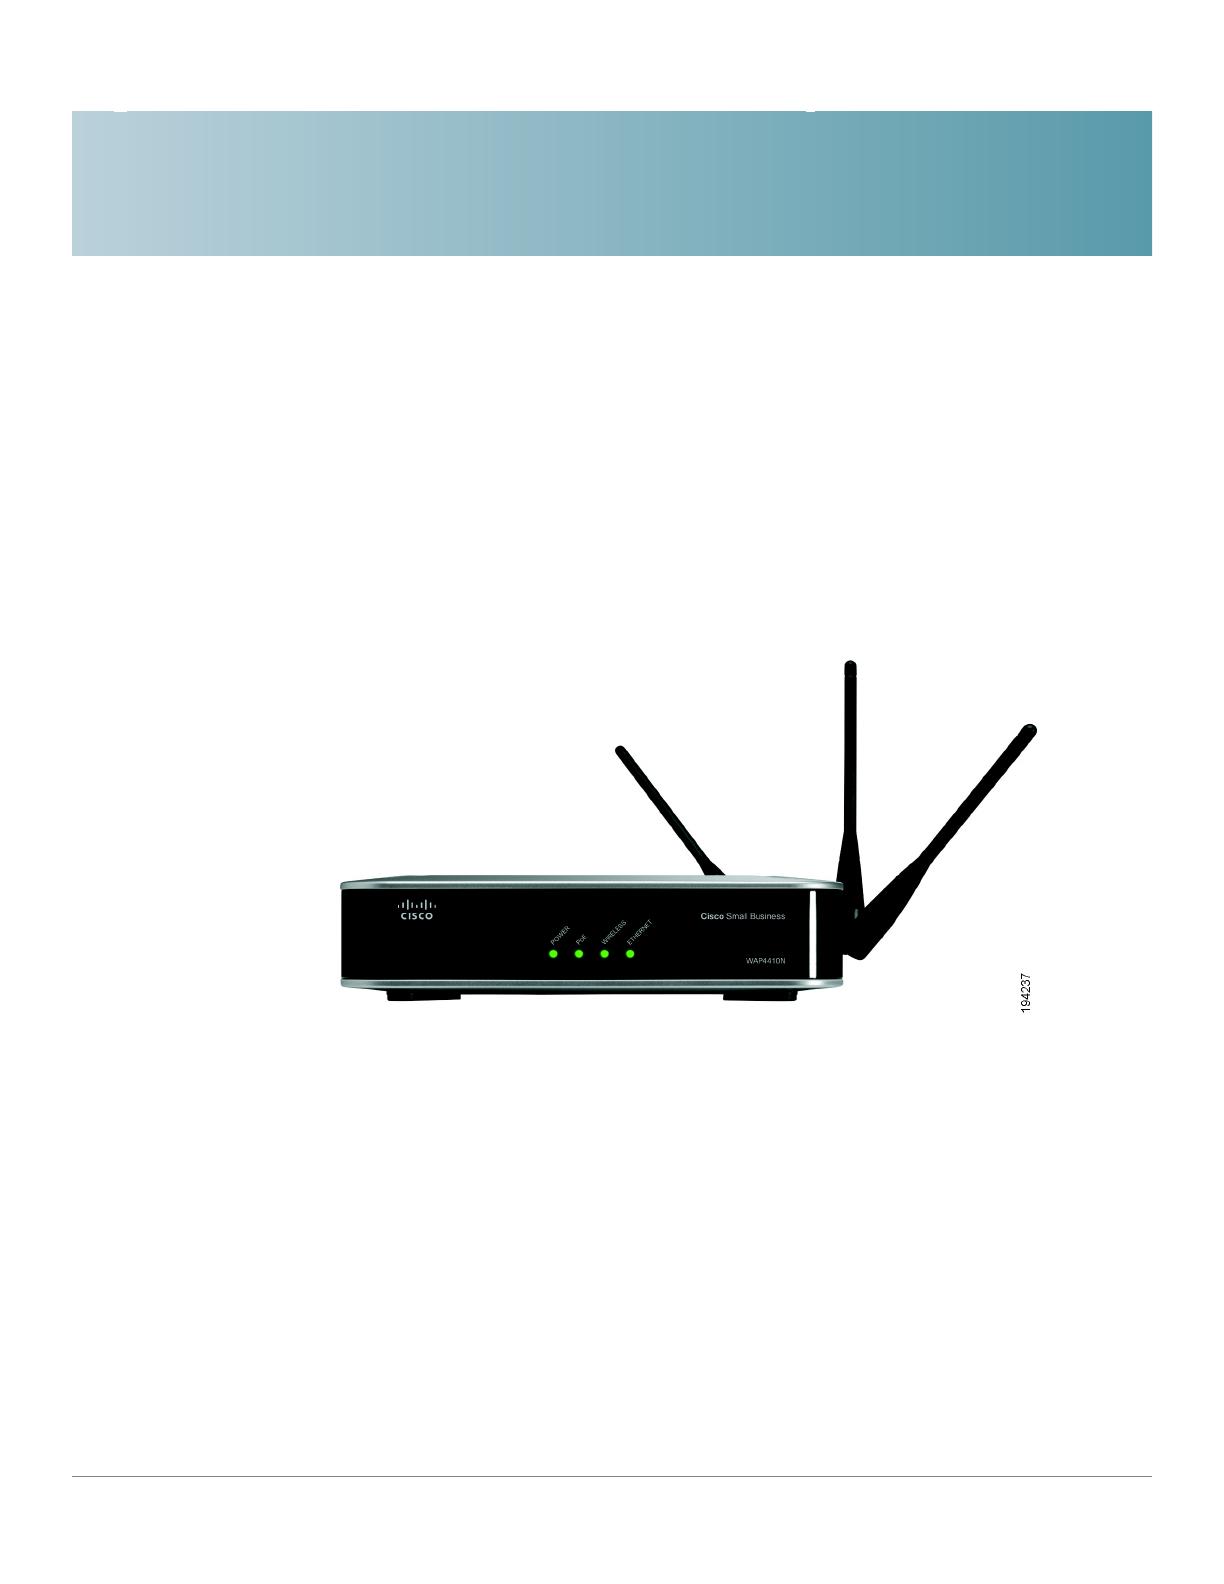
Thank you for choosing the Cisco WAP4410N Wireless-N Access Point with
Power over Ethernet.
This access point allows you to network wirelessly better than ever. An access
point allows for greater range and mobility within your wireless network while also
allowing you to connect the wireless network to a wired environment.
The Wi-Fi Protected Setup (WPS) feature is also supported to help you simplify
the setting up and configure security on a wireless network.
The Cisco WAP4410N Wireless-N Access Point with Power over Ethernet even
offers the convenience of Power over Ethernet (PoE) capability (in addition to
regular 12VDC power adaptor), so it can receive data and power over a single
Ethernet network cable.
The WAP4410N Access Point supports the 802.11n Draft 2.0 Specification by
IEEE. It also support 802.11g and 802.11b clients in a mixed environment. This
access point can support 802.11n connections, which are much faster than the
earlier 802.11b/g technologies. In addition, this access point provides longer
coverage by using multiple antennas to transmit and receive data streams in
different directions.
Networks are useful tools for sharing computer resources. You can access one
printer from different computers and access data located on another computer's
hard drive. Networks are even used for playing multiplayer video games. So,
networks are not only useful in homes and offices, they can also be fun.
Computers on a wired network create a LAN, or Local Area Network. They are
connected with Ethernet cables, which is why the network is called “wired.”
Computers equipped with wireless client cards or adapters can communicate
without cumbersome cables. By sharing the same wireless settings within their
transmission radius, they form a wireless network.
This is sometimes called a WLAN, or Wireless Local Area Network. The access
point bridges wireless networks of 802.11n, 802.11g and 802.11b standards and
wired networks.

Introduction
WAP4410N Wireless-N Access Point with Power Over Internet 2
1
Use the instructions in this guide to help you connect the access point, set it up,
and configure it to bridge your different networks. These instructions should be all
you need to get the most out of the access point.

2
WAP4410N Wireless-N Access Point with Power Over Internet 3
Planning Your Wireless Network
Network Topology
A wireless network is a group of computers, each equipped with one or more
wireless adapters. Computers in a wireless network must be configured to share
the same radio channel to talk to each other. Several computers equipped with
wireless cards or adapters can communicate with each other to form an ad-hoc
network without the use of an access point.
Cisco also provides products to allow wireless adaptors to access wired network
through a bridge such as the wireless access point, or wireless router. An
integrated wireless and wired network is called an infrastructure network. Each
wireless computer in an infrastructure network can talk to any computer in a wired
or wireless network via the access point or wireless router.
An infrastructure configuration extends the accessibility of a wireless computer to
a wired network, and may double the effective wireless transmission range for
two wireless adapter computers. Since an access point is able to forward data
within a network, the effective transmission range in an infrastructure network may
be more than doubled since access point can transmit signal at higher power to
the wireless space.
Roaming
Infrastructure mode also supports roaming capabilities for mobile users. Roaming
means that you can move your wireless computer within your network and the
access points will pick up the wireless computer’s signal, providing that they both
share the same wireless network (SSID) and wireless security settings.
Before you consider roaming, choose a feasible radio channel and optimum
access point position. Proper access point positioning combined with a clear radio
signal will greatly enhance performance.

Planning Your Wireless Network
Network Layout
WAP4410N Wireless-N Access Point with Power Over Internet 4
2
Network Layout
The Wireless-N Access Point has been designed for use with 802.11n, 802.11g
and 802.11b products. The access point is compatible with 802.11n, 802.11g and
802.11b adapters, such as the notebook adapters for your laptop computers, PCI
adapters for your desktop PCs, and USB adapters for all PCs when you want to
enjoy wireless connectivity. These wireless products can also communicate with
a 802.11n, 802.11g or 802.11b wireless print server (if available).
To link your wired network with your wireless network, connect the access point’s
Ethernet network port to any switch or router with Power over Ethernet (PoE)—or
a PoE injector, such as the Cisco WAPPOE or WAPPOE12. Note that the 12 VDC on
the WAPPOE12 is for the splitter output.
With these, and many other, Cisco products, your networking options are limitless.
Go to the Cisco website at www.cisco.com for more information about wireless
products.
Example of a Simple Wireless Network
The diagram below shows a typical infrastructure wireless network setup.

Planning Your Wireless Network
Example of a Simple Wireless Network
WAP4410N Wireless-N Access Point with Power Over Internet 5
2
The wireless access points are connecting to a Cisco switch that provides them
with power. Each access point can connect multiple wireless devices to the
network.
This network provides connectivity among wireless network devices and
computers that have a wired connection to the switch.
The switch connects to a router that connects to the Internet.
3
WAP4410N Wireless-N Access Point with Power Over Internet 6
Getting to Know the Wireless-N Access Point
This chapter describes the external features of the WAP4410N Access Point.
Front Panel
The access point’s front panel LEDs display information about network activity.
POWER LED—(Green) Lights up and remains lit when the device is powered on.
PoE LED—(Green) Lights up when the access point is powered through an
Ethernet cable.
WIRELESS LED—(Green) Lights up when the wireless module is active on the
access point. This LED flashes when the access point is actively sending to or
receiving data from a wireless device.
ETHERNET LED—(Green) Lights up when the access point successfully connects
to a device through the Ethernet network port. This LED flashes when the access
point is actively sending to or receiving data from one of the devices over the
Ethernet network port.

Getting to Know the Wireless-N Access Point
Back Panel
WAP4410N Wireless-N Access Point with Power Over Internet 7
3
Back Panel
The ports of the access point are located on the back panel of the switch.
RESET Button—There are two ways to reset the access point to the factory
default configuration. Either press the Reset button for approximately 10 seconds
or restore the defaults using the web-based utility of the access point.
ETHERNET Port—Connects to Ethernet network devices, such as a switch or
router that may or may not support PoE.
POWER Port—Connects the access point to power using the supplied 12VDC
power adapter.

Getting to Know the Wireless-N Access Point
Antennas and Positions
WAP4410N Wireless-N Access Point with Power Over Internet 8
3
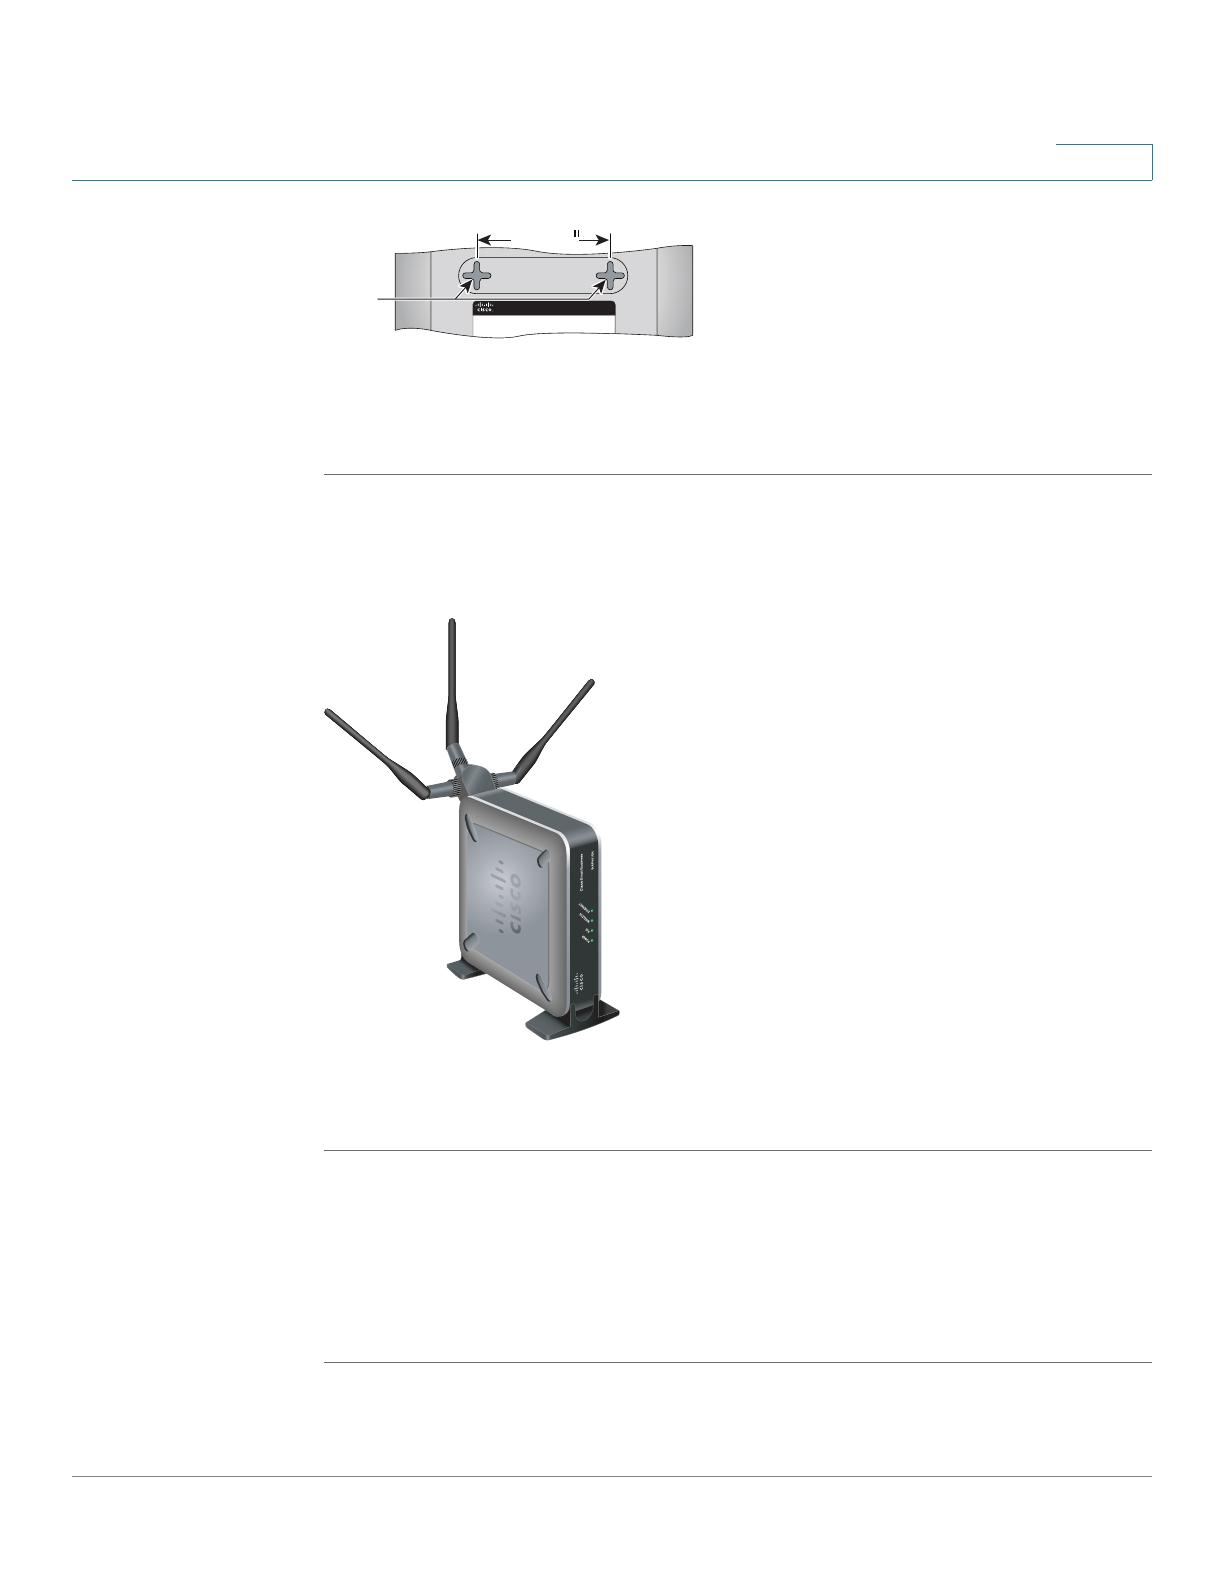
Antennas and Positions
The WAP4410N Access Point has three detachable 2dBi omni-directional
antennas. These antennas are located on the back of the device.
The three antennas have a base that can rotate 90 degrees when in the standing
position. The three antennas support 3X3 “multiple in, multiple out” (MIMO)
diversity in wireless-N mode.

4
WAP4410N Wireless-N Access Point with Power Over Internet 9
Connecting the WAP4410N Access Point
This chapter describes how to place and connect the WAP4410N Access Point to
your network.
Depending on your application, you might want to set up the device first before
mounting it.
Placement Options
You can place the WAP4410N Access Point horizontally on its rubber feet,
vertically in a stand, or mount it on the wall.
Desktop Option
For desktop mounting, place the access point horizontally on a surface so it sits on
its four rubber feet.
Wall-Mount Option
To mount the WAP4410N Access Point on a wall, follow these steps.
STEP 1 Determine where you want to mount the WAP4410N Access Point and install two
screws (not supplied) that are 2-15/16 inches apart (approximately 7.46 cm.).
STEP 2 With the back panel pointing up (if installing vertically), line up the WAP4410N
Access Point so that the wall-mount crisscross slots on the bottom of the access
point line up with the two screws.
Connecting the WAP4410N Access Point
Placement Options
WAP4410N Wireless-N Access Point with Power Over Internet 10
4
STEP 3 Place the wall-mount slots over the screws and slide the WAP4410N Access Point
down until the screws fit snugly into the wall-mount slots.
Stand Option
To place the access point vertically in a stand, follow these steps.
STEP 1 Locate the left side panel of the WAP4410N Access Point.
STEP 2 With the two large prongs of one of the stands facing outward, insert the short
prongs into the little slots in the WAP4410N Access Point, and push the stand
upward until the stand snaps into place.
Repeat this step with the other stand.
251580
Wall
mount
slots
2-15/16
235601

Connecting the WAP4410N Access Point
Connecting the WAP4410N Access Point to the Network
WAP4410N Wireless-N Access Point with Power Over Internet 11
4
Connecting the WAP4410N Access Point to the Network
You can connect the WAP4410N Access Point to your network in one of the
following ways:
• Using a PoE switch
• Using a standard switch
/