Page is loading ...

AXTC-A12
INSTALLATION INSTRUCTIONS
AxxessInterfaces.com © COPYRIGHT 2023 METRA ELECTRONICS CORPORATION REV. 8/24/23 INSTAXTC-A12
ATTENTION:
With the key out of the
ignition, disconnect the negative battery
terminal before installing this product.
Ensure that all installation connections,
especially the air bag indicator lights, are
plugged in before reconnecting the battery
or cycling the ignition to test this product.
NOTE: Refer also to the instructions included
with the aftermarket accessory before
installing this device.
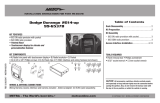
INTERFACE FEATURES
INTERFACE COMPONENTS
TOOLS REQUIRED
• Crimping tool and connectors, or solder gun,
solder, and heat shrink • Tape • Wire cutter
• Zip-ties
TABLE OF CONTENTS
Connections
LD-AX-SWCX-AU1 ...............................................2
LD-AX-SWCX-AU2 ................................................3
Programming .........................................................4
Troubleshooting.....................................................5
Audi Data Interface with SWC 2002-2013
• Provides accessory power
(10-amp)
• Provides illumination output
• Provides wires for multimedia
radios (park brake, reverse,
speed sense)
• Retains audio controls on the
steering wheel
• Designed to be compatible
with all major radio brands
• Auto detects vehicle type, radio
connection, and preset controls
• Ability to dual assign steering
wheel control buttons
• Retains memory settings even
after battery disconnection or
interface removal (non volatile
memory)
• Micro-B USB updatable
• AXTC-A12 interface
• LD-AX-SWCX-AU1 Harness
• LD-AX-SWCX-AU2 Harness
• 3.5mm Adapter
APPLICATIONS
Applications below use
LD-AX-SWCX-AU1 Harness:
A3 (1) ............................................... 2006-2013
A4/RS 4/S4 (with NAV) .................2005-2008
A4/RS 4/S4 ..................................... 2007-2008
A4/RS 4/S4 ...............................................2006
TT ......................................................2008-2013
Applications below use
LD-AX-SWCX-AU2 Harness:
A3 (2) ..............................................2006-2007
A4/S4 (3) ........................................2002-2006
A6 ..............................................................2004
Allroad ............................................2004-2005
TT ..................................................... 2002-2006
(1) With either Symphony Plus or NAV radio.
(2) With Concert radio (without NAV)
(3) With Symphony radio (without NAV)
Visit AxxessInterfaces.com
for more detailed information about the product
and up-to-date vehicle specific applications

2
20
3.5mm Jack
Connect to the jack on the radio
designated for an external steering
wheel control interface.
LD-AX-SWCX-AU1
Reset Button
LED Light
3.5mm Adapter (for radios with a wire for SWC)
Eclipse: Brown - Brown/White / Brown/White - Brown
Boss (with SWC wire): Key 1 (Gray) - Brown
Kenwood / JVC (with SWC wire): Blue/Yellow - Brown
XITE: SWC-2 - Brown
Universal Radio*: Key-A or SWC-1 - Brown
Key-B or SWC-2 - Brown/White *
* After programming, assign SWC buttons within radio menu
1. LD-AX-SWCX-AU1 harness only
2. For models without Bose only
3. For models with Bose only
4. Any remaining wires, tape off and disregard
Connection Notes
CONNECTIONS: LD-AX-SWCX-AU1 DIAGRAM
Radio Connections
Black - Ground
Black/White - Ground (1)
Yellow - Battery power
Red - Accessory power
Orange - Illumination
Blue - Amp turn-on (1)
Blue/White - Amp turn-on
Blue/Pink - VSS/Speed-Sense
Green/Purple - Reverse signal
Light Green - Parking brake
Gray – Front right speaker + (2)
Gray/Black – Front right speaker - (2)
White – Front left speaker + (2)
White/Black – Front left speaker -(2)
Green – Rear left speaker + (2)
Green/Black – Rear left speaker - (2)
Purple – Rear right speaker + (2)
Purple/Black – Rear right speaker – (2)
Gray RCA Jack – Front right output (3)
White RCA Jack – Front left output (3)
Green RCA Jack – Rear left output
Purple RCA Jack – Rear right output

3
REV. 8/24/23 INSTAXTC-A12
CONNECTIONS: LD-AX-SWCX-AU2 DIAGRAM
20
Radio Connections
Black - Ground
Black/White - Ground (1)
Yellow - Battery power
Red - Accessory power
Orange - Illumination
Blue - Amp turn-on (1)
Blue/White - Amp turn-on
Blue/Pink - VSS/Speed-Sense
Green/Purple - Reverse signal
Light Green - Parking brake
Gray – Front right speaker + (2)
Gray/Black – Front right speaker - (2)
White – Front left speaker + (2)
White/Black – Front left speaker -(2)
Green – Rear left speaker + (2)
Green/Black – Rear left speaker - (2)
Purple – Rear right speaker + (2)
Purple/Black – Rear right speaker – (2)
Gray RCA Jack – Front right output (3)
White RCA Jack – Front left output (3)
Green RCA Jack – Rear left output
Purple RCA Jack – Rear right output
Reset Button
LED Light
3.5mm Adapter (for radios with a wire for SWC)
Eclipse: Brown - Brown/White / Brown/White - Brown
Boss (with SWC wire): Key 1 (Gray) - Brown
Kenwood / JVC (with SWC wire): Blue/Yellow - Brown
XITE: SWC-2 - Brown
Universal Radio*: Key-A or SWC-1 - Brown
Key-B or SWC-2 - Brown/White *
* After programming, assign SWC buttons within radio menu
1. LD-AX-SWCX-AU2 harness only
2. For models without Bose only
3. For models with Bose only
4. Any remaining wires, tape off and disregard
Connection Notes
LD-AX-SWCX-AU2
3.5mm Jack
Connect to the jack on the radio
designated for an external steering
wheel control interface.

4
PROGRAMMING
Open the driver’s door, and keep open during the programming process.
Turn the key (or push-to-start button) to the ignition “ON” position.
Connect either the LD-AX-SWCX-AU1 or LD-AX-SWCX-AU2 harness to
the AXTC-A12 interface, and then to the wiring harness in the vehicle.
Program the interface by scrolling the Volume Wheel up at a heartbeat
pace until the LED light stops flashing.
The LED will flash Green & Red while the interface programs the radio to
the steering wheel controls. Once programmed, the LED will go out, then
produce a pattern which will identify the radio type installed. Refer to
the Radio LED Feedback section under Troubleshooting for radio types
.
1.
2.
3.
4.
5.
O
F
F
A
C
C
O
N
S
T
A
R
T
Green & Red LED
Green or Red LED
The LED will go out, then once again quickly flash Green & Red while
the interface programs itself to the vehicle. Once programmed, the LED
will go out again, then turn solid Green.
Cycle the ignition off, then back to the ignition “ON” position.
Test all functions of the installation for proper operation.
6.
7.
8.
Green & Red LED
Green LED
O
F
F
A
C
C
O
N
S
T
A
R
T
O
F
F
A
C
C
O
N
S
T
A
R
T

5
REV. 8/24/23 INSTAXTC-A12
Solid Green
Slow Red Flash
Slow Green Flash
Solid Red
Pass
Fail
Pass
Fail
Pass
Pass
Fail
Fail
Note: If the LED shows Solid Green for Pass (indicating
everything programmed correctly), yet the steering wheel
controls don’t work, make sure that the 3.5mm jack is plugged
in, and plugged into the correct jack in the radio. Once
corrected, press the reset button, then program again
.
Radio LED Feedback
At the end of programming the LED will turn Solid Green which
indicates programming was successful. If the LED didn’t turn Solid
Green, reference the list below to understand which programming
section the problem may stem from.
TROUBLESHOOTING
1. 2.
LED Reset
Button
If the interface fails to function,
press and release the reset
button, then repeat the
programming process from
step 4 to try again.
LED Light Radio
Programming
Section
Vehicle
Programming
Section

6

7
REV. 8/24/23 INSTAXTC-A12

AxxessInterfaces.com © COPYRIGHT 2023 METRA ELECTRONICS CORPORATION REV. 8/24/23 INSTAXTC-A12
INSTALLATION INSTRUCTIONS
AXTC-A12
KNOWLEDGE IS POWER
Enhance your installation and fabrication skills by
enrolling in the most recognized and respected
mobile electronics school in our industry.
Log onto www.installerinstitute.edu or call
386-672-5771 for more information and take steps
toward a better tomorrow.
®
Metra recommends MECP
certified technicians
Having difficulties? We’re here to help.
Contact our Tech Support line at:
386-257-1187
Or via email at:
Tech Support Hours (Eastern Standard Time)
Monday - Friday: 9:00 AM - 7:00 PM
Saturday: 10:00 AM - 5:00 PM
Sunday: 10:00 AM - 4:00 PM
/