Page is loading ...

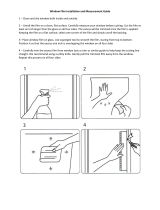
Generously spray the window with the Application
Solution, use a razor blade to remove stubborn dirt
or paint. Use special care cleaning the corners. Re-
wet the window, then squeegee downward. Wipe off
accumulated dirt from the window gasket with a soft
cloth. If possible, clean the outside of the window for
the best clarity.
CLEAN WINDOW
1.
Hint!
Greasy or smoke-covered windows can be cleaned rst with
glass cleaner then rinsed thoroughly with the Application
Solution. Apply lm to cool shaded windows when glass
temperature is between 45-90ºF. For best results, do not apply
in direct sunlight or freezing weather.
Please read these instructions carefully before beginning. You may
want to watch the instructional video online at gilafilms.com for
a thorough demonstration. We recommend practicing the steps with
a small piece of film or on a smaller window. Application is easier
with two people, especially on larger windows.
(Sold in GILA Tool Kit)
• GILA® Window Film Application Solution – Ready to
use for cleaning and application. Do not dilute or mix
with water.
• Squeegee and squeegee card – For smoothing the
• Utility knife – For trimming the
• GILA Edging Tool – To ensure a clean edge
• Low-lint cloth – For cleaning the
and the glass
Tools Needed
(Household items)
• Single-edged razor blade – For cleaning the glass
• Ruler or tape measure
• Transparent tape
• Scissors
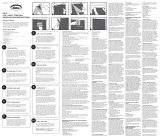
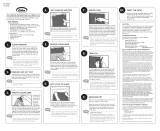
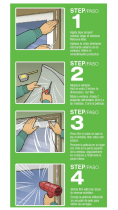
Unroll the film on a clean, flat surface. Carefully measure
your window before cutting. Cut the film at least an inch
larger than the glass on all four sides. The excess will be
trimmed once film is applied.
MEASURE AND CUT FILM
2.
Hint!
Try to use at least one of the factory edges. Work in a dust-
free area. Turn off fans.
Leaving the
on a clean, flat
surface, select
one corner of
the film and
attach two
small pieces
of transparent
tape (3-4
inches) to each
side – one on
the
and one on the liner. Leave some tape hanging
over the corner of the film (about 1 inch). Press the two
pieces of tape firmly together, then quickly pull them
apart to begin separating the clear liner away from the
You have the liner! Leave the tape in place
and move to the next step.
IDENTIFY CLEAR LINER
3.
Hint!
Usually the liner is on the outside surface of the lm roll. You
may want to fold the ends of the tape over themselves to
keep the two pieces of tape from sticking together.
Lightly spray the Application Solution onto the inside
surface of the window and both sides of the
This
helps reduce film curl and static electricity.
WET WINDOW AND FILM
4.
Hint!
Have a helper hold the lm by the edges while you spray.
Flip the lm over and repeat on the other side.
Peel the two strips of tape apart to release the liner
from the corner. As you begin to pull away the liner,
spray the smooth side of the film with the Application
Solution until the clear liner is removed and the smooth
side is completely saturated. Try to keep the
from
touching itself.
REMOVE CLEAR LINER
5.
Hint!
Have a helper hold the lm while you peel the clear liner
away and spray the smooth side of the lm. Handle the lm
very carefully to prevent creasing.
Hold the film so that the smooth side is facing the
window and apply to the glass. Use your hands to
smooth the film out and position it so that the excess
1” is overlapping the window on all four sides.
APPLY FILM TO GLASS
6.
Hint!
If you’re using a factory edge, line that up to the window
edge. For larger pieces of lm, leave some of the liner on
the lm while you apply it to the glass. Once the lm is in
place, remove the liner completely.
Spray the entire surface of the film facing you with the
Application Solution. Wrap your squeegee with a low-
lint cloth. Lightly squeegee the centerline of the
from top to bottom to set it in place. Begin smoothing
the film, starting at the top of the window. Squeegee
from the center to the right side and work downward,
leaving a 2” perimeter around the edges unsqueegeed.
Repeat this process for the left side
SMOOTH FILM
7.
Hint!
If “ngers,” or longer, larger bubbles, appear along any edge,
wrap your squeegee with a low-lint cloth and carefully push
the “ngers” toward the edge of the lm. The cloth will
absorb the excess water. The hard card squeegee works
great for this.
The GILA Edging Tool has a small slit along the edge.
Place the utility knife in this slit and line knife and
Edging Tool up to a top corner edge of the window.
Slowly and
pull the knife and Edging Tool down
the window to trim the film. Re-position the knife
and tools to get the corners. Gently pull the trimmed
film away from the window. Repeat this process on all
four edges of the film.
TRIM FILM
8.
Hint!
The GILA Edging Tool leaves a 1/16” gap between the lm
and the edge of the window, this gap is essential for the
proper thermal expansion of the glass. Use a new blade
after every 10 feet of lm you cut. Cutting lm causes the
blade to dull quickly, which can tear the lm.
ENJOY THE VIEW!
10.
Rewet the film and squeegee from the center to the
right side, working from the top down.
Repeat this process for the left side. Press firmly to
remove all the water so that the film can cure clearly.
If air bubbles are present, squeegee them out. Any
remaining small water bubbles should evaporate as
the film cures.
SQUEEGEE DRY
9.
Hint!
CORRECTING MISTAKES:
You may notice imperfections such as air bubbles or
debris between the lm and the glass. Simply peel the
affected area of the lm away from the glass. Use the
tip of your utility knife or squeegee to remove any debris
or bubble. Re-spray the lm and the glass with the
Solution and re-apply to the glass.
CLEANING AND CARE:
For best results, use the Application Solution. Wipe clean with
a rubber squeegee or low-lint cloth. If using an ammonia-based
glass cleaner, do not allow the cleaner to stay on the film for
more than 2 minutes.
REMOVAL:
Static Cling makes removal easy and clean. Removal is as easy
as peeling the film away from the glass. If your film has been
installed for several years or it doesn’t peel off the glass easily,
please use GILA Film Removal Solution (which is sold at the
GILA
display in most retail outlets) to facilitate removal.
More detailed removal instructions can be found on our
website.
INTENDED USE:
GILA residential window should only be applied as directed:
• Apply to the INSIDE surface of standard 1/8” single and
dual panes. This includes single, dual, removable storm panes,
all window shapes such as patio and French doors, and
half-rounds.
• Apply to the INSIDE surface of exterior removable
storm panes.
FOR WINDOWS LARGER THAN FILM SIZE
To cover larger windows, you may need to seam the
as
you would wallpaper. To obtain a perfect butt seam, vertically
overlap two sides, then use a ruler as a straight edge to guide
your knife as you cut through the center of both layers of film.
After cutting the seam line, peel the loose sheet of film from
the top, then lift the edge and slide the other waste piece from
underneath. Rewet the glass, lay down the film, rewet the film,
then squeegee from top to bottom in a slow, firm vertical
motion. A week after installation, you should waterproof the
seam with a coat of clear fingernail polish.
CAUTION:
Do not apply GILA residential
to motor vehicle windows.
For information on products designed for these applications,
visit gilafilms.com. Do not apply any film to frosted, etched,
leaded, cracked, holed, or deeply scratched glass, or any
otherwise flawed or defective glass or glass that is more than
40 years old.
CONSUMER SUPPORT:
For additional technical support or product inquiries,
please write, call, or go online:
GILA Film Products
P.O. Box 5068 • Martinsville, VA 24115 USA
Consumer Service Hotline, 1-800-528-4481
Monday-Friday, 8am-5pm EST
web:
•
SATISFACTION GUARANTEE:
The lifespan of the
depends on exposure to the elements,
handling, and care. GILA will gladly replace any product with
a manufacturing defect. Send the original sales receipt, an
explanation of the defect, a 4” x 4” sample of the defective film,
and the product UPC code from the packaging to:
GILA Film Products • DIY/WAR
P.O. Box 5068 • Martinsville, VA 24115 USA
All claims must be submitted in writing.
Please allow 3-4 weeks for processing.
© 2015 GILA is a registered trademark of CPFilms Inc., a division of St. Louis-based Eastman Chemical Company
Great work. You have successfully applied your GILA
Window Film. The
will fully “cure” over the
next 7 to 10 days. Dry, sunny weather speeds curing.
Any remaining small bubbles should disappear
during this time.
50175941
(11/2015)
/


