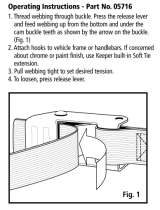
Hobie Mirage
Inflatable Kayak Manual
® ®
In 1950, Hobie’s dream was born in his
parents’ garage when he decided to apply
his love of woodworking to the sport of
surfing. Dad backed out the Buick... Hobie
carved out his very first surfboard...
Hobie’s business of fun had begun.
4
Table of Contents
Look for this icon. Online video is available at
www.hobie.com/support/products
Please read through the instruction manual before using this
product
®
Anatomy ........................................................................................5
Assembly ....................................................................................6
MirageDrive ..................................................................................10
Vantage CTi ..................................................................................13
On the Water ................................................................................ .18
Cup Holder ...................................................................................21
Storage and Transportation .........................................................22
Maintenance and Care ................................................................. .25
Kick Up Adjustment ......................................................................27
Safety ............................................................................................28
Warranty ...................................................................................... .30
Accessories ..................................................................................31
5
hobie.com
Anatomy
1
2
3 4
5
6 7 8 9
1. Hull
2. MirageDrive 180
3. Vantage CTi Seat
4. Cup Holder
5. Paddle
6. Cassette Plug
7. Repair Kit
8. Air Pump
9. Optional Tracking Skeg (only i11s)
6
Assembly
7/32
MirageDrive Cranks
7/32
Depending on the Mirage
kayak model, cranks may or
may not require assembly.
1
Insert cranks into
drums while
depressing button
at top.
2
Tighten crank
bolt all the way
(snug not tight)
using a 7/32”
Allen® wrench.
7
hobie.com
Assembly
Vantage CTi Assembly
1
2
Webbing Attachments
High/Low Legs
BOA Lumbar Adjust
Recline Adjust
Steering Track
Seat Track
D-Rings for Webbing Attachments
®
Webbing
Attachments
Webbing Attachments
High/Low Legs
BOA Lumbar Adjust
Recline Adjust
Steering Track
Seat Track
D-Rings for Webbing Attachments
®
Webbing
Attachments
Line up threaded
inserts on seat
back frame with
holes molded
in seat bottom
frame.
Once aligned,
insert screws
and tighten.
8
Assembly
Line up the
shorter (FWD)
handle on the
left and the
longer (REV)
handle on the
right
Screw in both
pull handles into
the levers on the
MirageDrive
FWD/REV Handle Installation
1
2
Shorter
handle on
the left
Longer
handle on
the right
Shorter
handle on
the left
Longer
handle on
the right
Thread into
FWD/REV levers
3/8 Wrench
9
hobie.com
Assembly
Deflating the Kayak
Pin
Pin
Pin
Locate the three air valves
on your kayak near the stern.
There is one valve for each of
the side tubes and one valve for
the floor.
Unscrew the cover of the valve
and make sure the pin is “up”.
If it does not spring up it is
in the “down” position. To
unlock the pin from the “down”
position push down on the pin
and turn it counterclockwise
until it pops up.
Line up the hose of the pump with the
valve. Make sure the pin is in the “up”
position. Plug in the hose and begin
inflating your kayak. Continue pumping
until tubes and floor are firm. Follow
pressure guides on kayaks and pump.
Adjust the lever on the back side of the
pump for more efficient pumping. Double
action is for more air volume and lower
pressure. Single action is for less air
volume and higher pressure.
Press the pin in the “down”
position. To lock the pin in the
“down” position, push it down
while turning it clockwise.
Note:
Open bilge
valve located
on front of the
kayak before
inflating. Close
valve before
using your
kayak.
Inflating the Kayak
1
2
3
4
10
MirageDrive Instruction
CLICK
Removal
Level
Level
Press down and
lock drive into
Click and Go’s.
The drive locks
automatically
when installed.
Lower drive
straight down
making sure the
spine is level.
Lift drive
straight
up.
Pull back
each Click
and Go lever
in unison.
Installation
1
2
1
2
11
hobie.com
MirageDrive Instruction
Pedal Adjustment
Squeeze
Adjust cranks
by rotating and
clicking them
into the desired
position. Make
sure both cranks
are in the same
position number.
With both feet
on the pedals
and together
(fins straight
down), your
knees should
be comfortably
bent and not
over crunched or
extended.
Press the
adjuster button
at top of crank.
1
2
3
12
MirageDrive Instruction
Reverse
From the forward
position, pull the
right handle to
shift the drive
into reverse.
(This is the
longer handle of
the two)
Shifting with
the fins too far
apart can cause
interference
with the shift.
Pull with firm
pressure while
cranks are close
together.
From the reverse
position, pull
the left handle
to shift the drive
into forward.
1
2
Left Handle = Forward
(shorter handle)
Right Handle = Reverse
(longer handle)
reverse
forward
13
hobie.com
Vantage CTi
2
Webbing Attachments
High/Low Legs
BOA Lumbar Adjust
Recline Adjust
Steering Track
Seat Track
D-Rings for Webbing Attachments
®
Webbing
Attachments
®
Anatomy
Items not shown to scale
14
Pull the legs out of the
Seat Bottom Frame and
flip to either a high or
low position. Plug the
legs back into the
Seat Bottom Frame
when the desired position
is chosen.
High
Pull & Flip Legs
Low
High/Low Legs
Vantage CTi
15
hobie.com
Vantage CTi
Front Mid Back
Pull to tighten strap
Clip
Before installing
the Vantage CTi,
choose the front,
middle or back
position in the
Seat Tracks.
Line up the legs
on the Vantage
CTi with the Seat
Tracks mounted
on the kayak.
Set the Vantage
CTi in the desired
location in the
Seat Tracks.
Clip the Webbing
Attachments on
the Vantage CTi
to the D-Rings
mounted on the
kayak. Pull to
tighten the
webbing and cinch
the Vantage CTi to
the kayak.
Seat Installation
1
2
3
4
16
Vantage CTi
Pull lever out to
activate the seat
back to recline.
Release lever to
lock seat into
position.
While holding the
lever out, push on
the seat back to
recline.
Recline Adjustment
1
2
3
17
hobie.com
Vantage CTi
C
l
i
c
k
C
l
i
c
k
C
l
i
c
k
Pull knob to release
lumbar.
Press knob to lock
lumbar.
Rotate knob clockwise
to tension lumbar.
Lumbar Adjustment
1
2
3
18
MirageDrive Operation
Shallow Water and
Beaching
Kick Up Fins
Press either pedal forward in
shallow water to raise fins.
Pressing one pedal fully forward
will orient the fins with the kayak
underside.
The kick up fins will automatically
retract backwards when coming in
contact with any object and resume
their normal position when clear of
obstruction and you pedal.
On the Water
19
hobie.com
On the Water
Rudder DOWN
Rudder UP
Cleat
Paddle Storage
Pull on “down”
“T” Handle fully
to engage
rudder.
Once rudder is
engaged in the
“down” position,
cleat the line to
hold the rudder
in place.
Uncleat “down”
“T” Handle line
before retracting
rudder.
Pull on “up” “T”
Handle to
retract rudder.
Push the paddle
into the paddle clips
on the side of the
kayak.
“Cleat”
“Up”
20
On the Water
There are
steering tracks
located on both
sides of the seat.
Choose what side
is best for you.
Slide the
steering handle
onto the track
over the lock pin.
The pin will click
into place.
Point the
steering handle
in the direction
you would like to
travel.
To remove the
steering handle,
pull down on the
knob located on
the underside
of the steering
track and slide
the handle off the
track.
Steering
1
2
3
4
  • Page 1 1
  • Page 2 2
  • Page 3 3
  • Page 4 4
  • Page 5 5
  • Page 6 6
  • Page 7 7
  • Page 8 8
  • Page 9 9
  • Page 10 10
  • Page 11 11
  • Page 12 12
  • Page 13 13
  • Page 14 14
  • Page 15 15
  • Page 16 16
  • Page 17 17
  • Page 18 18
  • Page 19 19
  • Page 20 20
  • Page 21 21
  • Page 22 22
  • Page 23 23
  • Page 24 24
  • Page 25 25
  • Page 26 26
  • Page 27 27
  • Page 28 28
  • Page 29 29
  • Page 30 30
  • Page 31 31
  • Page 32 32

Ask a question and I''ll find the answer in the document

Finding information in a document is now easier with AI