Page is loading ...

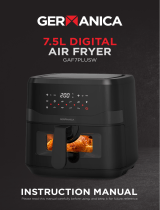
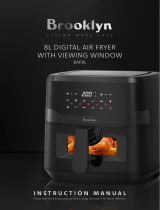
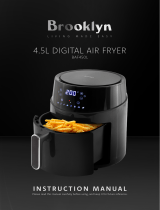
INSTRUCTION MANUAL
Please read this manual carefully before using, and keep it for future reference.


CONTENTS
General Safety 4
Introduction 8
Product Overview 8
Important Info 10
Preparing for Use 12
Before First Use 13
Preparing for Use 13
Using The Appliance 14
Cleaning 21
Storage 21
Troubleshooting 22
Specifications 24
Customer Helpline Last Page

4
Read this manual thoroughly before you start using the Air Fryer. The safety
precautions instructions reduces the risk of fire, electric shock and injury when
correctly complied to. Please follow all instructions and take notice of all warnings.
IMPORTANT INFORMATION
GENERAL SAFETY
The lightning flash with symbol within the
triangle is intended to warn you of a
non-insulated dangerous voltage in the
product’s enclosure that could be of
sucient magnitude to generate a risk of
electric shock to persons.
The exclamation point within the triangle
is intended to warn you to the presence
of important operating and maintenance
instructions in the documents included with
the product.
The lightning flash symbol within the triangle is intended to warn you of
non-insulated dangerous voltage the product’s enclosure that could be of
sucient magnitude to generate a risk of electric shock to persons.
• Only using furniture that can safely support the Products.
• Ensure the Product is not overhanging the edge of the supporting furniture.
• Do not place the product on a high furniture without securing both the furniture
and the product to a stable support.
• Do not place the product on cloth or other conductive materials.
• Warn children of the dangers of climbing on furniture to reach the air fryer
or its controls and to call for an adult to assist.
IMPORTANT INFORMATION
The cover (or back) of the unit should not be
removed to prevent risk of electric shock. This
unit must be serviced by a qualified service
personnel only.

5
GENERAL SAFETY (Cont.)
• When handling Air fryer, make sure to use handle to remove basket after
using the air fryer. Other surfaces may be hot.
• The outside of the air fryer is hot during and after use.
• Always use heat-resistant gloves, pads, or oven mitts when handling hot
materials, and when placing items in or removing items from the air fryer,
including trays, racks, accessories, or containers.
• When the air fryer is not in use, and before cleaning, turn o the appliance,
then unplug from outlet. Allow to cool completely before putting on or
taking o parts.
• Do not immerse the housing, cord, or plug in water or liquid.
• Closely supervise children near the air fryer.
• Do not use your air fryer if it is damaged, not working, or if the cord or plug is
damaged. Contact Customer Support info@ayonz.com
• Do not use third-party replacement parts or accessories, as this may
cause injuries.
• Do not use outdoors.
• Be extremely cautious when removing the basket if it contains hot oil, grease,
or other hot liquids.
• Do not clean with metal scouring pads. Metal fragments can break o the pad
and touch electrical parts, creating a risk of electric shock.
• Clean the basket after using and after allowing it to cool. Accumulated grease
and crumbs can overheat and catch fire.
• Do not store anything on top of your air fryer when in operation. Do not store
anything inside your air fryer other than recommended accessories.
• Do not operate with a separate remote control system (i.e. Timers or Wi-Fi
Smart Power Plugs).
• Only use as directed in this manual.
• Not for commercial use. Household use only.
RECOMMENDED:
Air Fryers should be placed and used on a “stable, horizontal, flat and
heat-resistant” surface. Must be placed on an insulated heat pad.
We recommend you purchase a heat insulation pad to be placed under
the air fryer, as the heat generated from the airfryer may cause damage to
the surface overtime.

6
GENERAL SAFETY (Cont.)
WHEN USING ELECTRICAL APPLIANCES, BASIC SAFETY PRECAUTIONS
SHOULD ALWAYS BE FOLLOWED INCLUDING THE FOLLOWING:
1. Read all instructions.
2. Do not touch hot surfaces.
3. To protect against electric shock do not immerse cord, plugs, or base in water
or other liquid.
4. WARNING: This electrical appliance contains a heating function. Surfaces,
also dierent than the functional surfaces, can develop high temperatures.
Since temperatures are dierently perceived by dierent persons, this
equipment shall be used with CAUTION. The equipment shall be touch only
at intended handles and gripping surfaces, and use heat protection like
gloves or similar. Surfaces other than intended gripping surfaces shall get
suciently time to the cool down before getting touched.
5. Unplug from outlet when not in use and before cleaning. Allow to cool before
putting on or taking o parts.
6. Type Y:If the supply cord is damaged, it must be replaced by the
manufacturer, its service agent or similarly qualified persons in order to
avoid a hazard.
7. The use of accessory attachments not recommended by the appliance manu
facturer may cause injuries.
8. Do not use outdoors
9. Do not let cord hang over edge of table or counter, or touch hot surfaces.
IMPORTANT SAFEGUARDS

7
GENERAL SAFETY (Cont.)
10. Do not place on or near a hot gas or electric burner, or in a heated oven.
11. Extreme caution must be used when moving an appliance containing
hot oil or other hot liquids.
12. Always attach plug to appliance first, then plug cord in the wall outlet.
To disconnect, turn any control to “o,” then remove plug from wall outlet.
13. Do not use appliance for other than intended use.
14. This appliance is not to be used by persons including children with
reduced physical, sensory or mental capabilities, or lack of of experience
and knowledge, unless they have been given supervision or instruction.
Children being supervised not to play with the appliance.
15. The appliances are not intended to be operated by means of an external
timer or separate remote-control system

8
INTRODUCTION
Thank you for buying this top quality air fryer. You will now be able to cook
a wide assortment of food in a healthier manner – with little or no oil!
The air fryer uses hot air, in combination with high-speed air circulation, and
a top grill to prepare your dishes quickly and easily. The ingredients are heated
from all sides, at once, and there is no need to add oil in most cases.
PRODUCT OVERVIEW
A: Rack
B: The tray
C: Basket handle
D: Air inlet
E: Control panel
F: Vent windows
G: Power cord

9
PRODUCT OVERVIEW
B: Temperature Plus/minus
C: French Fries
D: Meat
E: Time/temperature
F: Drumsticks
G: Steak
H: Time Plus/minus
I: Light
J: Start/stop
K: Vegetables
L: Chicken
M: Fish
N: Shrimp
N: Cake
A: Reheat

10
IMPORTANT INFO
- Never immerse the housing, which contains electrical components and
the heating elements, in water nor rinse it under the tap.
- Do not let any water or other liquid enter the appliance – to prevent
electric shock.
- Always put the ingredients to be fried in the tray, to prevent it from
coming into contact with the heating elements.
- Do not cover the air inlet and the air exhaust openings while the appliance
is operating.
- Do not fill the frying tray with oil as this may cause a fire hazard.
- Never touch the inside of the appliance while it is operating.
- Check whether the voltage indicated on the appliance corresponds to the
local mains voltage in your country before you connect the appliance.
- Do not use the appliance if the plug, the power cord or the appliance
itself is damaged.
- If the power cord is damaged, you must have it replaced at a service center
authorized by similarly qualified persons in order to avoid a hazard.
DANGER
Read this user manual carefully, before you use the appliance, and keep
it safely for future reference.

11
IMPORTANT INFO
- Keep the appliance and its mains cord out of the reach of children when
the appliance is switched on or is cooling down.
- Keep the mains cord away from hot surfaces.
- Do not plug in the appliance or operate the control panel with wet hands.
- Only connect the appliance to an earthed wall socket. Always make sure
that the plug is inserted into the wall socket properly.
- Never connect this appliance to an external timer switch.
- Do not place the appliance on or near combustible materials such as
a tablecloth or curtains.
- Do not place the appliance against a wall or against other appliances.
Leave at least 10cm free space at the back and sides and 10cm free space
above the appliance. Do not place anything on top of the appliance.
- Do not use the appliance for any purpose other than described in this manual.
- Do not let the appliance operate unattended.
- During hot air frying, hot steam is released through the air exhaust openings.
Keep your hands and face at a safe distance from the steam and from the air
exhaust openings. Also be careful of hot steam and hot air when you
remove the frying tray from the appliance.
- The surface below the appliance may become hot during use.
- Immediately unplug the appliance if you see dark smoke coming out of the
appliance. Wait for the smoke emission to stop before you remove the
frying tray from the appliance.

12
- Place the appliance on a horizontal, level and stable surface.
- This appliance is intended for normal household use only. It is not intended
for use in environments such as sta kitchens, oces, farms or other work
environments. Nor is it intended to be used by clients in hotels or other
similar environments.
- If the appliance is used improperly or if it is not used according to the
instructions in the user manual, the warranty becomes invalid and seller
refuses any liability for any damage that may be caused.
- Always unplug the appliance after use.
- Let the appliance cool down for approx. 30 minutes before you handle
or clean it.
- Remove burnt remnants.
CAUTION
IMPORTANT INFO

13
1. Remove all packing material.
2. Remove any stickers or labels from the appliance – other than the rating label.
3. Thoroughly clean the rack, and frying tray, with hot water and some liquid
washing soap using a non-abrasive sponge.
Note: You can also clean these parts in the dishwasher.
4. Wipe the inside and outside of the appliance with a moist cloth.
1. Place the appliance on a stable, horizontal and level surface that
is also heat resistant.
2. Place the rack in the frying tray properly.
Do not fill the frying tray with oil or any other liquid.
Do not put anything on top of the appliance. This disrupts the airflow
and aects the air-frying result.
BEFORE FIRST USE
PREPARING FOR USE

14
3. Start, Stop
After select function ,set the right time and right temperature, press ,
after BEEPS sounds, machine start to work. During the machine working,
press , after BEEPS sounds, machine stop working.
USING THE APPLIANCE
1. Power on
Plug in, there is BEEPS sounds. Light up. 1 seconds will be back to standby mode:
all light will be o expect
2. Menu selection/Temperature/Time
Plug in, it is at the standby mode. press , default temperature and default
time of the Program are 180°C, 15 min respectively, at that time you can adjust
the time and temperature freely by using Time +/- and Temperature +/- button.
You can also press any function icon to cook dierent food. When press the
function icon, the lights flickered, then press unit start to work. Every
function have its own default time and temperature (As shown in the table).
Customer can adjust the time and temperature freely by using Time +/- and
Temperature +/- button.
(1). The temperature control range is 50-200°C, every click on the + / -
temperature will increase or reduce 10°C. At 200°C, press the “+”, will loop back
to a temperature of 50°C, press the “-” at 50°C temperature will cycle back to
200°C. In the process of temperature control, temperature digital display will
flicker on the screen (not flashing during working), after flickering 3 times, the
temperature has been done of setting;
(2). The adjusting time range is 1 to 60 mins. every click on the + / - time will
increase or reduce 1 min. At 60 min if you press “+”, the time will cycle back to 01
min,. At 01 min , if you press “-”, the temperature will cycle back to 60 min. In the
process of time control, time digital display will flicker on the screen (not flashing
during working), after flickering 3 times, the time has been done of setting.

15
4. End of program
Heating element stop working when working time is done ,show 00 min, motor
continues to work, buzzer warning. motor continues to work 1 min,cooling
machine, then machine enter the standby mode.
USING THE APPLIANCE
Noted:
(1). During working, you can take frying tray out, stop working, and you can
check cooking result or add more food, machine continue to work on the
program if pull in the frying tray.
(2). Power cut or unplug during working, machine stop working, all light o,
machine continue to work on the program when power on or plug in again.
(3). During work, five red lights flicker on by one all the time.

16
Caution: Do not touch the pan during and about 30mins after use, as it gets
very hot. Only hold the pan by the handle.
USING THE APPLIANCE
Menu table
Function
Reheat 3 180
200
200
200
160
200
180
160
180
180
18
8
12
20
10
30
10
25
12
French fries
Meat
Drumsticks
Steak
Cake
Prawn
Fish
Chicken
Vegetables
menu Default
time(min)
Default
temperature°C
PROGRAM LOGISTICS

17
USING THE APPLIANCE
Operation step
1. Put the mains plug in an earthed wall socket.
2. Put the ingredients into the frying tray
3. Put the frying tray in the right position. Choose function from menu
and press START/PAUSE to start cooking.
4. Screen display
It will show temperature and time. Temperature is the setting temperature
and time is remain working time The function we have selected is flicker
5. Some ingredients require shaking halfway through the preparation time
(see section ‘Settings’ in this chapter). To shake the ingredients, pull
the frying tray out of the appliance by the handle and shake it. Then slide
the frying tray back into the air fryer.
6. When you hear the timer bell, the set preparation time has elapsed.
Pull the pan out of the appliance and place it on a heat-resistant surface.
7. Check if the ingredients are ready. If the ingredients are not ready yet,
simply slide the frying tray back into the appliance and cook it extra minutes
8. Check whether the ingredients are ready. If the ingredients are not ready yet,
you can simply slide the frying tray back into the appliance and cook it extra
minutes.
9. Empty the tray into a bowl or onto a plate.
Tip: To remove large or fragile ingredients, you can use a pair of tongs to lift
the ingredients out of the tray.
10. When a batch of ingredients is ready, the air fryer is instantly ready
for preparing another batch.
Note: When using the Health Fryer for the first time, a slight smoke or odour
maybe emitted. This is normal and will soon subside. Ensure that there is
sucient ventilation around the Health Fryer.

18
USING THE APPLIANCE
Settings
Except the preset menu, you also can use this air fryer to make other foods by
setting the time and temperature. This table below helps you to select the
basic settings for the ingredients you want to prepare.
Note: Keep in mind that these settings are only for reference. As ingredients
dier in origin, size, shape as well as brand, we cannot guarantee the best
setting for your ingredients.
Because the Rapid Air Technology instantly reheats the air inside the appliance,
pulling the frying tray briefly out of the appliance during hot air frying barely
disturbs process.
Tips:
- Smaller ingredients usually require a slightly shorter preparation time than
larger ingredients.
- A larger amount of ingredients only requires a slightly longer preparation
time, a smaller amount of ingredients only requires a slightly shorter
preparation time.
- Shaking smaller ingredients halfway through the preparation time optimized
the end result and can help prevent unevenly fried ingredients.
- You can coat fresh potatoes with a little oil for a crispy result. Fry your
ingredients in the air fryer within a few minutes after you have added the oil.
- Do not prepare extremely greasy ingredients such as sausages in the air fryer.
- Snacks that can be prepared in an oven can also be prepared in the air fryer.
- The optimal amount for preparing crispy fries is 500 grams.
- Use pre-made dough to prepare filled snacks quickly and easily. Pre-made
dough also requires a shorter preparation time than home-made dough.
- You can also use the air fryer to reheat ingredients by setting the temperature
to 150°C and the timer to about 10 minutes.

19
USING THE APPLIANCE
POTATOES & FRIES
MEAT & POULTRY
SNACKS
Thin frozen fries 12-16
8-12
8-10
6-10
6-10
10
10
10-14
7-14
13-15
10-15
12-20
18-25
18-22
18-22
18-22
200 Shake
Shake
Shake
Shake
Shake
Shake
Shake
200
200
200
200
200
200
200
160
180
180
180
180
180
180
180
180
180
12-18
15-18
add1/2 tbsp of oil
add1/2 tbsp of oil
add1/2 tbsp of oil
Use oven-ready
Use oven-ready
Use oven-ready
Use oven-ready
Use oven-ready
Time
(min.)
Temper-
ature(°C) Shake Extra information
Rösti
Potato gratin
Steak
Pork chops
Hamburger
Sausage roll
Drumsticks
Chicken breast
Spring rolls
Frozen chicken Nuggets
Stued vegetables
Frozen fish fingers
Frozen Bread-crumbed
cheese snacks
Thick frozen fries
Home-made fries
(8x8mm)
Home-made potato
wedges
Home-made potato
cubes
Note: Add 3 minutes to the preparation time before you start frying if the
appliance is cold.

20
USING THE APPLIANCE
Making home-made fries
For the best results, we advise to use pre-baked fries. If you want to make
home-made fries, follow the steps below:
1. Peel the potatoes and cut them into sticks.
2. Soak the potato sticks in a bowl of water for at least 30 minutes, take them
out and dry them with kitchen paper.
3. Pour 1/2 tablespoon of olive oil in a bowl, put the sticks on top and mix until
the sticks are coated with oil.
4. Remove the sticks from the bowl with your fingers or a kitchen utensil so that
excess oil stays behind in the bowl. Put the sticks in the tray.
Note:
Do not tilt the bowl to put all the sticks in the tray in one go, to prevent
excess oil from collecting at the bottom of the frying tray.
5. Fry the potato sticks according to the instructions in this chapter.
/