Page is loading ...

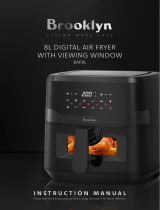
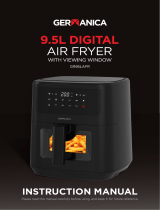
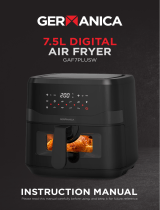
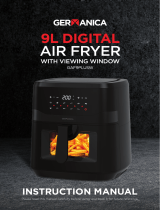
5L DIGITAL AIR FRYER
Model No.: KDF-596D
Care & Instruction Manual
WARNING: This appliance is operating at high
temperatures. To ensure your safety and the safety
of others, please ensure you read these instructions
paying particular attention to the safety precautions
before using this product and retain for future
reference.
A replacement copy of this manual can be obtained from www.argos-support.co.u

IMPORTANT SAFETY PRECAUTIONS
1. You should only plug the appliance into a 220V-
240V AC, 50Hz earthed socket outlet. Connecting
it to other power sources may damage the
appliance and will invalidate the guarantee.
2. Please read through this instruction manual
before your first use and keep it for future
reference.
3. Do not use an extension cord with this appliance.
4. Switch off and unplug when not in use and before
cleaning the appliance.
5. Beware of hot surfaces. Always wear
protective, insulated oven gloves or mitts
when removing food items or handling the tray
and basket - The oven gets very hot!
6. To protect against electrical shock do not immerse
cord, plugs, or main body in water or other liquid.
7. Close supervision is necessary when any
appliance is used by or near children.
8. Do not leave food in unit overnight.

9. Unplug from outlet when not in use and before
cleaning. Allow to cool before attaching or
removing parts or cleaning.
10. Do not use accessory attachments not
recommended by the appliance manufacturer as
may cause injury.
11. Do not let the cord hang over the edge of a table
or counter, or touch hot surfaces.
12. Do not place on or near a hot gas or electric
burner, or heated oven.
13. Children should be supervised to ensure that
they do not play with the appliance.
14. Keep the appliance and its cord out of reach of
children aged less than 8 years.
15. This appliance can be used by children aged
from 8 years and above and persons with
reduced physical, sensory or mental
capabilities or lack of experience and
knowledge if they have been given supervision
or instruction concerning use of the appliance
in a safe way and understand the hazards
involved. Children shall not play with the
appliance. Cleaning and user maintenance
shall not be made by children unless they are
older than 8 and supervised.

16. Use on a secure and stable worktop. Do not place near
the edge of the worktop.
17. Do not place the product where it can either fall or be
submerged into water or any other liquid.
18. Do not move the oven while in use.
19. A fire may occur if the oven is covered by or placed
near the flammable material, including curtains,
draperies, walls, and the like, when in operation.
20. Never leave the product unattended while in use.
21. Do not place any of the following materials in the oven:
cardboard, plastic, paper, or anything similar. This
includes “ready meals” for microwave or conventional
ovens which should not be cooked in an air fryer.
22. Do not store any materials, other than manufacturer's
recommended accessories in this oven when not in
use.
23. DO NOT operate the unit near to where aerosol
products are being used.
24. NOTE - This product may emit some odour when it is
first used. This is due to lubricant on the elements
burning off and is NORMAL. It will not continue
following further usage.
25. Always be extremely cautious when preparing foods
using fats and oil around heat as these can catch fire or
scold.
26. Where you see this symbol on the
product or attachments, it means:
CAUTION: Hot Surface

27. The product is not to be used if it has been dropped, or
if there are visible signs of damage.
28. The appliance is not intended to be operated by means
of an external timer or separated remote-control
system.
29. If the supply cord is damaged, it must be replaced by
the manufacturer, its service agent or similarly qualified
persons in order to avoid a hazard.
30. The outer surface may get hot when the appliance is
operating.
31. Never cook stews casseroles or any liquid based food
such as soup as the unit can become damaged by
liquid splashes and vapour”
32. Do not in front of plug sockets as there is a hot air vent
at the rear of unit.
33. Do not cover the air inlet (top of unit) or the air exhaust
openings at the back while the appliance is operating.
34. Do not fill the frying tray with oil as this may cause a fire
hazard.
35. During hot air frying, hot steam is released through the
air exhaust opening. Keep your hands and face at a
safe distance from the steam and from the air exhaust
opening. Also be careful of hot steam and hot air when
you remove the frying tray from the appliance.
36. Immediately unplug the appliance if you see dark
smoke coming out of the appliance. Wait for the smoke
emission to stop before you remove the frying tray from

the appliance.
SAVE THESE INSTRUCTIONS

2
Contents
Know Your Appliance ..................................................................................................................... 3
Digital Panel Function ..................................................................................................................... 4
Automatic Switch-Of ..................................................................................................................... 4
Before First Use ............................................................................................................................... 4
Preparing for Use ............................................................................................................................ 5
Using the Appliance ........................................................................................................................ 5
Pre-Heat/Manual ............................................................................................................................ 6
Preset cooking mode table ............................................................................................................. 7
Operation Tips ................................................................................................................................. 8
Using Oil .......................................................................................................................................... 8
Food Tips ......................................................................................................................................... 8
Making home-made fries ............................................................................................................... 8
Reheating Foods .............................................................................................................................. 9
Cooking Guide ................................................................................................................................. 9
Cleaning ......................................................................................................................................... 11
Troubleshooting ............................................................................................................................ 12
Technical Data ............................................................................................................................... 15
Disposal ......................................................................................................................................... 15
Connection to power .................................................................................................................... 16

3
Know Your Appliance
A. Frying Tray E. Frying tray
B. Clear Perspex button cover F. Vent (air in)
C. Basket release button G. Control Panel
D. Frying Basket Handle H. Hot Vent (air out)

4
Digital Panel Function
A. Temperature Plus / Minus
B. Numeric Display
C. Timer Plus / Minus
D. Start / Pause
E. Power
F. Steak
G. Vegetables
H. Drumstick
I. Pizza
J. Meat
K. Fish
L. Shrimp
M. Fries
N. Cake
O. Pre-Heat
Automatic Switch-Of
This appliance is equipped with a timer. When the timer has counted down to 0, the appliance
produces 10 “BEEPS” and switches off automatically. To switch off the appliance manually, press
“Power” to shut down the unit.
Note: Pressing “Start/Pause” only pauses the air frying process, the unit will NOT be switched
off.
Before First Use
1. Remove all packing material.
2. Thoroughly clean the Frying tray, and frying Basket, with warm water and some
washing up liquid using a non-abrasive sponge.
Note: You can also clean these parts in the dishwasher.
3. Wipe the outside of the appliance with a moist cloth.

5
Preparing for Use
1. Place the appliance on a stable, horizontal and level surface that is also heat resistant.
Do not fill the frying tray with oil or any other liquid.
Do not put anything on top of the appliance. This disrupts the airflow and affects the air-
frying result.
Using the Appliance
1. Power on
When plugging the unit into a wall outlet there will be a beep sound and the power
button will illuminate RED.
Now press the power button and the unit control panel will light up ready for
use.
2. Setting the Timer & Cooking Temperature
Press one of the 10 pre-set cooking modes (food icons) which will input both the time and
temperature automatically. You can freely edit both cooking time and temperature if you
wish by using Time and Temperature + /- buttons.
Both temperature and cooking time are alternated between constantly on the display
to show the current settings.
Press the Start/Pause button to begin the cooking cycle.
Some ingredients require shaking / flipping halfway through the cooking time. To shake /
flip the ingredients, pull the frying tray out of the appliance by the handle and shake it.
Then slide the frying tray back into the air fryer.
Tip: If you set the timer to half the cooking time, you hear the timer beep when you have to
shake / flip the ingredients. However, this means that you must set the timer again for the
remaining cooking time after shaking / flipping.
Warning: Make sure not to slide the cover press the basket release button when shaking or
the frying tray will be released from the basket and handle assembly.
When the timer reaches “00” it will give 10 “BEEPS” a cooling cycle then starts for 60
seconds, the fan will continue to run whilst the display will remain at “00”. You may
remove the contents before this cooling cycle ends if required
Pull the frying tray out of the appliance and place it on a heat-resistant surface. Then slide
the clear Perspex cover at the top of the basket handle away from you and press the

6
basket release button, the basket can then be lifted out and contents tipped out into a
serving bowl.
When a batch of ingredients is ready, the air fryer is instantly ready for preparing another
batch.
Note: When using the Air Fryer for the first time, a slight smoke or odour may be
emitted. This is normal and will soon subside. Ensure that there is sufficient ventilation
around the Health Fryer.
Pre-Heat/Manual
The Pre-Heat button is simply an extra cooking pre-set mode and can be used in the
same way as any of the pre-set modes (food icons). The Pre-Heat pre-set mode sets the
time to 3 minutes and the temperature to 180°C.
Select the Pre-Heat/Manual button , you can now freely edit both cooking time and
temperature.

7
Preset cooking mode table
The following table shows the pre-set cooking modes built into this unit.
Program Logic
Menu
Default
User Selectable Range
Time
(min)
Temperature
°C
Time
(min)
Temperature
°C
Function
Preheat
3
180
1-60
50-200°C
Fries
18
200
1-60
50-200°C
Meat
12
200
1-60
50-200°C
Drumsticks
20
200
1-60
50-200°C
Steak
12
180
1-60
50-200°C
Cake
25
160
1-60
50-200°C
Shrimp
8
180
1-60
50-200°C
Fish
10
180
1-60
50-200°C
Pizza
20
180
1-60
50-200°C
Vegetables
10
160
1-60
50-200°C
Caution: Do not touch the frying tray during and about 30mins after use, as it gets very hot.
Only hold the basket & tray assembly by the handle.

8
Operation Tips
1. Some ingredients require shaking halfway through the cooking time time. To shake the
ingredients, pull the frying tray out of the appliance by the handle and shake it. Then slide
the frying tray back into the air fryer.
2. When the timer ends, pull the frying tray out of the appliance and place it on a heat-
resistant surface.
3. To remove large or fragile ingredients, use a pair of tongs to lift the ingredients
out of the basket.
4. When a batch of ingredients is ready, the air fryer is instantly ready for preparing another
batch.
5. Air Fryer and Parts will become hot during the cooking process.
6. Do not over fill Fry Basket with foods.
7. Do not pack foods into Frying trays.
Using Oil
Adding a small amount of oil to food can make them crispier.
Oil sprays are good for applying small amounts of oil evenly to food.
Food Tips
You can air fry frozen food that can be baked in the oven.
To make cakes, pies, or any foods with filling or batter, you can place foods in a heat-safe
container and put that in Fry Basket.
Pat dry foods with marinades before adding to Fry Basket.
Making home-made fries
For the best results, we advise to use pre-baked fries. If you want to make home- made
fries, follow the steps below:
1. Peel the potatoes and cut them into sticks.
2. Soak the potato sticks in a bowl of water for at least 30 minutes, take them out and dry
them with kitchen paper.
3. Pour 1/2 tablespoon of olive oil in a bowl, put the sticks on top and mix until the sticks
are coated with oil.
4. Remove the sticks from the bowl with your fingers or a kitchen utensil so that excess
oil stays behind in the bowl. Put the sticks in the basket.
Note: Do not tilt the bowl to put all the sticks in the frying tray in one go, to prevent
excess oil from collecting at the bottom of the frying tray.
5. Fry the potato sticks according to the instructions in this chapter.

9
Reheating Foods
Simply set temperature to 180°C for up to 10 minutes.
Cooking Guide
Note: these settings are a guide. As ingredients differ in size shape and brand, you may
need to adjust cooking times and temperatures.
CHICKEN
Check food is cooked through with no raw meat and is piping hot.
Breasts, boneless
200g
17min
190°C
Drumsticks
1.15kg
25min
190°C
Legs, bone in
300g
30min
190°C
Tenders
Whole
20min
180°C
Thighs, bone in
110g
22min
190°C
Thighs, boneless
110g
20min
190°C
Wings
1.15kg
15min
190°C
BEEF
Check food is cooked through with no raw meat and is piping hot.
Roast Beef Joint
1.8kg
45-55min
190°C
Burger
110g
16min
180°C
Filet Mignon
220g
18min
200°C
Flank Steak
680g
12min
200°C

10
London Broil
900g
20-28min
200°C
Meatballs
1’’ each
7min
190°C
Ribeye,bone in
220g ,1’’ thick
10-18min
200°C
Sirloin Steak
340g ,1’’ thick
9-14min
200°C
PORK AND
LAMB
Check food is cooked through with no raw meat and is piping hot.
Roast Pork Loin
Joint
1.25Kg
55 min
180°C
Lamb Loin Chops
1’’ thick
8-12 min
200°C
Pork Chops, bone
in
180g ,1’’ thick
12 min
200°C
Pork Chops,
boneless
180g ,1’’ thick
10 min
180°C
Rack of lamb
650g – 900g
22 min
190°C
Tenderloins
450g
15 min
170°C
FISH AND
SEAFOOD
Check food is cooked through with no raw meat and is piping hot.
Calamari Rings
140g
4 min
200°C
Fish Fillet
225g ,1’’ thick
10 min
200°C
Salmon
170g fillet
12 min
190°C
Scallops
8-10 pieces
5-7 min
200°C
Shrimp
450g
4 min
180°C
Tuna
170g steak
7-10 min
200°C
FROZEN FOODS
Breaded Scampi
340g
9 min
200°C
Chicken Nuggets
340g
10 min
200°C
Fish Fingers
280g
10 min
200°C
Mozzarella Sticks
310g
8 min
200°C
Onion Rings
340g
8 min
200°C
Waffles
280g
8 min
200°C
Thick French
Fries
480g
18 min
200°C
Thin French Fries
560g
14 min
200°C
VEGETABLES
Asparagus
Stalks
6 min
200°C

11
Beetroot
Whole
40min
200°C
Broccoli
Florets
6 min
200°C
Brussel Sprouts
Halved
15 min
200°C
Carrots
Slices, ½’’ thick
15 min
190°C
Cauliflower
Florets
12 min
200°C
Corn on the Cob
Halved
6 min
190°C
Aubergine
1 ½ “ cubes
15 min
200°C
Fennel
Quartered
15 min
200°C
Green Beans
Whole
5 min
200°C
Mushrooms
½’’ slices
5 min
200°C
Parsnips
½’’ cubes
15 min
190°C
Peppers
1’’ chunks
15 min
200°C
Potatoes
680g, small baby
15 min
200°C
Potatoes
French Fries
25 min
200°C
Roast Potatoes
1.5’’ cubes
30 min
200°C
(Pre-Boiled)
Jacket Potato
Whole
40 min
200°C
Squash
½’’ chunks
12 min
200°C
Sweet Potato
Whole
35 min
190°C
Tomatoes
Cherry
4 min
200°C
Tomatoes
Large Halved
10 min
170°C
Courgette
½’’ sticks
12 min
200°C
Cleaning
Clean the appliance after every use.
The frying tray and Basket has a non-stick coating. Do not use metal kitchen utensils or
abrasive cleaning materials to clean them, as this may damage the non- stick coating.
1. Remove the mains plug from the wall socket and let the appliance cool down. Note:
Remove the frying tray to let the air fryer cool down more quickly.
2. Wipe the outside of the appliance with a moist cloth.
3. Clean the frying tray and Basket with hot water, some washing up liquid and a non-
abrasive sponge.
The frying tray and Basket are dishwasher-proof.
Tip: If dirt is stuck to the Basket, or at the bottom of the frying tray, fill the frying tray with hot

12
water and with some washing liquid soap. Put the basket into frying tray let the frying tray soak
for approximately 10 minutes.
1. Clean the inside of the appliance with hot water and a non-abrasive sponge.
2. Clean the heating element with a cleaning brush to remove any food residues.
Troubleshooting
Problem
Possible cause
Solution
The air fryer does not
work
The appliance is not
plugged into the mains.
Put the mains plug in an
earthed wall socket.
You have not set the
timer.
Follow the operational guide
"Using the Appliance" section in
this instruction manual
Results are
undercooked or
overcooked
Too much food has
been put into the
cooking tray
Put smaller batches of ingredients
in the tray.
Smaller batches are fried more
evenly.
The set temperature was
not correct
The preset temperature will
often need adjusting
depending on quantity and
size of the food type. Increase
or decrease temperature as
needed after choosing a food
type as explained in the "Using
the Appliance" section of this
instruction manual.
The set time was not
correct.
The preset time will often need
adjusting depending on quantity
and size of the food type.
Increase or decrease time as
needed after choosing a food
type as explained in the "Using
the Appliance" section of this
instruction manual.

13
The ingredients are
fried unevenly in the
air fryer.
Certain types of the
ingredients need to be
shaken halfway
throughout the
cooking time.
Ingredients that lie on the top of
or across each other (e.g. fries)
need to be shaken halfway
throughout the cooking time
(see section ‘Settings’).
Fried snacks are not
crispy when they come
out of the air fryer
You use a type of snack
meant to be prepared in
a traditional deep fryer.
Use oven snacks or lightly brush
some oil onto the snacks for a
crispier result.

14
Cannot slide the Tray
into the appliance
properly.
There is too much food in
the Basket.
Reduce the amount in the Basket
The tray is not placed
in the unit correctly.
Push the tray fully into the unit
until you hear a click.
White smoke comes
out of the appliance
You are preparing
greasy ingredients.
When cooking greasy foods it
may be necessary to set a
temperature of less than 180°C
The tray still contains
greasy residues from the
previous use.
White smoke is caused by
grease heating up in the
bottom of the tray under the
Basket. Make sure you clean
the tray properly after each
use.
Fresh potato fries are
fried unevenly in the air
fryer.
You did not soak the
potato sticks properly
before you fried them.
Soak the potato sticks in a bowl of
water for at least 30 minutes; take
them out and dry them with
kitchen paper.
You did not use the
right potato type.
Use fresh potatoes and make sure
they stay firm during frying.
Fresh potato fries are
not crispy when they
come out of the air
fryer.
The crispiness of the
fries depends on the
amount of oil and
water in the fries.
Make sure you dry the potato
sticks properly before you coat
them with oil.
Cut the potato into thinner
sticks for a crispier result.
Add slightly more oil for a
crispier result.

15
Technical Specification
Cookworks 5L Digital Air Fryer
Model
KDF-596D
Cat No
1486623
Rated Voltage & Frequency
220 – 240V AC 50-60Hz
Rated Power Input
1600W
Capacity
5L
Class rating
1 (earthed)
BS 1362 fuse
13A
Product dimensions (external)
330 x 270 x 290 mm
Product weight (net)
5.08Kg
Disposal
Recycling electrical products:
You should now recycle your waste electrical goods and in doing so
help the environment. This symbol means an electrical product should
not be disposed of with normal household waste. Please ensure it is
taken to a suitable facility for disposal. Visit www.recycle-more.co.uk,
click on "bank locator “and enter your postcode to find your nearest
recycling site.
Produced in China. Argos Limited, 489-499 Avebury Boulevard, Milton
Keynes, MK9 2NW. Argos (N.I.) Ltd, Forestside Shopping Centre, Upper
Galwally, Belfast, United Kingdom, BT8 6FX. Argos Distributors (Ireland)
Limited, Unit 7, Ashbourne Retail Park, Ballybin Road, Ashbourne, County
Meath, Ireland
www.argos.co.uk/cookworks
Tel: 0345 640 3030
/