Page is loading ...

!
!
!
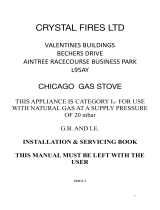
CRYSTAL(FIRES(
1(VALENTINES(BUILDINGS(
AINTREE(
L9(5AY(
!
TESC(REMOTE(CONTROL((
ADDENDUM(INSTRUCTIONS(
!
NOT(ALL(FUNCTIONS(SHOWN(IN(THESE(INSTRUCTIONS(WILL(WORK(WITH(YOUR(APPLIANCE(IT(ALL(
DEPENDS(ON(THE(VERSION(SUPPLIED(WITH(YOUR(PURCHASE(
!
!
!
!
VERSION(1!
; (1

Quickly start user instructions
!
Fire Control
!
This control is situated on your fire. The drawing shows the main features of the control.
!
The control required 3 AA size alkaline batteries to be inserted under the battery
compartment cover. The orientation of these is shown moulded into the battery
compartment.
!
!
!
!
!
!
!
!
!
!
!
!
!
!
!
!
!
After fitting the batteries and replacing the cover the fire can now operate. Slide the slide
switch to the right to the On position (I symbol).
!
To start the fire, press the power button and hold for 1 second then release. The burner will
within around 1 to 10 seconds, adjust to the maximum power setting,
!
The power of the burner can be adjusted up and down by pressing the – and + buttons.
!
To stop the fire, simply press the power button again and the burner will stop.
!
If you are not intending to use the fire for a long period ( i.e. over summer time months), the
battery life can be extended even more by sliding the white isolator switch to the left(away
from the On position, symbol 0 ).Handset (if supplied)
Ensure the power isolator switch on the front corner of Fire Control is in the on
position I.
NOTE: For safety reasons a button must be pressed and released for the command to
be recognised. Keeping hold of a button when pressing (unless other wise instructed) will
not be recognised as a command press.
; (2

Grasp around the handset to unlock its functions. The green unlock light will illuminate
to show when the handset is unlocked and ready to accept commands. (N.B. Keep a grip
of handset to keep it unlocked, to continue to operate the command buttons.)
!
!
!
!
!
!
!
!
!
!
!
!
!
!
!
!
!
!
!
!
!
!
!
!
!
!
!
!
!
; (3
Power button – To start the fire, (after following the instructions of the previous page), with one hand grasp
around the rear of both sides of the button area control. The green unlock light will illuminate. Keep the
handset held to keep the control unlocked, to enable operation of the buttons. Then with the other hand
touch and hold a finger on the power button for about 3 seconds. (A short beep and a flash of the unlock
light will happen upon touching.) When the word “pilot” appears at the bottom left hand corner of the
display, immediately release the power button. (A second flash of the unlock light and a longer beep will also
sound at the time to release the power button). The Fire should be lit within a few seconds. ( N.B. If power
button is held for more than a few seconds after second flash/beep/word pilot appears, the command is
ignored for safety reasons. Similarly if it is released too soon before the word pilot appears, the command is
also ignored. With this system, the control has been designed to ensure that only intended ignition of the
fire occurs.)To stop – with handset held to unlock it, press then release power button.
Mode – MAN( Manual), Zzz
(Snooze), thermostat or timed.
Time (12hour or 24 hr
display)
In Range of fire
(missing if not in
range or if Fire
Control turned off)
Room Temperature
Handset Unlocked
when Illuminated
To change handset
settings (see handbook)
Press to increase!"lame!
Press to decrease flame
To!change!mode!
(see!handbook)
Light sensor
(for display back
light)
Battery condition –
RC handset, FC fire
control
Gas fire burner
status
Day of the week

Operating instruction (Detailed)
!
Upon successful insertion of the batteries in the Handset the display will be
as shown. The handset will be supplied paired to the fire and all that is
required is to set the time of day and select if a 24h hour clock or 12 hour
clock display is required and if temperature display is on Celsius or
Fahrenheit.
!
!
!
!
Setting the time
Holding the handset as described previously to unlock the keypad, press and
hold “SET” for a few seconds and the display will be as shown
!
Setting the display for 12 or 24 Hour display
!
As always when pressing the remote control buttons keep the control held to
keep the green light on and therefore handset safety feature, unlocked. The
H indicates that it is time to set the timer to either 24 hour display or 12
Hour (AM or PM ) display. Press the + or – button on the handset to toggle
between the two settings. When you are ready to confirm the setting you
want press the “SET” button to progress to setting the day of the week.
!
!
!
Setting the day of the week
!
Press and release the + and – buttons until the correct day of the week is
shown on the display.
(Mo = Monday, Tu= Tuesday, We=Wednesday, Th=Thursday, Fr=Friday, Sa=
Saturday and Su=Sunday).
Press “SET” to accept the day of the week and to progress to setting the
Hour of the day.
Note: Whilst doing this setup pressing “SET” advances to the next display
and pressing “MODE” will return you to the previous display setting.
!
!
!
; (4

Setting the Hour
!
Press and release the + or – button to change the hour to the correct hour
and press set to store and to move to setting the minute.
Repeat this for setting the minutes.
!
Setting the temperature display to Celsius or Fahrenheit.
!
Press and release the + or - button to toggle between C and F .
When the display shows the desired symbol, press and release the “SET”
button to store.
!
As the important settings above have now been done. Press and hold (not
releasing straight away) the “SET” button for a few seconds and this will exit
the setup menu.(alternatively you can press and release the set button
several more times until the time of day is displayed on the handset.
!
The control is now ready for use with the Fire Control.
!
Note: the legend at the bottom shows the battery condition of both the
batteries in the hand set and in the fire control alternately. RC = Remote
Control handset and FC = Fire control. The control is designed to get the
most out of the batteries but when eventually the display shows they are
spent(when the battery legend is a empty area, we recommend you change
the batteries in the handset before they are flat, to avoid having to re-
program the time of day in again. N.B. Pairing is not lost, even if the
batteries are removed or flat. The pairing is not lost when the batteries are
flat but replacing them quickly before they have gone flat will avoid having to
set the time of day, day of the week etc again)
!
!
Paging the handset
If you have misplaced the handset(and it is in range of the fire), you can page
it by pressing the + button only on the fire control for around 5 seconds. The
handset will flash and make a noise to help you to locate it. Once you pick up
the TESC it knows you hold it and so the sound stops. The flashing and sound
will last for 60 seconds each time the handset is paged as described. If not
found in 60 seconds, page again and so on. NOTE: PRESS “+” Button ONLY ,
NOT “+” and “-‘ Together as you will accidentally break the handset pairing
and have to reset handset to factory state and pair again ( see other parts
of the booklet if this happens).
!
!
!
!
; (5

Advanced settings Menu
!
In the event that you may want to change the other preset settings of the
control features. Do not do a long press and hold above but a normal short
press and release will take you into the advanced settings area.
!
Advanced settings options are:-
•Back light –
oA = Automatic (default setting). The back light comes on in the
dark but not in the light.
o0 = Light never comes on.
o1 = Light comes on when ever handset is unlocked.
•Display contrast – 8 levels from 0 to 7 (default level 4) .
•P = pairing with other devices other than the fire control. The hand
set can pair with other modules to :-
oL= Operate an electric light – which is the dimmable in 9 steps
oF= operate an electric fan –which can have 9 speed levels
oA= operate an auxiliary contact to operate another device.
!
Other Modes than Manual mode
Depending upon the model of Fire your handset maybe enabled to have some
automatic features, namely, Thermostat mode, timed thermostat mode and
snooze mode. Snooze mode can be selected to work with in conjunction with
either manual or thermostatic modes.
!
You can switch between modes at any time with the handset unlocked by
pressing and releasing mode button to toggle between modes.
!
Note: If at any time the power button is pressed during operation, this will
stop the fire and exit any automatic mode and return the handset to manual
(MAN) operation mode.
!
!
!
Snooze mode in manual operation
!
Snooze mode is a time period you can set which will turn off the fire after a
certain time period has elapsed.
!
The snooze time period can be set before or during manual operation of the
fire. Hold the handset to unlock as described previously and press the mode
button as many times as necessary until the word MAN and the Zzz symbols
are flashing at the top of the display. Press and release the set button and
this will put the control into Manual snooze mode.
!
! "#

The default time period for the snooze time period is 1:00 hour. Pressing the
set button again will show you the snooze time period remaining. This can be
adjusted by pressing the “+” or “-“ buttons. The timer period that can be set
is from 1 minute to 4:00 hours.
!
After adjusting the time, press set again to enter the time setting required
(or if left for a few seconds this time is now stored and used).
!
Once this countdown timer has reached zero the fire will turn off (as if you
had pressed off manually, it does not recycle).
!
Snooze mode in Thermostatic mode
!
The same thing as above can be done before or during a thermostatic mode
operation (see below).
!
!
Subsequent hand set pairing
!
Display handset
The handset should be supplied already paired with your fire, however if it
becomes necessary to cancel the pairing and re pair it again do the following
steps below. ( NOTE: A new pairing can be accidentally started by
accidentally pressing the plus and minus buttons together at the same time
on the TESC control or wired swtich panel and held for 5 seconds.
!
!
Factory Reset of display handset ( to enable handset to be paired again)
To reset a handset to factory conditions to enable it to be paired with a
control. Hold the handset to unlock. Press and hold set until handset beeps
and release the set button. PROG will be at the top left corner. Press and
release the mode button until the word SETUP is flashing in the top right
corner. Press and release SET to enter the SETUP menu. Press and release
the set button around 9 times until you see CA0 on the display. Press then
release the + (or – button) to change the display to CA1 and press and release
the SET button again. The word TESC will appear in the window to show that
this handset is now reset and ready to pair again.
!
!
!
!
!
!
!
!
! "$

HANDSET IS PAIRED ORIGINALLY IN THE
FACTORY FOLLOW INSTRUCTIONS BELOW
ONLY IF HANDSET UNPAIRED OR REPLACED
!
Pairing the Handset to the Fire Control
!
With 2 good quality AA alkaline batteries in the handset in the direction
shown inside, if the handset can be paired with a control, it will have the
display with the word TESC on the display as shown adjacent.
!
The handset must be within 1 metre ( 3 feet) of the fire when pairing
!
!
After fitting the batteries as above (and with the power isolator slide switch
on the TESC Fire control on the fire put in the on position I), simultaneously
press and hold the – and + buttons on the fire control (i.e. not the handset)
until the handset makes a noise and the display shows the pattern as shown
here.
Hold the handset in one hand so your fingers wrap around the back of the
operating buttons area of the handset. A green unlock light will illuminate
when the handset has detected your hand. The green light must be
illuminated in this way for any of the command buttons to accept commands
to operate the fire control.
While the display is as shown, and holding the handset as described, press
the “SET” button with the other hand to finish off the pairing of the
handset to the Fire Control and to enter the setup the time of day on the
handset. As shown earlier in the instruction
!
N.B. If the display returns to the one shown above with the word “TESC”
shown, then too much time has passed before pressing “SET” and so the
handset has not paired yet. Simply repeat pairing again.
N.B. Only ever press “+” and “-“ buttons together when pairing handsets. If
done afterwards this will break the pairing made and a factory reset of the
handset will need to be performed See Factory Reset of display handset
!
!
!!
!
!
!
!
!
! "%

!
!
Handset – without display
!
!
!
!
!
!
!
!
!
!
!
!
!
!
!
!
!
!
!
!
!
!
Buttons
!
! Power button – for On/Off of burner
+ Increase burner power
- Decrease burner power
! Activity Light – flashes red when starting and stopping burner only.
! Illuminates when key pad is unlocked
SET Button not used for operation
AUX Button used for operating an auxiliary device ( sometimes not used
depending upon you fire model)
!
!
!
!
!
! "&

Pairing a new handset
!
Remove the back panel and insert two AA Alkaline batteries in the
direction shown by the symbols moulded into the compartment and
replace the cover.
!
Hold the handset with one hand ensuring your hand is wrapped around
the back and that your hand is in contact with both sides of the
handset. The green light of the “Unlock” symbol should light and flash.
The flashing indicates that it is not paired with anything at the
moment and is ready to be paired.
!
Put the handset down within 1 metre of the Fire that you wish to pair
the handset with. Press the + and – buttons on the Fire Control (i.e. not
the +and – buttons on this handset) for around 6 seconds. The handset
should make a noise and the green “Unlock” light should be flashing
even without holding the handset.
The handset has received a pairing request and to accept this pick up
the handset and hold as described above to keep the keypad unlocked
and press and hold the “SET” button for 3 seconds. You will hear a
beep and now the handset is paired to the fire control. The unlock
green light will stay permanently lit when holding the handset
!
Starting the fire
Pickup and keep hold of the handset as described above to unlock the
keypad.
Press and hold the power button ! continuously until the red light
illuminates next to the ! symbol (this takes typically 3 seconds). As
the red light illuminates release immediately the power button. The
red light will then flash as the burner is being lit. While the burner is
lighting the red light will flash. When the burner has lit the red light
will stop completely. The burner will be at maximum burner rate when
fist lit.
You may now put the handset down.
!
Note: If the power button differently to the above i.e. pressed for too
long or too short a time or the grip on the handset is not firm or
released too soon, the Ignition will be interrupted and not complete.
The reason for the remote control having this strict start sequence is
for safety reason so that the starting operation of the fire will be
most unlikely to be done other than intentionally by an adult. If not
done correctly , wait a few seconds and try again.
!
!
! "'(

Burner regulation
When the burner is in operation, hold the handset as described above
to unlock the keypad and then press and release the + and – buttons to
regulate the flame of the burner. Pressing and releasing the button will
move the burner one step at a time. Pressing the button continuously
will move the burner rate to the maximum full when pressing + or
minimum burner power if pressing -.
!
Stopping the burner
Pick up and hold the handset as described above to unlock the keypad.
Press and then release the power button once. The handset will beep
and the burner will stop.
!
!
Auxiliary button
If your fire is fitted with an Auxiliary feature (lights , fans etc) this
button will operate those devices when pressed. Hold to unlock as
usual, then Press once and release to start that auxiliary device ,press
again and release to stop.
!
!
!
Installer note:
To reset the handset to factory conditions (to enable the handset to
be paired with another fire for example), hold handset to unlock, press
and hold for at least 10 second the SET button. The green and red
lights will start to flash. They will flash for 1 minute and during this
minute if you want to reset the handset, open the battery box and
remove a battery for a few seconds. Replace the battery and cover,
the handset will now be reset and ready to pair as a new handset to
another (or the same) device as shown above in pairing section.
!
!
!
Paging the handset
If you have misplaced the handset you can page it by pressing the + button
only on the fire control for around 5 seconds. The handset will flash and
make a noise to help you to locate it. Once you pick up the TESC it knows you
hold it and so the sound stops. The flashing and sound will last for 60 seconds
each time the handset is paged as described. If not found in 60 seconds,
page again and so on. NOTE: PRESS “+” Button ONLY , NOT “+” and “-‘
Together as you will accidentally break the handset pairing and have to reset
handset to factory state and pair again ( see other parts of the booklet if
this happens).
!
! "''

SWITCH PANELl OR BUTTON PANEL (if fitted)
!
!
!
!
!
!
!
Starting the fire
Press and hold the
power button !
continuously until the red light illuminates next to the ! symbol
(this takes typically 1 second). As the red light illuminates release
immediately the power button. The red light will then flash as the
burner is being lit. While the burner is lighting the red light will flash.
When the burner has lit the red light will stop completely. The burner
will be at maximum burner rate when first lit.
!
Note: If the power button is pressed for too long or too short a time
this is taken as an accidental press and the fire will not ignite for
extra safety reasons. It is to try an ensure that the starting operation
of the fire will be most unlikely to be done other than intentionally by
an adult. If not done correctly , wait a few seconds and try again.
If you wish to power down the fire so it will not start even if any of
the power symbol buttons are pressed, slide the “power Isolating
switch to the “0” position ( perhaps a good idea to do in the event of
leaving the fire not operated for long periods like the summer months
or when going on long holidays).
!
!
!
! "')
!
*+,"-.,-/01-2."3-451"
!
!
!
!
67+88"12"-./7+08+"930:+""
!
!
!
!
67+88"12",+/7+08+"930:+""
!
!
!
!
67+88";2<+7"=>112."0.,"523,"?27"0"8+/2.,"12"81071"9-7+"
@7+3+08+"<5+."7+,"-.,-/01-2."3-451"0;;+078AB"
!
67+88"0382"12"812;"9-7+"
!

Burner regulation
When the burner is in operation, press and release the + and – buttons
to regulate the flame of the burner. Pressing and releasing the button
will move the burner one step at a time. Pressing the button
continuously will move the burner rate to the maximum full when
pressing + or minimum burner power if pressing -.
!
Stopping the burner
!
Press and then release the power button once. The burner will stop and
the red indicator light will illuminate momentarily to show the fire is
turning off.
!
!
!
!
!
!
!
!
!
!
INJECTOR : 500
!
SPARE PARTS : TESC REMOTE HANDSET TESC 001
: ODS PILOT TESC 002
!
APPLIANCE
HIGH RATE
LOW RATE
SUPER HEATRAVE!
6.5Kw
4.1kW
SLIMLINE
6.5Kw
4.1kW
DIAMOND
6.5Kw
4.1kW
JEWEL
6.9Kw
4.1kW
JEWEL HIW
6.9Kw
4.1kW
CF2 MONTANNA
5.2Kw
2.6Kw
CF1
5.5Kw
2.9Kw
GEM
6.9Kw
4.1kW
SAPHIRE
6.2Kw
3.8 kW
! "'C
/