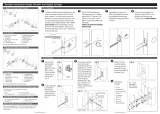
Signature Hardware 444764 Installation guide

Type
Installation guide
1Door Handle and Lockset Installation Instructions
DOOR HANDLE AND LOCK SET
INSTALLATION INSTRUCTIONS
Before you begin, read the installation instructions below. Observe all local building and safety codes. For the following
installation instructions it is assumed that holes for the handle and lock set are pre-drilled.
Unpack and inspect the product for any shipping damages and ensure that none of the required pieces are missing. If
you nd damages, do not install. Contact Customer Service at 1.866.855.2284. If you need assistance or have questions
while installing your door handle and lock set, contact Customer Service.
We recommend consulting a professional if you are unfamiliar with installing hardware xtures. Signature Hardware
accepts no liability for any damage to the handle, lock set, or door, or for personal injury during installation.
TOOLS AND MATERIALS:
IMPORTANT INFORMATION
The following instructions assume the door and door frame have pre-drilled holes that t the new deadbolt and lock set
hardware.
DEADBOLT INSTALLATION
Safety glasses
Screwdriver
Wood chisel
Drill
1. Adjust hardware for the backset, if necessary. The backset
is the distance from the edge of the door to the center of the bore
hole. If your new latch bolt hardware accommodates different
backsets, adjust it to t your door.
2. Fit the latch bolt into the door. Insert the latch bolt of the
deadbolt into the edge of the door. If the attached faceplate is
not ush with the door, carefully chisel out (mortise) some of the
door. The mortise in the edge of the door allows the attached
faceplate to lie ush with the door.
3. Secure the faceplate. Mark the positions for the faceplate
pilot holes. Drill pilot holes, if necessary. Secure the faceplate to
the door with screws.
4. Install the cylinder and thumb lever. Test t the cylinder and
thumb-turn plate so you’ll know how the pieces t together. Fit
the exterior deadbolt hardware rst, then the interior hardware,
making sure to align the holes and screw guides. Insert and
tighten the long screws from the inside. Hold the interior knob of
the deadbolt in place, and tighten the small screw to secure it in
place.
Latchbolt and Faceplate
Cylinder
Thumbturn Plate
Exterior Cover
2Door Handle and Lockset Installation Instructions
DOOR KNOB OR HANDLE INSTALLATION
1. Adjust hardware for the backset if necessary. The
backset is the distance from the edge of the door to the cen-
ter of the bore hole. If your new latch bolt hardware
accommodates different backsets, adjust it to t your door.
2. Fit the latch bolt into the door. Insert the latch bolt of the
handle into the edge of the door. Insert the faceplate on the
latch bolt if it is not already attached. If the faceplate is not
ush with the door, carefully chisel out (mortise) some of the
door. The mortise in the edge of the door allows the attached
faceplate to lie ush with the door.
3. Secure the latch bolt faceplate. Mark the positions for
the faceplate pilot holes. Drill pilot holes, if necessary. Secure
the faceplate to the door with screws.
4. Install the handles. Push the latch bolt in, then insert the
spindle through the door. (In some cases the spindle is
attached to the door knob.) Fit the outside door knob
hardware into the latch bolt assembly. Insert the inside door
knob hardware, tting the inside knob over the spindle and
aligning the screws holes. Hand-thread the mounting screws,
and then tighten them rmly with a screwdriver.
5. Install the strike plate. Mark the end of the bolt with
lipstick or paint. Close the door, and turn the handle
several times to mark the door frame. If necessary, mortise
the area around the hole so the strike plate will t ush with
the door frame. Secure the strike plate to the door frame with
screws.
5. Install the strike plate. Mark the end of the bolt with
lipstick or paint. Close the door, and turn the deadbolt several
times to mark the door frame. If necessary, mortise the area
around the hole so the strike plate will t ush with the door
frame. Secure the strike plate to the door frame with screws.
Interior and Exterior
Door Knobs
Latchbolt
Strike plate
Spindle
Faceplate
Strike plate
  • Page 1 1
  • Page 2 2

Signature Hardware 444764 Installation guide

Type
Installation guide

Ask a question and I''ll find the answer in the document

Finding information in a document is now easier with AI