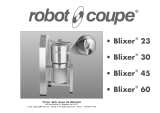
Robot Coupe Blixer 3 Operating instructions

Type
Operating instructions

This manual is also suitable for

Robot Coupe Blixer 3 is a powerful food processor designed for high-speed vegetable processing and a variety of culinary tasks. With its sharp "S" blade, it can chop, grind, puree, and mix ingredients efficiently. The 3-liter stainless steel bowl allows for processing a substantial amount of food, making it suitable for both home and professional kitchens. The magnetic safety switch ensures safe operation, stopping the motor when the lid is removed. Robot Coupe Blixer 3 is a versatile tool for preparing various dishes, from coarse chops to fine purees.

Robot Coupe Blixer 3 is a powerful food processor designed for high-speed vegetable processing and a variety of culinary tasks. With its sharp "S" blade, it can chop, grind, puree, and mix ingredients efficiently. The 3-liter stainless steel bowl allows for processing a substantial amount of food, making it suitable for both home and professional kitchens. The magnetic safety switch ensures safe operation, stopping the motor when the lid is removed. Robot Coupe Blixer 3 is a versatile tool for preparing various dishes, from coarse chops to fine purees.

robot coupe U.S.A., Inc.
P.O. Box 16625, Jackson, MS 39236-6625
280 South Perkins St., Ridgeland, MS 39157
website: www.robotcoupeusa.com
1-800-824-1646
OPERATION MANUAL
FOR
MODELS
®
Blixer 3
Serial Numbers BX3/xxxx
also covers the BX3 version
September 2004
2
Blixer 3 Operation Manual
I. INTRODUCTION
The Robot Coupe commercial food processor performs a
host of culinary feats. It is designed for high speed and qual-
ity vegetable processing and will chop, grind, puree and mix
using the cutter bowl attachment.
This operators manual is broken down into sections giving
you detailed instructions for assembly and operation of the
cutter bowl attachment. Close attention should be paid to all
instructions in this manual to ensure a long life utilization of
your food processor. This manual should be kept within
easy access to all users for reference, and should be read
completely by all first time users of the machine.
Maintaining the food processor in good working condition is
very important. Inspect the machine and all parts regularly to
make sure they are in good working condition.
DO NOT operate a machine that has malfunc-
tioned in any way. Discard any food processed
at the time of the malfunction and have the ma-
chine inspected and repaired at one of the Ro-
bot Coupe Authorized Service Agencies. A list
is provided in the back of this manual. Contact
one of these service agencies for all of your
service, parts and accessories.
CAUTION: Your Robot Coupe comes with a
sharp cutting “S” blade. Always handle with
safety in mind. We suggest that a pair of cut-
ting gloves be worn when handling the “S”
blade.
Machine Specifications:
The Model ®Blixer 3 is equipped with a high speed motor
generating 1/2 Hp which plugs into a standard 120 volt/ 60
Hz, 15 amp power outlet. The full load amperage rating is 10
amps. The machine is supplied with a 3 liter stainless steel
bowl, with S-blade and clear polycarbonate cover. A bowl
and lid wiper assembly is supplied with removable handle.
CAUTION:
Always connect the Robot Coupe to a grounded
outlet with Ground fault circuit interrupter
(GFCI) protection device.
Disconnect the machine from the power outlet
when not in use and when cleaning or servic-
ing the unit.
Machine must be operated and stored in a lo-
cation not subject to water drips or spray or
explosive vapors.
The machine must not be modified in any way
from its original configuration.
Should the machine malfunction or should any
part be damaged, it must not be operated until
it is repaired by a qualified technician using only
genuine Robot Coupe® repair parts.
Operating times of 5 minutes or longer can
cause processed food to increase to tempera-
tures above 125 F.
Failure to follow operating instructions or at-
tempts to operate the machine outside its de-
sign limits may create a hazardous condition
that could damage the machine and /or injure
users.
The machine must be operated on a clean
sturdy counter or table. Keep the area around
and under the machine clear to allow air circu-
lation. Otherwize, the motor can overheat.
3
Blixer 3 Operation Manual
II. ASSEMBLY \ DISASSEMBLY
INSTRUCTIONS
First, a good working area should be chosen to operate the
unit. The motor base should be placed on a counter at a
comfortable working height, and have a standard 115 volt
power outlet available. Always keep the machine unplugged
during assembly and disassembly.
A. CUTTER BOWL ATTACHMENT ASSEMBLY
INSTRUCTIONS
The ®Blixer 3 comes from the factory completely assembled.
However, prior to use the machine should be cleaned accord-
ing to the cleaning instructions detailed in section IV.
There are five basic components of the unit: The assembled
motor base which contains the motor and other electrical com-
ponents, the 3 liter stainless steel bowl, the processing “S”
blade, the wiper assembly, and a clear polycarbonate see-
through lid.
Instructions for Assembly:
Step 1. Place the bowl on the motor base with the handle just
off center and to the left (as you are facing the front) of the
center of the motor base and twist counterclockwise. This
should lock the bowl into place. When the bowl is in the proper
position, it should be level with the top surface of the motor
base.
NOTE: The machine should not be operated unless the
bowl is in the proper position.
Step 2. Place the processing blade down on the motor shaft
and rotate it until it falls into place. The bottom blade should
be located just off the bottom of the bowl when properly in
place. Wear cutting gloves when handling the blade.
Step 3. Push the wiper shaft through the center of the lid
from the underside. With the other hand attach the wiper
handle. Press the metal button and push the handle on to the
wiper shaft. Rotate if necessary to align the square hole in
the handle with the square part of the shaft. Press together
firmly from both sides. When the button is released it should
pop out to its original position.
Step 4. Notice the raised tab on the top of the lid extending to
the edge. At the edge there is another plastic tab extending
downward. Place the lid on the bowl so that this tab in the lid
assembly will be over the bar on the front side of the bowl.
Press the lid down and fasten the hasp type clamps on each
side of the bowl over the bowl lid.
NOTE: The tab on the lid assembly provides a safety feature
for the machine so that if the lid is removed while the motor is
running, the magnetic safety switch will stop the motor. This
should only be considered a safety device and not used
to turn the machine off. Always use the off switch lo-
cated on the front of the machine to turn the unit off!
Additionally, always make sure the blades have come to a
complete stop before removing the bowl lid. If the safety switch
ever fails to operate as described above, the unit should be
serviced.
The machine should now be completely assembled and ready
to run according to the operation instructions listed in the next
Section.
Disassembly:
Disassembly of the unit is simply done in reverse order of
assembly. Remember to turn the unit off, and make sure the
blade has come to a full stop before removing the bowl lid. It
is also recommended that the machine be unplugged from
the wall socket during assembly and disassembly.
4
Blixer 3 Operation Manual
III. OPERATION
Your Robot Coupe is equipped with a power on and off switch,
and magnetic safety switch. The magnetic safety switch is
operated through the plastic tab on the lid assembly. When
the lid and bowl are locked in position, the magnetic switch is
closed allowing the machine to be run by pushing the on and
off switches located on the front of the motor base.
General Use of the Bowl:
The full capacity of the bowl is 3 liters. As a general rule the
machine is operated with a maximum capacity of 1.5 to 2.5
liters, or about 3/4 full. The headspace above the product is
required to allow for a vortex or mixing action caused by the
blades which is responsible for complete and uniform mixing.
The maximum load limit will vary according to the type of prod-
uct. Heavy dense products such as meats or pastes, will put
a greater strain on the motor. If the motor has trouble start-
ing, reduce the amount of product in the bowl.
Loose or light weight products may be filled in the bowl up to
the 3/4 fill level as long as the correct circulation is being ob-
tained. The load limit for loose and light weight products is
usually only restricted by the capability of the product to be
properly circulated in the container.
The load capacity of liquids is dependent on the viscosity of
the liquid. The bowl on the unit is
not sealed for water tight-
ness. However, the design of the lid and the high center hub
in the bowl, allows for a limited volume of these liquids. Gen-
erally speaking, thin liquids such as water should not be filled
above the top blade. Filling the bowl higher than the center
hub with the thin liquid will cause the liquid to leak onto the
motor base and possibly leak out the sides of the lid when
running.
Thicker liquids approaching the consistency of applesauce
and thicker, usually do not present a problem with leaking.
Range of Operation:
Your Robot Coupe can perform operations ranging from a
coarse chop, to a very fine micron size reduction of solids. It
will mix, blend, homogenize, and deaerate powders, solids,
and liquids.
To Chop:
A uniform chop can be obtained by pulsing the unit on and off
very quickly. Load the bowl with solids such as meat portions
no larger than 2 inches square and not over 3/4 full. Alter-
nately press the ON and OFF buttons with a quick start/stop
action. With this pulsing action the bottom blade tosses the
product up allowing the top blade to chop the product. Con-
tinue until the desired consistency has been reached.
For Complete Size Reduction and Homogenizing:
Load the bowl not over 3/4 full, pieces should not be larger than 2
to 2 1/2 inches square. Turn the machine on and allow to run
continuously. Depending on the product, it may be necessary to
wipe the walls of the bowl incorporating the accumulated product
back into the sample. A larger batch sometimes allows for better
circulation. On the other hand, too large a sample may not circu-
late as well. Most size reduction/homogenizing procedures take
about 3 minutes. Do not leave the machine running unat-
tended.
Tough or heavy products should be reduced in size by pulsing the
unit two or three times. Once the load has been reduced, turn the
machine on and run continuously to finish the product. Total pro-
cessing time should not require more than 3 minutes.
IV. PREVENTIVE MAINTENANCE GUIDE
Your Robot Coupe has been designed to provide maximum trouble-
free performance. Adherence to the assembly and operating in-
structions will assure good performance and a long life.
CARE:
While the Robot Coupe is a ruggedly constructed machine, over-
all handling should be accomplished with a sense of use rather
than abuse. Reasonable care should be exercised. The unit is
made of sturdy plastic material and will yield a long life if not mal-
treated. While the machine is reasonably portable, care should
be taken not to drop it. Equally, it should not be picked up by the
bowl, lid, or the cord. The unit should be picked up from the bot-
tom and care should be exercised in relocating it.
CLEANING:
Proper cleaning of the unit is one of the MOST IMPORTANT pre-
ventive maintenance measures the user can employ. The high
acid content of food can cause harm to the electrical parts con-
tained within the housing. Although these elements are isolated
from the outside through seals, food juices will tend to seep. If
food juices are permitted to collect on the machine over periods
of use, erosion of the seals can occur. It is recommended that the
machine be cleaned after each operational use, and minimally
once per day.
Correct cleaning procedures are required to insure that damage
is not inflicted in the cleaning process. The motor base assembly
of the unit contains the motor and electrical components.
DO NOT IMMERSE THE MOTOR BASE ASSEMBLY
IN WATER.
While the bowl, blade and lid, are dishwater safe, the high tem-
peratures of dish machines will tend to shorten the life of the plas-
tic parts. Hand washing in a pot sink will provide for the longest
life of the parts. Cleaning of the blade should be accomplished
with care to help prevent cuts. Wear cutting gloves when han-
dling the blade. A stiff bristle brush will be effective in knocking
the food out of the crevices.
5
Blixer 3 Operation Manual
Cleaning of the motor base assembly must be done with care.
First, unplug the unit—A sponging with a cloth lightly soaked
in a soluble detergent is acceptable, making sure the water is
not permitted to penetrate the seals. Always clean the motor
shaft.
Periodically lubricate the seals located under the flange at the
bottom of the motor shaft. To do this, turn the machine on its
side and spray up under the flange with pressurized oil, e.g.
WD-40 or mineral oil.
PREVENTIVE MAINTENANCE CHECKS:
In addition to cleaning the seals, an examination should be
made periodically to assure that a seal against food is being
maintained. With proper care, and depending on use, the seals
should last for a year or more. However, they can and should
be replaced when wear or erosion is noted or minimally once
per year. It is recommended that the seals be replaced by an
authorized repair agency. Good operational performance is
obtained when the blades are sharp. Continued use can dull
the blade. Replace the blades as needed.
In general, the best preventive measure that can be applied
is close adherence to the assembly and operator’s instruc-
tions along with cleaning and common sense. Make sure the
bowl is fitted on flush and rotated in interlock position before
operating the machine.
DO NOT LEAVE THE MACHINE ON WHEN IT IS
NOT PROCESSING FOOD.
DO NOT PICK UP THE MACHINE BY THE LID,
BOWL, CORD, OR BOWL HANDLE, ALWAYS
LIFT BY THE BASE.
DO NOT PUT YOUR HAND OR FINGERS INSIDE
THE BOWL
DO NOT ALLOW THE MACHINE TO RUN UNAT-
TENDED.
DO NOT RUN THE MACHINE WITHOUT ALL THE
PARTS, INCLUDING THE FEET, IN PLACE.
TROUBLE SHOOTING AIDS:
The following sections have indicated potential problems and
the correct solution which should be implemented by the user.
Problems which extend beyond these will require an experi-
enced repairman. A list of the authorized agencies is sup-
plied.
V. TROUBLE SHOOTING AIDS
A. Unit does not start when assembled correctly
1. Pull plug and try another outlet
2. Make sure bowl and lid are in the proper position
and the plastic lid tab is in line over the magnet
bar on the bowl.
3. Check the built-in reset button (circuit breaker) on
the bottom.
B. Unit stops running while processing
1. Check the built-in reset button (circuit breaker) on
the bottom.
2. Turn unit off, and unplug machine
3. Remove the bowl and blade.
4. Remove product from bowl
5. Reassemble unit
If unit does not operate after following above:
6. Check outlet for current (Breaker or Fuse)
7. Try unit again
8. Call local service (factory) agency
C. Unit starts to spark or smoke
1. Turn unit off, unplug it, call local factory autho-
rized service agency.
VI. SERVICING OF YOUR ROBOT COUPE
Your Robot Coupe has a one year limited warranty against
defects in parts and workmanship. Should the unit require
service, check with your distributor to see where local service
is available. If not or if you wish your unit to be serviced at the
factory, call for return instructions and upon receipt of same,
ship it PREPAID and insured to our factory address.
Robot Coupe USA, Inc. Service Dept.
Phone: 1-800-824-1646
601-898-8411
Price list for USA only
Indexes
Part # Description
1 BX3031.1 Handle
2 BX3031.2 Lid with seal
3
BX3031.3
Lid Seal (BX3)
4 BX3031 Lid W/Wiper Blade Assy.
5 BX3031.4 Horizontal Wipe Blade
6 BX3031.5 Holder W/Veri. & Horiz. Wipe Blade
7 BX3031.7 Holder W/Vertical Wiper
8 BX3032 *Blixer Bowl Assy
9 BX3031.6 Vertical Wiper Blade
10 BX3029.1 Blade Cap
11 BX3029 *Blade (BX3)
12 BX3028 Bowl Only
13 R3069U Lckg Bush Set w/Screws
14 BX3028.2 Pin, Bowl
15 RA424.3 Spring, Bowl Pin
16 BX3028.3 Bowl Pin Retaines
17 BX3026 Screw Cover
18 R3025 Motor Support Screw
19 BX3064 Shaft
20 R3065U Deflecter Washer SS
21
Number NA
Description NA
22
Number NA
Description NA
23 BX3021 Motor Support BX3
24
Number NA
Description NA
25 R3022 Grill
26 R664S Relay DPST
27 39085 (G) Magnetic Switch Assy, BX3
28 R496 Cord W/Plug (R4X,S,P,Y)
29 R3045 Cord Protector
30 R233 Strain Relief
31 R3034 Rubber Cord Sleeve
32 R1716 Motor Support Seal
33 R1716 Motor Support Seal
34 R237 6203 Bearing R2 Top/Btm
35 R237 6203 Bearing R2 Top/Btm
36 RSI3006U Motor 120V 345RPM
37 RSI3006.1U Start Capacitor(BX3,2Y-1,3Y-1)
38 R3005 Baffle Plate
39 R3004B Btm Cushion Bushing,Cent
40 R3072 Screen Kit (Canada Only)
41 R286A 12 Amp Breaker
42 BX3003 Base BX3
43 R3001 Foot, Black
44 R119 Screw (Base-MS 3.9x19)
PRICES AND OTHER INFORMATION SUBJECT TO CHANGE WITHOUT NOTICE
MODEL
Blixer 3
Serial Numbers BX3/xxxx
NA-Not Available
NLA-No Longer Available
* Denotes Accessories
8/25/04
86$,QF
32%R[-DFNVRQ06
6RXWK3HUNLQV6W5LGJHODQG06
HPDLOLQIR#URERWFRXSHXVDFRP
ZHEVLWHZZZURERWFRXSHXVDFRP

52%27&283(86$,1&/,0,7(':$55$17<
<2851(:52%27&283(352'8&7,6:$55$17('727+(25,*,1$/385&+$6(5
)25$3(5,2'2)21(<($5)5207+('$7(2)385&+$6(
7KLV/,0,7(':$55$17<LVDJDLQVWGHIHFWVLQWKHPDWHULDODQGRUZRUNPDQVKLSDQGLQFOXGHVODERUIRUUHSODFHPHQWRI
GHIHFWLYHSDUWVSURYLGHGUHSDLUVDUHSHUIRUPHGE\DQDXWKRUL]HGVHUYLFHDJHQF\VHHDWWDFKHGOLVW7KH&86720(5PXVW
LQIRUPWKH6HUYLFH$JHQF\RIWKHSRVVLELOLW\RIZDUUDQW\FRYHUDJHDQGSURYLGHDFRS\RIWKHGDWHGVDOHVRUGHOLYHU\UHFHLSW
%()25(:$55$17<5(3$,56$5(%(*815HSODFHPHQWSDUWVDQGDFFHVVRULHVDUHZDUUDQWHGIRUQLQHW\GD\VIURP
WKHGDWHRISXUFKDVHZKHQSXUFKDVHGVHSDUDWHO\DQGZLOOEHYHULILHGE\GDWHGVDOHVUHFHLSW25SDFNLQJVOLSZKLFKOLVWWKDW
LWHP$OOSDUWVRUDFFHVVRULHVUHSODFHGXQGHUZDUUDQW\PXVWEHUHWXUQHGWRWKH6HUYLFH$JHQF\
7+()2//2:,1*$5(
127&29(5('81'(5:$55$17<
 'DPDJHFDXVHGE\DEXVHPLVXVHGURSSLQJRURWKHUVLPLODULQFLGHQWDOGDPDJHFDXVHGE\RUDVUHVXOWRI
IDLOXUHWRIROORZLQVWDOODWLRQDVVHPEO\RSHUDWLQJFOHDQLQJXVHUPDLQWHQDQFHRUVWRUDJHLQVWUXFWLRQVLQFOXG
LQJIDLOXUHWRYHULI\DQGFRUUHFWURWDWLRQRIWKUHHSKDVHPRWRUV
 /DERUWRVKDUSHQDQGRUSDUWVWRUHSODFHNQLIHDVVHPEOLHVRUEODGHVZKLFKKDYHEHFRPHGXOOFKLSSHGRUZRUQ
GXHWRQRUPDOXVH
 0DWHULDORUODERUWRUHQHZRUUHSDLUVFUDWFKHGVWDLQHGFKLSSHGGHQWHGRUGLVFRORUHGVXUIDFHVEODGHVNQLYHV
DWWDFKPHQWVRUDFFHVVRULHV
 7UDQVSRUWDWLRQFKDUJHVWRRUIURPDQDXWKRUL]HGVHUYLFHDJHQF\IRUUHSDLUVRIDPDFKLQHGHVLJQDWHGDV
³&$55<,16(59,&(¶7DEOH7RS0RGHOV
 /DERUFKDUJHVWRLQVWDOORUWHVWDWWDFKPHQWVRUDFFHVVRULHVLHERZOVFXWWLQJSODWHVEODGHVDWWDFKPHQWV
ZKLFKDUHUHSODFHGIRUDQ\UHDVRQ
 &KDUJHVWRFKDQJH'LUHFWLRQRI5RWDWLRQRI7KUHH3KDVHHOHFWULFPRWRUV,167$//(5,65(63216,%/(
$OO5RERW&RXSHSURGXFWVPXVWRSHUDWH
FRXQWHUFORFNZLVH
 6+,33,1*'$0$*(,6127&29(5('%<:$55$17<9LVLEOHDQGKLGGHQGDPDJHVDUHWKHUHVSRQVL
ELOLW\RUWKHIUHLJKWFDUULHU7KHFRQVLJQHHPXVWILOHDGDPDJHFODLPSURPSWO\DJDLQVWWKHFDUULHURUXSRQ
GLVFRYHU\LQWKHFDVHRIKLGGHQGDPDJH
.((3$//25,*,1$/&217$,1(56$1'3$&.,1*0$7(5,$/6
)25&$55,(5,163(&7,21
5RERW&RXSH86$,QF5RERW&RXSH6$RUDQ\RIWKHLUDIILOLDWHVGLVWULEXWRUVRIILFHUVGLUHFWRUVDJHQWVHPSOR\HHV
RULQVXUHUVZLOOQRWEHREOLJDWHGIRUFRQVHTXHQWLDORURWKHUGDPDJHVORVVHVRUH[SHQVHVLQFRQQHFWLRQZLWKRUE\UHDVRQRI
WKHXVHRIRUWKHLQDELOLW\WRXVHWKHPDFKLQHIRUDQ\SXUSRVH
7+,6:$55$17<,6*,9(1(;35(66/<$1',1/,(82)$//27+(5:$55$17,(6(;35(66('25,03/,('
)250(5&+$17$%,/,7<$1')25),71(6672:$5'$3$57,&8/$5385326($1'&2167,787(67+(21/<
:$55$17<0$'(%<52%27&283(86$,QF
  • Page 1 1
  • Page 2 2
  • Page 3 3
  • Page 4 4
  • Page 5 5
  • Page 6 6
  • Page 7 7
  • Page 8 8
  • Page 9 9

Robot Coupe Blixer 3 Operating instructions

Type
Operating instructions
This manual is also suitable for

Robot Coupe Blixer 3 is a powerful food processor designed for high-speed vegetable processing and a variety of culinary tasks. With its sharp "S" blade, it can chop, grind, puree, and mix ingredients efficiently. The 3-liter stainless steel bowl allows for processing a substantial amount of food, making it suitable for both home and professional kitchens. The magnetic safety switch ensures safe operation, stopping the motor when the lid is removed. Robot Coupe Blixer 3 is a versatile tool for preparing various dishes, from coarse chops to fine purees.

Ask a question and I''ll find the answer in the document

Finding information in a document is now easier with AI