Page is loading ...

PRO C E E D
PAV Audio/Video Preamplifier

CAUTION
RISK OF ELECTRIC SHOCK
DO NOT OPEN
CAUTION: TO REDUCE THE RISK OF ELECTRICAL SHOCK, DO
NOT REMOVE COVER. NO USER-SERVICEABLE PARTS INSIDE.
REFER SERVICING TO QUALIFIED PERSONNEL.
WARNING: TO REDUCE THE RISK OF FIRE OR ELECTRIC SHOCK, DO
NOT EXPOSE THIS APPLIANCE TO RAIN OR MOISTURE.
NOTICE
This equipment has been tested and found to comply with the limits for a Class B digital device, pursuant to Part 15 of the
FCC Rules. These limits are designed to provide reasonable protection against harmful interference in a residential
installation. This equipment generates, uses and can radiate radio frequency energy and, if not installed and used in
accordance with the instructions, may cause harmful interference to radio communications. However, there is no guarantee
that interference will not occur in a particular installation. If this equipment does cause interference to radio or television
reception, which can be determined by turning the equipment on and off, the user is encouraged to try to correct the
interference by one or more of the following measures:
• Reorient or relocate the receiving antenna;
• Increase the separation between the equipment and the receiver;
• Connect the equipment into an outlet on a circuit different from that to which the receiver is connected;
• Consult the dealer or an experienced radio/TV technician for help.
CAUTION: Changes or modifications to this equipment not expressly approved by the manufacturer could void the user’s
authority to operate the equipment.
The information contained in the manual is subject to change without notice. The most current version of this manual will
be posted on our web site at http://www.madrigal.com.
The lightning flash with arrowhead symbol, within an equilateral triangle, is intended to
alert the user to the presence of uninsulated “dangerous voltage” within the product’s en-
closure that may be of sufficient magnitude to constitute a risk of electric shock to per-
sons.
The exclamation point within an equilateral triangle is intended to alert the user to the
presence of important operating and maintenance (servicing) instructions in the literature
accompanying the appliance.
Marking by the “CE” symbol (shown left) indicates compliance of this device with the EMC
(Electromagnetic Compatibility) and LVD (Low Voltage Directive) standards of the
European Community.

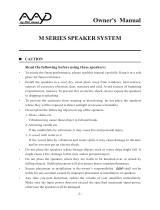
Important Safety Instructions
Please read all instructions and precautions carefully and completely before operating your PAV audio/video pream-
plifier.
1. ALWAYS disconnect your entire system from the AC mains before connecting or disconnecting
any cables, or when cleaning any component.
2. This product is equipped with a three-conductor AC mains power cord which includes an earth
ground connection. To prevent shock hazard, all three connections must ALWAYS be used. If your
electrical outlets will not accept this type of plug, an adapter may be purchased. If an adapter is
necessary, be sure it is an approved type and is used properly, supplying an earth ground. If you
are not sure of the integrity of your home electrical system, contact a licensed electrician for assis-
tance.
3. AC extension cords are not recommended for use with this product. If an extension cord must be
used, be sure it is an approved type and has sufficient current-carrying capacity to power this
product.
4. NEVER use flammable or combustible chemicals for cleaning audio components.
5. NEVER operate this product with any covers removed.
6. NEVER wet the inside of this product with any liquid.
7. NEVER pour or spill liquids directly onto this unit.
8. NEVER block air flow through ventilation slots or heatsinks.
9. NEVER bypass any fuse.
10. NEVER replace any fuse with a value or type other than those specified.
11. NEVER attempt to repair this product. If a problem occurs, contact your Proceed
®
retailer.
12. NEVER expose this product to extremely high or low temperatures.
13. NEVER operate this product in an explosive atmosphere.
14. ALWAYS keep electrical equipment out of the reach of children.
15. ALWAYS unplug sensitive electronic equipment during lightning storms.

4
Table of Contents
Maximizing the Value of Your Purchase..................................................... 7
Send in that warranty card!............................................................................... 7
Unpacking and Placement ........................................................................ 8
Unpacking ..........................................................................................................8
Installing Batteries in the Remote Control ......................................................... 8
Placement ..........................................................................................................8
Ventilation ........................................................................................................... 8
Operating Voltage ...................................................................................... 9
A Word About Installation ..........................................................................10
Home Theater and the Proceed PAV......................................................... 11
PAV system diagram ................................................................................... 11
Movie Sound and the PAV ................................................................................ 11
Dolby Pro Logic™ Sources ................................................................................12
THX Cinema Sources .........................................................................................12
Music and the PAV ............................................................................................12
Subwoofers and Surround Modes....................................................................12
Front Panel ..................................................................................................13
Viewing Simulcasts ........................................................................................... 13
Rear Panel ..................................................................................................18
IR input tip polarity .................................................................................... 20
Learning Remote Control .......................................................................... 24
Planning Your Installation .......................................................................... 28
Choosing The Equipment ................................................................................ 28
Planning Your Equipment Placement ............................................................. 28
The “Correct” Size for Your Television Screen .................................................. 29
The Power Amplifiers ........................................................................................ 29
The Left, Center and Right (LCR) Front Speakers ............................................ 29
toe-in of left & right speakers ................................................................... 30
The Subwoofer(s) .............................................................................................. 30
The Surround Speakers......................................................................................31
dipolar surround placement .....................................................................31
conventional surround placement .......................................................... 32
The Wiring.......................................................................................................... 32
example wire lengths chart ..................................................................... 32
Working in Unusually Large Rooms ................................................................. 32
System Planning Guide............................................................................. 33
Video Placement ............................................................................................. 33
Electronics Placement ..................................................................................... 33
Speaker Placement ......................................................................................... 33
Additional Notes on Speaker Placement ....................................................... 34
System Setup & Calibration ...................................................................... 35
Operating the On Screen Menus with the Remote....................................... 35
Operating the On Screen Menus from the Front Panel ................................ 35
Setting Up.......................................................................................................... 36
Set Speakers......................................................................................................36
Phantom Center Channel ........................................................................ 37
Physical Setup................................................................................................... 37
Testing For Proper Phasing ............................................................................... 37
Input Level Calibration ..................................................................................... 38
Output Level Calibration.................................................................................. 39
set levels menu.......................................................................................... 39
Setting the Surround Delay.............................................................................. 40

5
Setting Input Defaults ........................................................................................41
Programming a New On Screen Alias .............................................................41
cd 1 menu .................................................................................................. 42
alias menu ................................................................................................. 42
Programming Input Offsets .............................................................................. 42
input level offset menu ............................................................................. 43
Programming Default Modes .......................................................................... 43
default surround mode menu..................................................................44
Programming Video Inputs.............................................................................. 44
video input defaults menu .......................................................................44
Mode Defaults .................................................................................................. 45
Setting Mode Defaults...................................................................................... 45
Programming the IR Input ................................................................................ 47
Changing the PAV’s IR Address ........................................................................ 48
Configuring the Remote Trigger output .......................................................... 48
Using the PAV ............................................................................................. 49
Setting the Volume ........................................................................................... 49
Home THX cinema ........................................................................................... 49
Dolby Pro Logic Surround................................................................................. 49
Stereo Surround ................................................................................................ 49
Mono Surround .................................................................................................50
Surround Off......................................................................................................50
Mono .................................................................................................................50
The Operate Menu...........................................................................................50
The Display Pref Menu.......................................................................................51
Programming the Remote Control ........................................................... 52
Programming Other Components’ Functions ................................................ 52
teaching the PAV remote control new commands ................................ 53
Programming PAV Functions ............................................................................ 54
remote only menu..................................................................................... 55
surround, path and misc control menus.................................................. 55
Planning Your Remote Control.................................................................. 57
The Proceed Bank: Left.................................................................................... 57
The Proceed Bank: Center .............................................................................. 57
The Proceed Bank: Right ................................................................................. 57
Bank 2: Left........................................................................................................ 58
Bank 2: Center ..................................................................................................58
Bank 2: Right ..................................................................................................... 58
Room Acoustics......................................................................................... 59
Room Reverberation ........................................................................................ 59
The Boundary Effect ......................................................................................... 59
Room Modes ....................................................................................................60
Your System Settings...................................................................................61
Operate Menu Settings.....................................................................................61
Set Speakers Settings ........................................................................................61
Set Levels ............................................................................................................61
(more on next page)

6
Set Delay ............................................................................................................61
vcr 1 Input Defaults ............................................................................................61
vcr 2 Input Defaults ...........................................................................................61
laserdisc Input Defaults .....................................................................................61
tv/aux Input Defaults.........................................................................................61
cd 1 Input Defaults............................................................................................ 62
cd 2 Input Defaults ........................................................................................... 62
tape 1 Input Defaults ........................................................................................ 62
tape 2 Input Defaults........................................................................................ 62
bal/aux Input Defaults ..................................................................................... 62
tuner Input Defaults .......................................................................................... 62
THX Cinema Surround Defaults........................................................................ 62
Pro Logic Surround Defaults ............................................................................. 62
Stereo Surround Defaults .................................................................................. 62
Mono Surround Defaults .................................................................................. 62
Surround Off Defaults ....................................................................................... 62
Mono Defaults .................................................................................................. 62
PAV Menu Structure (partial)..................................................................... 63
Troubleshooting ......................................................................................... 64
Care and Maintenance ............................................................................ 65
U.S. and Canadian Warranty .................................................................... 66
90-Day Limited Warranty..................................................................................66
Five Year Extended Warranty ...........................................................................66
Obtaining Service ..................................................................................... 67
Dimensions ................................................................................................ 68
Specifications............................................................................................ 69
Installation Notes ....................................................................................... 70

7
Maximizing the Value
of Your Purchase
Congratulations on choosing a superb product. Your Proceed PAV is designed to
give you many years of outstanding performance, and we are confident you will
be happy with it.
We value our relationship with our customers, and often are in a position to help
you enjoy your home entertainment system even more—if we have some way of
contacting you.
Send in that warranty card! Sending in your warranty card registers your product with us so that warranty
service in the U.S. and Canada (see the warranty policy on page 70) can be ob-
tained easily and quickly even if you have lost your original sales slip. (And how
many of us are organized enough to retain all those sales slips?) Moreover, send-
ing in the card automatically extends the warranty from 90 days to five years, at
no cost to you. Please send it in soon, before you forget.
But there are even more benefits to sending in your registration card, including
services for people outside the U.S. and Canada.
✓ software update notices
✓ performance upgrade notices
✓ free subscription to Madrigal’s QuarterNotes newsletter
We have occasionally offered software updates to our products that provide new
features and control options (for example, to facilitate their inclusion in custom
installations, or that automate customer preferences to greater degrees than previ-
ous software versions). These updates are generally a matter of changing out a
socketed EPROM. If they include features you would like to have, you can get
them—if you know about them.
We also try to offer performance upgrades and/or conversions to make upgrading
within a family of products as cost-effective as possible for our customers. For
example, people who already owned the Proceed DAP digital processor when
the HDCD process became available were able to upgrade their unit to HDCD™
for an extremely nominal price. While not all upgrades can be inexpensive, they
all represent excellent values—if you know about them.
One of the best ways we have of communicating with the large number of cus-
tomers we have around the world is through our company newsletter,
QuarterNotes. This newsletter contains information on industry developments,
new products, software updates and upgrades, as well as general interest articles
on recommended music and movies, and occasional profiles of customers and
industry personalities. QuarterNotes is a service we provide to help keep open
our lines of communication with our customers, and it is free—if we know
where to send them.
So please, take a few minutes to fill out the warranty
registration card, and drop it in the mail.

8
Unpacking and Placement
Unpacking Unpack your Proceed
®
PAV audio video preamplifier and keep all packing ma-
terials for future transport. Locate and remove all accessory items from the
cartons. Accessories include:
1 AC power cord
1 PAV remote control
4 alkaline batteries for the remote control
Important! Your PAV has been shipped with software pre-installed that
enables it to work seamlessly with a Proceed PDSD as part of
a high performance, two-piece multichannel controller. If you
need to use the PAV by itself (without a PDSD), your dealer
must install the enclosed EPROM found in a small black anti-
static box. Do not attempt to install this yourself, as only
qualified technicians may open the unit without voiding the
warranty!
Installing Batteries in
the Remote Control
Turn the remote control over and slide the battery compartment cover up and
away from the body of the remote. Insert the four alkaline batteries found in the
Accessories kit, being careful to follow the polarity indications given on the inside
of the battery compartment. Replace the battery cover.
Placement Place the PAV near the source equipment, thus keeping interconnecting cables
reasonably short. It may be placed on a shelf or in a cabinet where it’s conve-
nient to operate.
Note that adequate clearance for the AC cord and connecting
cables must be left behind the PAV. We suggest leaving at least
three inches of free space behind the PAV to allow all cables
sufficient room to bend without crimping or undue strain.
Ventilation It is normal for your PAV to run quite warm. Be sure to allow 2 to 3 inches of
clearance above the PAV to allow heat dissipation through air circulation. The
vents on both the bottom and the top of the PAV must be kept free from any ob-
struction which would reduce the flow of air through the unit. The best rule of
thumb is this: if the top of your PAV is too hot to touch, it needs better ventila-
tion. If so, consider drilling holes in the supporting shelf under the PAV to pro-
mote flow-through ventilation, or use fans to increase air circulation. Avoid place-
ment on soft surfaces that would restrict airflow (such as carpeting).
Mechanical drawings are included in this manual to facilitate special installations
and custom cabinet work (see “Dimensions” at the end of this manual).

9
Operating Voltage
The PAV preamplifier is factory-set for 100V, 120V, 200V, 220V, or 240V AC mains
operation at either 50 or 60Hz, according to the country for which the unit was
manufactured. (230V only in European Union countries, in compliance with CE
regulations.) Make sure that the label on the bottom of the PAV indicates the cor-
rect AC operating voltage for your location. The operating voltage cannot be
changed by the user, and any attempt to do so will void the warranty.
If the voltage indicated does not match what is supplied to your area, see your
Proceed dealer.

10
A Word About Installation
Every effort has been made to make the Proceed PAV simple and straightforward
to install and use. We also know of no other product which offers this level of
performance and flexibility. Still, we have no way to evaluate many other variables
such as the size and shape of your room, its acoustics, and the associated equip-
ment you have chosen to use with your PAV. All of these factors influence the ul-
timate performance of your system. Moreover, the PAV incorporates many system-
specific adjustments which enhance its performance with the widest possible
range of associated components.
For this reason, we strongly encourage you to have your
system installed and calibrated by your dealer, whose
experience, training, and specialized equipment can make a
profound difference in the final performance of the system.
The PAV features the ability to “remember” the carefully calibrated settings chosen
by your installer. You may adjust any or all of these settings to suit your taste for
a particular recording, either from the front panel or from the remote control.
When you want to return to the calibrated settings (which most accurately repro-
duce the widest variety of program material), simply press recall on the remote
control or on the front panel.

11
Home Theater and
the Proceed PAV
Perhaps the most exciting development in home entertainment in recent years is
the much-discussed “marriage of audio and video.” Movies are available in high
quality formats such as laserdisc, and big-screen televisions have improved vastly
over the dim, fuzzy pictures many people remember from a few years ago. Com-
bined with sound reproduced via several loudspeakers and (perhaps) a
subwoofer, it has become possible to have movie excitement in the home which
far exceeds that available in most local theaters.
Unfortunately, many people found these “home theaters” sadly lacking when it
came to their performance with more traditional music sources. Although some
were capable of shaking the walls with explosions and sound effects, few were
capable of reproducing the nuances of a string quartet, a big band, or a well-re-
corded vocalist.
The Proceed PAV is designed for people (like ourselves) who desire to “have it
all.” The PAV offers the musical refinement, control flexibility and movie excite-
ment of both a dedicated high end music system and a full-blown home theater
system, all in one simple package. With its introduction, there is no longer a need
to compromise on either music or movies. A single system can do it all.
PAV system diagram
LF
RF
Ctr
RS
LS
Listening Room
Sub
Surround Power Amplifier
Center/Sub Power Amplifier
Main (Front) Power Amplifier
RS
LS
Ctr
Sub
LF
RF
vcr cd tunerlaserdisc
PR OC E E D
LU
C
A
S
FIL
M
®
pav
vcr 1 vcr 2 laser disc tv/aux
cd 1 cd 2 tape 1 tape 2 bal/aux tuner
thx
cinema
pro
logic
stereo mono off
surround modepath
main remote both record
standby input level delay recall
ref. level
sub
rear
center
balance
master
mute
Movie Sound and the PAV Unlike traditional stereo sources, Dolby Stereo™ movie soundtracks contain four
channels: Left, Center, Right and Surround. The three speakers in the front of the
room (L, C, and R) provide precise localization of sounds, or imaging, while the
surround channel is intended to be reproduced in a diffuse manner to the sides
and behind the audience—to literally “surround” that person in the ambient
sounds of the environment shown on the screen. Normally, a correctly operating
Surround channel would be so diffuse and enveloping as to be almost sublimi-
nal. Its purpose, after all, is to draw you into the movie, not to distract you from
it.

12
Dolby Pro Logic™ Sources The PAV accurately decodes the Dolby Stereo™ soundtracks available in virtually
all modern film soundtracks, many television shows, and even some music re-
cordings. It does so by employing carefully optimized Dolby Pro Logic circuitry,
for superior performance and accuracy. Use the pro logic mode whenever listen-
ing to most surround-encoded television shows, MTV (most of which is now sur-
round encoded), and other surround-encoded program material which has been
created for general distribution.
THX Cinema Sources In addition, the PAV incorporates Home THX
®
audio processing to help movie
soundtracks make the transition from large movie theaters into the home. This
extra step is necessary because the acoustics of movie theaters and living rooms
are so different. Some adjustments are necessary in order to achieve the same
subjective effect in your home as in the finest movie auditoriums. These “adjust-
ments” are precisely what Home THX offers. Use the THX cinema mode for
Dolby Stereo movies which were created for theatrical release—meaning virtually
all movies made since the late 1970’s.
Music and the PAV When it is time to enjoy some of your favorite music, the PAV gives you several
simple options, any of which may be selected by pressing the mode button to
cycle through the choices.
The stereo surround mode uses ambient cues contained in your normal stereo
recordings to create a realistic, full-bodied soundfield using all available speakers.
It has been carefully tuned to enhance stereo playback, and can be expected to
be relatively subtle rather than dramatic. (As with attending a live concert, one’s
attention should rarely be called to the characteristic sound of the “hall.” The
acoustics of the space in which the music is performed should enhance the musi-
cal experience without becoming an end unto themselves.)
The mono surround mode can be used to give acoustically “dry” mono record-
ings a sense of spaciousness. This mode can be used for historical monophonic
music recordings as well as for older movie classics which were recorded in
mono. This mode is particularly helpful when watching older, mono movies on a
big-screen television, where the disparity between aural and the visual size would
otherwise be a distraction to the movie experience.
The surround off mode returns your system to two-channel stereo.
Finally, we have provided a “true mono” mode which reproduces both the Left
and the Right signals through the center channel speaker (and subwoofer) only.
The mono mode is sometimes desirable when listening to noisy monophonic
music recordings or movie soundtracks. Since noise tends to be random in na-
ture, much of it cancels out when L+R are mixed together, as they are in this
mode.
Subwoofers and
Surround Modes
If a subwoofer is connected to the sub outputs, it will normally be given the
deepest bass (below 80 Hz) at all times, independantly of the surround mode or
input selected. Whether or not the three front speakers are also given the deepest
bass information (below 80 Hz) to reproduce is determined by the settings of
the set speakers menu during setup. (See System Setup & Calibration for more
information).

13
PR O C E E D
pav
vcr 1 vcr 2 laser disc tv/aux
cd 1 cd 2 tape 1 tape 2 bal/aux tuner
thx
cinema
pro
logic stereo mono off
surround modepath
main remote both record
standby input level delay recall
ref. level
sub
rear
center
balance
master
mute
1 2 3 5 6 7 8
91011121314151617
LU
C
A
S
FIL
M
®
4
Front Panel
1 VIDEO SOURCE SELECTION BUTTONS
These four buttons select both the video and associated audio signals from
any of the four A/V inputs. To use these Selection Buttons, choose the ap-
propriate path (see path, below). (For your music/home theater room,
“main” would be appropriate.) Then make your selection. The sophisticated
switching system employed in the PAV allows simultaneous, independent
routing of both audio and video signals along any or all of three paths:
main, remote and record.
2 AUDIO SOURCE SELECTION BUTTONS
These six buttons select audio signals from among the six audio-only
inputs. (Note that both cd1 and bal/aux are balanced inputs which use
precision XLR connectors.) To use these selection buttons, choose the ap-
propriate path (see path, below), and then make your selection.
Viewing Simulcasts Selecting any audio source after having selected a video source will cause
the newly-selected audio signal to “override” the audio portion of the video
selection (leaving the video signal unaffected). Thus, to enjoy a simulcast,
merely select the desired picture followed by the desired sound. To revert
to the sound of the video input, just press the video input button again.
3 MAIN DISPLAY
The main display provides information pertaining to the operation of the
PAV including relative volume levels, and is used in conjunction with the
buttons which surround it. At all volumes above a relatively quiet back-
ground level, and in all modes, the volume control enjoys a resolution of 0.5
dB. Thus a change of 10 decibels would be indicated by a change of 20 in
the display.

14
The main display indicates the master volume by default, or the following
offsets when chosen: balance, center, rear, subwoofer. In addition, it can also
display the input level (used in calibrating the Dolby Pro Logic circuitry to
the source material) and the rear channel delay (in milliseconds). Right-
and Left-facing arrows are provided to indicate the direction of the balance
offset. Finally, the infrared receiver and transmitter for the remote control are
positioned on the left side of the main display.
4 VOLUME +/–
These up/down buttons are used to make adjustments on the PAV, apart
from source and path selection. While the volume +/– buttons normally
control the master volume of the music/home theater system (main path),
they can be used in concert with other buttons to control almost any as-
pect of system performance (as indicated below).
5MASTER
When the indicator above this button is lit, any adjustment made with the
volume +/– buttons will be applied to all loudspeakers equally, including
Center, Rears, and Subwoofer(s), thus raising or lowering the overall volume
without changing the relative balance of the various speakers. This is the
default mode of operation for the volume control, to which the PAV auto-
matically returns after you make other adjustments.
6 BALANCE
Pressing this button followed by the volume +/– buttons will alter the rela-
tive volume of the Front Left and Front Right speakers. The direction of the
perceived image shift is indicated by the green arrowhead indicators in the
main display, as well as by the on screen display. Pressing volume + in the
balance mode will shift the image to the right (in a “positive” direction);
pressing volume – will shift the image to the left (in a “negative” direction).
7CENTER
Pressing this button followed by the volume +/– buttons will alter the vol-
ume of the Center speaker relative to all others. The resulting offset will be
indicated in the main display, as well as by the on screen display, until the
volume control reverts to its normal master mode. As an example, increas-
ing the center channel volume by three steps would result in a 3 being dis-
played until the volume control reverted to normal operation, at which
point the display would again indicate the overall volume setting.
8 REAR
Pressing this button followed by the volume +/– buttons will alter the rela-
tive volume of the Rear speakers relative to all others. The resulting offset
will be indicated in the main display, as well as by the on screen display.

15
9MUTE
Pressing the mute button will reduce the main output level of the preampli-
fier by a user-modifiable amount, ranging from 2.5 to 55 decibels (5 to 110
in the main display). Pressing the mute button a second time without ad-
justing the volume will return it to its previous setting. If you adjust the vol-
ume with either the front panel buttons or the remote control while in the
mute mode, the preamplifier will adjust its volume from the muted volume
and disengage the mute function. The factory default setting of the mute
circuit is -20 dB (a change of 40 units in the Main Display). (See Using the
PAV for information on changing the factory default setting.)
10 SUB
Pressing this button followed by the volume adjustment buttons will alter
the volume of the Subwoofer(s) relative to all other speakers. The resulting
offset will be indicated in the main display, as well as by the on screen dis-
play.
11 REFERENCE LEVEL INDICATOR
This LED indicator is lit when the PAV is playing at Home THX reference
level (normally calibrated during initial setup—see Output Level Calibra-
tion, p. 36).
12 RECALL BUTTON
Pressing the recall button restores the PAV to its calibrated reference set-
tings for the relative output of all speakers. This is especially helpful after
having experimented with various settings of balance, center, rear, or sub,
or when comparing a modified surround default to “flat” balance, since one
touch of a button will restore your preamplifier to its original state (as de-
termined by the setup calibrations stored in memory; see System Setup &
Calibration and Using the PAV for more details).
13 DELAY BUTTON
Pressing this button allows you to adjust (using the volume adjustment but-
tons) the delay introduced to the signal being sent to the rear channels,
between 15 and 30 milliseconds (mS). (See Setting the Surround Delay,
page 37, for more details.)
14 INPUT LEVEL BUTTON & INDICATOR
Pressing this button adjusts the input level (or offset) on the main signal
path. Together with the input level indicator in the main display immedi-
ately above it, it may be used to compensate for variations in level among
sources. This adjustment is important primarily for movie sources (since
Dolby Pro Logic circuitry is level-sensitive by its nature). When the Input
Level is set correctly, the green indicator LED should be on most or all of
the time during loud passages, but should never turn red (which would in-
dicate an overload condition).
If overload should occur, pressing the input level button followed by the
volume – button will reduce the input level. Do so until the indicator re-
mains green during even the loudest passages.

16
Conversely, if you rarely see the green LED illuminate during loud passages,
you should increase the Input Level to compensate for the relatively low
level of the source. Press the input level button, followed by the volume +
button to increase the input level.
15 SURROUND MODE SELECTOR
Pressing this button cycles among the various surround modes of the PAV:
• THX cinema — for movies which were mixed for theatrical re-
lease; both THX cinema and pro logic indicators are lit, confirm-
ing that Pro Logic is in use whenever the THX cinema mode is
selected.
• pro logic — for all other surround-encoded material, such as
many TV shows and some music recordings; only the pro logic
indicator is lit.
• stereo surround — for enjoying two-channel stereo recordings
using all loudspeakers; the stereo surround indicator is lit.
• mono surround — for monophonic recordings which would ben-
efit from some degree of additional ambience or spaciousness,
such as many classic movies and some sporting events; the mono
surround
indicator is lit.
• surround off — to return the system to two-channel stereo; the
surround off indicator is lit.
• mono —a “true” mono, reproduced only through the center chan-
nel speaker and subwoofer. Noisy mono soundtracks often enjoy
significant noise reduction by being reproduced in this mode;
both mono and off indicators are lit to denote the fact that the
surround circuitry is disengaged, leaving you with a “true” mono.
16 PATH SELECTOR
Pressing this button cycles among your various signal path options:
• main — the home theater; this path determines which video and
audio sources are sent to the Main outputs on the back of the
PAV. Sources selected for the main path are indicated in yellow on
the front panel LEDs. (If the LED blinks red, it is indicating a
tape loop condition caused by the same source having been se-
lected on the record path; deselect the source on the record path
first, then reselect your main source.)
• remote — determines which video and audio sources are sent to
the Remote outputs on the back of the PAV, to be sent to another
system elsewhere in the house. These sources are indicated in
green on the front panel LEDs. The remote path may also be
used as a secondary Record Output path if necessary.
• both — the audio and video signals for both main and remote
paths may be selected at the same time, for your convenience; as
when entertaining, perhaps, for whole-house background music.
Sources selected for “both” main and remote paths will be indi-
cated by yellow LEDs (the same as for the main signal path).
• record — determines which video and audio sources are sent to
the various record output jacks. The source selected for the
record path is indicated on the front panel in red LEDs. As a
safety measure, the PAV will prevent the selection of any record-
able device as its own source (to avoid feedback loops). If such a
selection is attempted, the PAV will cause the appropriate LED to

17
flash yellow on the front panel, indicating a conflict on the main
path. The PAV will also display the words tape loop on screen as
a warning.
Tip: To avoid any possibility of running into a “Tape Loop” problem
(where the PAV prevents you from choosing what you want, in
order to protect the system from possible damage), simply
select a non-recording source such as TV on the record path.
17 STANDBY BUTTON
Pressing this button places the PAV in standby mode, turning off the display,
disengaging all control functions, and turning off all outputs. The internal
circuitry remains on in order to maximize performance on demand by vir-
tue of all circuits remaining thermally stable. Lest you think this wasteful,
you should know that the PAV draws less than power than a typical light
bulb, whether in standby or fully on. The benefits of having it always
warmed up and ready to go (and always able to respond to remote control
commands) far outweigh the small amount of power used. We recommend
using the rear panel power switch only when you will be away from the
house for extended period of time, such as during a vacation.
There is another good reason for using the PAV’s standby mode. The PAV
will generate a full-frame black video signal at its video outputs during
standby, rather than passing no signal at all. This is particularly helpful with
many projections televisions, since it gives the projector a “sync” signal to
lock onto without calling for any light to be generated. This feature allows
the projector to remain fully warmed up at all times without risking dam-
age to the phosphors which create the projected light.

18
cd1 bal/aux
PRO C E E D
R
PUSH
21
3
p a v
by MADRIGAL AUDIO LABORATORIES
vcr1 vcr2 tape1 tape2
vcr1 vcr2 tape1 tape2
laser
disc
tv
aux cd2 tuner
center
sub
rear
surround remote main
o u t p u t s
main remote
laser
disc
tv
aux
vcr1 vcr2
main rem
vcr1 vcr2
i n p u t s
remote
i. r. turn-on
PUSH
21
3
PUSH
21
3
PUSH
21
3
1 2 3 4
9 7 6 58
10
11
12
13
12
3
12
3
12
3
12
3
Rear Panel
Caution! Disconnect all associated equipment from the AC mains
BEFORE making any signal connections and applying power
to the PAV.
1 SINGLE-ENDED AUDIO INPUTS (8)
Accepts right-channel and left-channel audio signals from source equipment
with single-ended (RCA) outputs. Single-ended audio inputs are provided
for a total of eight components, designated: vcr1, vcr2, tape1, tape2, a
laserdisc player, your tv (or auxiliary component), a cd2, and a tuner. Note
that the video portion of the signal from any video source (VCR, laserdisc,
TV) would be connected on the right side of the rear panel in the Video
Input section. (See below.)
Connect the right-channel and left-channel single-ended outputs of your
various source components to the corresponding inputs on the PAV.
2 BALANCED AUDIO INPUTS (2)
Accepts right-channel and left-channel signals from source equipment with
balanced outputs. Provisions are made for two balanced signals via high
quality XLR connectors, designated cd1 and bal/aux.
The pin assignments of these XLR-type female input connectors are:
Pin 1: Signal ground
Pin 2: Signal + (non-inverting)
Pin 3: Signal – (inverting)
Connector ground lug: chassis ground
PUSH
21
3

19
These pin assignments are consistent with the standards adopted by the
Audio Engineering Society. Refer to the operating manuals of your bal-
anced-output line-level sources to verify that the pin assignments of their
output connectors correspond to the PAV. If not, wire the cables so that the
appropriate output pin connects to the equivalent input pin.
Connect the right-channel and left-channel balanced outputs of your source
components to the corresponding balanced inputs on the PAV.
Note: If you do not have balanced sources and need more single-
ended inputs, it is possible to fabricate a cable to connect line-
level sources with single-ended output to these balanced inputs:
1
2
3
Male RCA
(connect to source)
Male XLR
(connect to PAV)
22-gauge
buss wire
3 VIDEO INPUTS (4)
Four video inputs are provided in the PAV, designated: laserdisc, tv/aux,
vcr1, and vcr2. These inputs may be configured for use with either com-
posite or S-video (Y/C) signals during setup. Composite video inputs use
RCA connectors. S-video inputs utilize “S” connectors:
S-video connector
The PAV does not provide for “cross-feeding” of S-video and composite sig-
nals. Any signal entering the PAV in either format will be output in the same
format only. We strongly recommend standardizing on one or the other
throughout the system for maximum ease of use. In addition, using both
the composite and the S-video inputs simultaneously may result in a loss of
video signal quality.
Connect the video outputs of your video components to the corresponding
video inputs on the PAV. (See System Setup and Calibration for more infor-
mation on programming these inputs for either composite or S-video use.)
Installation Note: S-video (Y/C) signals are more susceptible to degradation
over long wire runs. The quality of wire used makes a
significant difference, but regardless, it is generally
inadvisable to run S-video cables more than six or eight feet
(2–2.5 meters). Composite video signals hold up better over
longer runs, especially when high quality 75
Ω
cable such as
Madrigal MDC-2 is used.
ground
signal +

20
4 AC POWER SWITCH AND AC POWER INPUT
An AC power switch is provided which disconnects the PAV from the wall
outlet’s AC power. The PAV is designed to be left in Standby when not in
use, rather than completely “off.” Being in Standby allows it to respond to
commands from the remote control and maintains a stable operating tem-
perature at all times for optimal performance and longevity.
Plug the supplied three-prong power cord into the AC Power Input
recepticle provided before plugging the power cord into the wall. If a
longer AC power cord is required for your application, be sure to use a
three-conductor power cord which conforms to IEC standards.
The Proceed PAV has been safety-tested and is designed
for operation with a three-conductor power cord. Do not
defeat the “third pin” or earth ground of the AC power cord.
Beside the power switch you will find a communications port. This is re-
served for future use (communicating with the PAV's companion piece, the
Digital Surround Decoder). Do not insert anything into this port other than
the communications cable from a “DSD.”
5 REMOTE IR AND REMOTE TURN-ON
A
1
⁄8" “mini” jack labeled remote ir. in the lower right corner of the rear
panel provides direct access to the infrared control circuitry of the PAV. It
may be configured during setup (in an on screen menu) to interpret in-
coming signals in either of two ways:
• Remote: when in Remote mode, the PAV will interpret any com-
mand entering through the remote IR jack as being intended to
affect the remote path only. This feature allows easy access to all
sources connected to the PAV from elsewhere in the house with
the addition of any commercially-available IR repeater.
• Local: when in the Local mode the remote IR jack replaces the
infrared receiver in the main display of the front panel. This
mode is most often used with an IR repeater when the PAV and
other components are placed inside of cabinets (preventing the
normal IR receiver from receiving remote commands). Setting the
remote IR jack to local will disable the IR receiver in the main
display to avoid inconsistent operation which might be caused by
interference between the two. (See Programming the IR Input,
page 47.)
The incoming signal for the remote IR input should conform to widely-ac-
cepted IR repeater standards: that is, the signal present should be between
3-15 volts DC at less than 100 mA current, with a positive tip polarity, as
shown below:
IR input tip polarity
+–
3-15 volts @ less
than 100 mA
/