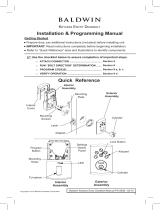
Baldwin Door Hardware DCTRD152 Installation guide
- Type
- Installation guide

Torque
Blade
Not used with
SmartKey products
Not used with
SmartKey products
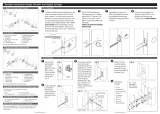
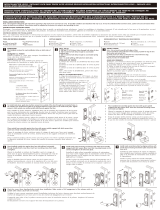
Double Cylinder Deadbolt Installation Instructions
Fits 1-3/4" (44 mm) up to 2" (51 mm) doors
(Thick door service kits for
2" (51 mm) up to 2-1/2" (64 mm) doors
available through customer service)
Please note: Product illustrations
may differ from your product.
Installation is the same.
www.baldwinhardware.com • Customer Service 1.800.437.7448
1. Adjust and install latch
3. Install Trim
4. Install Strike
Measure your door backset as shown.
If backset of door measures 2 3/4" (70mm),
adjust latch by rotating face as shown.
Do not
overtighten
screws.
LATCH FACE ASSEMBLY
Remove backplate.
Snap on collar.
For Drive-In Latch
LATCH INSTALLATION
Install with 1/2" (13 mm) screws.
UP
UP
Drive in with hammer.
For Square Corner/
Round Corner
For Drive-In Latch
OR
Ensure the latch is inserted
with the word “UP” on top.
Note, for a 1-1/2" (38 mm) diameter
hole, test if latch extends and
retracts. Chisel out area if required.
After the completion of Step 1, install the longer torque blade supplied
in the kit. Proceed to Step 3 and install with longer screws.
Install longer torque
blade and reinstall clip
to secure.
THICK DOOR KIT INSTALLATION INSTRUCTIONS
(AVAILABLE SEPARATELY)
Supports 2" (51 mm) up to 2-1/2" (64 mm) doors
Remove clip and
torque blade.
1/8" (3 mm) pilot holes
may be required.
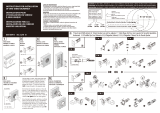
TEMPLATE
Door Preparation
If your door requires drilling, use the supplied template below with the door preparation
instructions available at www.baldwinhardware.com
1-3/4"
(44 mm)
2"
(51 mm)
2-1/4"
(57 mm)
2-1/2"
(64 mm)
Centerline
Ligne médiane
Linea central
Fold
Doble
Plier
2-3/8" 60mm
2-3/4" 70mm
WARNING: This Manufacturer advises that no lock can provide complete security by itself. This lock
may be defeated by forcible or technical means, or evaded by entry elsewhere on the property. No lock
can substitute for caution, awareness of your environment, and common sense. Builder’s hardware
is available in multiple performance grades to suit the application. In order to enhance security and
reduce risk, you should consult a qualied locksmith or other security professional.
47065 / 02
Copyright © 2011 Baldwin Hardware Corporation
2. Measure door thickness
• If door measures 1-3/4" (44 mm): Use shorter
deadbolt mounting screws in Step 3.
• If door measures between 1-3/4" (44 mm)
and 2" (51mm): Use longer torque blade
supplied in the box. See illustrations in Thick Door
Installation Instructions below to replace the torque
blade. After torque blade replacement, proceed to
Step 3 and install deadbolt with longer mounting
screws supplied in the box.
• If door is thicker than 2" (51 mm): See Thick
Door Installation Instructions below.
deadbolt
mounting
screws
Do not distort clip.
Ensure clip ts tightly.
The drilling template must be printed to scale
to ensure correct hole placement. To confirm
correct print scale, the square below must
measure exactly 1" by 1" (25mm x 25mm).
1"
25mm
1"
25mm
1"
25mm
Measure
after printing.
Page is loading ...
-
 1
1
-
 2
2
Baldwin Door Hardware DCTRD152 Installation guide
- Type
- Installation guide
Ask a question and I''ll find the answer in the document
Finding information in a document is now easier with AI
in other languages
Related papers
-
Baldwin SC.WESxELL.TRR.150 Installation guide
-
Baldwin SCCSD190 Installation guide
-
Baldwin HDARCLRAR481 Installation guide
-
Baldwin 9BR3510-012 Installation guide
-
Baldwin ENTRATSR152 Installation guide
-
 Baldwin Door Hardware 8031151 Installation guide
-
 Baldwin Door Hardware 8285.056.AC3 Installation guide
-
Baldwin 85386.056.ACXH Installation guide
-
Baldwin RUS.RSR.481 Installation guide
-
Baldwin Door Hardware 85355056LENT Installation guide
Other documents
-
Baldwin NAPXROU.TSR.003 Installation guide
-
Kwikset 802AVH LIP L03 Installation guide
-
 Sure-Loc Hardware IN301-CDR 32D Installation guide
-
Baldwin 380SLB US4 SMT Installation guide
-
Kwikset 96870-090 User guide
-
 Faultless D264-F Installation guide
-
Kwikset 800CEXJ L03 SMT CP Installation guide
-
Kwikset 801SEXJ 5 SMT CP Installation guide
-
Kwikset 816SQT26SMTRCAL Installation guide
-
Baldwin 8231.050 Installation guide


