Page is loading ...

CRAFTSMEN, INC.
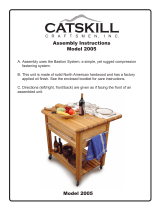
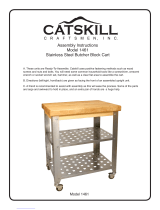
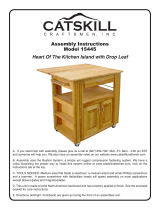
Assembly Instructions
Model 1448
Model 1448
A. Assembly uses the Bastion System; a simple yet rugged compression
fastening system.
B. This unit is made of solid North American hardwood and has a factory
applied oil finish. See the enclosed booklet for care instructions.
C. Directions (left/right, front/back) are given as facing the front of an
assembled unit.

P/N: TT1448B
(1) Table Top 48” x 24” x 2”
P/N: SLS1448B
(2) Slated Shelf 43-3/4” x 18” x 1-3/4”
P/N: DF1448B
(1) Drawer Front 39-3/8” x 5-3/8” x 3/4”
P/N: DBK1448B
(1) Drawer Back 38-3/8” x 4-1/2” x 3/4”
P/N: TBK1448B
(1) Top Back Brace 39-1/2” x 5-1/2” x 3/4”
P/N: TSB1448B
(2) Top Side Brace 14-1/2” x 5-1/2” x 3/4”
P/N: DSL1448B
(1) Drawer Side Left
14” x 4-1/2” x 3/4”
P/N: DSR1448B
(1) Drawer Side Right
14” x 4-1/2” x 3/4”
P/N: DB1448B
(1) Drawer Bottom 37-5/8” x 15-5/8” x 5.2mm
GLIDE-1448B
14”
P/N: FL/BRleg1448B
(2) Front Left/Back Right Legs
33-1/2” x 2-3/16” x 2-3/16”
P/N: FR/BLleg1448B
(2) Front Right/Back Left Legs
33-1/2” x 2-3/16” x 2-3/16”
Model 1448
Parts List
P/N: GSB1448B
(2) Glide Support Brace
14-1/2” x 2” x 3/4”

P/N: L-bracket1448B
(4) L-Brackets
(10)
(10)
(10)
P/N: Leveler1448
(4) 7/8 Leveler
P/N: Pipe1448B
(1) Nickel Plated Towel Bar Handle
32” x 5/8”
P/N: EndCap1448B
(2) Pipe End Cap
5/8”
(12)
(14)
P/N: SKRU 7/16 panhead (8)
7/16 #6 PANHEAD SCREW
P/N: Pipe Holder 1448B
(2) Pipe Holder
P/N: T-Nut1448
(4) T-Nut
Model 1448
Parts List
Continued
P/N: SKRU 5/8 #6 (8)
5/8 #6 WOOD SCREW

Bastion Assembly
INSTRUCTIONS FOR BASTIONS
3
ILLUSTRATION ONLY. See Steps 1 & 3
for bastion placement for this unit.

4
STEP 1
ASSEMBLE SIDE PANELS
A. Each side panel consists of two (2) legs, one (1) top side
brace and one (1) glide support brace. When assembled,
diagonal legs will be the same (i.e. Front Right/Back Left &
Front Left/Back Right). Side panels are identical when
assembled -- the drawer glides will determine left and right
sides.
B. Tap a 3/4” pin in each end of the top side braces. Take
each of the 4 legs and install one (1) bastion post per leg, on
the side of the leg which also has two (2) pin holes for the
glide support sticks. Locate post holes. Tap posts in with
hammer until threads engage wood; turn posts down until
the solid shaft hits the wood (all threads are into wood), then
back post out until the hole in the post is perpendicular to
the long length of the leg (about 1/2 turn).
C. Lay out Front Left leg, one (1) top side brace and back
left leg as in Illustration 1A. Note the two pilot holes for the L
brackets are along the top inside of the top side brace.
D. Take the top side brace and drop a barrel-shaped bronze
bastion nut into the nut access hole as illustrated. Threaded
end of the nut faces out. Insert front left leg post into the
hole in the end of the brace, through the side of the barrel
nut, until the hole in the post can be seen through the
threaded end of the nut. Insert the set screw into the nut
and tighten down. The tip of the set screw will seek the
center of the bastion post as it is tightened, leaving a tight
joint. If the joint is loose, check to make sure the set screw is
not cross-threaded or that the post is out too far (not
threaded into leg deep enough.) See Instructions for
Bastions illustrations on page 3 for clarrification of assembly.
E. Insert two 3/4” pins into each end of the glide support
brace. Insert brace pins into the holes on the inside of the
left front leg as illustrated (4 pilot holes out).
F. Attach Back Left leg in same manner.
G. Repeat for other side panel.
Table top “L” Bracket holes
nut access holes
not used
holes for
shelves
TOP SIDE BRACE
Bastion Post
GLIDE SUPPORT BRACE
Glide Support Steel Pin Holes
Illustration 1A
Illustration 1B
Illustration 1C

PREPARE SIDE
ASSEMBLIES FOR BACK
BRACES
The Top Back Brace utilizes
the Bastion system for
attachment. Place the
Bastion posts into their
positions on the back legs
only of both side assemblies.
Bastion Post
Positions for
Top Back Brace
5
7/16”
inch

STEP 3
ATTACH BACK BRACE
A. You may find it easiest to attach the back brace and shelves by inverting the island. Attach the back brace
with bastions to the right and left side assembly.
STEP 4
ATTACH SHELVES
A. It is recommeded to get a friend to help hold the shelves in place as you attach them using 1-1/4” #8 screws.
6

7
STEP 5
TABLE TOP PREPARATION & ATTACHING
Attach four (4) “L” brackets (using 5/8” #6 screws) to the bottom side of the table top. Note the proper position
of the “L” brackets.
Illustration 7-A
Make sure the round
hole is used to attach
the L-Bracket to the
bottom of the Table Top.
STEP 6
ATTACH TABLE TOP
Utilizing the “L” brackets, attach the table top, using
5/8” #6 screws.

STEP 7
INSERT LEVELER FEET
A. Hammer the threaded T-bolt into the predrilled hole on the bottom of
each leg. Screw the leveler into the T-bolt. Height of each of four levelers
can be adjusted to stablize entire unit.
Leg
8

STEP 8
Assemble Drawers
A. Attach the Drawer Back to the Left and Right Drawer Sides with four 1 ¼”#8 Screws. Make
sure the slots that run the length of the Sides are aligned with the slot in the Drawer Back to
accept the Drawer Bottom.
B. Slide in Drawer Bottom, best side up,
Illustration 8A
Illustration 8A
9

Illustration 8C
Drawer Front
D. Insert the
B-Nuts into the nut
access holes on the inside of
the Drawer Sides with the threaded
end facing out. Take the Drawer Front and
carefully insert the Posts into the ends of the
Brace Sides, through the sides of the B-Nut until
seated. Push Nut snugly against the wood in
the nut access hole toward the Drawer Front.
Hole should be slightly off-center toward the
Drawer Front. Insert the Set Screw and tighten
down. The Drawer Sides should be tight against
the Drawer Front.
Illustration 8D
C. Take two (2) Bastion Posts, align the threaded
ends of the Posts with the post holes located near the
ends of the inside Drawer Front. Tighten Posts
down until the solid shaft of the Post hits the wood.
Back Post out until the hole/screwdriver slot in the
end of the Post is parallel and in direct line with the
long edges of the Drawer Front.
E. Attach the Drawer Glides (left and
Right) to the Drawer Sides using two
7/16” #6 Pan Head Screws per glide.
Open end of glide goes toward the back
of the drawer.
DO NOT INSERT DRAWER
INTO CABINET AT THIS TIME.
Illustration 8E
10

11
STEP 9
ATTACH TOWEL BAR
See Illustrations 10 and 11. Screw Nickel Plated Towel Bar Posts into the drawer
front using 1-1/4” #8 screws. Attach pipe holder by sliding supports over posts
and secure with tiny set screws using allen wrench provided. Set screws go
toward bottom of draw. Slide towel bar through holes in supports and secure in
place with set screws. Bar should be equidistant on either side of the supports.
Tap end caps into place. See illustration 12.

STEP 10
INSERT DRAWER
A. Align the drawer glides attached to the drawer and the other half of the glides attached to
the glide support braces. Slide the drawer all the way in until you hear an audible click. The
drawer should now be secured to the glides.
12

BUTCHER BLOCK OIL COUPON
For continued beauty and long life of your
Catskill Craftsmen cart, we recommend
Catskill Craftsmen’s Butcher Block Oil.
If you would like to purchase Butcher Block
Oil direct from Catskill Craftsmen’s factory,
we offer a reduced price. For one eight ounce
(8 fl. oz.) bottle, which is sufficient for two
applications, simply send $6.95 along with
the completed coupon to the address below or
visit us online at www.catskillcraftsmen.com.
REDUCED
PRICE TO OUR
CUSTOMERS!
CRAFTSMEN, INC.
NAME _____________________________________
ADDRESS __________________________________
__________________________________________
CITY ______________________________________
STATE _________________________ ZIP _______
Please make checks payable to: Catskill Craftsmen Inc.
15 West End Ave. Stamford, NY 12167-1296
Catskill Craftsmen, Inc.
15 West End Ave.
Stamford, NY 12167-1296
CRAFTSMEN, INC.
Please send me _____# of bottle(s) of the
Catskill Craftsmen Butcher Block Oil for
$6.95. My Check or Money Order is enclosed
for a total of $______________.
Item Code: 1448
13
KITCHEN
ISLAND CARE
The top and base has an oil
coating. Use Catskill’s
Butcher Block Oil or Mineral
oil for food-safe use.
/