Page is loading ...

EVI Audio GmbH 5/19/2005
PCI-CAN Cards for IRIS
IRIS V2.0 now supports using a PCI-CAN bus card for the CAN network. The following
interface cards from PEAK System Technik have been tested and found to work with IRIS
properly:
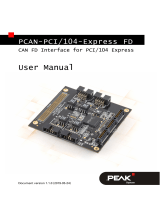
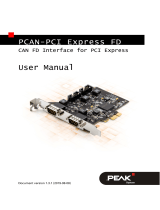
- IPEH-002066, PCAN-PCI card, 1 CAN port, isolated
- IPEH-002067, PCAN-PCI card, 2 CAN ports, isolated
Further information can be found at the PEAK System Technik internet page
www.peak-
system.com
Installing and configuring a PCI-CAN card:
1. Install the CAN card properly in your PC.
2. Install the driver by running pcandrv.exe and other software which is supplied with the
CAN card (floppy disk).
3. The installation program installs the following software via start – programs - PCAN:
- Driver for the PCAN-PCI card
- Netconfig (for CAN network configuration)
- PCANStat (indicates the network status)
- PCANView (for displaying the data transfer on the CAN bus)
- PCANView Help.hlp (Help File for PCANView)
The program Netconfig is needed afterwards, the other programs can be helpful for
diagnostics, e. g. when telephoning with our support people.
4. After successful installation open the Properties of CAN-Hardware window by selecting
Start – Properties – Control Panel – CAN-Hardware. Select PCI at Active device.
One or two devices must appear now, e.g.
Hardware: PEAK PCI-CAN
Resources: card=PEAK PCI, device=11, function=0, controller=0, port=0xff1fe000,
IRQ=9,
Firmware n.a.
Attention!
You can only use either USB or
PCI. Connection to both is not possible!
5. The cards have no internal termination resistors. Generate either a cable from SUB-D
to RJ-45 and include a resistor of 120 Ohms into the SUB-D connector, or include an
adapter SUB-D to 2 RJ-45 sockets and use a CAN-TERM termination plug.
The conversion from CAN to SUB-D is as follows:
Signal RJ-45 Connector SUB-D 9-pin Connector
CAN_H (+) 4 7
CAN_L (-) 5 2
CAN_GND 2 3 / 6
6. After that, access the program Netconfig (do not start IRIS yet) and assign a network
with a significant name to every controller (e.g. Controller 0 = PCC1, Controller 1 =
PCC2). PCC1 / PCC2 are the IRIS default network names for the PCI-to-CAN
Converter. When you exit the program, you are asked if you want to save the entries.
Answer with Yes.
IRIS - PCI-CAN Interface.doc F. Lermer 1 / 2

EVI Audio GmbH 5/19/2005
IRIS - PCI-CAN Interface.doc F. Lermer 2 / 2
7. Start IRIS now and insert the first amplifier(s). In the Amplifier Dialog select New and
change to PCI CAN Interface in the Combo-box. A CAN interface is inserted with the
amplifier.
Double-click on the interface icon to open the PEAKCAN Local User Interface window.
In line Net you should read PCC1 and the line Hardware should display PEAK PCI-
CAN. If you decided in Netconfig to use another network name you can change it in the
interface’s Properties menu, entry net, opened by right-click on the interface icon.
8. If you are using a PCAN-PCI card with two CAN ports you now can add a second
interface to the project. Drag a second interface either directly from Add Device… or
insert the next amplifier(s) and select New PCI CAN Interface in the Combo-box again.
9. For the second interface you have to change the net entry to PCC2 in the interface’s
Properties menu opened by right-click.
10. Assign the correct net for every inserted amplifier in the Amplifier Dialog.
Notes:
For large systems with many amplifiers it is recommended to use PCI-to-CAN interfaces
instead the UCC1 USB interface. The reason for this is that the USP port has possibly to
share it’s bandwidth with other USB devices like mouse, keyboard, removable memory and
so on.
When using two or more interfaces in an IRIS project the Online dialog opens for each
interface separately when going online.
/