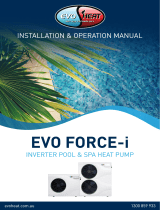
Evo Force ManualDomestic Pool Owner's manual

Category
Above ground pool accessories
Type
Owner's manual

This manual is also suitable for

The Evo Force ManualDomestic Pool is a heat pump designed to heat swimming pools efficiently, providing a comfortable and enjoyable swimming experience. It features an easy-to-use control panel with a clear display for temperature adjustment, operation mode selection, and other settings. The device also boasts a quiet operation, minimizing noise disturbance during use. Additionally, the Evo Force ManualDomestic Pool has built-in safety features, such as automatic defrost and overheat protection, ensuring safe operation and peace of mind.

The Evo Force ManualDomestic Pool is a heat pump designed to heat swimming pools efficiently, providing a comfortable and enjoyable swimming experience. It features an easy-to-use control panel with a clear display for temperature adjustment, operation mode selection, and other settings. The device also boasts a quiet operation, minimizing noise disturbance during use. Additionally, the Evo Force ManualDomestic Pool has built-in safety features, such as automatic defrost and overheat protection, ensuring safe operation and peace of mind.

2 3
CHAPTER 1: Installation
Chapter 1 deals with installation of your Evoheat pool heater
and is predominately for use by your installer/
technician. Evo recommends however that owners make
themselves familiar with this chapter.
CHAPTER 2: Operation
Chapter 2 covers operation of your Evoheat pool heater
including basic and advanced operation modes and
maintenance/ troubleshooting.
Please take the time to read this manual thoroughly.
Failure to do so can void customer warranty, cause possible
damage to your heater, and may cause a loss of
heater efciency.
4 5
Table of Contents
1. General information 4
1.1 Introduction
4
1.2 Consumer and Safety Information
4
1.3 Energy Saving Tips 4
2. Specications
5
2.2 Dimensions 6
CHAPTER 1 Installation
8
1. Air Flow 8
2. Water Flow
8
3. Electrical Connection
9
4. Heater Condition
9
3. General Installation Information 9
3.1 Inspection
9
3.2 Location 10
3.3 Clearances
11
3.4 Water Flow and Plumbing Setup
11
3.5 Water Pump Connection 12
Installation Options
12
1. Slave Mode
12
2. Seperate Systems 12
3. EVO JBox
13
3.6 Drainage 13
3.7 Electrical Connection
14
3.8 Remote Controller Connection 15
Table of Contents
CHAPTER 2 Operation 16
Display Explanation 16
1. Controller Operation
16
Control Panel Explanation
16
Operation Instructions
17
a) On-off Operation 17
b) Mode Selection
18
d) Keyboard Lock and Unlock
19
e) Clock Setting 20
f) Timer On and Off Setting
21
g) Parameter Setting 24
2. PCB I/O Ports Description
28
3. Parameter
28
Parameter Table 28
Description of the Parameters
30
MAINTENANCE AND TROUBLESHOOTING
35
4.1 Maintenance
35
4.2 Troubleshooting
35
Troubleshooting Guide 36
Appendix
Temp Sensor Probes 37
Appendix A – Wiring Diagrams
38
Appendix B – Technical Data
41
EVOHEAT Warranty
46
Warranty Registration
47
6 7
1. General information
1.1 Introduction
This manual provides installation and operation instructions for EVOHEAT heat pumps. Read
these installation and operation instructions carefully before proceeding with the installation
and operation of your heater. Consult your EVOHEAT Distributor with any questions regarding
this equipment.
Installation and service must be performed by a qualied installer. The manufacturer will not
be responsible for any damage to the unit or injury caused by improper installation, operation
or maintenance.
1.2 Consumer and Safety Information
a. Evo recommends 27°C as the optimum water temperature for swimming.
b. The consumption of alcohol or drugs before or during spa or pool use can cause
drowsiness which could lead to unconsciousness and subsequent risk of drowning.
c. Immersion in water exceeding 38°C during pregnancy is not recommended.
d. The water temperature should always be checked with an accurate thermometer before
entering a spa or hot tub.
e. Persons with a medical history of heart disease, diabetes, circulatory or blood pressure
problems should consult their physician before using a hot tub or spa.
f. Persons taking any medication or drugs which induce drowsiness (e.g., tranquilizers,
antihistamines, or anticoagulants) should not use spas or hot tubs.
g. Prolonged immersion in hot water can induce hyperthermia.
1.3 Energy Saving Tips
It is important to note that a heat pump will not heat a pool as fast as a large gas pool heater.
If the pool water is allowed to cool signicantly, it may take several days to return to the
desired swimming temperature. For weekend use, it is more economical to maintain the pool
water temperature at or near your desired swimming temperature. If you do not plan to use
your pool for a prolonged period, then you might choose to turn the heat pump completely
off or decrease the temperature setting of the control several degrees to minimize energy
consumption.
8 9
a. Use an accurate pool thermometer. A difference of 2°C, between 26°C and 28°C,
will signicantly increase energy consumption.
b. Carefully monitor the water temperature of your pool in the summer time. You can
reduce heat pump usage due to warmer air temperatures.
c. When the pool is not to be used for long periods, turn off the heat pump.
d. Where possible, shelter the pool from prevailing winds with well-trimmed hedges or
other landscaping, cabanas, or fencing.
e. Always use a high quality pool cover when practical. Besides providing a valuable water
saving feature, a pool cover will dramatically reduce heat loss. See attached appendix
for further information.
Model:Force 5
unit mm
340
372
98
350
50
Water outlet
50
Water inlet
600
956
360
545
372
264
290
746
569
280
395
290
92
50
Water outlet
Water inlet
300
50
M
o
d
el:Force 9 / Force
1
4
430
630
1003
395
50
50
440
103
Water Inlet
Water Outlet
455
1248
455
Model:Force 18
u
ni
t mm
50
50
470
430
400
98
Water Inlet
Water Outlet
868
1115
447
790
470
Model:Force 22 / Force 2
6
10 11
CHAPTER 1
Installation
Example of a unit with a
refrigerant leak and zero
pressure – notify
Evoheat Dealer.
Before installation it is very important to ensure 4 variables
are carefully checked to allow the unit to operate correctly:
1. Adequate Air Flow
2. Correct water ow volume
3. Correct electrical connection & supply
4. Heater condition
1. Air Flow
Installing the heater indoors or in an enclosed space will result in very poor performance and
can in extreme cases damage the heater. Ensure the heater is installed in a well ventilated
area with plenty of fresh air, a minimum gap between walls/fences etc of 600mm on the
sides and 1500mm overhead clearance.
Important: Ensure that the cold air off the top of the heater does not
recycle through the heater.
SEE PAGE 8 FOR FURTHER INFORMATION
2. Water Flow
It is CRITICAL that there is sufcient water ow to the unit. Incorrect water ow can cause a
loss of efciency and possible damage to the unit. Optimal water ow rates are listed in the
Evoheat sales brochure and in this manual on page 5. It is imperative that water ow is kept
as close as possible to these ow rates. Correct water ow not only offers optimal heater
performance, but may also prevent possible damage to your heater.
SEE PAGE 9 FOR FURTHER INFORMATION
3. Electrical Connection
Always use a qualied Electrician to perform any electrical work. Ensure the power cable and
circuit breaker are of a suitable size for the heater being installed. Also check that there is
adequate voltage and current available at the heater connection to run the unit. Voltage range
should be 220-240 volts for single phase, and 380-415 volts for 3 phase units. Voltage ranges
outside these parameters will cause heater damage and void your warranty. Correct phase
connection is important with 3 phase heaters.
SEE PAGE 10 FOR FURTHER INFORMATION
4. Heater Condition
Check the heater packaging upon delivery for any obvious signs of damage. Inform your
supplier IMMEDIATELY if there is any evidence of rough handling.
When the heater has been removed from the packaging check the refrigerant gauge on the
front panel of the unit. The gauge should be showing a pressure of approx 1Mpa on the
outside black band any less than this gure means there may be a leak in the refrigerant
system and you should immediately contact your Evoheat Dealer.
3. General installation information
3.1 Inspection
Inspect the packaging, the heater and other items after receipt for possible damage in
transportation. Please contact your EVOHEAT dealer immediately should you suspect any
damage has occurred during transportation.
Install your EVOHEAT heat pump in accordance with the procedures in this manual. Always
check that your installation will comply with local building and council regulations.
12 13
From pump
PVC Coupler
Recommended (Provided)
To pool
Condensation Drain
Barb FTG
2500mm
Air outlet
Air inlet
500mm
700mm
300mm
700mm
1000mm
800mm
Air inlet
Air outlet
2000mm
Correct installation is required to ensure safe and efcient operation of your pool heater.
Installation requirements for EVOHEAT heat pumps include the following:
a. Appropriate site location and clearances.
b. Sufcient air ventilation.
c. Correct electrical connection.
d. Adequate water ow.
This manual provides the information needed to meet these requirements.
Review all application and installation procedures completely before
continuing the installation.
3.2 Location & minimum clearances
Evo recommend the heat pump should ONLY be installed in a location with appropriate
ventilation.
The Evo pool heat pump should be installed with a minimum clearance of at least 3.5m to
the water’s edge. Furthermore, EvoHeat recommend installing the heat pump no greater
than 7.5 meters away from the water’s edge due to heat loss from the piping. If you do not
have a location with these suggested clearances, please contact our EvoHeat Tech Support
Specialist on 1300 859 933 to discuss appropriate installation locations.
The heat pump should be installed a maximum of 5m below the water level of the pool/spa.
Make sure the heat pump is not located where large amounts of water may run-off from a
roof into the unit. Sharp sloping roofs without gutters will allow excessive amounts of rain
water mixed with debris from the roof to be forced through the unit. A water deflector may
be needed to protect the heat pump.
If installing the heater on an existing pump/filtration system the heater must be installed
AFTER the filter and BEFORE the chlorinator/sanitizer.
The heat pump should be installed on a flat level surface.
In the event that a suitable location is unavailable contact Evo Industries for specialist
technical advice.
3.3 Airflow Clearances
The unit needs continuous fresh
air whilst running. The heater
draws up to 80m3/min ambient air
through the sides and discharges
through the top fan cowl. Leave
sufcient space for unobstructed
airow into and out of the heater.
Do not locate the heater in an
enclosed area, or the discharged
cold air will recirculate into the
unit and consequently lower the
heating efciency.
3.4 Water Flow and
Plumbing Setup
All EVOHEAT heat pumps have a
factory preset internal water ow
switch. If there is insufcient water
ow the heater will not operate.
Before connecting the heater
to the plumbing, all piping must
be thoroughly ushed to ensure
no debris can enter the heater.
Failure to remove pipe debris
can jam or damage the ow
switch and may cause damage
to the heater.
When cleaning the pool it is
advisable to turn off your heater
as restricted water ow may
cause the heater to shut down
and indicate low water ow fault
(P08 error).
Minimum airflow required clearances
A Variable speed pump or bypass valve and plumbing MUST be tted to allow
water ow to be adjusted through the heater. Do not direct connect a water
pump with higher ow than required to the heat pump.
14 15
3.5 Water Pump Connection
How do I connect up my new
EVO heater to my pool or spa?
The EVO JBox is the answer. The JBox
will save you money on water pumps
and running costs.
The JBox allows either the heater
OR the chlorinator to supply power
to the water pump so each system
can run independently of the other.
Installation Options
There are 3 methods to install an
Evo heat pump.
1.
Slave Mode
Heater is connected to the ltration
system but relies on water ow from
the chlorinator for start and stop times.
Advantages
Only 1 pump needed savings on
purchase and running costs.
Disadvantages
As the heater may need to run
18+hrs a day the chlorinator will
need to be adjusted to allow the
pump to run longer. This can
cause water chemical balance
issues resulting from over or
under chlorinating the pool. You
will need to constantly monitor
and ddle with the chlorinator
output to keep it.
2. Seperate Systems
Heater runs on a dedicated circuit
to the ltration system. The heater
controls the start and stop times
of this pump.
Advantages
Easy to use – set and forget the heater operation and leave your chlorinator to
work as normal
No water balance issues due to adjusting the chlorinator running time.
Disadvantages
Purchase of 1 extra water pump at up to $800
Electrical use from this pump could add up to over $1000 per year
3. EVO JBox
Heater is connected into the ltration plumbing. After installing the Evo JBox and having your
electrician hard wire the JBox to the heater, simply plug the water pump into the JBox and
plug the JBox into the Chlorintor.
Advantages
Only 1 pump needed savings on purchase and running costs
Save up to $1000pa on electricity
Easy to use – set and forget the heater operation and leave your chlorinator to
work as normal
No water or chemical balance issues due to adjusting the chlorinator running time
Disadvantages
None!
Order an EVO JBox with your heater and relax in your pool while maximising the savings.
3.6 Drainage
Whilst the heater is operating, water in the air condenses on the ns of the evaporator. In
the instance of high humidity, the condensate may be several litres per hour. This may give
the impression that the heater is leaking, however this is a normal function of heat pumps.
The heater will automatically activate reverse cycle or de-icing mode when required which
also increases condensate discharge. This normally occurs at temperatures below 8 degC.
The condensate water will discharge through the base of the heater. As an option a pipe
can be connected to the drain on the base of the unit to direct condensate water to an
appropriate location.
Typical Plumbing Layouts
Pool
Chlorinator
Heater
Filter
3 way
valve
Slave Mode
Electrical Control
Heater
Bypass
Pool
Filter
Chlorinator
Heater
Electrical
Control
Electrical
Control
3 way
valve
Heater
Bypass
Pool
Chlorinator
Heater
JBox
Filter
Electrical
Control
3 way
valve
Heater
Bypass
1. Slave Mode
2. Separate Systems
3. Evo JBox
16 17
Condensate Drain Barb
Fit these into the 2 holes under the unit if you need to direct water away from the heater.
Put in hot water if stiff.
3.7 Electrical Connection
NOTE: EVO heat pumps MUST be connected by a licensed electrician.
Under no circumstances should you attempt to install or repair your
heat pump yourself.
Heater electrical installation undertaken by an unlicensed installer may cause electric shock
or even death, and will void the warranty.
A licensed electrician must read the information in this manual before connecting.
a. Ensure power is disconnected during installation or service.
b. Always comply with the national and local electrical codes and standards.
c. Ensure electrical cable size is adequate for heater requirements at the
installation location.
d. The heater must be equipped with a circuit breaker and isolation device.
e. Circuit breaker must be installed between the heater and the water circulation pump if
the water pump is hard-wired into the heater. Please note recommended circuit breaker
sizes make no allowance for a water pump hard wired into the heater.
f. Evo strongly recommends the installation of a Residual Current Device.
g. The unit must be well earthed.
Remove the front panel to access the electrical connection terminals of the heater.
The electrical wiring diagram is afxed to the inside of the front panel.
SEE APPENDIX “A” FOR WIRING DIAGRAM INFORMATION
3.8 Remote Controller Connection
All Evo heaters are able to be controlled remotely by any device capable of opening and
closing a circuit. The circuit must be low voltage 5V or lower.
Remove the cable loop between DI01 and GND on the pcb and connect the remote cable
from the external controller into these terminals.
When this circuit is open (no connection) the Evo heat pump will not operate. When the
circuit is closed the unit will operate according to the parameters set on the controller(s).
Connect here
9
4. USAGE AND OPERATION
10
ON
OF
OU
T
E
VO
mi
Sy
4. US
9
4. U
M
10
4. USAGE AND OPERATION
11
4. USAGE AND OPERATION
c
k
2.The contr
2.1Starting u
Actual M
2.2 Modes s
If it is cold
heating, auto m
AttentionTh
For example:
TEMP
OUT
In the off i
w
a
ter outlet t
and aux. disp
Attention: the o
For example:
4. USAG
12
4. USAGE AND OPERATION
13
14
s time,
n
k to
r on.
P
4. USAG
TE
IN
TE
IN
TE
IN
Press
to save h
value s
14
4. USAGE AND OPERATION
15
4. USAGE AND OPERATION
16
ng
15
P
o
et
4. USAG
16
4. USAGE AND OPERATION
17
4. USAGE AND OPERATION
18
17
2.4 Keyb
To avoid m
At the ma
When the k
unlocked
NOTES: W
TE
IN
2.5 Malfu
Ther e
malfunctio
You can r
For exam
4. USAG
18
27
27
27
Meaning
Heating inlet target temp.
Adjustable
Adjustable
Adjustable
3. Parameter table
Cooling inlet target temp.
Auto inlet target temp.
Remark Default
4. USAGE AND OPERATION
Remark:
The wire controller can display the temperature unit as "" or "" according to the unit
Model you bought.
30 31
2. PCB I/O Ports description
No. Type Parameter and description Setting value Default
Level
Code Setting
1 d Start defrosting temperature d01 -30-0°C F/U
2 End defrost temperature d02 0-30°C F/U
3 Defrosting cycle d03 1-90min F/U
4 Maximum defrosting time d04 1-20min F/U
5 E EEV mode E01 0-1 F/U
6 Super heat E02 -20-20°C F
7 Initial place E03 0-500 F
8 Minimum place E04 0-500 F
9 Defrost place E05 0-500 F
10 Cooling place E06 0-500 F
3. Parameter
Parameter table
11 F Fan parameter F01 0-4 F/U
12 Coil temp. in high speed fan mode
(Cooling)
F02 -15-60°C F
13 Coil temp. in low speed fan mode
(Cooling)
F03 -15-60°C F
14 Coil temp. when the fan stop (Cooling) F04 -15-60°C F
15 Coil temp. in high speed fan
mode(Heating)
F05 -15-60°C F
16 Coil temp. in low speed fan
mode(Heating)
F06 -15-60°C F
17 Coil temp. when the fan stop(Heating) F07 -15-60°C F
18 Fan start low speed running time F08 0-23h F
19 Fan stop low speed running time F09 0-23h F
20 Fan speed control temp. F10 0-1 F
21 h Automatic restarting H01 0-1 F
22 Model(cooling only/AUTO/heating only) H02 0-2 F/U
23 Temperature unit transformation H03 0-1 F
24 P Water pump model P01 0-2 F/U
25 Water pump running cycle P02 0-120min F/U
26 Water pump running time P03 0-30min F/U
27 Delay in switching on the compressor
after switching on the pump
P04 0-30min F/U
28 r Inlet water setting temp. (cooling) r01 r08-r09 F
29 Inlet water setting temp. (Heating) r02 r10-r11 F
30 Target setting temp. (Auto mode) r03 r08-r11 F
31 Cooling differential r04 0-10°C F
32 Cooling stop differential r05 0-10°C F
33 Heating differential r06 0-10°C F
34 Heating stop differential r07 0-10°C F
35 Minimum set point in Cooling r08 -30-r09°C F
36 Maximum Cooling set point r09 r08-80°C F
37 Minimum Heating set point r10 -30-r11°C F
38 Maximum Heating set point r11 r11-80°C F
  • Page 1 1
  • Page 2 2
  • Page 3 3
  • Page 4 4
  • Page 5 5
  • Page 6 6
  • Page 7 7
  • Page 8 8
  • Page 9 9
  • Page 10 10
  • Page 11 11
  • Page 12 12
  • Page 13 13
  • Page 14 14
  • Page 15 15
  • Page 16 16
  • Page 17 17
  • Page 18 18
  • Page 19 19
  • Page 20 20
  • Page 21 21
  • Page 22 22
  • Page 23 23
  • Page 24 24
  • Page 25 25
  • Page 26 26
  • Page 27 27
  • Page 28 28
  • Page 29 29
  • Page 30 30

Evo Force ManualDomestic Pool Owner's manual

Category
Above ground pool accessories
Type
Owner's manual
This manual is also suitable for

The Evo Force ManualDomestic Pool is a heat pump designed to heat swimming pools efficiently, providing a comfortable and enjoyable swimming experience. It features an easy-to-use control panel with a clear display for temperature adjustment, operation mode selection, and other settings. The device also boasts a quiet operation, minimizing noise disturbance during use. Additionally, the Evo Force ManualDomestic Pool has built-in safety features, such as automatic defrost and overheat protection, ensuring safe operation and peace of mind.

Ask a question and I''ll find the answer in the document

Finding information in a document is now easier with AI