Polyurethane Protective Tape 8734NA

3M Polyurethane Protective Tape 8734NA Operating instructions

  • Hello! I am an AI chatbot trained to assist you with the 3M Polyurethane Protective Tape 8734NA Operating instructions. I’ve already reviewed the document and can help you find the information you need or explain it in simple terms. Just ask your questions, and providing more details will help me assist you more effectively!
September 2018
Polyurethane Protective Tape
Preparation and Application Instructions
General Use
Tools and Materials Required
1. Clean, lint-free cotton rags or equivalent
2. Isopropyl alcohol*
3. Plastic application squeegee
4. Razor blade safety knife to cut tape
5. 3M™ 391X Air Release Tool
6. Hypodermic needle
7. 3M™ Protective Tape Application Solution (1 Quart)
General Cleaning and Surface Preparation
All substrates should be considered contaminated and must be cleaned prior to application of 3M™ Polyurethane
Protective Tape. The recommended procedure is as follows:
1. Thoroughly wash and clean hands before handling tape
2. Saturate a clean cotton cloth isopropyl alcohol* and wipe the substrate surface
3. Dry with a lint free cloth before the solvent evaporates from the surface
Specific Application Surfaces
A. Aircraft Polyurethane Paint Surfaces
Note: Paint must be fully cured before applying 3M Polyurethane Protective Tape. (Minimum of 24 hrs. @ 75°F)
1. Mask application area with 3M 471 Vinyl Tape
2. Follow General Cleaning and Surface Preparation procedure above
3. Sand with 320 grit sandpaper to achieve a smooth surface
4. Thoroughly wipe with isopropyl alcohol* until there is no trace of residue
Note: 3M™ Adhesion Promoter 86A should be used on critical applications where the user has determined its suitability.
B. Unpainted Metal Surfaces
1. Aluminum (etched, anodized), stainless steel, nickel and many other metal surfaces require only
isopropyl alcohol* before application of 3M Polyurethane Protective Tape.
*Note: When using solvents and other chemical products, extinguish all ignition sources, including pilot lights, and follow the
manufacturer’s precautions and directions for use.
Preparation and Application Instructions
Application Instructions
A. Surface preparation
See General Cleaning and Surface Preparation above.
B. Temperature
The protective tape can be applied when air and application temperatures
are above 60°F (16°C).
**Do NOT apply in direct sunlight**
C. Liner removal – Depending on size and shape, all or a portion of the
protective liner should be removed from the polyurethane protective
tape before the start of the application. NOTE: (HANDS MUST BE KEPT
CLEAN AT ALL TIMES.)
D. Dry Application Method
1. Pieces smaller than one square foot (0.1 sq. meter)
i. Remove entire liner from adhesive side of tape.
ii. Align film and press one edge to surface with finger.
iii. With plastic applicator, squeegee remaining unapplied
portion using firm overlapping strokes.
2. Long, narrow (4" or less) sections.
i. Apply as above except remove only 12 inches of liner at a
time.
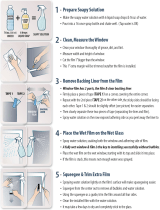
E. Wet Application Method (recommended method)
This method is designed to facilitate the application of large (> 6" [150
mm] width) or special shapes in order to help prevent pre-adhesion which
could result in wrinkles, creases, blisters and bubbles in the polyurethane
protective tape.
1. Mark correct position of film on application surface using 3M™
Vinyl Tape 471.
2. Remove liner and coat adhesive side with wetting solution.
3. Thoroughly spray surface with wetting solution.
4. Position tape and spray wetting solution on tape surface to
prevent squeegee from sticking.
5. Squeegee from top of tape to bottom using firm, overlapping
strokes to smooth out tape. Dry entire area with rag. Work out
blisters with the plastic applicator, or pull pack.
6. Trim with a sharp razor blade being careful not to cut into the
application surface.
7. Allow applied protective tape to dwell overnight and check for
blisters. Re-squeegee and remove blisters if present.
F. Removal of Entrapped Air or Wetting Solution
If dry air bubbles are present after the application, puncture tape at one
end of blister with a pin and press out air with squeegee or thumb toward
puncture. If a wet application bubble is present, remove liquid with a
hypodermic needle.
Preparation and Application Instructions
*These products were manufacture under a 3M Quality Management System registered to the AS9100 standard
Automotive & Aerospace Solutions Division
3M Center
St. Paul, MN 55144-1000
Phone 1-800-328-1684
Web
www.3M.com/aerospace
Film Installation Instruction
Issue date: 9/2018
3M is a trademark of 3M Company
© 3M 2018.All rights reserved.
Technical Information: The technical information, guidance, and other statements contained in this document or otherwise provided by 3M are
based upon records, tests, or experience that 3M believes to be reliable, but the accuracy, completeness, and representative nature of such
information is not guaranteed. Such information is intended for people with knowledge and technical skills sufficient to assess and apply their own
informed judgment to the information. No license under any 3M or third party intellectual property rights is granted or implied with this
information. Product Selection and Use: Many factors beyond 3M’s control and uniquely within user’s knowledge and control can affect the use
and performance of a 3M product in a particular application. As a result, customer is solely responsible for evaluating the product and
determining whether it is appropriate and suitable for customer’s application, including conducting a workplace hazard assessment and reviewing
all applicable regulations and standards (e.g., OSHA, ANSI, etc.). Failure to properly evaluate, select, and use a 3M product and appropriate safety
products, or to meet all applicable safety regulations, may result in injury, sickness, death, and/or harm to property. Warranty, Limited Remedy,
and Disclaimer: Unless a different warranty is specifically stated on the applicable 3M product packaging or product literature (in which case
such warranty governs), 3M warrants that each 3M product meets the applicable 3M product specification at the time 3M ships the product. 3M
MAKES NO OTHER WARRANTIES OR CONDITIONS, EXPRESS OR IMPLIED, INCLUDING, BUT NOT LIMITED TO, ANY IMPLIED WARRANTY
OR CONDITION OF MERCHANTABILITY, FITNESS FOR A PARTICULAR PURPOSE, OR ARISING OUT OF A COURSE OF DEALING, CUSTOM,
OR USAGE OF TRADE. If a 3M product does not conform to this warranty, then the sole and exclusive remedy is, at 3M’s option, replacement of
the 3M product or refund of the purchase price. Limitation of Liability: Except for the limited remedy stated above, and except to the extent
prohibited by law, 3M will not be liable for any loss or damage arising from or related to the 3M product, whether direct, indirect, special,
incidental, or consequential (including, but not limited to, lost profits or business opportunity), regardless of the legal or equitable theory asserted,
including, but not limited to, warranty, contract, negligence, or strict liability.
/