Page is loading ...

04.24.13 Rev. 0.3a 1
Instructions and Advices
to use the electronic controller
Logik 25-S
ORIGINAL INSTRUCTIONS
(I
NDUSTRIAL CONTROL EQUIPMENT)
39UG
FILE: E316817

04.24.13 Rev. 0.3a 2
I
NDEX
CAUTIONS Page 3
TECHNICAL FEATURES Page 4
MOUNTING Page 5
ELECTRICAL DRAWINGS AND LEGEND OF THE CONNECTION Page5
CONNECTION THROUGH SERIAL PORT RS232 Page 8
CONTROL PANEL Page 9
MENU FLOW Page 10
MAIN MENU Page 11
SETTING °C/F°, BAR/PSI, LANGUAGE Page 11
VISUALIZATION AND SETTING OF THE PARAMETERS USER LEVEL Page 12
ENTER THE PASSWORD Page 12
VISUALIZATION OF THE MENU Page 12
VISUALIZATION AND SETTING OF THE PARAMETERS Page 12
MENU 0 = WORKING PRESSURES Page 13
MENU 3 = TEMPERATURES Page 13
MENU 5 = WORKING TIMER Page 13
MENU 6 = OIL – FILTERS/HOURS Page 13
MENU 7 = WORKING HOURS Page 14
MENU 8 = MAINTENANCE Page 14
MENU 9 = ALARMS Page 15
MENU 10 = RESET Page 15
MENU 11 = COMPRESS. CONFIG. Page 16
MENU 12 = CLOCK TIMER Page 17
MENU 13 = CHANGE PASSWORD Page 18
ALARMS WITH IMMEDIATE COMPRESSOR SHUT OFF Page 18
ALARMS WITH COMPRESSOR SHUT OFF AFTER 30 SECONDS UNLOAD RUN Page 18
WARNINGS (VISUAL ALARMS) Page 19
MESSAGES VISUALIZED IN ALARM LIST ONLY Page 19
MAINTENANCE MESSAGES Page 19
HOW LOGIK 25-S CONTROLS THE COMPRESSOR Page 20
MASTER/SLAVE OPERATION Page 22
WARRANTY TERMS Page 23

04.24.13 Rev. 0.3a 3
CAUTIONS
THE LOGIK 25-S IS AN INDUTRIAL CONTROL EQUIPMENT (NOT A SAFETY
INSTRUMENT) FOR THE OPERATION OF A SCREW COMPRESSOR.
THE INSTALLATION MUST BE MADE IN ACCORDANCE TO THE LOCAL AND
INTERNATIONAL STANDARDS AND REGULATIONS WHERE THE COMPRESSOR IS
MANUFACTURED.
THE INSTALLATION AND START UP OF THE CONTROLLER MUST BE CARRIED OUT BY
TRAINED PERSONNEL WELL KNOW IN THIS MANUAL.
THE CONTROLLER HAS TO BE USED IN STANDARD INDUSTRIAL ENVIRONMENT AND
IT CAN NOT BE USED IN EXPLOSION RISK ENVIRONMENT, MARITIME AND MILITARY
PURPOSE.
THIS MANUAL COULD BE SUBJET TO CHANGES; PLEASE CONTACT LOGIKA CONTROL
TECHNICAL OFFICE IN CASE OF DOUBT ON THE LAST VERSION.

04.24.13 Rev. 0.3a 4
TECHNICAL FEATURES
- Industrial control equipment for the operation and management of screw compressors only; don’t mount and use in
explosive room.
- In accordance to CE regulation:
Low tension: 2006/95/CE
Safety: EN 60730-1 (General regulations)
EMC 2004/108/CE
- In accordance to UL 508 (FILE #: E316817).
- Inputs and outputs via terminal-block board to wires (300V, 15A, 18-14AWG).
- Black auto-extinguishing box in ABS:
a) according CE:
IP64 for the front panel and IP20 for the other parts;
b) according UL:
Type 1 and Type 12 for front panel mounting , installation in pollution degree 2 for the other parts
- Tightening torque: 8 Nm
- Working temperature: 0°C (32°F) ÷ 50°C (122°F) 90% RH (non condensing).
- Storage temperature: -20 (-4°F) ÷ +70 °C (158°F).
- Power supply: 12Vac ± 10% 50 ÷ 60 Hz. (power of the transformer’s secondary: ~ 9 VA) from safety transformer.
- Max. current absorbed = ~ 350 m.A..
- Visualization through back light alphanumerical LCD 20 digits x 2 rows and nr. 1 led for alarm status.
- Messages selectable in 8 languages: Italian – English – French – German – Spanish – Portuguese – Turkish –
Russian.
- nr. 5 key buttons: increase, decrease, enter, start, stop.
- nr. 1 input for temperature probe.
- nr. 1 input for pressure transducer.
- nr. 1 input for PTC or Klicson for motor protection (IN8).
- nr. 7 opto isolated digital inputs from 12/24Vac to detect:
IN 1 = emergency stop button
IN 2 = thermal motor
IN 3 = thermal fan
IN 4 = remote start/stop
IN 5 = air filter pressure switch
IN 6 = separator filter differential pressure switch
IN 7 = settable as: door of the electrical cabinet open – control phase relay – generic alarm
- nr. 3 digital inputs for connection to Logika Control phases unit.
- nr. 7 outputs via relay with contact 1.5A max. (general use):
RL1 = line contactor
RL2 = delta contactor
RL3 = star contactor
RL4 = load solenoid valve
RL5 = fan contactor
RL6 = settable as: condensate drain solenoid valve or compressor status
RL7 = settable as: alarm output or compressor status
MAX. RATED CURRENT WITH ALL RELAYS CLOSED: 4.5A
- nr. 1 real time clock with buffer battery, around 10 years electrical life.
- nr. 1 serial port RS232 for connection to second compressor (Master/Slave operation), P.C. or GSM unit (Super
Vision and Tele Assistance).
- Check min. and max. power supply to the controller.
- Non volatile memory to store setting data, working hours, compressor status, alarm list.
- The controller switches OFF due to micro interruption longer than ~ 300 m.s..
Accessories:
- nr. 1 temperature probe KTY 13.5 for detection of the air end temperature: black cable TPE, length 2.5 m,
working range –10 ÷ 130°C, resolution 1°C, precision ± 1°C.
- nr. 1 Logika Control phases unit.
- nr. 1 pressure transducer 4-20 mA for working pressure control: 2 wires, AISI 316L stainless steel membrane,
working range 0 ÷ 15 bar, resolution 0,1bar, precision ± 0,1bar.
- Windows™ application for remote control (Super Vision and Tele Assistance).
- nr. 1 Logika Control phases unit:
a) for power supply 380 ÷ 400V three phase
b) for power supply 230V three phase
c) for power supply 440 ÷ 460V three phase

04.24.13 Rev. 0.3a 5
MOUNTING
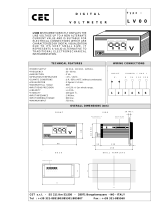
Use the drawing below as overall dimensions to mount the controller.
ELECTRICAL DRAWING AND LEGEND OF THE CONNECTIONS
OVERALL DIMENSIONS
161 mm
106 mm
NOTES ON THE CONNECTIONS
Respect the working technical features and
instructions on the electrical wiring; in
special way both the cables of the
temperatures probes and pressure
transducers must be isolated from the
power cables and proper RC filters must be
placed on the contactors’ coils.
Besides pay attention low voltage and high
voltage cables run on separate trunks.
- On the back side of the controller there
must be enough space for wiring and
connectors.
- The rear side of the controller must be
protected against condensation, oil and
dust.
- Don’t wash the front panel by water
injection; clean the front mylar with a soft
cloth using soap water.
NOTE: the inputs not used have to be
connected to 12-24V directly, except IN5 if
not used has not to be connected

04.24.13 Rev. 0.3a 6
LEGEND
Terminal M1
Pole 1-2 = power supply 12Vac
Terminal M2 – RS 232
Pole 1 = GND
Pole 2 = RX
Pole 3 = TX
Pole 4 = +12Vdc
Terminal M3
Pole 1-2 = air end temperature probe
Pole 3-4 = pressure transducer (pole 3 = negative – pole 4 = positive)
Terminal M4
Pole 1 = pole 5 of the control phases (GND)
Pole 2 = pole 1 of the control phases (T)
Pole 3 = pole 2 of the control phases (S)
Pole 4 = pole 3 of the control phases (R)
NOTE: THE GND FROM THE CONTROL PHASES UNIT MUST NOT BE CONNECTED TO EARTH.
IT’S THE GROUND OF THE CONTROLLER AND MUST BE CONNECTED TO IT.
Terminal M5
Pole 1 = IN 1 = emergency stop button (L)
Pole 2 = IN 2 = thermal motor (L)
Pole 3 = IN 3 = thermal fan (L)
Pole 4 = IN 4 = remote start/stop (L)
Pole 5 = IN 5 = air filter pressure switch (L)
Pole 6 = IN 6 = separator filter differential pressure switch (L)
Pole 7 = neutral = 0Vac
Terminal M6
Pole 1 = RL7 = alarm or compressor status
Pole 2 = RL6 = condensate drain solenoid valve or compressor status
Pole 3 = RL5 = fan contactor
Pole 4 = RL4 = solenoid valve
Pole 5 = RL3 = star contactor
Pole 6 = RL2 = delta contactor
Pole 7 = RL1 = line contactor
Pole 8 = common = 24 ÷ 230Vac
Terminal M7
Pole 1-2 = IN 8 = PTC or Klicson for motor protection
Total resistance of operation = 2.900 ohm
Total resistance of restoration = 1.600 ohm
Pole 3 = IN 7 = settable as door of electrical cabinet open – control phase relay – generic alarm (L)

04.24.13 Rev. 0.3a 7
EXAMPLE OF CONNECTION TO THE SECURITY PRESSURE SWITCH
Contactors 230Vac
If the operation of the contactors and
solenoid valves comes through 230 Vac, the
digital inputs have to be connected to 12
Vac; next to the contact of the pressure
switch, place and energize an auxiliary
relay and put the contact in serie to
12 Vac (L) (see drawing on the right).
When the pressure switch is closed, the
auxiliary relay with contact closed supply
power to the digital inputs; the power
supply of the controller is connected before
the contact of the relay.
When the pressure switch opens, the
auxiliary relay opens power to the digital
inputs; the controller detects all the digital
inputs open and signal the alarm “SEC.
PRESSURE SWITCH”.
Contactors 24Vac
If the operation of the contactors and
soenoid valves come through 24 Vac, the
digital inputs have to be connected to 24
Vac (see drawing on the right); on this
way when the pressure switch opens due
to high pressure, 24 Vac lacks and
deenergize all the contactors, solenoid
valve and digital: the controller detects
all the digital inputs opened and signal
the alarm “SEC. PRESSURE SWITCH”.
I°
12
–
0
II°
Security pressure
switch for high
pressure detection
Power supply to
the controller
Power supply to digital
inputs and uses
2
4
–
0
I°
12 – 0
II°
Security pressure
switch for high
pressure detection
Auxiliary relay
Power supply to
the controller
Power supply to
the uses
230
–
0
Power supply to digital
inputs

04.24.13 Rev. 0.3a 8
CONNECTION THROUGH SERIAL PORT RS232
C
onnection Master – Slave LOGIK 25-S / LOGIK 25-S
Connection Master – Slave LOGIK 25-S / LOGIK 16-S
C
onnection Logik 25-S / PC
NOTE: in case of connection to PC through serial port RS232 or connection of single compressor (RS232) or several
compressors (RS485) to GSM unit, select the parameter COMPRESSOR Nr. into menu 11 COMPRESS. CONFIG.
Logik 25-S PC
Terminal M2 D’Sub 9 poles
Pole n°1---------------Pole n°5
Pole n°2---------------Pole n°3
Pole n°3---------------Pole n°2
Unit nr.1 Unit nr. 2
Terminal M2 Terminal M2
Pole n°1--------------------Pole n°1
Pole n°2--------------------Pole n°3
Pole n°3--------------------Pole n°2
Logik 25-S Logik 16-S
Terminal M2 Terminal M4
Pole n°1--------------------Pole n°1
Pole n°2--------------------Pole n°3
Pole n°3--------------------Pole n°2
Logik 16
-
S
M4
RX
TX
GND
4
5
3
2
1
Logik 25
-
S
RX
TX
GND
4
3
2
1
+V
RX
TX
GND
4
3
2
1
+V
Logik 25
-
S
Logik 25
-
S
RX
TX
GND
4
3
2
1
+V
RX
TX
GND
4
3
2
1
Logik 25-S
6
9
5
1

04.24.13 Rev. 0.3a 9
INSTRUCTION FOR SERIAL CONNECTION RS232 AND/OR RS485
NOTES ON THE WIRING: wrong wiring can damage both the controller and other devices connected to the
serial port.
Be careful to the following technical points below:
1. Use flexible, twisted pair, earth shielded cable, type 22 AWG.
2. The total length of the net has to be no more than:
- 5 m for serial connection through RS232
- 400 m for serial connection through RS485
3. In serial connection RS485 the maximum devices connectable are 32 units.
NOTES ON INSTALLATION
• The signal wire must be placed in electrical trunk separated from power cables or dangerous cables like the wires
of lighting and so on….
• Don’t place the signal wires near power bus-bar, lamps, transformers and high frequency antenna.
• The signal cable must be minimum 2 m far from heavy inductive load (motors, inverters and control / patch
board).
• Don’t pull the cables by strength over 12 Kg; stronger strength can damage the wires and reduce the signal
transmission on the line.
• Don’t twist, knot, crush and fray the wires.
• Use always a single cable without cut it to make the connection between two devices.
• Pay attention to wire stripper.
• To be sure that the connection is well done, sign the position of terminal block with the colour of the wire.

04.24.13 Rev. 0.3a 10
MENU FLOW AND VISUALIZATION OF THE PARAMETERS
8,5 bar 85°C
OFF
°C/°F – B/P- LANGUAGE
PASSWORD Nr.
0)
WORKING
PR
ESSURE
S
7)
WORKING HOURS
9) ALARMS
PASSWORD Nr.
FACTORY 3 = 666666
PASSWORD Nr.
SERVICE 1 = 22
PASSWORD Nr.
SERVICE 2 = 4444
0)
PRESSURE
S
3) TEMPERATURES
5) WORKING TIMER
6) OIL – FILTERS/HOURS
7) WORKING HOURS
8) MAINTENANCE
9) ALARMS
11) COMPRESS. CONFIG.
12) CLOCK TIMER
13) CHANGE PASSWORD
8,5 bar 85°C
COMPRESSOR STATUS
11
)
C
OMPRESS. CONFIG
.
I
0) PRESSURES
3) TEMPERATURES
5) WORKING TIMER
6) OIL – FILTERS/HOURS
7) WORKING HOURS
8) MAINTENANCE
9) ALARMS
10) RESET
11) COMPRESS. CONFIG.
12) CLOCK TIMER
13) CHANGE PASSWORD
0) PRESSURES
3) TEMPERATURES
5) WORKING TIMER
6) OIL – FILTERS/HOURS
7) WORKING HOURS
8) MAINTENANCE
9) ALARMS
10) RESET
11) COMPRESS. CONFIG.
12) CLOCK TIMER
13) CHANGE PASSWORD
6) OIL – FILTERS / HOURS
(visualization only)
14
)
CLOCK TIMER

04.24.13 Rev. 0.3a 11
MAIN MENU
Power ON the compressor and the LCD visualizes the main menu where:
a) on the first row, working pressure and air end temperature probe;
b) on the second row, compressor status:
OFF = compressor ready to start by the Start button ;
IN SET = compressor in stand by for pressure set reached;
LOAD RUNNING = compressor working;
UNLOAD RUNNING X SET = compressor running unload for pressure set reached;
UNLOAD RUNNING (blinking) = compressor is going to stop;
OFF BY REMOTE STOP = contact of remote start/stop remote open;
OFF BY TIMER – NEXT ON: XX:XX = compressor stopped by timer and visualization of the time to the next start;
when the compressor is stopped by timer, pushing the button for about 3 seconds, the start is forced and
when the button is pushed, it stops coming back under timer operation.
WAIT= safety timer in progress.
Visualizing the main menu pushing:
- the button go to the visualization and setting of language, scale of temperature (°C/°F), scale of the pressure
(Bar/PSI);
- the button go to the visualization and setting of the user parameters;
- the buttons + go to the menu to set the password number (service 1 – service 2 – factory 3) to enter into
the next menu.
NOTE:
1) ANTIPANIC FUNCTION: in any step of the flow pertinent to the setting and/or visualization, pushing the button
longer than 5 seconds, shift back to the main visualization.
2) After 120 seconds from the last pushing of any button, the LCD visualizes the main menu automatically.
3) During the visualization and/or setting, the controller is activated and eventual alarms are detected and visualized
in the main menu.
SETTING °C/°F, BAR/PSI , LANGUAGE
I
n the main menu, pushing the button the LCD visualizes the message “°C – Bar – LANGUAGE”; pushing the
button enter into the programming and the LCD visualizes the message “°C” (blinking) and “°F”: by the button
and/or select the scale needed to visualize the temperature and by the button confirm the selection;
the LCD visualizes the message “Bar” (blinking) and “Psi”: by the button and/or select the scale needed to
visualized the pressure and confirm the selection by the button ; the LCD visualizes the message “ITALIANO” and
by the button and/or select the language among Italian – English – French – German – Spanish – Portuguese
– Turkish – Russian; by the button confirm the language selected; by the last pushing of the button the
controller shift back to the main menu.
I
I
0

04.24.13 Rev. 0.3a 12
VISUALIZATION AND SETTING OF THE PARAMETERS USER LEVEL
In the main menu, pushing the button the LCD visualizes the menu 0 “WORKING PRESSURE”; again by the button
flow other menu down and by the button flow them up; after the visualization of the last menu, the LCD shift
back to the main menu.
Once the menu has been selected, pushing the button enter into the programming or visualization of the pertinent
parameters.
ENTER THE PASSWORD
I
n the main menu, pushing the button and (both pushed), the LCD visualizes the message “PASSWORD N° 1-
2-3” with “1” blinking; by the button and/or select the password level and by the button confirm it: the
LCD visualizes the password level selected on the first row while “_ _ _ _ _ _” with the first under score blinking on the
second row; by the button and/or select the first number on the first under score and confirm it by the button
; set the next number according the same procedure and after confirmation of the last one the LCD visualizes the
first menu.
NOTE: for security reasons, just enter the figure are hidden
.
If the password entered is wrong the LCD visualizes the message “PASSWORD WRONG” for 5 seconds shifting back
to visualize the main menu.
Default values of the password levels:
Password service 1 = 22 (2 numbers)
Password service 2 = 4444 (4 numbers)
Password factory 3 = 666666 (6 numbers)
NOTE: quitting the setting under password, the password level selected is missed after 120 seconds since the last
pushing of any button.
PASSWORD MISSED?
In case you forget or miss the password number, to restore the default values, supply power to the controller keeping
the button pushed for 5 seconds; after this time the message “PRESET” blinks for 3 seconds to inform the default
value of the three password levels have been loaded again.
VISUALIZATION OF THE MENU
By the button and/or flow the menu up/do
wn; after the last menu the LCD shift back to the main
visualization.
Once the menu needed has been selected, by the button enter into visualization or programming of the pertinent
parameters.
VISUALIZATION AND SETTING OF THE PARAMETERS
By the button and/or select the paramet
er to change and confirm it by ; the data selected starts blinking;
by the button and/or change the data; pushing again confirm the new value and the data stops blinking;
visualizing the last parameter, pushing the button shift back to visualizes the menu selected.

04.24.13 Rev. 0.3a 13
MENU 0 = PRESSURES
Fun
ction
Descri
ption
Setting values
Default
Password level
WP1 Top range transducer 15 ÷60 15 3
WP2
High p
ress
. alarm
(WP3+0,5) ÷ (W P1
-
0,5 )
11,0 bar
2
-
3
WP3 Stop pressure (WP4+0,2) ÷ (WP2-0,2) 10,0 bar 0-1-2-3
WP4 Start pressure 3 ÷ (WP3-0,2) 8,5 bar 0-1-2-3
WP5 Start press. slave 2,8 ÷ (WP4-0.2) 8,3 bar 0-1-2-3
WP6 Offset -2,0 ÷ +2,0 0 bar 2-3
NOTE: the parameter WP5 is visualized only if the compressor has been set for Master/Slave operation (see menu 11
COMPRESS. CONFIG.).
MENU 3 = TEMPERATURES
Function
Descri
ption
Setting values
Default
Password level
WT1 High temp. alarm (WT2+2°) ÷ 125 110 °C 3
WT2
High temp.
warning
(WT3
+2°) ÷ (WT1
-
2°C)
105 °C
3
WT3 Temp. Start fan 30 ÷ ( WT2-2° ) 70 °C 2-3
WT4 Delta T Stop fan 5 ÷ 15°C 10 °C 2-3
WT5 Low temp. alarm -10 ÷ +15 0 °C 2-3
WT6 Offset -10 ÷ +10 °C 0 °C 3
MENU 5 = WORKING TIMER
Fun
ction
Descri
ption
Setting values
D
efa
ult
Password level
Wt1
Star
2 ÷ 20 sec
5 sec.
3
Wt2 Star/Delta 10 ÷ 50 m.s. 20 m.s. 3
Wt3 Before loading 1 ÷ 900 sec. 2 sec. 3
Wt4
Unload
1 ÷ 10 min
4 min.
2
-
3
Wt5 Safety 10 ÷ 240 sec. 60 sec. 3
Wt6 RL6 On 1 ÷ 10 sec 2 sec 1-2-3
Wt7 RL6 Off 1 ÷ 10 min 3 min. 1-2-3
NOTE: changing the set value, the new data is loaded once the timer in progress is elapsed.
MENU 6 = FILTERS – OIL HOURS
Fun
ction
Descri
ption
Setting values
Counter
Reset
Default
Password level
CAF Change air filter 100 ÷ 3.000 h. xxxxxx h. NO 2.000 1-2-3
COF
Change o
il filter
100 ÷ 10.000 h
xxxxxx h.
NO
2.000
1
-
2
-
3
CSF Change sep. filter 100 ÷ 10.000 h xxxxxx h. NO 4.000 1-2-3
C-- Change oil 100 ÷ 10.000 h xxxxxx h. NO 8.000 1-2-3
C--h Check compressor 100 ÷ 10.000 h xxxxxx h. NO 500 1-2-3
BL Maintenance bearings 100 ÷ 29.999 h xxxxxx h. NO 29.999 1-2-3
NOTE:
- setting the parameter C--h to 10.000 the maintenance alarm “CHECK COMPRESSOR” will not be visualized.
- leaving the parameter BL at the default value (29.999) the alarm “BEARING LUBRICATE” will not be visualized.
The counter is the ON time of the line contactor (RL1) and it comes backwards; when the timer goes to 0, the LCD
visualizes the pertinent message and the counter will go on negative.
By the button and/or select the parameter to change and confirm it by the button ; the LCD visualizes the
message: on the first row CAF = xxh xxm (xxhxxm is the time to elapse), on the second row CHANGE AIR FILTER
Confirm by again and the LCD visualizes:
On the first row “CAF- SET:10.000 – RESET”
On the second row “COUNTER: - 3.500 - |NO| (YES)”
“CAF” is the short name of the parameter with the value previously changed.

004.24.13 Rev. 0.3a 14
a) If you need to set a new value, push the button and the first character starts blinking; by the button and/or
set the new value and confirm it by ; automatically the next character starts blinking: set all the next
character according the same procedure for the first one. Confirming the last character the new value is loaded into
the memory and the LCD shift back to the message selected automatically. During the setting, if you need to goes
back to previous character, its possible to do by pushing and at the same time.
b) If you need to reset the counter in progress
, push the button and the message “NO” blinks; pushing the button
select the message “YES” and push the button to reset the counter; the new value is stored into the
memory; the LCD shift back to the message selected.
c) If you just need to read the data, it’s possible to do it at level 0 (without password): push the button to enter
into the menu; by pushing or flow up/down the different timer to the maintenance.
MENU 7 = WORKING HOURS (no password is needed)
T
otal hours 99.999 h.
Load hours 99.999 h
% working hrs xx %
Starts/hour N° x
Total capacity xxxxxxxx m³ (max. 8 characters)
Software release x.yy.aaaaaa
The total hours are the addition of the ON hours of the line contactor (RL1).
The load hours are the addition of the ON hours of the load solenoid valve (RL4).
The working % is got by dividing the ON hours of RL4 to the ON hours of RL1 in the last 100 working hours of RL1: the
percentage is updated every 5 hours.
NOTE: it’s possible to change both “Total hours” and “Load hours” if password level 3 has been enabled.
Pushing the first figure starts blinking to be modified; by and/or select the new figure and
confirm it by and going to the next figures to set according the same procedure.
Confirming the last figure, the new value will be loaded into the memory.
Starts/hour are the maximum times the motor is allowed to start in 1 hour.
The value of the total capacity is got by multiplying the load hours to the set in the parameter “Flow rate”.
The software release is the upgrade number of the software uploaded into the microcontroller and eventual
customization (i.e. 1.27 Standard).
M
ENU 8 = MAINTENANCE (Password level 1-2-3)
Maint. hrs memory Memory of reset or change set of the timer hours filters/oil: buffer of 20 data.
Quick oil drain See following explanation
Maintenance mode Enabled on multiunit slave operation only (see below)
By the button and/or select the message and confirm by :
a) if Maint. hrs memory has been confirmed, by the button and/or flow up/down the data in the memory;
the LCD visualizes on the first row the progressive number of the message – date – time the event has been
detected and the pertinent message on the second row; after the last message, shift back to the previous
visualization. Memory can holds up to 20 data: 21st erases the first one and so on; if there is not any data into
the memory, the LCD visualizes the message “MEMORY EMPTY”;
b) if “Quick oil drain” has been confirmed, the confirmation is accepted only if the compressor is in the status
“compressor loading” or “compressor unloading for set”; on the second row the message “NO” (blinking)
and “YES”; by the buttons and/or select the function needed and confirm by ; confirming “NO” the LCD
shifts back to the message “MAINTENANCE”, confirming “YES” go to the operation “Quick oil drain” (see
instruction Quick oil drain, page 21).

04.24.13 Rev. 0.3a 15
c)
if Maintenance mode has been confirmed, you enter into a menu to select YES/NO and set the way to
maintenance.
YES: the compressor is excluded by the multiunit operation, it shifts to standing alone operation so you can carry
out the normal maintenance.
MENU 9 = ALARMS
Memory of the alarms: visualization of he progressive
number, date and time the alarm has been detected and
pertinent cause.
The memory holds up to 20 alarms: the 21st erases the first one and so on; if there is not any alarm into the memory,
the LCD visualizes the message “MEMORY EMPTY”.
MENU 10 = RESET
Descri
ption
Password
level
Working hours 3
Alarms 2
-3
Maintenance 2
-3
G
eneral
3
By
the button and/or select the message and confirm reset by .
Example: if “Working hours” has been selected and confirmed, on the second row the LCD visualizes the blinking
message “RESETTING”; when the reset is complete (total hours, load hours and working percentage), the LCD shift
back to the message “Working hours”.
After the last message the LCD shift back to menu “RESET”.
NOTE: the GENERAL reset is accepted only when the compressor is “OFF” and the controller will load all the default
values.

04.24.13 Rev. 0.3a 16
ME
NU 11 = COMPRESS. CONFIG. (COMPRESSOR SETTING)
Code
Description
Function
Value
Meaning
Default
Level
C01
*
Restart Way to restart MAN-AUT MAN (manual) – AUT (automatic), MAN 1-2-3
C02
S
tarts/hour -------------
6 ÷ 20
Max starts allowed in 1 hour time 6 2-3
C03 T
imer Wt4 Unload timer Wt4 YES-NO YES = Wt4 fixed – NO = Wt4 variable YES 2-3
C04 Control phases
L
ogika Control
phases unit
YES-NO
YES = control phases enabled
NO = control phases disabled
YES 1-2-3
C05 *
*Security Safety program YES-NO
YES = Safety enabled
NO = Safety disabled
NO 3
C06 Low voltage Low voltage alarm YES-NO
Y
ES = alarm enabled
NO = alarm disabled
YES 1-2-3
C07 ***Master/Slave Type of operation 0/1/2
0
= standing alone – 1 = Multiunit/Slave
2 = Master/Slave
0 2-3
C07.1 ****Timer M/S
B
alance of working
hours
00÷200 h
Setting value “0” the balance is not
operated
100 h. 2-3
C07.2 Timer slave Time to Slave start 1 ÷ 99 min.
A
fter power ON, when this timer is
elapsed if the Master has not reached the
stop pressure, Slave starts in operation
5 min. 2-3
C08 Compressor nr. For serial connection
1 ÷ 32
E
nter the number of position of the
compressor for the serial connection
1 2-3
C09 Serial number
S
erial number of the
compressor
20
alphanumerical
characters
Setting level 3, visualization level 1-2-3- 3
C10
Flow rate
Capacity
2,0 / 40,0
Setting of the capacity in m
3
/min.
0000
3
C11 I
nput PTC Setting input PTC YES/NO NO = disabled – YES = enabled 0 3
C12
I
nput IN7 Setting input 0/1/2/3
0 = disable – 1 = door open
2 = control phase relay – 3 = alarm
0 3
C13 O
utput RL6 Setting relay 0/1
0 = condensate drain – 1 = compressor
status
1 3
C14 O
utput RL7 Setting relay 0/1 0 = alarm – 1 = compressor status 1 3
C15 ******C—h SHUT OFF Compressor shut off NO/YES NO = disabled – YES = alarm enabled NO 3
NO
TES:
*RESTART:
selecting “Man”, in case of power off the controller doesn’t restart automatically and the LCD visualizes the message
"POWER FAULT"; selecting “Aut.”, in case of power off the controller restart automatically with a delay time set on
Wt5; during this time the LCD visualizes the message “WAIT”.
The change of the default value is stored into the alarm buffer and cancelled by general reset only.
**SECURITY:
of safety program is enabled, when the timer “CAF” is elapsed, the controller detect a shut off alarm and the LCD
visualizes the message “Fault for security”; the reset is possible only entering into this menu and select
“Safety = NO”; on this way the alarm message changes into “Change Air filter”.
***M/S OPERATION:
1 = the compressor works as slave into a multiunit group: set a compressor # 2 ÷ 5 different from others slaves
2 = the compressor communicate through serial port RS232 with a second compressor as Master/Slave operation (see
pertinent instruction in this manual) and the LCD visualizes the following message:
****TIMER MASTER / SLAVE:
set the time to change Master into Slave; if one of the two compressors has the working hours higher than the time
set in this parameter, it will not be set as Master as long as the balance of the working hours will be reached.
***** COMPRESSOR NR.:
In case of Master/Slave operation enabled, the compressor selected with value 1, will be the Master.
****** C—h SHUT OFF: alarm joined to the maintenance timer C—h (check compressor); if it’s enabled, 100 hours before the
timer elapses the compressor shut off and the LCD visualizes SHUT OFF FOR AL32 – CHECK COMPRESSOR.
It’s possible to reset the alarm and re-start the machine: on the next 100 hours, every 50 working minutes the LCD
will visualizes the related maintenance message C—h. Once the last 100 hours are elapsed the compressor shut off
again; not it’s possible to reset the alarm by resetting the related maintenance timer only.

04.24.13 Rev. 0.3a 17
MENU 12 = CLOCK TIMER (use password 666666)
Set the automatic start and stop of the compressor.
On the first row the LCD visualizes the message “OFF – ON” (OFF blinking); by the button and/or select:
OFF: if you need to start and stop the compressor by the pertinent buttons; confirming this selection by the button
, the LCD shift back to the message “CLOCK TIMER”.
ON: if you need to start and stop the compressor operated by timer; confirming this selection by the button the
LCD visualizes the message:
DAY 1 (1 means Monday and 7 Sunday)
By the buttons and/or select the day and confirm it by ; on the second row the LCD visualizes the message
1 ON 00:00 – OFF 00:00
with the 1st ON hour (hours and minutes) blinking: set it by the button and/or ; confirming it by , the first
OFF hour starts blinking and it get automatically the data set on the first ON hours and so on till the last OFF hour (for
every day of the week three ON/OFF selections are available).
Confirming the last OFF hour of the day selected, the LCD visualizes the request to set the next day; repeat the same
procedure for all 7 days of the week.
If you need to copy the setting of the previous day, after you’ve confirmed the day by , push in sequence the
buttons and .
If you need cancel the setting after the day has been confirmed, push in sequence the buttons and .
After the last OFF hour of the 7th day has been confirmed, the LCD visualizes the following message:
DLS TIME: NO - YES (default YES)
YES = the summer changes into DLS time the last Sunday on March and October, at 2:00 am in March, at 3:00 am in
October.
NO = the change summer / DLS time is not operated.
NOTE:
- The setting range of each hour is between 00:00 e 23:59.
- If the third OFF hour goes over 23:59, the setting shift to the next day and it’s indicated on the upper row where the
message change from "DAY 1" change into "DAY 1-2".
- If the setting of OFF hour is the same of previous ON hour, this setting is not taken into consideration.
- Examples:
a) Set the hours on three levels
1 ON 07:30 - OFF 12:30 - 2 ON 13:30 - OFF 17:30 - 3 ON 18:30 - OFF 23:30
b) Set the hours on two levels
1 ON 07:30 - OFF 12:30 - 2 ON 13:30 - OFF 17:30 - 3 ON 17:30 - OFF 17:30
c) Set the hours on one level
1 ON 07:30 - OFF 17:30 - 2 ON 17:30 - OFF 17:30 - 3 ON 17:30 - OFF 17:30
d) Compressor OFF all the day
1 ON 00:00 - OFF 00:00 - 2 ON 00:00 - OFF 00:00 - 3 ON 00:00 - OFF 00:00
NOTE: in case the compressor stops by timer, it’s possible to force starting by pushing the start button for 3 seconds.

04.24.13 Rev. 0.3a 18
ME
NU 13 = CHANGE PASSWORD (Password level 2-3)
By the button confirm the menu and the LCD visualizes the message “PASSWORD N°1-2-3” with 1 blinking(the
possibility of modification depends on the password level entered).
By the button and/or select the password level: confirming the level by , the upper row of the LCD
visualizes the message “PASSWORD N x” (number selected) while the lower row, the first digit blinking and lightened
fixed (for level 1: one digit lightened, setting of 2 numbers - for level 2: three digits lightened, setting of 4 numbers –
for level 3: 5 digits lightened, setting of 6 numbers).
By the button and/or set the new number and confirm by ; the next digit starts blinking.
Repeat the same procedure for the next numbers; confirming the last number by the LCD shift back to the
message “CHANGE PASSWORD”.
AL
ARMS WITH IMMEDIATE COMPRESSOR SHUT OFF
Cod
e
Description
Cause
01 EMERGENCY STOP Emergency stop button opened (IN1)
0
2
MOTOR OVERLOAD
Thermal motor opened
(IN
2)
03 F
AN OVERLOAD Thermal fan opened (IN3)
04 N
O PHASE One or more phases are missed longer than 300 m.s.
0
5
WRONG PHASE
Phases inverted
07 INPUT POWER FAULT All the inputs IN1 ÷ IN7 opened
11 H
IGH PRESSURE Working pressure over set W P2
12 TEMP. PROBE FAILURE Air end temperature probe failure
13 HIGH AIR END TEMP. Air end temperature over set WT1
14 LOW AIR END TEMP. Air end temperature probe lower than set WT5
18 P
OWER FAULT In case of power off and compressor set as manual restart
20 P
TC MOTOR Input IN 8 opened
21 SECURITY PRESS. SWICTH Security pressure switch opened (power supply to digital inputs missed)
22 INPUT IN7 OPEN VSD has fault. Check VFD for fault code.
25 SEPARATOR FILTER Separator filter differential pressure switch opened (IN6)
33 R
S232 FAILURE
Field bus error: Watchdog activated by MODBUS and no communication to
remote control
ALARMS WITH COMPRESSOR SHUT OFF AFTER 30 SECONDS UNLOAD RUN
Cod
e
De
scription
Caus
e
26 PRESS. TRANSD. FAILURE Pressure transducer failure
28 L
OW VOLTAGE
Power supply to the controller lower than 9,5Vac; reset accepted when
voltage overcomes 10,6Vac
29 S
ECURITY
Timer CAF elapsed; alarm detected only if the parameter Safety is set
YES
30 H
IGH AIR END TEMP.
Air end temperature over set WT2. Reset with temperature lower than
WT2-5°C
32 S
HUT OFF FOR AL32 Timer C—h elapsed: reset related maintenance timer
NOTE:
in case of shut off alarm RL7 (if it set as alarm operation) is energized + DL1 and the alarm message is stored
into the alarms memory; after the cause of the alarm has been solved, push the button to reset the alarm and
restart the compressor.
If the alarm “Low voltage” (code 28) has been disabled in menu 11 COMPRESSOR SET, it will not be detected.

04.24.13 Rev. 0.3a 19
WARNINGS (VISUAL ALARMS)
Cod
e
De
scription
Cause
35 SETTING DATA FAILURE Default data loaded
36
A
IR FILTER
Air filter pressure switch closet
(IN
5)
37 MULTIUNIT FAILURE No communication to master or master’s transducer failure
39 LOW VOLTAGE
Power supply to the controller lower than 11.6Vac with automatic reset
when the voltage rise to 12Vac
40 HIGH VOLTAGE Power supply to the controller over 14.5Vac
41 CLOCK FAILURE
Take power off and on again to the controller; if the fault goes on, contact
Logika Control
42 RS232 FAILURE Communication interrupted
47
*
MAX.
STARTS/HOUR
Starts/hou
r
has reached the value set in parameter Start
s
/hour
(menu 7)
47* The alarm code “Max. starts/hour” informs the compressor will not stop; it will run continuously load/unload
according the pressure, until the expiration of 1 hour time from the first starting in the hour.
NOTE:
1) In case of warnings RL7 is energized intermittently (if it is set as alarm) + DL1.
2) In case of message visualized (if it has not automatic reset), pushing the button the message reset, deexciting
RL7 + DL1 and storing the message into the alarm memory
3) The code alarm 42 reset automatically when the communication restart properly.
MESSAGES VISUALIZED IN ALARM LIST ONLY
Cod
e
De
scription
Cause
48
MAN
RESTART
R
estart
set
from
automatic in
to
manual
49 AUTO RESTART Restart set from manual into automatic
MAINTENANCE MESSAGES
Cod
e
Description
Cau
se
50 CHANGE AIR FILTER Counter of the timer set into menu 6 parameter CAF elapsed
51
CHANGE OIL FILTER
Counter of the timer set into menu 6 parameter
COF
elapsed
52 CHANGE SEP. FILTER Counter of the timer set into menu 6 parameter CSF elapsed
53 CHANGE OIL Counter of the timer set into menu 6 parameter C-- elapsed
54 CHECK COMPRESSOR Counter of the timer set into menu 6 parameter C-h elapsed
55 LUBRICATE BEARINGS Counter of the timer set into menu 6 parameter BL elapsed
With message visualized on the LCD, the relay RL7 is excited intermittently (if it’s set as alarm) + DL1; pushing the
button the message is reset and RL7 + DL1 unexcited.
After the maintenance request by the message has been carried out, reset the counter into menu 6 Hours Filters/Oil; if
the counter has not been reset, every 50 working hour or next ON to the compressor, the LCD visualizes the
maintenance message.

04.24.13 Rev. 0.3a 20
HOW LOGIK 25-S CONTROLS THE COMPRESSOR
S
afety time Wt5
Pushing the stop button , the compressor stops according the following procedure:
a) if the compressor is loading, it changes into unload run for the time set on timer Wt5; during this time the restart
is accepted by the button ; when the timer Wt5 is elapsed, the compressor stops and the LCD visualizes the
message “OFF”;
b) if the compressor is unloading and the timer Wt4 is higher than Wt5, once the timer Wt4 is elapsed, the
compressor stops and the LCD visualizes the message “OFF”; if Wt4 is lower than Wt5, the timer Wt5 keeps on
counting and once it elapses, the compressor stops and the LCD visualizes the message “OFF”;
c) if the compressor is “IN SET” status, it stops and the LCD visualizes the message “OFF”;
d) when the compressor stops and the LCD visualizes the message “OFF”, the timer Wt5 starts; during this time if
the start button is pushed, the LCD visualizes the message “WAIT” and the compressor doesn’t start; the
compressor starts when the timer Wt5 is elapsed.
In case of compressor stopped due to an alarm, the timer Wt5 starts: during this time, if the alarm message is reset
and the start button is pushed, the message “OFF” starts blinking and the compressor doesn’t start; the compressor
starts when the timer Wt5 is elapsed.
Compressor stopped through remote start/stop input (IN4)
When the remote start/stop input (IN4) opens, the compressor stops according the following procedure:
a) if the compressor is loading, it changes into unload run for the timer set on Wt4 and the LCD visualizes the
blinking
message “OFF BY REMOTE STOP”; if the input IN4 is still opened, the compressor stops and the LCD
visualizes the message “OFF BY REMOTE STOP”; during the timer Wt4, if the input IN4 closes, the compressor
comes back under pressure transducer operation;
b) if the compressor is unloading, when Wt4 is elapsed, the compressor stops and the LCD visualizes the message
“OFF BY REMOTE STOP”;
c) if the compressor is “IN SET” status, the LCD visualizes the message “OFF BY REMOTE STOP”.
Operation of the load solenoid valve (RL4)
1 ) Wt4 set as fixed time
:
When the pressure reaches the stop set, the load solenoid valve (RL4) switch OFF and the LCD visualizes the
message “UNLOAD RUNNING X SET” and the timer Wt4 starts; when the timers elapses, if the pressure is not
below the start set, the compressor stops.
During the timer in progress, if the pressure is below the start set, the load solenoid valve (RL4) switches ON
and the LCD visualizes the message “LOAD RUNNING” and the timer Wt4 reset.
2) Wt4 set as variable time:
On the first start the compressor works as explained to point 1 above; on the next load run, the controller counts
the time the pressure spend to decrease from stop to start set; if this time (tx) is higher than the set on Wt4, the
next unload run, Wt4 will be reduced of 1 minute and so on up to a minimum time of 2 minutes.
The first cycle tx comes to be lower than t4 changed, the next unload run will come back to be counted as the
value set on Wt4.
ATTENTION: on the contact of the relay operating the load solenoid valve is mounted an RC Filter (22 η
ηη
ηF
+ 100 Ω
ΩΩ
Ω) sized for power of 4.7W; in case a less power load solenoid valve is used, if the valve keeps on
powered even if the contact of the relay is opened, the RC Filter must be eliminated by cutting the
terminal of the resistor R11.
0
I
/