Information for Users on Collection and Disposal of Old
Equipment and used Batteries
These symbols on the products, packaging,
and/or accompanying documents mean that
used electrical and electronic products and
batteries should not be mixed with general
household waste.
For proper treatment, recovery and recycling
of old products and used batteries, please
take them to applicable collection points, in
accordance with your national legislation and
the Directives 2002/96/EC and 2006/66/EC.
By disposing of these products and batteries
correctly, you will help to save valuable
resources and prevent any potential negative
effects on human health and the environment
which could otherwise arise from inappropriate
waste handling.
For more information about collection and
recycling of old products and batteries, please
contact your local municipality, your waste
disposal service or the point of sale where you
purchased the items.
Penalties may be applicable for incorrect
disposal of this waste, in accordance with
national legislation.
For business users in the European Union
If you wish to discard electrical and electronic
equipment, please contact your dealer or
supplier for further information.
[Information on Disposal in other Countries
outside the European Union]
These symbols are only valid in the European
Union. If you wish to discard these items,
please contact your local authorities or dealer
and ask for the correct method of disposal.
Note for the battery symbol (bottom two
symbol examples):
This symbol might be used in combination with
a chemical symbol. In this case it complies with
the requirement set by the Directive for the
chemical involved.
Table of contents
Safety precautions ..................................... 2
Supplied accessories ................................. 3
Preparing the remote control .................... 3
Placement of speakers............................... 4
Making the connections ............................. 4
Overview of controls .................................. 5
Disc .............................................................. 6
Using an iPod/iPhone ................................. 7
Radio ............................................................ 7
Clock and timers......................................... 8
Sound effects .............................................. 9
External equipment .................................... 9
Maintenance ................................................ 9
Troubleshooting ....................................... 10
Specifications ............................................11
MPEG Layer-3 audio coding technology licensed from
Fraunhofer IIS and Thomson.
“Made for iPod” and “Made for iPhone” mean that an
electronic accessory has been designed to connect
specifically to iPod, or iPhone, respectively, and
has been certified by the developer to meet Apple
performance standards.
Apple is not responsible for the operation of this device
or its compliance with safety and regulatory standards.
Please note that the use of this accessory with iPod, or
iPhone may affect wireless performance.
iPhone, iPod, iPod classic, iPod nano, and iPod touch
are trademarks of Apple Inc., registered in the U.S. and
other countries.
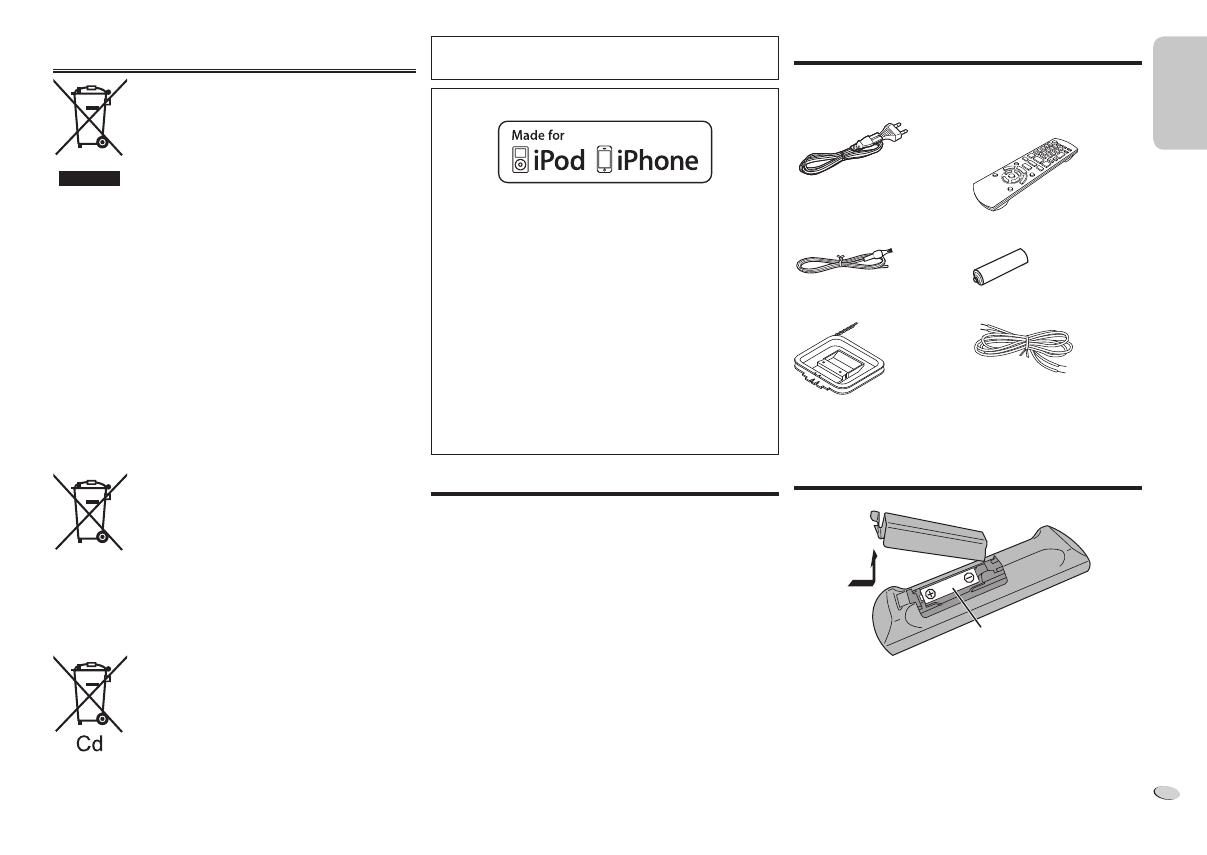
Supplied accessories
Check and identify the supplied accessories.
1 x AC mains lead
1 x Remote control
(N2QAYB000640)
1 x FM indoor antenna 1 x Remote control battery
1 x AM loop antenna 2 x Speaker cables
Preparing the remote control
R6/LR6, AA
Use alkaline or manganese battery.
Install the battery so that the poles (+ and –) align with
those in the remote control.
Point the remote control at the remote control sensor,
away from obstacles, at a maximum range of 7 m directly
in front of the main unit.
ENGLISH
3
3
RQT9672
SC-PMX5EG_RQT9672-E_1gb.indd 3SC-PMX5EG_RQT9672-E_1gb.indd 3 2/1/2012 10:13:26 AM2/1/2012 10:13:26 AM


