Page is loading ...

800-447-8638
www.kregjig.com
Introduction Introduction
kregjig.com
Woodsmith
Kreg Club
Your online resource for everything “Kreg.” Whether
you can’t remember how to make a particular joint,
need to order some more self-tapping screws, or just
want to see what kind of accessories are available for
your jig... this is where you’ll fi nd it.
Kreg Tool Company is a proud sponsor of the popular
Woodworking TV Show, “The Woodsmith Shop.”
Instead of focusing on larger projects, the Woodsmith
Shop focuses on tips, techniques, and woodshop
fundamentals. It’s a great way to learn the basics
and take your projects to the next level. Learn more
at www.woodsmithshop.com.
As a member of the Kreg Club, you’ll be the fi rst to receive
all new tips, tricks and project ideas... sent right to your
inbox. As a valued Kreg customer, you’ll also receive
exclusive offers and product sneak-previews based on the
Kreg products you already own. Just sit back and let the
information come to you! Sign up today at www.kregjig.com.
• Tips/Tricks
• Project Plans
• Product Updates
• Exclusive Offers
• Product “Sneak Peaks”
• Much More...
Our hope is that your Kreg Jig
®
Jr. opens up a
whole new world of project possibilities for you.
We’ve made every effort to make the it as fun
and easy-to-use as possible. Along with this
user manual, here are several other resources
you may fi nd helpful along the way.
2
CLUB

800-447-8638
www.kregjig.com
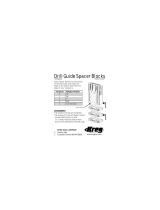
Components Components
Clamp Pad Adapter:
This simple adapter snaps onto the back of the jig, allowing
Kreg Face Clamps to be attached for faster drilling and
superior repeatability.
Drill Guide:
This two-hole drill guide helps keep your drilling stroke
straight and true. Features 2 lifetime-guaranteed hardened
steel ‘cores.’
Easy-Press™ Positioning Sliders:
These two removable positioning sliders allow you to
compensate for workpiece thickness adjustments with a
simple press of your thumb.
Wood-Chip Release Holes:
Two holes at the base of each hardened steel core allow
wood chips to escape, easing the drill stroke and improving
the lifetime of your drill bit.
Mounting Hole:
For tight applications where a clamp won’t reach, the jig can
be secured to the workpiece using a wood screw through
this small hole.
Clamp Adapter Holes:
For high-speed repeatable applications, these two holes
secure the Clamp Pad Adapter in place for use with Kreg
Face Clamps.
Depth Collar | Allen Wrench:
The Depth Collar can be set at predetermined lengths along
the drill bit and locked in place with the Allen Wrench to set
the bit’s maximum plunge depth.
#2 Square Driver | 3/8” Stepped Drill Bit:
These two uniquely designed Kreg bits feature long-lasting
durable steel and are specialized for use with the
Kreg Jig
®
and Kreg Joinery™.
A
A
B
B
C
C
D
D
E
F
F
G
G
H
H
E

800-447-8638
www.kregjig.com
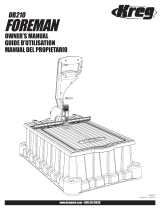
Jig Settings Jig Settings
To get the right Pocket-Hole depth, you’ll fi rst have to
adjust the position of the Depth Collar on the Drill Bit. The
collar prevents the your drill from plunging too far into the
workpiece, so its position is essential.
Begin by placing the bit inside the Depth Setting Gauge
found inside of the Kreg Jig
®
Jr.’s case. Place the step of
the bit as far forward as it will go, then slide the Depth
Collar onto the shank of the bit until it reaches the marking
which matches your workpiece thickness, as shown. Lock
the Depth Collar fi rmly into place with the included Allen
Wrench.
To create the strongest joint possible, you’ll need to set your
jig to match the thickness of your workpiece. The
Kreg Jig
®
Jr. makes this easy, in just two simple steps!
On the bottom of each Positioning Slider there are markings
which represent different material thicknesses. Press
each slider with your thumb and slide it until the marking
which matches the thickness of your workpieces comes into
alignment with the large arrows on the bottom of the jig, as
shown.
To ensure the exit-point of your screw is at the center of the
workpiece for the strongest joint possible, you’ll also need to
adjust the Positioning Sliders on either side of the Kreg Jig
®
Jr.
For 3/4” material, place the step of the bit as far forward as it will go
and tighten the depth collar at the 3/4” marking.
Positioning Sliders shown set for 3/4” thick material.

800-447-8638
www.kregjig.com
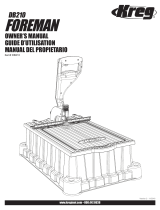
Clamping Drilling
For the majority of applications
any simple bar clamp or c-clamp
you have lying around will work
just fi ne to keep the jig clamped
tightly to the workpiece while you
drill your Pocket-Holes.
With the Kreg Jig
®
Jr. properly set to match the thickness of
your workpiece, you’re ready to clamp the jig in place and
start drilling. Depending on the type of work you’re doing,
you’ve got several options:
Along with the Jig settings, another important part of
getting the strongest possible Kreg Joint™ is to space your
Pocket-Holes evenly across the workpiece. Your Kreg Jig
®
Jr. features a 2-hole Drill Guide which lets you drill holes in
narrow stock without having to reposition the jig.
For panels we recommend placing the fi rst Pocket-Hole
roughly 2 inches away from the exposed edge of the panel,
and every 6” after that.
Included with your Kreg Jig
®
Jr. is a stepped drill bit
designed specifi cally for use with Kreg Joinery™. While
the large part of the drill actually creates the “pocket”, the
narrow tip drills the guide hole for the screw. When
you drill your fi rst hole, place the bit about an
inch inside of the Drill Guide, bring the drill
up to full speed, and plunge the bit
smoothly and consistently into the
workpiece.
With the included Clamp Pad
Adapter, the Kreg Jig
®
Jr. can
be connected directly to any one
of our Face Clamps when you
need to take your work on the
road or just get faster and more
repeatable Pocket-Holes.
In certain tight situations where
the use of a clamp is not
possible, the Kreg Jig
®
Jr. can
also be secured in place with
a common wood screw driven
through the Mounting Hole on
the top of the jig.

800-447-8638
www.kregjig.com
Choosing a Screw Choosing a Screw
*Note: Screw length is measured from bottom of
the head to the tip of the screw
1
1
⁄4”
Kreg offers a complete line of specialized screws for every
workpiece size and type. Use this graph to fi nd the correct
screw. All are available online, at www.kregjig.com or at
your local authorized Kreg dealer.
Fine Thread
Fine thread screws are
recommended for hardwoods as
they reduce the chance of the
material splitting when driven.
Coarse Thread
Due to a signifi cantly larger
thread diameter, coarse thread
screws offer a much stronger
hold in composite materials such
as MDF and plywood.
Self-Tapping
Auger point
eliminates the
need to drill a
pilot hole.
Deep Square Drive
improves driver
engagement and
reduces the
possibility of
cam-out.
Use in woods such as:
• Ash • Oak • Maple • Walnut • Hickory • Cherry • Mahogany • Birch
Use in woods such as:
• Pine • Cedar • Basswood • Poplar • Plywood • Melamine• Particle Board
Screw Selection / Kreg Jig
®
Setting Chart
Material
Thickness
Screw
Length
Kreg Jig
®
Setting
1
⁄2” (12 mm)
1” (25 mm)
1
⁄2” Marking
5
⁄8” (16 mm) 1” (25 mm)
5
⁄8” Marking
3
⁄4” (19 mm) 1
1
⁄4” (32 mm)
3
⁄4” Marking
7
⁄8” (22 mm) 1
1
⁄2” (38 mm)
7
⁄8” Marking
1” (25 mm) 1
1
⁄2” (38 mm) 1” Marking
1
1
⁄8” (29 mm) 1
1
⁄2” (38 mm) 1
1
⁄8” Marking
1
1
⁄4” (32 mm) 2” (51 mm) 1
1
⁄4” Marking
1
3
⁄8” (35 mm) 2” (51 mm) 1
3
⁄8” Marking
1
1
⁄2” (38 mm) 2
1
⁄2” (64 mm) 1
1
⁄2” Marking

800-447-8638
Welcome to the Kreg Jig
®
family.
Bienvenido a la familia de Kreg Jig
®
.
Bienvenue dans la famille Kreg Jig
®
.
NK7716
/