Preparation
12
VQT1C39
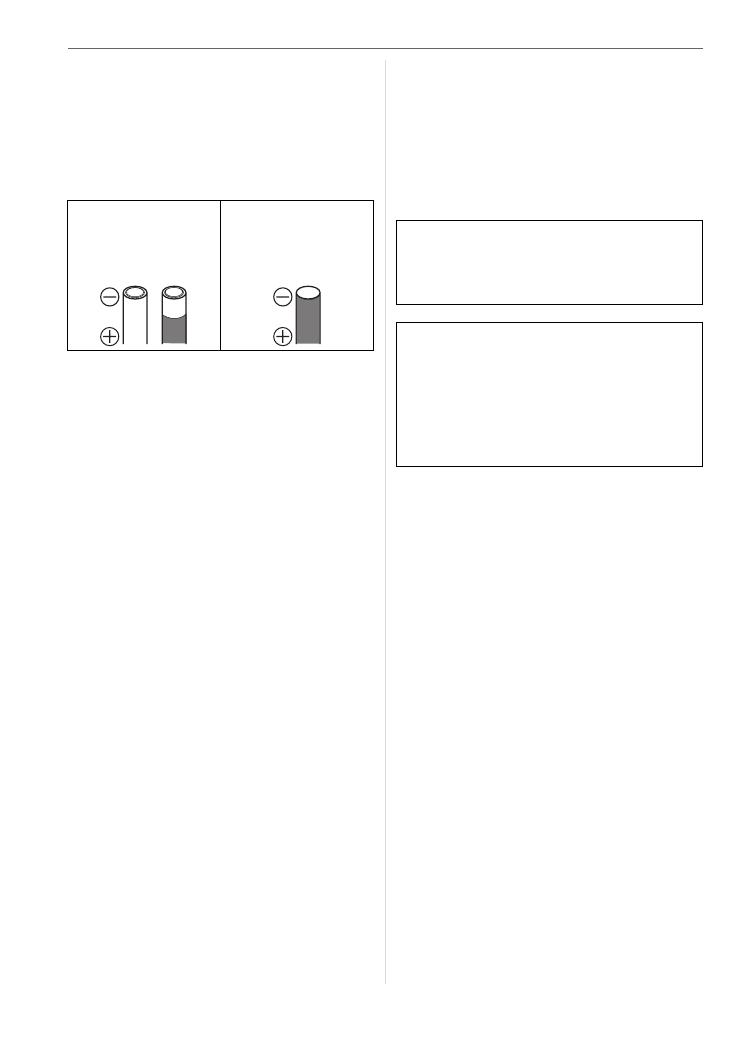
∫ Battery shapes that cannot be used
• Batteries with unusual shapes cause
leakage, heat generation or explosion if
inserted in the camera.
• Batteries with the covering partly or fully
peeled off. Never use these batteries.
(Refer to the illustration below.)
∫ Proper Care and Handling of Batteries
Mishandling batteries may cause leakage,
heat generation, fire or explosion. Observe
the following.
• Do not heat or expose to flame.
• Do not splash batteries with water/sea
water or wet battery terminals.
• Do not peel off or scratch the covering on
batteries.
• Do not drop, throw or subject batteries to
other strong impacts.
• Do not use batteries that show signs of
leakage, deformation, discoloration etc.
• Do not store batteries in high humidity
areas or high temperatures.
• Keep batteries away from children.
• Always use 2 new batteries of the same
type when replacing batteries.
• Remove the batteries if you do not intend
to use the unit for a long time.
• Batteries may heat up soon after you start
using the unit. Turn the camera off and
wait until the battery temperature
decreases before removing them.
• Battery performance deteriorates and
recording/playback time decreases when
the ambient temperature is low [10 °C
(50 °F) or less]. This is particularly true
when using oxyride or alkaline batteries
so warm them in your pocket etc. before
using them. Make sure that no metal
objects such as a lighter are placed
together with the batteries when warming
them in your pocket.
• If there is grease or dirt on the battery
poles, the recording/playback time may
become extremely short. Before inserting
the batteries, clean the battery terminals
with a soft, dry cloth.
∫ Ni-MH Batteries (Nickel Metal Hydride)
You can use Ni-MH batteries after charging
them with a nickel metal hydride battery
charger. However, improper handling of the
batteries may cause leakage, heat
generation, fire or explosion. Observe the
following.
• If there is dirt on the battery poles, you
may not be able to charge normally. Clean
the battery poles and the battery
recharger terminals with a soft, dry cloth.
• When charging batteries for the first time,
or after having not used them for a long
period of time, they may not charge fully.
This is a feature of Ni-MH batteries and is
not a malfunction. Battery performance
will become normal after a few charges
and discharges.
• We recommend charging the batteries
after they are fully discharged. If you
charge the batteries before they are fully
discharged, it can reduce battery
performance. This is called “memory
effect”.
• All or part of the
covering on the
battery is peeled
off.
• The - pole is flat.
If battery leakage occurs, remove the
batteries and thoroughly wipe the leakage
in the battery compartment. Insert new
batteries or fully charged Ni-MH batteries.
If battery electrolyte spills on your hands
or clothes, thoroughly wash them with
water. Battery electrolyte can cause loss
of sight if it comes into contact with your
eyes. Do not rub your eyes. Wash them
immediately with clean water and consult
a doctor.
VQT1C39ENG.book 12 ページ 2006年12月21日 木曜日 午前10時57分


