Page is loading ...

Instruction Manual
Item No.: 738247
120V~, 60Hz, 900W
Wards.com 1
•
888
•
557
•
3848
Montgomery Ward Customer Service
1112 7th Ave, Monroe, WI 53566
8:00 a.m. to Midnight, Monday through Friday
Brew it
while you
sleep!
by
Wards.com 1
•
888
•
557
•
3848
by
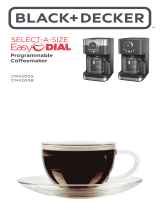
12-cup Coffeemaker
®
®
Model: CM 40527

3
2
1
•
888
•
557
•
3848
Wards.com
PLEASE SAVE THESE INSTRUCTIONS
THIS APPLIANCE IS FOR HOUSEHOLD USE ONLY
© 2016 Montgomery Ward, Inc. All rights reserved.
Thank you for purchasing your Chef Tested
®
12-cup Coffeemaker by
Montgomery Ward
®
. Put through the paces by the experts, it will perform to the
highest standard, time after time, with all the convenience, easy cleanup and
durability you rely on from Wards.
We guarantee it!
With the hold and serve feature on your Chef Tested
®
12-cup Coffeemaker, you
don't have to wait for the whole pot to brew before having that delicious cup of
coffee. Use the delayed brewing function to have your coffee waiting for you
when you get out of bed in the morning. Rich with features yet so easy to use.
You will love your new coffeemaker!
PLEASE READ THESE INSTRUCTIONS BEFORE USE
Basic safety precautions should always be followed when using your appliance.
WARNING: TO AVOID THE RISK OF ELECTRICAL SHOCK, ALWAYS MAKE
SURE THE PRODUCT IS UNPLUGGED FROM THE ELECTRICAL OUTLET
BEFORE ASSEMBLING, DISASSEMBLING, RELOCATING OR CLEANING.
1. Before using this appliance, make sure voltage is compatible with rating label.
2. To protect against electrical shock, do not place power cord, plug or appliance in
water or other liquid.
3. Do NOT let power cord hang over edge of table or counter or touch any hot
surfaces.
4. Unplug from outlet when not in use and before moving. Always unplug using the
plug and not by pulling on the power cord.
5. NEVER connect or disconnect plug with wet hands.
6. Do NOT allow appliance to rest on power cord.
7. Do NOT operate any appliance with a damaged power cord or plug, or after the
appliance malfunctions or has been damaged in any manner. Call our toll-free
customer service number for information regarding returning or replacing
the product.
8. Always place appliance on a flat, level and heat-resistant surface.
9. Do NOT place or use the unit or any parts on or near a hot gas or electric
burner, in a heated oven, under a broiler, on a stovetop or in a freezer.
10. Do NOT use or place appliance near or on any flammable materials such as
tablecloth, curtains, towels, paper, plastic, etc.
11. Close supervision is necessary when any appliance is used by or near children.
This appliance is not suitable for use by children.
12. NEVER leave appliance unattended when in use.
13. Do NOT touch any of the hot surfaces of the appliance.
14. Do NOT operate without water.
15. Allow appliance and carafe to cool down completely before handling and cleaning.
16. Do NOT open lid on water tank during brewing.
17. Do NOT put empty carafe on warming plate when appliance is ON.
18. This appliance is NOT recommended for outdoor or commercial use.
19. Do NOT clean unit with any abrasive pads or cleaners.
20. Use appliance only for its intended use.
by
ank you
for your
purchase!
Important Safeguards ........................... 3
Polarized Plug ......................................4
Parts & Features ................................ 5-6
Before Using for the First Time............. 6
How to Use ........................................... 7
Cleaning & Care ................................... 8
Helpful Hints ......................................... 9
Warranty & Return Information ...... 10-11
Table of Contents
Important Safeguards
®

4
1
•
888
•
557
•
3848
Wards.com
5
Polarized Plug
SHORT CORD INSTRUCTIONS
1. A short power cord is provided to reduce the risk resulting from
becoming entangled in or tripping over a longer power cord.
2. Longer detachable power cords or extension cords should not be used with
this appliance.
3. If a long detachable power cord or extension cord is used:
• The marked electrical rating of the detachable power supply cord or extension
cord should be at least as great as the electrical rating of the appliance.
• If the appliance is of the grounded type, the extension cord should be the
same type 3-wire.
• The longer cord should be arranged so that it will not drape over the countertop
or tabletop where it can be pulled on by children or tripped over.
PLASTICIZER WARNING
CAUTION: To prevent Plasticizers from migrating from the finish of the countertop
or tabletop or other furniture, place NON-PLASTIC coaster or placemats between
the appliance and the finish of the countertop or tabletop. Failure to do so may
cause the nish to darken. Permanent blemishes may occur or stains can
appear.
This appliance has a polarized plug (one blade is wider than the other). As a
safety feature to reduce the risk of electrical shock, this plug is intended to fit a
polarized outlet only one way. If the plug does not fit fully in the outlet, reverse
the plug. If it still does not fit, contact a qualified electrician. Do NOT attempt to
modify the plug in any way.
Parts & Features
Control Panel
1
2
3
4
5
6
7
8
9
10
1. Permanent Filter
2. Filter Basket
3. Measuring Spoon
4. Carafe Lid
5. Carafe
6. Lid
7. Water Tank
8. Water Gauge
9. Control Panel
10. Warming Plate
1
2
3
4
5
6
7
8
1. Clock/Timer
2. Delay Brew Indicator
3. Delay Brew Button
4. Hour Button
5. Minute Button
6. Program Button
7. ON/OFF Indicator
8. ON/OFF Button

C
Before Using for the First Time
How to Use
7
6
1
•
888
•
557
•
3848
Wards.com
CAUTION: Risk of suffocation - keep all packaging and plastic bags out of the
reach of children.
1. Remove all packaging materials.
2. Place the coffeemaker on a flat, level and heat-resistant surface.
3. Open lid on water tank and add cold tap water up to the maximum line on the
water gauge. Do NOT add coffee grounds.
4. Close lid.
5. Plug in the power cord and press the ON/OFF button. The coffeemaker will
start "brewing" the water.
6. After all of the water has passed through the coffeemaker into the carafe, dis-
card water and press the ON/OFF button to turn the appliance off.
7. After the coffeemaker has cooled down, use a damp cloth to wipe down only
the outside of the housing unit. Do NOT use an abrasive scouring pad or steel
wool as this could damage the finish.
WARNING: Do NOT touch warming plate or carafe until they have completely cooled.
8. Wash carafe and all other detachable parts in warm, sudsy water or in the
dishwasher on the top rack.
9. Place washed and dried permanent filter into filter basket.
WARNING: Do NOT immerse the coffeemaker in water or other liquid.
Setting the Current Time
1. Plug in the power cord. The LCD will display
AM
12:00 and the colon will flash.
2. Press the Program button. The word CLOCK will display on the LCD.
3. Continuously press the Hour button to set the current hour and AM or PM.
4. Continuously press the Minute button to set the current time.
Brewing Coffee
For best results, use coffee ground for use with automatic drip coffeemakers.
CAUTION: To avoid damage to appliance, do NOT operate without water.
1. Open lid and fill water tank up to desired line/number of cups. Do NOT exceed
the maximum level line.
2. Place the filter basket in the coffeemaker.
3. Using the measuring spoon, add desired amount of ground coffee to permanent filter.
4. Set permanent filter into filter basket.
5. Close lid.
6. Put carafe on warming plate.
7. Press ON/OFF button.
CAUTION: To avoid personal injury, do NOT open lid on water tank during brewing.
8. Wait one minute after brewing is complete before removing the carafe.
Hold and Serve
To pause brewing for 30 seconds, press the ON/OFF button. Remove the carafe
to pour yourself a cup of coffee. Replace carafe on warming plate and press the
ON/OFF button to resume brewing.
Delayed Brewing
To delay brewing until a later time, follow the steps below.
1. Follow steps 1–6 under 'Brewing Coffee' (shown above).
2. Make sure the current time is displayed on the clock. If it's not, follow the
instructions for setting the current time (shown above).
3. Press the Program button until TIMER displays on the LCD.
4. Press the hour, then minute buttons to set the time for brewing to begin.
5. Press the Delay Brew button; TIMER will no longer be displayed and the
current time will show.
6. Press the ON/OFF button.
To cancel delayed brewing, press the ON/OFF button. To begin brewing immediately,
press the ON/OFF button again.
Parts & Features (cont'd)
Your Chef Tested
®
12-cup Coffeemaker has the following handy features:
• 12-cup Brewing Capacity
• Hold and Serve - brewing is put on hold for 30 seconds while you pour
yourself that first cup of coffee.
• Water Gauge - no guesswork on how much water to add with the transparent
water gauge and handy marked filling lines.
• Permanent Filter - you won't have to hunt around town for that elusive filter to
fit your coffeemaker. The Chef Tested
®
12-cup Coffeemaker has a permanent
filter that is good for you and the environment.
• Delayed Brewing - set up the coffeemaker the night before and have fresh
brewed coffee when you get out of bed in the morning.
• Auto Shutoff - the coffeemaker will keep your coffee warm for two hours after
brewing and then automatically shut off for safety.
• Memory - if power is interrupted to the appliance for less than ten seconds,
the previous command will be remembered when power is resumed.

8
1
•
888
•
557
•
3848
Wards.com
9
Cleaning & Care
This appliance contains no user-serviceable parts. Do NOT try to repair it yourself.
If your appliance is damaged or does not operate, please call customer service to
repair or replace it.
PRECAUTIONS:
• Always unplug the appliance and allow it and the carafe to cool before cleaning.
• Do NOT use anything abrasive that can scratch or damage the finish.
• NEVER IMMERSE THE HOUSING UNIT IN WATER OR PUT IN DISHWASHER.
• NEVER IMMERSE A HOT CARAFE IN WATER OR ANY OTHER LIQUID.
Daily Cleaning
For fresh-tasting coffee every time, the detachable parts of the coffeemaker should
be washed after every use.
1. Dispose of used coffee grounds.
2. Wash carafe, permanent filter, filter basket and measuring spoon in warm,
sudsy water or put in the top rack of the dishwasher.
3. Thoroughly dry all items before resuming use.
Extended Use Cleaning
To keep your coffeemaker operating efficiently and avoid mineral buildup, follow
these instructions. The frequency of cleaning your coffeemaker will depend on the
type of water used when making coffee. Harder water will require more frequent
cleaning.
1. Open lid and fill water tank to maximum level line with undiluted, white vinegar.
2. Close lid.
3. Set empty permanent filter into filter basket and place in the coffeemaker.
4. Place carafe on warming plate.
5. Press ON/OFF button.
6. After a cup's worth of vinegar has entered the carafe, press the ON/OFF button.
7. Let appliance sit for 15 minutes.
8. Press ON/OFF button to resume cleaning.
9. When the water tank is devoid of vinegar, shut the coffeemaker off and allow
appliance and carafe to cool.
10. Dispose of vinegar down sink drain and wash all of the detachable parts in
warm, sudsy water or the top rack of the dishwasher.
TO STORE:
Be sure all parts are clean and dry before storing. Store appliance in its box or in a
clean, dry place free from sharp objects. Never store it while it is hot or wet.
Helpful Hints
For consistently great-tasting coffee, follow these helpful hints.
• Store unopened coffee grounds in a cool, dry place to avoid rancidity.
• Refrigerate open package of coffee grounds to maintain freshness.
• Purchase coffee beans and grind them at home for optimum flavor.
• Reheating brewed coffee or reusing coffee grounds will result in a less flavorful
coffee and is not recommended.
• Using fresh, cold water will bring out the best taste of the coffee.
• Cleaning your coffeemaker on a regular basis is recommended, especially when
using heavily roasted coffee which can leave oily residue on the inner workings
of the coffeemaker and inside the carafe.

7
10
11
1
•
888
•
557
•
3848
Wards.com
Returns
If any item, for any reason, does not meet your expectations, just return it to us.
We’ll gladly either:
• Refund your merchandise amount
• Credit your account
• Send a replacement
You may return any unused item in its original packaging within 60 days of its
receipt for a full refund of the purchase price (excluding shipping and handling
charges).
Please send returns to:
Montgomery Ward, Inc.
Attn: Customer Returns
2000 Harrison Suite 100
Clinton, IA 52732-6676
When returning an item:
• Use the original packaging and pack it securely.
• Please adequately insure your item in case you need to make a claim
with the carrier you choose for returning your item.
• Include your order number and reason for return.
• We recommend keeping the receipt for 4 weeks.
Montgomery Ward, Inc. warrants this Chef Tested product
to be free from defects in material and workmanship
for one year from provable date of purchase.
Within this warranty period, Montgomery Ward will repair or
replace, at its option, defective parts of this Chef Tested
product at no charge, provided the product is returned,
freight prepaid with proof of purchase to Montgomery Ward.
Allow 2–4 weeks for return shipping.
This warranty does not cover improper installation, misuse,
abuse or neglect on part of the owner. Warranty is also
invalid in any case that the product is taken apart or
serviced by an unauthorized service station.
This warranty gives you specific legal rights and they may
vary from state to state.
THE FOREGOING WARRANTIES ARE IN LIEU OF ALL
OTHER WARRANTIES AND CONDITIONS,
EXPRESS OR IMPLIED, INCLUDING
BUT NOT LIMITED TO THOSE OF MERCHANTIBILITY
OR FITNESS FOR A PARTICULAR PURPOSE.
1 Year Limited Warranty
Montgomery Ward Customer Service
8:00 a.m. to Midnight CT, Monday through Friday
Wards.com 1
•
888
•
557
•
3848
®
/