Page is loading ...

ClearWater Sand Filters are the latest
in pool filter technology. The spherical
tank design evenly distributes the
pressure resulting in greater strength
and longer life.
HIGH RATE SAND FILTER
1
2
3
4
5
5
6
8
10 11
12
13
14
15
16
17
18
19
20
21
Removal
Tool End
22
9
7
1
2
1d 5
6
1c
3
1b
1e
4
Item Part No. Description
1 WVS003 Multi-Port Valve Assembly
2 425-1928 Waste Adapter Fitting
3 805-0224 O-Ring
4 830-3000 PSI Gauge
5 417-4161 1 ½" Buttress x 1 ½" MPT Fitting (2)
6 805-0224 1 ½" Buttress x 1 ½" MPT Fitting O-Ring (2)
7 505-1970 Collar Wrench
8 718-1960 Split Nut - Sand Filter
9 819-0015 Screw - ¼"-20 PPH x 2"
10 820-0013 Serrated Hex Nut- ¼"-20
11 805-0435 O-Ring
12 505-2040 Lateral - Manifold Assembly for 16" Filter
505-2050 Lateral - Manifold Assembly for 19" Filter
505-2060 Lateral - Manifold Assembly for 22" Filter
505-2080 Lateral - Manifold Assembly for 26" Filter
13 505-1930 Lateral
14 502-2011 Sand Fill Guide
15 505-1960 Threaded Sleeve for Split Nut
16 515-1601 16" Sand Filter Body
515-1901 19" Sand Filter Body
515-2001 22" Sand Filter Body
515-2061 26" Sand Filter Body
17 602-5311 Self-threading Drain Screen
18 805-0224 O-Ring
19 602-5301 Drain Cap & Removal Tool
20 672-7211 Filter Base
21 820-0017 3/8" Flat Washer
22 819-0016 Bolt - 22" or 26" Sand Filter 3/8" - 16 x 2" Hex
819-0019 Bolt - 19" Sand Filter 3/8" - 16 x 1 ½" Hex
819-0020 Bolt - 16" Sand Filter 3/8" - 16 x 1 ¼" Hex
-- 810-0118 Instruction Sheet
Item Parts No. Description
1 600-9600 Multi-Port Lid Assembly
1b 600-9500 Diverter Valve Assembly with Gasket
1c 805-0254 Lid O-Ring
1d 602-1931 Lid Handle Only
1e 711-1910B Diverter Gasket (Spider)
(NOTE: We recommend purchasing gasket glued into diverter by the factory)
2 819-0010 Lid Screw
3 820-0013 Hex Nut
4 800-0100 Split-Nut Bolt & Nut
5 800-0150 O-Ring Kit with Pin & Washer
6 827-0002 Spring
SAND FILTER PARTS LIST
MULTI-PORT VALVE ASSEMBLY PARTS LIST

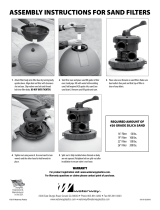
1. Open box and remove Filter and Multi-Port Valve Assembly.
2. IMPORTANT: To prevent damage to internal filter lateral components, fill filter tank full
with water prior to adding sand. With Sand Fill Guide (#14) positioned in filter tank
opening, add only recommended #20 grade silica sand (see Fill Chart). Remove Sand
Fill Guide. IMPORTANT: Clean and remove all debris from filter tank flange after
adding sand.
3. Assure that O-Ring (#11) is positioned onto Multi-Port throat.
4. Install Multi-Port Valve with inlet and outlet ports facing pool. Top of internal sand pipe
seats directly into Multi-Port Valve. Push Multi-Port Valve evenly onto tank flange.
Note: Make sure tank flange is clear of any sand debris.
5. Install Split-Nut (#8 & 9) by threading collar clockwise until hand tight. Then use collar
wrench to tighten further.
6. To use collar wrench (#7) place on collar assembly and use both hands to turn wrench ½ to
¾ of a turn to secure Multi-Port Valve to filter body.
NOTE: When pressure gauge reading is 5 PSI or higher than original starting pressure, the filter
needs to be cleaned. The ClearWater Sand Filter System features our exclusive 7-Position
Multi-Port Valve, which ensures safe and simple filter maintenance.
Pressurized vessel. Never attempt to loosen or open Split-Nut Assembly (#8 & 9) while
system is running. It could cause severe injury or harm to user.
1. Turn off pump.
2. Attach Backwash hose (optional) to waste port adapter.
3. Rotate Multi-Port Valve handle to Backwash position. Turn pump on and run for 90
second intervals or until discharge water is clear. Turn pump off.
4. Rotate Multi-Port Valve Valve handle to Rinse position. Turn pump on for 30 seconds.
5. Repeat steps 3 & 4 until all discharge water is clear while pump is turned on.
6. Turn pump off. Rotate Multi-Port Valve valve handle to Filter position. Turn pump on.
Valve is now in normal operating position.
1. Backwash filter system completely (follow cleaning instructions).
2. Run a filter cleaning chemical through filter system.
3. Turn pump off. Disconnect hoses from skimmer and return fitting.
4. To drain water, remove drain cap (#19) from bottom of filter tank. DO NOT remove drain
screen (#17). To flush sand from tank, remove Self-Threading Drain Screen (#17) by turning
the Drain Cap (#19) around and using as a removal tool.
5. Unscrew drain plugs located at bottom of pump trap and front of pump housing. Let water
drain completely.
6. Disconnect filter to pump connection. Loosen union connection on discharge of pump and
remove from pump. DO NOT lose 2" union gasket. Lift and remove pump and pump base
from filter base. Store inside.
WARNING: NEVER CHANGE VALVE POSITION WITH PUMP RUNNING!
INADEQUATE FILTERING:
• Sand level too low
• Inadequately cleaned system
• Excessive dirt load
• Chemical imbalance
• Inadequate system pressure
NO WATER FLOW:
• Obstruction of suction or return line
• Clogged impeller
• Suction system air leaks
• Slice valve closed
• Clogged hose fitting
• Clogged basket
• Dirty sand
INSTALLATION INSTRUCTIONS
WINTERIZATION TROUBLESHOOTING
CLEANING INSTRUCTIONS
Sand Fill Chart:
16" Model - 50 lbs.
19" Model - 100 lbs.
22" Model - 150 lbs.
26" Model - 200 lbs.
WARRANTY
For product registration visit: www.waterwayplastics.com.
For Warranty questions or claims please contact point of purchase.
810-0118.0916
©2016 Waterway Plastics
2200 East Sturgis Road, Oxnard CA 93030 • Phone 805.981.0262 • Fax 805.981.9403
www.waterwayplastics.com • waterwa[email protected]
Designed,
Engineered &
Manufactured
in the USA.
/


