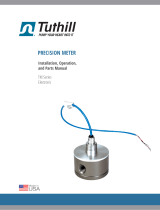
Installation, Operation,
and Parts Manual
TS Series
Anodized Aluminum
Electronic Dispenser Meter

P (800) 634-2695 • (260) 747-7524
F (800) 866-4861
8825 Aviation Drive
Fort Wayne, Indiana 46809
Manufacturing Facility located in Fort Wayne, IN
Our manufacturing facility is
ISO 9001:2008 and Atex Certied
Tuthill Meters and Principles of Operation...........................................1.3
Meter Specications and Materials of Construction...........................1.4
Model, Assembly & Part No. (=identication of internals).................1.5
Meter Specications and Model Capacity.........................................1.4
Safety Instructions...........................................................................1.6-7
Installation and Operation Recommendations................................1.6-7
Start-Up and Operation....................................................................1.6-7
Wiring Diagrams:
Directly to High Frequency Quadrature Registers...........................1.9
Via SCL Directly to Lower Frequency Quadrature Registers...........1.7
To Non-Quadrature Registers........................................................1.10
Control Drawing CD1000...............................................................1.11
Control Drawing CD1001.........................................................1.12-13
Reversing Flow Direction...................................................................1.8
Flow Meter Recalibration ................................................................. 1.14
Warranty ..... ......................................................................................1.22
Flow Meter:
Wet vs. Dry Pulser....................................................... 1.15
Troubleshooting the Flowmeter....................................1.16
Servicing the Flowmeter...............................................1.10
Parts List: 1st Generation (WET pulser)..................... 1.20
2nd Generation (DRY pulser).....................1.22
Torque / Tool Table...................................................... 1.24
SCL:
Optional Signal Conditioner.....................................1.25-26
Accessories:
Standard .................................................................... 2.1-2
High Capacity ............................................................... 2.3
Air Eliminator ............................................................. 2.4-5
Back Pressure Valve .................................................... 2.6
Air Check Valve ............................................................ 2.7
Tuthill Corporations humble beginnings date back to 1892, when
James B. Tuthill purchased a clay quarry and a kiln and began
supplying Chicago common bricks to local construction rms. In the
early 1920’s, his efforts to improve lifting clay from the quarry turned
up a new transportation idea—a steam-powered truck engine.
The design eventually proved unworkable, but Tuthill recognized
the value of the engine’s small, internal gear pump, which injected
fuel oil directly into the truck boiler. The pump design was rened
and marketed to companies that produced oil-red boilers for use in
residential and industrial heating, where it enjoyed great success and
formed the basis on which the Tuthill Pump Company was formed.
Over 120 years and ve generations later, Tuthill Corporation is a
global presence in vacuum pumps, blowers, plastics, and fuel and
chemical transfer systems. We take great pride in our “Made in USA”
moniker, making quality and durability top priorities. Tuthill Precision
Meters carry that legacy and competency in uid transfer products
to new levels. Our patented “Wave Form” gears provide extreme
accuracy through strict control of uid slippage in the metering
chamber, and our electronics work with virtually any metering or
management system.
Your choice of a Tuthill Precision Meter is an investment in
professional equipment that will pay dividends for years to come.
We appreciate your business, and look forward to serving you in the
future!
Serial Number
This ow meter is the subject of a continuing improvement program. To
ensure correct supply of replacement parts, every parts inquiry must
include the Serial No. from the original ow meter assembly.

About Tuthill Meters
We thank you for purchasing a Tuthill flow meter for liquid
measurement service. Tuthill is formerly FPP Meters.
FPP was established in 1980. Since its inception, the
company has been dedicated to manufacturing cost-
effective, high performance flow metering devices for
petroleum, industrial, commercial and municipal service.
Our facilities include computerized order entry and inventory
control, so that you are assured of accurate and prompt de-
liveries. Furthermore, our production personnel ensure that
each order, regardless of size, receives individual attention.
Constant attention to new product development and produc-
tion design, our high standards of manufacture and final
testing are the reasons why Tuthill flow meters meet your
most demanding requirements. With the ‘Waveform’ oval
gear (2003 patent) meter accuracy is better than ever be-
fore.
Our meters are used in batching, blending, process control
and to dispense fluids in liquid handling facilities throughout
the World. Service includes gasohol blends, bio-diesel and
special formulation racing fuels.
Principle of Operation
Positive Displacement meters have a measuring chamber,
where inlet & outlet are separated by rotors, a rotating ele-
ment or sliding vanes. As the liquid passes through the flow
meter, it causes the rotors/element/vanes to turn, which
forms the basis for volumetric measurement.
The Oval Gear metering principle is based on two elliptical
(oval) gears, which turn on center on two horizontal shafts
inside a measuring chamber formed by two overlapping cyl-
inders. The oval gears have meshing teeth along their en-
tire circumference, ensuring that the gears will maintain cor-
rect position in relation to each other at
all times, without the use of timing
gears.
The volume being transferred from the
inlet to the outlet side (= volume meas-
ured), forms between the oval gear and
the side of the measuring chamber,
alternately in the upper and the lower half of the measuring
chamber.
In a full 360° rotation of the gears, four such known volumes
are released to the downstream side of the flow meter.
With precision machining and close internal tolerances, the
slippage is minimal for superior linearity (accuracy) over a
broad turn-down ratio. Oval gear meters are largely unaf-
fected by changes in liquid viscosity.
The TS Series meter is designed to provide:
V●● Assy: Drive to a mechanical register
(see FPPMSV02).
F●● Assy: Electrical pulse signal to an electronic
register installed on the flow meter.
W●● Assy: Electrical pulse signal to a remote
electronic register.
In the two electronic versions, the flow meter is 100% gland-
less with static O-ring seals only. An internal magnet turns
in the vertical plane; a sensor mounted in flow meter end
cover reads changes in the magnetic field, and generates 64
pulses per 360° rotation . Several different signal types are
available, to ensure signal compatibility with all electronic
registers.
Fluid Compatibility
Tuthill flow meters are available in anodized aluminum and
stainless steel, with a variety of rotor types and seals, to
ensure compatibility with a broad range of liquids. If in doubt
about compatibility with a a specific fluid, please refer to the
Precision Meter Technical Manual. If that publication
does not provide a clear answer, please consult with your
authorized Tuthill Meter distributor, or Customer Care at the
factory.
While most refined petroleum products can be handled with
the same flow meter, some require different rotors and/or
seals. Do not change service liquid, without consulting with
your authorized Tuthill Meter distributor.
1 . 3
TS Series, Principle of Operation
Only 2 moving parts.
Patented ‘Waveform’ oval gears = sustained accuracy with a minimum of maintenance.
No metal-to-metal contact in measuring chamber or in bearings.
The lowest differential pressure values amongst rotary PD meters.
=> Lower Cost of Ownership!

Flow Meter Specifications
Model Nominal Pressure Rating¹ at 100°F (38°C):
Flow Meter² 400 PSI 28 BAR 2750 kPa
Strainer² 400 PSI 28 BAR 2750 kPa
Air Eliminator 150 PSI 10 BAR 1035 kPa
Air Check Valve 150 PSI 10 BAR 1035 kPa
Electronic Valves 150 PSI 10 BAR 1035 kPa
(1) Pressure rating is reduced at higher operating temperatures.
(2) With optional 150# RF ANSI flange adaptors, the pressure
rating is 275 PSI = 19 BAR = 1900 kPa.
Model Nominal Temperature Rating:
Design temperature: -40°F/+257°F -40°C/+125°C
Pulser ATEX listing: -40°F/+140°F -40°C/+60°C
If the operating temperature can exceed +120°F (+50°C),
use HV/HT rotors.
Model Nominal Capacity on low viscosity liquids (1 cP):
TS10A 40 GPM 150 lpm 9 m³/h
TS15A 60 GPM 230 lpm 14 m³/h
TS20A 150 GPM 570 lpm 34 m³/h
TS30A W&M 200 GPM 760 lpm 45 m³/h
OK to 265 GPM 10 00 lpm 60 m³/h
Optimum performance (accuracy & service life) is between
50% and 85% of nominal capacity.
On low viscosity, lubricating liquids, intermittent service to
125% of nominal capacity is acceptable.
NTEP approvals are with 5:1 turn-down.
OIML approvals are with 10:1 turn-down.
Meters may be used at lower flow rates, but meter error in-
creases below 10% of capacity on low viscosity liquids.
On higher viscosity liquids, error at low flow rates diminishes
progressively. Over 100 cP performance should be accept-
able to 3-5% of capacity, over 1000 cP performance should
be acceptable to 1-2% of capacity.
Liquid Viscosity³:
With standard LV rotors, meters may be used to full nominal
capacity up to 300 cPs (1500 SSU). When viscosity can
exceed 300 cPs (1500 SSU), high viscosity (HV) rotors must
be used.
With HV rotors, meters may be used to full nominal
capacity up to 1000 cPs (5000 SSU).
Over 1000 cPs (5000 SSU), HV rotors are mandatory.
In high viscosity service, flow meter capacity is reduced ac-
cording to this table:
(3) PTFE bearings are used primarily on shear sensitive
liquids, resins & adhesives.
Rotors : PPS (polyphenylene sulfide resin),
carbon bearings standard;
PTFE™ bearings optional,
for use on shear sensitive liquids and
where trace contamination from wear on
carbon bearings might be an issue.
Rotor shafts : HC303SS
Internal fasteners : 300 Series SS
Seals : Viton™ standard,
PTFE™ optional,
Anodized Aluminum:
356 Aluminum (used in castings)
Silicon 6.5-7.5%
Iron 0.5%
Copper 0.2%
Manganese 0.1%
Magnesium 0.20-0.40%
Zinc 0.2%
Titanium 0.2%
Aluminum remainder
6061 Aluminum (used in extrusion, TS20A & TS30A)
Silicon 0.6%
Copper 0.25%
Magnesium 1.0%
Chromium 0.2%
Aluminum remainder
1 . 4
A
/B
V
/D F/E S/H
cP 11.00 1.00 1.00 1.00 32 SSU
10 1.00 1.00 1.00 1.00 60
50 1.00 1.00 1.00 1.00 240
100 1.00 1.00 1.00 1.00 475
200 1.00 1.00 0.90 1.00 925
300 0.86 1.00 0.73 0.98
400 0.77 1.00 0.62 0.96
500 0.71 1.00 0.57 0.94
600 0.66 1.00 0.53 0.92
700 0.63 1.00 0.50 0.90
800 0.60 1.00 0.48 0.85
900 1.00 0.80
1.00 0.75
0.53 0.42
0.41 0.32
0.11 0.09
0.05 0.04
1,000
5,000
Liquid
Viscosity
4,725
4,250
3,775
3,300
2,825
2,350
1,875
47,200
4,720,000
472,000
1,000,000
100,000
10,000
Flow Meter Coefficient
Standard
PTFE brgs.
Rotor Code Rotor Co d e
23,600
Liquid
Viscosity
1,425

Flow Meter Assembly No. & Part No.
1 . 5
Part No. Flow Sensors for remote register
Part No. Meters with Register Flange
1½", 60 GPM
2", 150 GPM
Wi thout regis ter fla nge (RF)
Wi th Regi s ter Fl a nge
Wi th RF + EMR3 register head no s tra iner
Wi th RF + ELNC regi s ter head Strainer wi th thermo wel l
No a cce s s ories not a ppl i ca ble
Strai ner/Air Eliminator Engl i s h front pa nel on EMR3
S/AE & el ectr. preset valve Spanish front pa nel on EMR3
NPT compani on fla nges not a pplica ble
BSP compa nion fla nges Cord-grip on Fl ow Sens or
150# RF ANSI flange a daptors ATEX cabl e gl a nd on Fl ow Sensor
Vi ton s eals LV PPS/carbon Fxx a ssy. without regi s ter
Vi ton s eals HV PPS/carbon Fxx a ssy wi th TBB + EMR3 regis ter
Vi ton s ea l s LV
PPS/PTFE
Fxx a ssy wi th 100 PPG SCL + ELNC register
Vi ton s ea l s HV
PPS/PTFE
Wxx a s s y wi th TBB
PTFE seals LV
PPS/carbon
Wxx a s s y wi th 100 PPG, 5-12VDC
PTFE HV
PPS/carbon
Wxx a s s y wi th 100 PPG, 24VD
C
PTFE seals LV PPS/PTFE
Wxx a s s y wi th 10 PPL, 5-12VDC
PTFE seals HV PPS/PTFE
Wxx a s s y wi th 10 PPL, 24VDC
UL s eals LV PPS/carbon
PTFE seals LV
SS/proprie ta ry
PTFE seals LV
PPS/proprieta ry
1", 40 GPM
M
eter/Register
configurao
n
Not every
combinaon
is available!
20 Mesh s trai ner ba s ket
Strainer Basket Mesh
=
28 =
No pres et val ve
110V, X-Prf, 2-stage preset valve
SEALS, ROTORS & Rotor mat'ls
Flanges
Signal Condioner and/or Register
Flow Sensor cable fing
H =
U =
S =
M =
V =
F -
S =
B =
D =
E =
6 =
7 =
T =
G =
K =
H =
L =
B =
C =
X =
U =
A =
1 =A =
16 17
X =
E =
S =
A =
Accessories retsigeR.lcni front panel
Strainer
2 =
10 11 12 13 14 1
5
30 =
4 =
6 =
3 =
0 =
40 Mesh s trai ner ba s ket
X =
T =
1 2 3 4
5
6
X =
no s trainer basket
4 =
3", 200-265 GP
Preset Valve
Size/Capacity
10 =
1 =
6 =
7 =
15 =
20 =
Model No. Assy No. Variables
7 8 9
0 4T S A W
T S A F
Fxx a ssy wi th TBB + MCR-05 register
8 =

SAFETY INSTRUCTIONS
Make sure that all necessary safety precautions have been
taken, including proper clothing, personal safety equipment
and fire safety equipment if required.
Before Start-Up of the Flow Meter, make certain that:
1. The meter is properly mounted, secured and piped.
2. All connections are tight.
3. All bleed and drain valves are closed.
4. Do NOT smoke near meter, or use meter near an open
flame, when metering flammable liquids. Fire or Explo-
sion could result.
5. This meter is not intended for use on liquids, which re-
quire 3A Sanitary equipment for human consumption. It
may be used on edible liquids, which do not spoil easily,
such as vegetable oils, liquid sweeteners & similar.
Install the Flow Meter and Accessories in compli-
ance with all applicable Local, State & Federal
Construction, Electrical and Safety Codes.
vertical end covers). Failure to observe this will impact
negatively on flow meter accuracy.
Hydraulic shock can be harmful to flow meter and other
system components. Consideration to eliminate hydraulic
shock should be given in selection of pump and design of
the piping system.
Flow meters are designed to withstand a certain level of
vibrations, such as might be experienced on retail deliv-
ery tank trucks. If the flow meter will be used in a system
with higher levels of vibration, it must be protected with:
Vibration isolating pad under the mounting pedestal.
Vibration isolators (flexible hose) on both inlet & outlet.
Apply pipe compound to male threads, to install the two
companion flanges. Tighten to a position, that allows
the meter to bolt to the companion flanges, free of pipe
stress.
It is recommended that a Strainer be installed upstream
of each flow meter, to prevent damage from foreign mat-
ter, such as welding slag, pipe scale or parts breaking off
other equipment.
If no fluid is specified, strainer basket comes standard
with 40 mesh. We also offer:
20 mesh (std. with HV rotors) for use on high vis-
cosity liquids, such as heavy fuel oil, automotive
lube oils, liquid sugars, molasses, etc.
100 mesh for gasoline, alcohol & solvent service.
Flush the system to remove all debris, scale and welding
slag prior to flow meter installation. If this is not possi-
ble, temporarily remove rotors (oval gears), and reinstall
after the system has been flushed.
When installing the flow meter, consider future mainte-
1 . 6
Installation, Start-Up & Operation
Installation
Protective caps installed in flow meter flanges prior to
shipment should remain in place until you are ready to
install in the piping system.
Positive Displacement meters are designed to operate full
of liquid. The meter should be installed in a manner, so
that it remains full of liquid at all times.
The flow meter is not designed to operate on air, but the
design and materials of construction allow for operation
on vapor for short periods of time without damage to the
oval gears or flow meter internals.
The meter should always be supported by bolting
firmly to a solid platform or foundation. Never use the
connecting pipe as the sole means of support.
For most accurate measurement, the flow meter should
operate with some backpressure (avoid delivering into an
open vessel).
The flow meter can operate with liquid going Left-to-Right,
Right-to-Left (see page 1.8) or Vertical Up, but it must be
installed with rotor shafts in horizontal position (= with
OPERATING TEMPERATURE
TS Series assemblies are rated for:
F●● assy See register temperature rating
W●● assy -40°F/+225°F (-40°C/+107°C).
However:
They are not suitable for cryogenic service.
When operating temperature exceeds +120°F (+50°C),
pressure rating is reduced. Please refer to Tuthill
Techni-cal Manual for details.
OPERATING PRESSURE
Maximum non-shock Operating Pressure is:
Flow Meter/Strainer : 400 PSI (28 BAR) at 100°F
Air Eliminator/Valves: 150 PSI (10 BAR) (= +38°C)
The flow meter should never be operated in excess of this
pressure. Care should be taken to eliminate thermal and
hydraulic shock conditions, so that system pressure never
exceeds Maximum Working Pressure rating.

Start-Up & Operation
Very slowly fill the system with liquid, to avoid operating the
flow meter on air or vapor. This can be accomplished in the
following manner:
1. Throttle the meter inlet valve, and allow the system to fill
slowly by gravity.
2. Crack open the outlet valve. Start the pump, and then
slowly crack open the inlet valve, filling the meter slowly
before fully opening the inlet and outlet valves.
In normal operations:
Avoid sudden changes in temperature.
Avoid sudden changes in flow rate.
Gradually increase or decrease the flow rate.
1 . 7
Installation continued & Start-Up/Operation
nance of both flow meter and accessories. The meter
can be serviced in place, provided block (isolation) valves
are included, and adequate space allowed.
In critical installations a by-pass line is recommended,
so flow can continue while flow meter is being serviced.
When an Air Eliminator is included in the flow meter
assembly, the strainer/air eliminator must be in horizontal
position, since the air eliminator operates on a gravity
principle. A few drops of liquid may be expelled when the
air eliminator vents, so vent ports should be piped back to
storage or to a collection tank (sloping towards the tank).
Thermal relief valves are recommended, and should be
installed whenever it is possible to block (isolate) the flow
meter between two valves. The pressure rise in a closed
system, from just a few degrees increase in temperature,
can be many times normal working pressure.
Connections for calibration should be provided during
installation. An easy means for diverting flow into a cali-
bration vessel (or master meter) should be considered.
Refer a diagram for the suggested installation is shown
below.
TRV protects portion of system, which can be
isolated between valves IV1, CV1 & IV2.
Calibration Connection valves
Thermal Relief valve
IV1 & IV2:
C
V1 & CV2:
BPV :
TRV:
BY-PASS LINE
IV1 IV2
: IV2 & BPV closed, other valves open
TRV
: IV1 & IV2 closed (by-pass open)
During Calibration
: BPV, CV1 & CV2 closed
TEM PORARY MASTER METER
CV2
OPERATING FLOW M ETE
R
Normal Operation
BPV
Service/Maintenanc
e
CV1
Isolation Valves
By-Pass valve
(or Prover Tank)
OPTIONAL
The optimum flow meter installation
should include the components and
features shown in this diagram.

NOTE: K Factors shown here are nominal (average).
Individual flow meters can vary slightly; and all flow
meters will shift to some degree with viscosity fluc-
tuations (see page 1.14)
Direction of Flow
TS Series flow meters can operate in either direction. Stan-
dard assembly, when facing the flow meter, has the flow
going Left-to-Right, unless specified differently at time of
the order. A label with the word INLET is placed on the inlet
flange, as assembled at the factory. To change the direction
of flow:
1. Reverse the position of any accessories attached to the
flow meter.
2. If Quadrature pulse signal is used, reverse output leads
for channels A & B on the TBB (or SCL):
TBB SCL
Signal cable removed Pulser plugs into J1.
from TB1 for clarity Signal cable removed
from TB1 for clarity
L-to-R R-to-L
WHITE: On A On B
GREEN: On B On A
NOTE: The ELNC register is not W&M certified in
t
he EU.
The SCL is not yet approved for use in
t
he EU.
1 . 8
Flow Meter Communications & Direction of Flow
Electronic TS Series meters have an internal pulser, which
generates a Quadrature pulse signal. This pulse signal can
be fed directly to most electronic registers with Quadrature
capability. In such assemblies, recalibration is through cor-
rection of the K Factor (number of pulses/unit volume) in the
electronic register.
In some cases an SCL board (#13) is added to the flow me-
ter assembly. This signal conditioner is added when:
1. The receiving instrument does not recognize Quadra-
ture signal.
2. Flow meter pulse frequency exceeds the electronic
register capacity at maximum flow rate. This can occur
at surprisingly low flow rates (see below).
3. The electronic register requires a scaled pulse value
(1, 10, 100 or 1000 pulses/volume unit).
4. Local authorities demand a mechanical calibration de-
vice. The SCL includes two dials with setting from 00
to 99. Changing the setting by 1, represents approx.
0.03% correction to the pulse signal.
Register model: LCR-II™
Frequency lim it: 625 Hz
FLO
W
METE
R
MODEL GP M LP M
PPG ppl
TS10A 40 150 1728 456
1152
Hz
0.43
ms
TS15A 60 230 1013 268 1013
Hz
0.49
ms
TS20A 150 570 395 104 988
Hz
0.51
ms
TS30A 200 760 276 73 920
Hz
0.54
ms
Interm. dut
y
250 945 1150
Hz
0.44
ms
Interm. dut
y
300 1135 1380
Hz
0.36
ms
With EL0300-3-13 = 100 PPG scaler
TS10A 40 150 100 26
67
Hz
1.30
ms
TS15A 60 230 100 26 100
Hz
1.30
ms
TS20A 150 570 100 26 250
Hz
1.30
ms
TS30A 200 760 100 26 333
Hz
1.30
ms
Interm. dut
y
231 875 385
Hz
1.30
ms
If higher flow rates occur, use EL0300-3-18 (see below)
With EL0300-3-18 = 10 PPL scaler
TS10A 40 150 37.9 10
25
Hz
2.50
ms
TS15A 60 230 37.9 10 38
Hz
2.50
ms
TS20A 150 570 37.9 10 95
Hz
2.50
ms
TS30A 200 760 37.9 10 126
Hz
2.50
ms
Interm. dut
y
250 945 158
Hz
2.50
ms
Interm. dut
y
300 1135 189
Hz
2.50
ms
EMR
3
Please refer to FPP261 for other registers.
ELNC
400 Hz
CAPACITY K Fact o r
F
requency
(H
z
)
&
Pulse ON time at
100% of model cap.
1667 Hz

Wiring Diagram to High Frequency Quadrature Register/Controller
1 . 9
A. EL0304 Terminal Block Board (TBB)
EL0305 TBB/Amplifier
EL0305 is used for remote high frequency electronic
registers accepting quadrature signal, when the cable
distance is in 200-600’ (60-180 m) range.
For greater distances external amplifier (2xPIA-300) is
required.
Pulser cable plugs into:
J1 on EL0304
AMP on EL0305
Signal output cable is connected to TB1
B. EL0304 to EMR³ Register
EL0305 TBB/Amplifier to EMR³ Register
Pulser cable plugs into:
J1 on EL0304
AMP on EL0305
Signal output cable is connected
to TB1
··
·
·
··
·
·
EL0304 to MCR-05 RegisterC.
EL0305 TBB/Amplifier to MCR-05 Register
Pulser cable plugs into:
J1 on EL0304
AMP on EL0305
Signal output cable is connected
to TB1
··
·
·+ 5 VDC
CHANNEL A SIGNAL
CHANNEL B SIGNAL
CLEAR
NOT USED
NOT USED

Wiring to Low Frequency Quadrature Register/Controller
1 . 10
D. EL0300 Scaler/Calibrator/Linearizer (SCL)
While the SCL can have multiple functions, in many
cases it is included strictly as a signal conditioner
(= ‘Jitter filter’). In those cases, only the calibrator
function is active.
·Pulser plug is removed. Pulser leads are connected
directly to TB2 on the SCL.
Signal output cable is connected to TB1.
This diagram applies to the ELNC register, when the
flow meter/register are used in non-hazardous zone.
It also applies to LectroCount™ and other lower fre-
quency registers with quadrature input.
E. EL0300 (SCL), EL2057 Energy Limited Power Supply (ELPS) & ELNC Register
When flow meter/ELNC register is
used in a hazardous zone, the
EL2057 (AC/DC power supply &
barrier, UL listed) must be used.
EL2057 is in a NEMA 7 enclosure
(Expl-Proof, but not water proof), so
it must be installed under roof or
inside a water proof cabinet.
Pulser plug is removed. Pulser
leads are connected directly to
TB2 on the SCL.
Signal output cable is connected
to TB1.
Note 1 : See CD1000 & CD1001 for installation of intrinsically safe apparatus.
Note 2 : Cable lengths are limited by entity parameters.
Note 3 : ELPS output option: Install U1, R3 & TB6.
F. EL0300 to non-Quadrature Register
Same as diagram D, but connect only signal channel A.
EL5591
or
EL0303
SCL is not yet approved
for use in the EU.
SCL is not yet approved
for use in the EU.
SCL is not yet approved
for use in the EU.
·
·
·

Control Drawing CD1001
1 . 11
The ELNC is not
W&M certified
in the EU.

1 . 12
Control Drawing CD1000, left side
The ELNC is not
W&M certified in
the EU.

Control Drawing CD1000, right side
1 . 13
The ELNC is not
W&M certified
in the EU.

B. Re-calibrate after 15-30, 180 and 360 days.
After the run-in calibration and follow-up calibrations, it is
possible to evaluate degree of change under normal operat-
ing conditions. Based on values found, and total volume
being metered under normal operating conditions, decide
whether a 6, 12 or possibly 24 month schedule should be
adopted.
Procedures & Methods
Flow meters subject to Weights&Measures regulations, or
used in systems where the flow rate can fluctuate, should
be tested at minimum, intermediate & maximum flow rates.
In non-W&M service, a flow meter always operating at a
steady flow rate, can be tested at that flow rate only.
All calibration tests should be:
Of at least 60 second duration, to minimize the effect of
flow meter error during start-up and shut-down.
Repeated 3 times to confirm flow meter repeatability.
Flow me- t e r s
can be c a l i -
brated
against a prover
tank, a pipe prover or a master meter. Please consult with
your distributor and/or local regulatory agencies to deter-
mine methods available (or required).
After calibrating a known volume (X) into an accurate
prover, or through a Master Meter (MM), compare with
register reading (Y) and calculate correction:
If using a MM, always correct for MM error as shown on
MM accuracy curve, for the flow rate used during the test.
When re-calibration has established that a correction is
required, the procedure varies with flow meter configura-
tion and/or the specific electronic register used. Please
refer to register manual for full details & procedures.
A. In some electronic registers, you can enter a revised K
Factor in programming model (the ELNC & EMR³).
B. In some electronic registers, you can run a given vol-
ume, and then tell the register what that volume was.
It will update the K Factor based on this (EMR³).
C. If the flow meter includes the SCL (see pages 24 & 25
for more detail), you can use a small screwdriver to
change the mechanical calibrator setting. Each setting
change (such as from 37 to 38), equals approximately
a 0.03% change:
When prover/master meter reading is less than
flow meter register reading, add percentage cal-
culated to original calibrator setting.
When prover/master meter reading is more than
flow meter register reading, subtract percentage
calculated from original calibrator.
1 . 14
Flow Meter Calibration
Optional SCL scaler card (not yet approved in the EU)
Mechanical calibrator Jumper for Voltage
for pulse signal. selection (5 or 6-12 VDC)
Flow Meter Calibration
All TS Series meters are accuracy tested prior to shipment.
Data from accuracy testing is not supplied with flow meters,
since results achieved on our test fluid do not apply to actual
liquid of operation, unless the two liquids have identical vis-
cosity characteristics. When calibrated on a liquid with 1 cP
viscosity, we expect that flow meters used on:
0.5 cP liquid will under-register by about 2%
10 cP liquid will over-register by 0.35% to 0.6%
100 cP liquid will over-register by 0.7% to 1.5%
This shift in the accuracy curve illustrates the need for re-
calibration of new flow meters on actual liquid of service,
after installation in place of service. The accuracy curve will
not shift significantly at higher viscosities, even if the actual
operating liquid has viscosities up to 500,000 cP.
Individual flow meters may differ slightly from the norm.
Such variations are corrected through the K Factor pro-
grammed into the register/controller.
Frequency of Calibration
If the flow meter is used in Custody Transfer service (subject
to Weights&Measures regulations), it must obviously be re-
calibrated in accordance with local W&M regulations. In
most cases these regulations call for annual re-calibration,
though different time periods apply in some territories.
If the user is ISO9000 certified, user ISO standards will indi-
cate frequency of re-calibration for instrumentation. Those
rules should be observed.
If neither W&M regulations, nor internal standards apply, our
recommendations are:
A. Calibrate immediately after installation.
X-
Y
Xx 100
= % correction

1 . 15
WET vs DRY Pulser
This flow meter exists in 2 generations:
1st generation, manufactured from 2007 through 2009
Has pulser (#10) in SS housing, exposed to the operating fluid.
Pulser is sealed with an O-ring (#16),
held in place by a heavy retainer (#11) with a LARGE center hole.
Meter must be isolated & drained if pulser must be inspected.
2nd generation, introduced gradually; only type as of Jan 1st, 2010
Pulser (#10) without housing, sensing magnet position through the wall.
No O-ring, held in place by a thin retainer (#11) with SMALL center hole.
Pulser can be inspected without draining the flow meter.
Look at item 11 to identify which type you are working on!
WET
DRY
Identifies : WET DRY
Retainer
thickness : 0.105” (2.67 mm) 0.020” (0.51 mm)
Hole diameter : 7/8” (21 mm) 19/32” (15 mm)
Part No. : ST9250 ST9250-1

Reduced Flow Rate
Strainer basket partially blocked. Clean the basket.
Pump not functioning correctly. Repair pump.
Valve stuck in partially closed position. Check valves and
repair.
Meter rotors (oval gears) partially ‘salted’ with chemical
deposits, slowing the movement. Clean the meter (see
page).
Product Flows, but the register does not record
Check power supply to the register.
Check the connections between the pulser and the elec-
tronic register.
Check pulser output. Replace pulser (or SCL) if needed.
If product is flowing, and the flow meter is generating a
pulse signal, the problem is in the electronic register.
Please refer to the manual for the electronic register.
Product Flows, register does not record correctly
If the error factor is constant, the flow meter is fine. The
likely cause is either:
Incorrect K Factor in the electronic register. Re-calibrate
the meter and correct the K Factor.
A constant problem with air getting into the system. Re-
view system design and control valves.
If the error is random, the likely cause is either:
Poor cable connections (insulation not trimmed, or stray
strands getting close to incorrect contacts). This can be
either on the scaler board or where pulse signal is con-
nected to the register. Inspect and correct connections
as necessary.
Valve leaking, allowing a portion of the system to drain.
Check & repair valves.
An intermittent problem with air in the system, combined
with inadequate air elimination. Review system design
and control valves.
Interference from other electrical equipment nearby., pos-
sibly combined with sub-standard cables.
Breaking Teeth on Rotors (Oval Gears)
This is a sign of hydraulic shock conditions in the system.
Common sources:
Starting or stopping flow too rapidly. Replace damaged
components and correct operational practices.
Pump by-pass not adjusted properly. Re-adjust as nec-
essary.
Leakage from End Covers
The seals (and possibly end covers) have been damaged
due to excessive pressure. There are two possible sources:
Starting or stopping flow too rapidly. Replace damaged
components and correct operational practices.
The flow meter is in a system, where it can be isolated
between two valves. Add a Thermal Relief Valve to bleed
off excess pressure when the temperature rises.
1 . 16
Trouble Shooting the Flow Meter
Installation, Maintenance & Service must be performed
by personnel:
A. Qualified to work on this type of equipment.
B. Familiar with all applicable local codes and ordi-
nances covering the type of service, where the flow
meter is used (gasoline, LPG, etc.).
Purpose
This high accuracy electronic positive displacement flow
meter is designed to provide reliable liquid measurement
with a minimum of service requirements.
Functionality
The liquid moves the rotors, which in turn drive a single
magnet rotating in the vertical plane. Each 360º turn of the
magnet generates 64 pulses, Quadrature or single channel.
If there are frequency limitations in the electronic register, it
might be necessary to include an optional scaler board to
reduce the pulse resolution. When required, this component
fits inside the pulser enclosure in meter front cover.
Assembly
The flow meter can be assembled for Left-to-Right, Bottom-
to-Top or Right-to-Left flow. The flow meter performs
equally well in all directions, but when Quadrature pulse
signal is used, it is necessary to reverse signal leads if used
for a different flow direction from that originally intended.
Installation: See page 1.6
Maintenance
Electronic TS Series flow meters have no parts, which re-
quire replacement in the short term. The flow meter should
be re-calibrated periodically, and when meter wear factor
increases beyond the norm, the rotors should be replaced.
Trouble Shooting & Service
Prior to opening or disassembly of any flow meter, all
internal pressure must be relieved and all liquid must be
drained. This must be done in accordance with applica-
ble company and local codes & ordinances.
Make sure that all necessary safety precautions have
been taken, including proper clothing, personal safety
equipment and fire safety equipment if required.
No Flow
Blocked strainer basket. Clean the basket.
Faulty or non-functioning pump. Repair pump.
Valve stuck in closed position. Check and repair valves.
Flow meter ‘frozen’ due to build-up of chemical salts (or
frozen water) inside the measuring chamber. Clean the
flow meter (see page ), and inspect for damage.
Meter jammed on a particle that has passed through a
damaged strainer basket. Remove particle and replace
rotors if necessary, replace strainer basket.

This electronic flow meter, with only 2 moving
parts, is available in two versions:
F●● Assembly with register installed
In this version the electronic register is attached to the regis-
ter mounting pad (#7), which is installed directly on top of
flow meter case (#1). This permits service of the flow meter
without removing the electronic register, eliminating the risk
of unintentional swapping of registers between flow meters.
W●● Assembly for use with remote register
When the flow meter is used with a remote electronic
register, whether for practical or temperature reasons,
items 7, 8, 9, 18 & 26 in the parts list are deleted.
It does not get any simpler than this!
Installation, Maintenance & Service must be performed
by personnel:
A. Qualified to work on this type of equipment.
B. Familiar with all applicable local codes and ordi-
nances covering the type of service, where the flow
meter is used (gasoline, LPG, etc.).
Relieve All Internal Pressure Prior to Opening
Drain Liquid prior to Working on Flow Meter
Rinse with Neutral Liquid
prior to Seasonal Storage
Triple Rinse with Neutral Liquid
prior to Shipment for any reason.
Servicing the Electronic Flow Meter
There are only 4 parts or components, which will require
inspection and/or replacement at some point. In the order
they are likely to occur, these are:
Regular Maintenance (1-3 years)
A. Pulser O-ring (16) 1st generation/WET pulser only
Not applicable to 2nd generation, see page 1.15.
Very Long Term Wearing Components (3-10 years)
B. Bearing Plate assembly (4)
C. Oval Gears (2)
Longest Term Wearing Components (5-20 years)
D. Post Plate assembly (3)
Electronic Components
The electronic components have an indefinite life expec-
tancy, but can fail if the system is wired incorrectly, poorly
grounded, cables used are not to minimum standard re-
quired or the system is hit by lightening.
While we do not expect that these components will need
replacement, instructions are provided in case it should be-
come necessary.
1 . 17
Flow Meter - Disassembly
Standard Optional
Terminal Block Board SCL signal conditioner
Signal cable removed Not yet approved for
from TB1 for clarity use in the EU.
This flow meter comes standard with a terminal block board
for easy connections.
When the receiving instrument has special requirements (to
K Factor, pulse frequency, signal width or similar), it might
be necessary to add the optional SCL signal conditioner.
The SCL then replaces the terminal block board.
In field retrofit, remove plug from pulser cable &
strip leads, so cable can be attached to TB2.
Pulse output signal cable is connected to TB1.
OR
OR

4. Remove 4 screws (20) from bearing plate assembly (4),
and pull the bearing plate off the meter body. If the bear-
ing plate is stuck to meter body, gently tap with a rubber
mallet, or use a 5/16-8 x 1” jack bolt to push it free.
5. Inspect inside of bearing plate (4) for scoring (minor
markings is acceptable). If the bearing plate is scored, it
should be replaced
6. Verify that the drive shaft (29A) for the magnet assembly
is turning smoothly.
6.1 If it wobbles, replace bearings (2 x 29B).
6.2 If the drive shaft is worn,
replace magnet drive assembly (29A, B & C).
7. Before removing oval gears, mark across both gears (2)
with a soft pencil for alignment during re-assembly.
7.1 Extract the gears, and inspect for wear or damage.
Replace if necessary.
7.2 Inspect the interior of the measuring chamber and
the post plate assembly for wear or damage. Re-
move any deposits using a fine emery cloth, or fine
wire brush; be careful not to score or damage any of
the internal parts.
7.3 If posts, or post plate, are worn, the complete
assembly must be replaced. To replace, see D.
Reassemble in reverse order:
Align oval gears on mark made prior to disassembly.
Installing new gears, the lower gear must be at 90° to
the upper gear, when the upper gear is horizontal.
Make sure that the gears turn freely on the shafts, and
do not rub or bind against the housing (1). Nor should
there be excessive clearance. Leave the top gear with
the slot for the coupling (29A) in horizontal position.
Re-attach the bearing plate (4) with coupling/magnet
(29)in the up position. Align with dowel pins, and
1 . 18
Flow Meter - Disassembly
A. Pulser O-ring (16), or Pulser (10)
First relieve system pressure and drain the flow meter.
1. Remove 4 screws (12a) from the dust cover (12), and
detach the dust cover.
2. Release signal cable from TB1 on the board (13).
3. Release pulser (10) leads from J1 on terminal block
board/SCL (13).
4. Remove 2 terminal block board/SCL screws (13a), and
take the board (13) out. Place on a clean & dry surface.
5. Remove 3 retainer screws (11a), and detach the retainer
(11). The pulser (10) can now be removed, so the O-ring
(16) can be replaced.
Reassemble in reverse order, checking all O-ring seals
for damage. PTFE O-rings must be replaced whenever
the flow meter has been opened.
B. Bearing Plate (4)
C. Oval Gears (2)
First relieve system pressure and drain the flow meter.
In a W●● flow sensor with remote register, items 7, 8, 9, 18
& 26 are not included. Here the front cover can be removed
directly for access to flow meter internals after signal cable
has been disconnected. In an F●● flow meter with register,
remove the two screws (18) from the clamp (8) and take the
clamp off - leaving the register in place on the flow meter.
1. Remove 4 screws (12a) from the dust cover (12), and
detach the dust cover.
2. Release signal cable from TB1 on the board (13).
3. Remove cover screws (19) from the front cover, and slide
the cover off the flow meter (downwards), leaving the
register in place on the flow meter. Be careful that the
plug on the output cable slips up through the stand-off (9);
if the plug catches on the edge, it might pull off.
When servicing meters with PTFE
seals, replace all seals every time
the flow meter is serviced.

TS Series - Exploded View, Electronic
Next re-install the rear cover (6) and O-ring (17). Make
sure that the drain plug (24) is located at the bottom of
the flow meter.
Check all O-ring seals for damage. PTFE O-rings must
be replaced whenever the flow meter has been opened.
To check Pulser (10), or
Terminal Block Board/SCL (13):
Same process as in A.
Terminal Block Board
Visual inspection of cables & terminals.
Quadrature (Hall Effect) Pulser
Remove pulser from flow meter. Expose BLACK & WHITE
leads (in Quadrature pulsers also the GREEN lead). This
can be done at convenient junction, or at the register.
Use a Volt Meter to measure voltage between the white &
black leads. It should be nearly equal to the power supply
voltage provided on the red lead.
Pass a magnet across the tip of the sensor. The voltage
must switch to nearly zero (less than 0.2 V). If the magnet
does not actuate the sensor, the sensor has failed.
For Quadrature pulsers, repeat this test across the black &
green leads.
Practical field test = install a new pulser. If the problem
persists, the original pulser is good. The problem has now
been isolated to the electronic register (either program-
ming, or register failure).
SCL
When this optional component is included, please refer to
the SCL section in this manual (pages 1.25 & 1.26).
make sure that coupling is horizontal to match up to
the gear. Gently push into place.
Turn the magnet (29C) with two fingers, to ensure that
gears are turning freely in the measuring chamber.
Re-install the front cover (5) and O-ring (17). Make
sure that the drain plug (24) is located at the bottom of
the flow meter.
Check all O-ring seals for damage. PTFE O-rings
must be replaced whenever the flow meter has been
opened.
Pull signal cable back down through the stand-off (9)
and re-attach to the terminal block board/SCL (13).
Replace dust cover and re-seal the flow meter.
D. Post Plate assembly (3)
First relieve system pressure and drain the flow meter.
1. Remove cover screws (19) from flow meter rear cover (6),
and take the rear cover off.
2. Remove 4 screws (20) from the post plate assembly (3),
and pull the post plate assembly straight back. If the post
plate assembly is stuck to meter body, gently tap with a
rubber mallet, or use a 5/16-8 x 1” jack bolt to push it free.
Do not use a hammer on the posts!
3. Inspect the inside of the post plate assembly (3) for scor-
ing (minor markings are acceptable). If the post plate
assembly is scored, or posts are worn, it must be re-
placed.
Re-assemble in reverse order:
Attach the post plate assembly to meter housing (1); it
must attach to the side marked with a dimple on the flat
side. Align on dowel pins and fasten.
1 . 19
When servicing meters with PTFE
seals, replace all seals every time
the flow meter is serviced.
·
·
·
·
·
·
·
·

Parts List - WET pulser
1 . 20
Assy No. Mdl TS10A Mdl TS15A Mdl TS20A Mdl TS30A
ITEM Fxx Wxx DESCRIPTION QTY & P/No. QTY & P/No. QTY & P/No. QTY & P/No.
1 + + Flow Meter body
2 Std. + + Gear Set, PPS/carbon, LV 1 GSTS10RC 1 GSTS15RC 1 GSTS2HRC 1 GS5201RC **
opt. HT GSTS10RC-MV GSTS15RC-MV GSTS2HRC-MV GS5201RC-MV
HV GSTS10RC-HV GSTS15RC-HV GSTS2HRC-HV GS5201RC-HV
PPS/Teflon, LV GSTS10RT GSTS15RT GSTS2HRT GS5201RT
HT GSTS10RT-MV GSTS15RT-MV GSTS2HRT-MV GS5201RT-MV
HV GSTS10RT-HV GSTS15RT-HV GSTS2HRT-HV GS5201RT-HV
3 + + Post Plate Assy 1
4 + + Bearing Plate Assy/magnet 1
5 + + Front Cover n/a
6 + + Rear Cover 1
7 + Register mounting pad 1 1 1 MF001076-002 1 MF001076-002
7a + Screws 4 4 4 4 FS001082-000
Std. + Cord grip, plastic 1 EL1807 1 EL1807 1 EL1807 1 EL1807
opt. + X-Prf cable gland (ATEX) MS3141 MS3141 MS3141 MS3141
10 + + Pulser, Quadrature, WET 1 EL5519 1 EL5519 1 EL5519 1 EL5519 (1)
11 + + Retaining plate, pulser 1 ST9250 1 ST9250 1 ST9250 1 ST9250
11a + + Screw, retaining plate 3 FS9515 3 FS9515 3 FS9515 1 FS9515
12 + + Dust cover, pulser compartm 1 MP1310 1 MP1310 1 MP1310 1 MP1310
12a + + Screw, dust cover 4 FS2799 4 FS2799 4 FS2799 4 FS2799
13 Std. + + Terminal Block Board (TBB) 1 EL0304 1 EL0304 1 EL0304 1 EL0304
opt.
Filter for non-quadr. Service EL0306 EL0306 EL0306 EL0306 (1)
SCL, signal conditioner EL0300-3-13B EL0300-3-13C EL0300-3-13E EL0300-3-13F (1)
13a + + Screw, TBB/SCL 2 FS2222 2 FS2222 2 FS2222 2 FS2222
13b + + Signal ouput cable (3) 3 EL4005 3 EL4005 3 EL4005 3 EL4005
14 + + n/a n/a 1
15 + + 1 SL3043 1 SL3043 1 SL3043 1 SL3043 *
16 Std. + + 1 SL1212 1 SL1212 1 SL1212 1 SL1212 *
opt. + + SL2212 SL2212 SL2212 SL2212 *
17 Std. + + 1 SL1157 2 SL1157 2 SL1167 2 SL1167 *
opt. + + SL2157 SL2157 SL2167 SL2167 *
18 + 2 FS0856 2 FS0856 2 FS0856 2 FS0856
19 + +
16
20 + +
Mounting pedestal
O-ring, dust cover, Buna N
O-ring, pulser, Viton™ O-
ring, pulser, PTFE™ O-
ring, cover, Viton™
O-ring, cover, PTFE™
Bolt, stand-off retainer
Screw, cover
Screw, post/bearing plates
8
21 + + Screw, pedestal to body
n/a n/a
22 + + Split lock washer
n/a n/a
23 + + Dowel pin
2 MS9021 4 MS9021 4 MS9021 4 MS9021
24 + + Drain plug 1 MS4019 2 MS4019 2 MS4019 2 MS4019
25 + + Plug, cable port n/a n/a n/a n/a
26 + Screw, mounting pad 2 FS2900 2 2 2
29a + + Magnet assy. Incl. in #4 Incl. in #4 Incl. in #4 Incl. in #4
29b + + Drive shaft/roll pin assy. Incl. in #4 Incl. in #4 Incl. in #4 Incl. in #4
29c + + Bearing insert Incl. in #4 Incl. in #4 Incl. in #4 Incl. in #4
30 Std. + + 2 FK1110-1 2 FK1160-1 2 FK1200-1 2 FK1300-1
opt. FK1111-1 FK1161-1 FK1201-1 FK1301-1
FK7110-1 FK7160-1 FK7200-1 FK7300-1
FK5110-1 FK5160-1 FK5200-1 FK5300-1
30b Std. + + 1 SL1223 1 SL1233 1 SL1233 1 SL1240 *
opt. SL2223 SL2233 SL2233 SL2240
30c + +
Flange kit, NPT
Flange kit, BSP
Flange kit, CS welding
Flange kit, ANSI adaptor
O-ring, flange, Viton™
O-ring, flange, PTFE™
Screw, for comp. Flange 2 FS2950 4 FS5008 4 FS2950 4 FS1951
PTFE O-rings have ‘no memory’, replace every time the flow meter has been opened for inspection or service.
* = Recommended Spare Parts (regular maintenance items required every 1-2 years).
** = Suggested Spare Parts, with expected life in 3-10 year range
*** = Very long life items, with expected life in 5-20 year range.
(1) = Indefinite life expectancy. Can fail if wired incorrectly or exposed to voltage spike.
(2) = Several versions. If ordering replacement, pls include meter Model & Serial No. + inscriptions from original device.
(3) = Cable is supplied in increments of 1 foot (30 cm). 3 x EL4005 = 1 length, 3 feet (90 cm) long.
(4) = This Repair Kit includes all parts for upgrade to DRY pulser. After installation, refer to page 1.22.
If flow meter is in a remote location, perhaps some of
these items should be kept on hand.
Parts List is under revision with new service kits.
ow meter model & Serial No.
9
9
MF001076-002 MF001076-002
FS001082-000FS001082-000FS001082-000
FS2900 FS2900 FS2900
Page is loading ...
Page is loading ...
Page is loading ...
Page is loading ...
Page is loading ...
Page is loading ...
Page is loading ...
Page is loading ...
Page is loading ...
Page is loading ...
Page is loading ...
Page is loading ...
Page is loading ...
Page is loading ...
Page is loading ...
Page is loading ...
/
