a. Insert the CD and run the Autorun.exe.
Note:
You can also download the driver from this product’s
Support page at www.tp-link.com.
b. Select TL-WN8200ND and follow the
steps to install the driver and WPS Tool.
Note:
If you can’t install the driver successfully, disable the
antivirus software and firewall, then try again.
Connections are available
Wireless Network Connection
Connect automatically Connect
√
TP-Link_XXXX
c. When the "Success!" message appears, your
computer is connected to Wi-Fi.
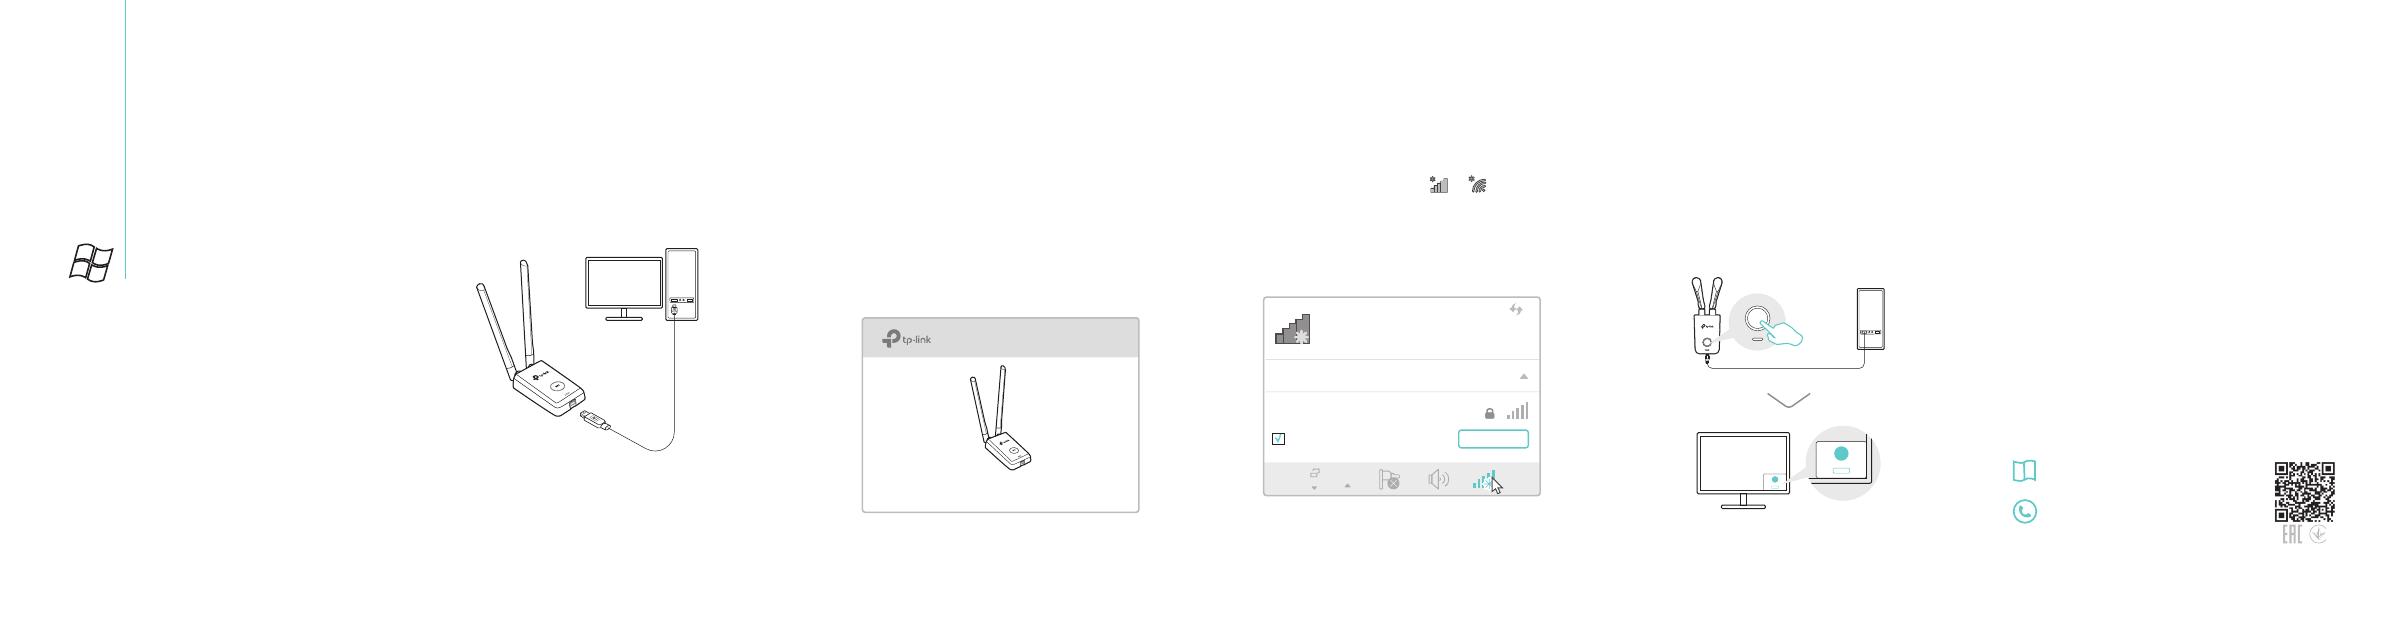
For Windows
Install the antennas and connect the
adapter to your computer using the USB
cable provided.
Option 1: Via Windows Wireless Utility
a. Click the network icon ( or ) on the
taskbar.
b. Select your Wi-Fi network, click Connect
and enter the password when prompted.
Option 2: Via WPS Tool
a. Press the WPS button on your router.
b. Within 2 minutes, press and hold the WPS
button on the adapter until WPS Tool opens.
This USB Adapter can only be powered by computers that comply with
Limited Power Source (LPS).
For detailed instructions, please refer to the
User Manual from this product’s Support
page at www.tp-link.com.
For technical support and other information,
please visit http://www.tp-link.com/support,
or simply scan the QR code.
7106507321 REV2.1.0
©2017 TP-Link
TL-WN8200ND
1 Connect to a Computer 3 Join a Wireless Network
2 Install Driver and WPS Tool
WPS
WPS
Cancel

